
 opensource.guide
No paid content found
opensource.guide
No paid content found
 Multilingual
Categories: Education & Learning
Learn how to launch and grow your project.
 Visit website
 Updated: 2026-09-27 18:09
Language: English (default)
Updated: 2026-09-27 18:09
Language: English (default)
 Access: Normal
 Profile views 2
 Outbound visits 1
Related questions
More questions →What Are Open-Source UI Element Libraries and How Do They Differ From UI Frameworks?
An open-source UI element library is a collection of individual, ready-made interface pieces—buttons, cards, inputs, toggles, loaders—that you copy into your own project and adapt. A UI framework, by contrast, is a structured system of components, conventions, and often a theming layer that governs how your whole interface is built. The practical difference: an element library gives you a snippet; a framework gives you a way of working. If you need a polished button in ten minutes, reach for the element library. If you're building a 40-screen product with a team, you probably want the framework.
What "open-source UI element library" actually means
The term gets used loosely, so it helps to separate the parts:
- Open-source: the code is publicly available, and the license tells you what you may do with it—copy, modify, redistribute, or use commercially.
- UI element: a single, self-contained piece of interface, usually small enough to read in one sitting. A button with hover states, a pricing card, a search field.
- Library: a browsable, searchable collection of those elements, typically contributed by many different people.
On a site like Uiverse, elements are shared by a community and written in plain CSS or Tailwind. You find one you like, copy the markup and styles, paste them into your project, and adjust colors, spacing, and text to fit. There's no package to install and no build step required—which is exactly the appeal, and also the source of most of the confusion.
Element library vs. UI framework: the core differences
| Dimension | Open-source UI element library | UI framework / design system |
|---|---|---|
| Unit of reuse | A single snippet you copy | A component you import or call |
| Installation | None; paste into your code | Package install, config, sometimes a provider |
| Consistency | Depends on you; each element may look different | Enforced by shared tokens and APIs |
| Theming | Manual edits per element | Central theme/config file |
| Updates | You own the copy; no upstream updates | Version bumps bring fixes and changes |
| Accessibility | Varies per contributor; must be checked | Usually tested and documented |
| Best for | Prototypes, landing pages, small sites, one-off needs | Multi-page apps, teams, long-lived products |
| Learning curve | Low—read the CSS | Higher—learn the API and conventions |
The table isn't a verdict. It's a map of trade-offs. Element libraries win on speed and freedom; frameworks win on consistency and maintenance.
Licensing and attribution: what to check before you paste
This is where people get into trouble, and it's worth slowing down for.
- Find the license. Every element or collection should state one. Common open-source licenses include MIT, Apache-2.0, and BSD. Some projects use copyleft licenses like GPL, which can impose obligations if you redistribute your code.
- Understand what the license permits. MIT and Apache-2.0 are permissive: you can typically use the code in commercial and closed-source projects. Copyleft licenses may require you to release derivative source under the same terms.
- Check attribution requirements. Permissive licenses usually require you to keep the copyright notice and license text somewhere in your project. That's a real obligation, not a formality.
- Look for per-element terms. On community sites, the site's overall terms and the individual contributor's stated wishes may differ. If a contributor asks for credit, honor it.
- When in doubt, ask or avoid. If a snippet has no license at all, you don't have clear permission to reuse it. Treat "no license" as "not open source," even if the code is publicly visible.
This article is general information, not legal advice. For commercial products with real exposure, have someone qualified review the licenses you're relying on.
How to use a community element in your project: a practical workflow
Here's a repeatable process that avoids most of the usual mess.
1. Start from a real need, not a browsing session
Decide what you need first—"a compact primary button with a loading state"—then search. Browsing aimlessly produces a pile of pretty snippets that don't fit together.
2. Copy the smallest version that works
Take the markup and the styles. Strip anything you don't need: demo wrappers, extra animations, decorative layers. Less code means fewer surprises.
3. Convert it to your conventions
If your project uses design tokens or CSS variables, replace hard-coded values:
/* Before: hard-coded */
.button { background: #4f46e5; border-radius: 8px; }

/* After: token-based */
.button { background: var(--color-primary); border-radius: var(--radius-md); }
This one step is what keeps a copied element from looking like a foreign object in your UI.
4. Check accessibility before you ship
Community elements vary widely here. Verify at minimum:
- Keyboard focus is visible and the element is reachable by Tab.
- Color contrast meets WCAG AA (4.5:1 for normal text).
- Interactive elements use semantic HTML (
<button>, not a clickable<div>). - Form inputs have associated labels.
- Motion respects
prefers-reduced-motion.
5. Test in context
Paste it into a real page with real content. Long labels, small screens, and dark mode break more copied elements than anything else.
6. Note where it came from
Keep a short comment or an internal credits file: source, license, date. Future you—and your legal reviewer—will be grateful.
Where element libraries genuinely shine
- Prototypes and demos: you need something clickable today, not a design system.
- Landing pages and marketing sites: a handful of distinctive elements, each custom.
- Filling gaps: your framework lacks one specific component, and you don't want to build it from scratch.
- Learning: reading well-made CSS is one of the fastest ways to improve.
- Small projects: a personal site doesn't need a theming architecture.
Where they fall short
- Consistency at scale: ten elements from ten contributors rarely look like one product.
- Maintenance: you own every copy. When your design changes, you edit each one.
- Accessibility debt: you inherit whatever the contributor did or didn't do.
- No upstream fixes: a bug fixed in the original won't reach your copy.
- Integration friction: different naming conventions, different units, different assumptions about resets.
When to choose which
Choose an element library when the scope is small, the timeline is short, or you need a few distinctive pieces rather than a whole system.
Choose a framework or design system when multiple people build multiple screens over months, when consistency is a product requirement, or when accessibility and theming need to be guaranteed rather than checked.
A hybrid works well for many teams: adopt a framework for the structural components—forms, navigation, layout—and borrow individual elements for the places where you want personality. Just route every borrowed element through the same token and accessibility checks, so it lands as part of your system rather than beside it.
The short version: open-source UI element libraries are a fast, flexible way to get good-looking interface pieces into a project. They are not a substitute for a design system, and the license and accessibility details are the part worth reading carefully.
How to Use Ahrefs for Your First SEO Audit: A Step-by-Step Tutorial
If you're new to Ahrefs and want to run your first SEO audit, the fastest path is: open Site Explorer, enter your target URL, review the Overview for a health snapshot, then dig into Organic Keywords, Top Pages, and Site Audit to find specific problems. From there, build a short prioritized to-do list instead of trying to fix everything at once.
This tutorial walks through that workflow using a realistic starting scenario, explains what the numbers mean, and shows how to turn findings into actions.
Before You Start: Pick a Narrow Scope
A common beginner mistake is auditing an entire large website on day one. The reports become overwhelming, and you can't tell which issues matter.
Instead, choose one of these starting points:
- A single important page (your homepage or a key product/service page)
- A small site (under ~50 pages, e.g., a personal blog or small business site)
- One section of a bigger site (e.g.,
/blog/)
For this tutorial, assume you're auditing a small business site with about 30 pages. The same steps scale up later.
You'll need an Ahrefs account to follow along. Ahrefs offers paid plans, and pricing and feature limits change over time, so check the current Pricing page for what's included in each tier before committing.
Step 1: Enter Your Target in Site Explorer
Site Explorer is Ahrefs' core tool for analyzing any website or URL.
- Open Site Explorer from the top navigation.
- In the search box, paste your domain (e.g.,
example.com). - Choose the Exact URL or Domain mode depending on scope. For a full-site view, use Domain or Prefix; for a single page, use Exact URL.
- Press Enter.
You'll land on the Overview report. Don't try to absorb everything — focus on four numbers first.
Reading the Overview Snapshot
| Metric | What it tells you | How to use it |
|---|---|---|
| Ahrefs Rank (AR) | Relative strength of the site's backlink profile vs. others in the database | Useful for comparing against competitors, not as a standalone goal |
| Organic traffic | Estimated monthly visits from search | A rough trend indicator, not exact analytics |
| Organic keywords | Estimated number of keywords the site ranks for | Shows breadth of visibility |
| Backlinks / Referring domains | Total links and unique sites linking to you | Referring domains matter more than raw backlink count |
Important caveat: Ahrefs' traffic and keyword numbers are estimates based on its own data. They won't match Google Search Console or your analytics exactly. Treat them as directional, not absolute.
Step 2: See What You Already Rank For
Go to Organic Keywords in the left sidebar. This shows queries where your site appears in search results.
Sort by Traffic (descending) to see which pages bring the most estimated visitors. Then look for:
- Keywords ranking in positions 4–15 — these are often the easiest wins. A small content or on-page improvement can push them onto page one.
- Keywords with high volume but low position — potential opportunities if the topic is relevant.
- Irrelevant keywords — if you rank for something off-topic, it may signal thin or mismatched content.
Write down 5–10 of the position 4–15 keywords. These become your first optimization targets.
Step 3: Find Your Best and Weakest Pages
Open Top Pages. This ranks your URLs by estimated organic traffic.
Look for two things:
- Your top performers — understand what topics and formats work. Can you create more content like this?
- Pages with traffic but poor rankings — these may need on-page fixes (title, headings, internal links).
If a page gets zero traffic and targets a topic you care about, it's a candidate for a rewrite or consolidation.
Step 4: Run a Technical Site Audit
Now move to Site Audit. This crawls your site and flags technical and on-page issues.
- Click Site Audit → New project.
- Enter your domain and set crawl settings (default is usually fine for a small site).
- Start the crawl and wait for it to finish.
Once complete, you'll see a Health Score and a list of issues grouped by category.
Which Issues to Fix First
Not all issues are equal. Prioritize in this order:
| Priority | Issue type | Why it matters |
|---|---|---|
| 1 | Broken links (404s) | Bad for users and crawl efficiency |
| 2 | Pages blocked from indexing | They can't rank at all |
| 3 | Missing or duplicate title tags | Directly affects click-through and relevance |
| 4 | Slow-loading pages | Affects experience and rankings |
| 5 | Thin content | Low value to users and search engines |
Ignore low-impact warnings (like minor meta description length) until the big items are handled.
Step 5: Turn Findings Into a To-Do List
You now have raw data. Convert it into a short, actionable list. Example:
- Fix 3 broken links found in Site Audit.
- Rewrite title tags on 5 pages with duplicate titles.
- Improve 4 pages ranking in positions 6–12 by adding missing subtopics and internal links.
- Remove or update 2 thin pages with no traffic.
Keep the list to 5–10 items max for your first audit. Finishing a short list beats starting a long one.
Common Beginner Mistakes
- Chasing every red flag. Site Audit flags many minor issues. Fix what affects rankings and users first.
- Trusting estimates as exact numbers. Ahrefs data is modeled, not measured from your analytics.
- Auditing a huge site too early. Start small to learn the interface.
- Ignoring search intent. A page can be technically perfect but still fail if it doesn't match what searchers want.
- Forgetting to re-crawl. After fixes, run Site Audit again to confirm improvements.
Where to Go Next
Once your first audit is done:
- Compare with competitors using Site Explorer's Competing Domains and Content Gap reports.
- Track keyword rankings over time with Rank Tracker.
- Explore backlink opportunities in the Backlinks and Link Intersect reports.
- Set up recurring Site Audit crawls so new issues surface automatically.
Your first audit isn't about perfection — it's about building a repeatable habit: enter a target, read the key reports, pick the highest-impact fixes, and act. Do that once a month and your site's health compounds.
How to Launch Your Own Open Source Project
Open Source Guides (opensource.guide) is a GitHub-maintained collection of free guides that walks you through launching and growing an open source project. If you have a piece of code you want to share publicly and are willing to maintain it, the site's "Starting an Open Source Project" guide is the most direct starting point. It covers what open source actually means, how to prepare your project before you announce it, and how to set it up so other people can use and contribute to it.
What the site covers
The homepage organizes its guides into a set of practical topics, each aimed at a different stage of a project's life:
| Guide | What it helps with |
|---|---|
| Starting an Open Source Project | Getting ready to launch your own project |
| How to Contribute to Open Source | Making contributions, for first-timers and veterans |
| Finding Users for Your Project | Getting your project into the hands of users |
| Building Welcoming Communities | Encouraging people to use, contribute to, and share your project |
| Best Practices for Maintainers | Documenting processes and leveraging your community |
| Leadership and Governance | Formal rules for decision-making as a project grows |
| Getting Paid for Open Source Work | Financial support for your time or project |
| Your Code of Conduct | Adopting and enforcing healthy community behavior |
| Open Source Metrics | Measuring and tracking your project's success |
| The Legal Side of Open Source | Licensing and other legal questions |
| Accessibility Best Practices | Making your project usable by everyone, especially people with disabilities |
| Security Best Practices | MFA, code scanning, dependency management, private vulnerability reporting |
| Maintaining Balance for Open Source Maintainers | Self-care and avoiding burnout |
For a brand-new project, the first, fourth, fifth, and tenth guides are the ones you'll return to most.
A practical launch sequence
The guides are written as advice rather than a rigid checklist, but the order below reflects how their topics build on each other.
1. Decide whether your project should be open source
Before writing any setup files, the "Starting an Open Source Project" guide asks you to think about why you're opening the project and who it's for. A project that exists only for your own use, or one that depends on code you can't share, is a poor fit. A project you'd like others to use, extend, or learn from is a good one.
2. Add the files that make a project usable
At minimum, a launchable project needs:
- A license — without one, the code is legally "all rights reserved" by default, and others can't safely reuse it. The Legal Side of Open Source guide covers choosing one.
- A README — explains what the project does, how to install it, and how to run it.
- Contribution guidelines — tell people how to report bugs, suggest features, and submit changes.
- A code of conduct — sets expectations for how community members treat each other.
3. Prepare before you announce
The guides emphasize doing setup work before publicizing the project, so early visitors find something they can actually use. That means a working install path, at least a rough issue tracker, and a clear statement of what the project does and doesn't do.
4. Publish and find your first users
Once the project is public, "Finding Users for Your Project" covers how to get it in front of people who'd benefit from it. This is where you start thinking about where your potential users already are, rather than broadcasting everywhere.
5. Set up for maintenance
"Best Practices for Maintainers" and "Leadership and Governance" address what happens after launch: documenting your processes, deciding how decisions get made, and sharing load as contributors arrive. "Maintaining Balance for Open Source Maintainers" is specifically about avoiding burnout — a real risk once a project has users filing issues.
What you'll need before starting
- A public code host (the guides are published by GitHub and assume a Git-based workflow, though the advice is host-agnostic).
- A clear idea of who the project is for.
- Willingness to respond to issues and pull requests, at least initially.
- A license decision — this is the one item you can't defer, because it determines what others are legally allowed to do with your code.
Common sticking points
- Skipping the license. Without one, your project isn't really open source in a usable sense, no matter how public the repository is.
- Announcing too early. Users who arrive to a broken install or an empty README rarely come back.
- Underestimating maintenance. The guides treat maintainer burnout as a first-order concern, not an afterthought, because it's one of the most common reasons projects stall.
- No code of conduct. Communities without stated behavioral expectations tend to handle conflict badly once they grow.
Where to go next
The site is itself open source and accepts contributions, so if a guide is unclear or missing something, you can suggest an improvement. It's also available in many languages, including 简体中文 and 繁體中文, if English isn't your first language. Start with "Starting an Open Source Project," then move to the community and maintainer guides as your project picks up users.
What Is Open Source Guides?
Open Source Guides (opensource.guide) is a free, GitHub-maintained collection of practical guides for people who create, maintain, or contribute to open source software. It is useful if you are launching a project, looking for your first contribution, or trying to sustain an existing community — and it is not a code-hosting platform, a course, or a tool you install.
What the site actually offers
The homepage describes the site simply: "Open source software is made by people just like you. Learn how to launch and grow your project." The content is organized as standalone guides rather than a single linear course, so you can read only the topic you need.
Current guide topics listed on the site include:
| Guide | What it covers |
|---|---|
| Starting an Open Source Project | Getting ready to launch your own project |
| How to Contribute to Open Source | Making contributions, for first-timers and veterans |
| Finding Users for Your Project | Getting your project into the hands of users |
| Building Welcoming Communities | Encouraging people to use, contribute to, and evangelize your project |
| Best Practices for Maintainers | Documenting processes and leveraging your community |
| Maintaining Balance for Open Source Maintainers | Self-care and avoiding burnout |
| Leadership and Governance | Formal rules for making decisions as a project grows |
| Getting Paid for Open Source Work | Financial support for your time or your project |
| Your Code of Conduct | Adopting and enforcing healthy community behavior |
| Open Source Metrics | Measuring and tracking your project's success |
| The Legal Side of Open Source | Legal questions around open source |
| Accessibility Best Practices for Your Project | Making a project usable by everyone, especially people with disabilities |
| Security Best Practices for Your Project | MFA, code scanning, dependency management, private vulnerability reporting |
The range is the point: the site treats open source as a set of human and organizational problems (community, governance, money, law, burnout) alongside technical ones (security, accessibility).
Who it is for
Two audiences are served by the same site:
- Maintainers — people who already run a project and need help with documentation, governance, funding, or their own workload.
- Contributors — people who want to participate in someone else's project, including first-timers.
If you are deciding whether a specific project is worth contributing to, this site will not answer that. It teaches the general practice, not project-specific evaluation.
Language and access
The site is available in many languages, including English, 简体中文, 繁體中文, 日本語, 한국어, Deutsch, Français, Español, Português, Русский, العربية, Hindi, and others. The interface shows a language selector, so non-English readers are not limited to the English guides.
No pricing, account, or login requirement appears in the site content. Treat access as open reading unless you encounter a gate yourself.
How to use it
- Pick the guide matching your current situation — for example, "Starting an Open Source Project" if you have an idea but no repository, or "How to Contribute to Open Source" if you want to help an existing one.
- Read that guide end to end before jumping between topics; each is written to stand alone.
- Apply one change at a time — add a README, adopt a code of conduct, enable MFA — and check the result against the guide's stated goal.
- Return to adjacent guides as your project changes; "Finding Users" matters after launch, "Governance" after you have multiple maintainers.
A concrete example: if you have a small library with two outside contributors and no decision process, the Leadership and Governance guide is the relevant entry point, not Starting a Project.
Related entry points
The homepage also links to opensourcefriday.com, a recurring prompt to spend a few hours contributing to software you already use. The site itself is open source and invites suggestions through a "Contribute" link, so the guides are editable by readers.
If your goal is to understand what open source guides exist and which one applies to you, this site is the direct answer. If your goal is to host code, manage issues, or run CI, you need a platform rather than a guide.
How Can Open Source Maintainers Avoid Burnout?
Burnout happens when the demands of a project outpace your capacity to meet them, so the fix is rarely "try harder." Open Source Guides addresses this directly in its guide Maintaining Balance for Open Source Maintainers, which focuses on self-care and avoiding burnout. The practical answer is to reduce and reshape the work: set boundaries, share responsibility, and let the community carry more of the load. This applies to anyone maintaining a project solo or with a small team, especially when contributions, issues, and support requests keep growing.
Why maintainer burnout is a structural problem, not a personal failing
Maintainers often absorb several roles at once: reviewing code, answering questions, triaging issues, writing docs, and making decisions. Each role has its own volume, and none of it stops when you take a break. Open Source Guides frames maintainer balance as a legitimate topic alongside governance, metrics, and legal concerns, which signals that sustainability is treated as part of running a project rather than an afterthought.
The guide's angle is self-care and burnout avoidance, so the recommended moves are about protecting your time and energy rather than maximizing output.
Practical steps to reduce maintainer load
Set and publish expectations
Write down what you will and won't do, then make it visible. A short statement in your README or contributing guide about response times, scope, and what counts as a valid issue prevents the slow accumulation of guilt-driven work. When expectations are explicit, you can point to them instead of justifying each decision individually.
Share responsibility
Open Source Guides covers Leadership and Governance as a separate topic, and that connects directly to burnout: formal rules for making decisions let others act without waiting on you. Options include:
- Adding co-maintainers or reviewers with defined areas
- Delegating triage to trusted contributors
- Documenting processes so decisions don't route through one person
Build a welcoming community
The Building Welcoming Communities guide is about encouraging people to use, contribute to, and evangelize your project. A community that feels ownership over the project reduces the number of tasks that only you can do. This is a load-reduction strategy as much as a growth strategy.
Use metrics to make informed decisions
Open Source Metrics is framed around measuring and tracking success so you can make informed decisions. Applied to burnout, this means looking at where your time actually goes — issue volume, review backlog, repeat questions — and changing the process where the numbers show a bottleneck.
Adopt a code of conduct
Your Code of Conduct is described as a way to facilitate healthy and constructive community behavior by adopting and enforcing one. A code of conduct gives you a legitimate basis to redirect or decline interactions that drain time and attention, which protects both the community and you.
What the guides do not promise
Open Source Guides does not present a single fix or a guaranteed outcome. It offers a set of practices — balance, governance, community, metrics, conduct — that you combine based on your situation. There is no pricing or account requirement described on the site for reading these guides; the content is presented as open and community-improved, with a contribution path for suggestions.
A reasonable starting point
If you are already feeling stretched, pick one change rather than all of them:
- Publish a short expectations statement so the boundary exists in writing.
- Identify one recurring task and hand it to a contributor or co-maintainer.
- Review your issue and review backlog against your actual capacity, and close or defer what you cannot sustain.
The goal is not to do more open source work — it is to keep doing it over a longer period without losing the interest that brought you there.
Website Overview
Identifiable technologies and additional version or configuration signals make the service easier to fingerprint, which may help targeted scanners narrow their checks. An established domain and managed infrastructure suggest continuity of operations and may support dependable delivery, although neither guarantees service quality.
Domain and Registration
Registered in 2016, this domain has about 10 years of history. That suggests continuity, although ownership and purpose may have changed. The registrar, MarkMonitor Inc., specializes in corporate domain and brand management, suggesting attention to domain asset protection. Transfer-protection status is present, helping reduce the risk of unauthorized domain transfers. The domain uses the common .guide extension, which is not an independent safety signal.
DNS and Email
Nameservers are provided by NS1, indicating managed DNS hosting. CAA records restrict which certificate authorities are authorized to issue certificates. No CNAME was found; the observed records resolve directly to addresses. No MX record was found. A conventional explicit inbound-mail route is not configured. DNSSEC signatures were not detected, so this additional DNS authenticity protection is not confirmed.
TLS and Certificates
The certificate uses an RSA 2048-bit public key, offering broad client compatibility. The server supplied a complete certificate chain. No organization name is present in the certificate; the available fields are consistent with domain validation. The certificate was issued by Let's Encrypt, commonly associated with automated certificate services. The certificate's total validity is about 89 days, consistent with a short renewal cycle.
HTTP and Browser Security
The checked browser-security headers were not detected, leaving fewer explicit browser-side safeguards. CORS permits any origin to read this response. This is common for public resources; sensitive responses need narrower handling. No X-Powered-By header was found, reducing one common source of backend fingerprinting information. The x-cache, x-served-by, via response header indicates a CDN or caching proxy in the delivery path. No obvious internal addresses or debug information were found in the headers.
Technology Stack Analysis
The public page identifies Jekyll 3.10.0, Fastly, with exact versions exposed for 1 technologies. These details can narrow vulnerability checks, although exposure alone is not a vulnerability.
Search and Social Sharing
The Generator tag identifies Jekyll v3.10.0, making the publishing system easier to fingerprint. Twitter Card metadata is configured. JSON-LD includes Organization data, helping describe the organization as an entity. The page declares 30 language or regional alternatives using hreflang. The title has 63 characters, within a common display range.
 Hosting and Email
 NS1
NS1 Hosting
 Fastly
 Location
 United States
 Pages, Search and Sharing
| Meta description | Learn how to launch and grow your project. |
|---|---|
| Canonical URL | https://opensource.guide/ |
| Language | English (default) · Multilingual |
| Twitter Card | summary_large_image |
Social Sharing Preview
11 fields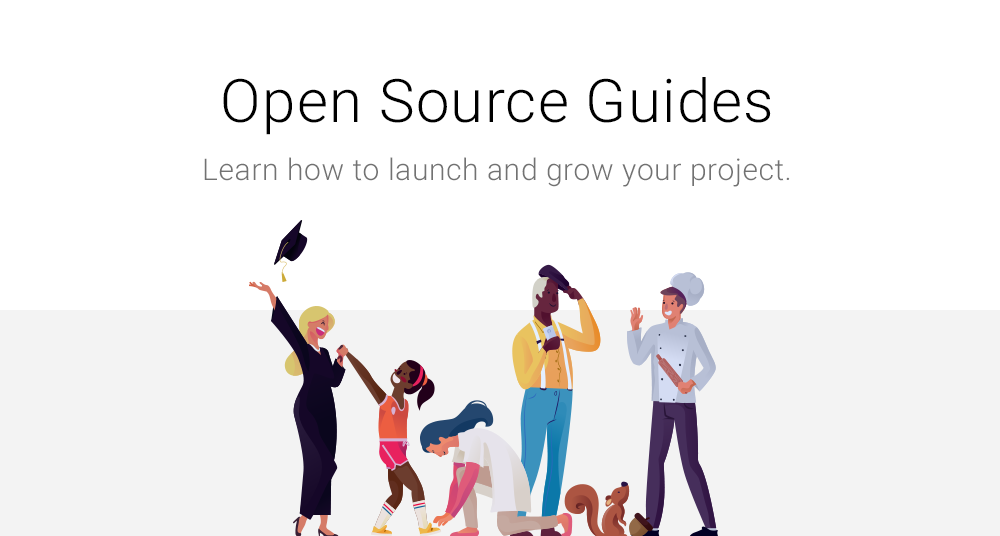

Sharing metadata
| og:url | https://opensource.guide/ |
|---|---|
| og:type | website |
| og:image | https://opensource.guide/assets/images/cards/default.png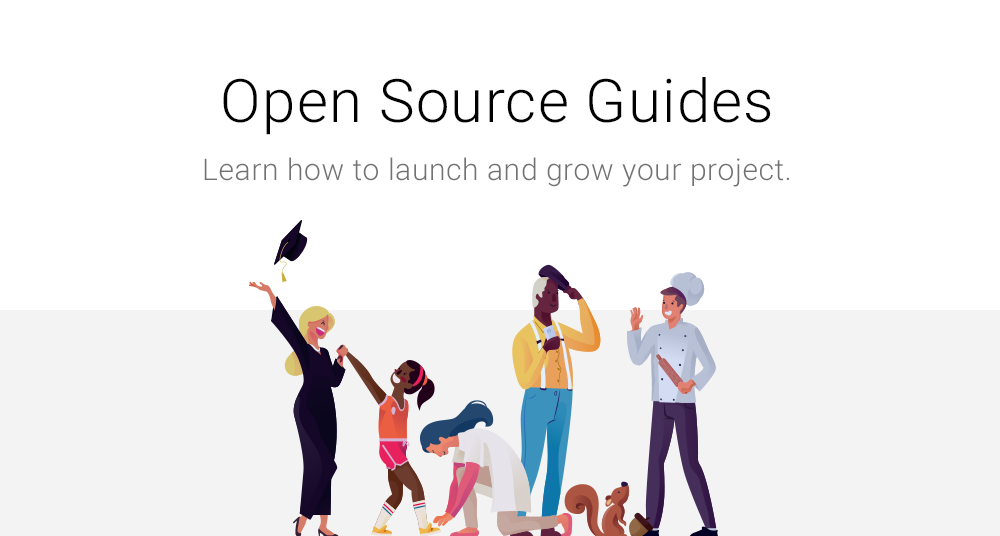 |
| og:title | Open Source Guides |
| og:locale | en |
| og:site_name | Open Source Guides |
| og:description | Learn how to launch and grow your project. |
| twitter:card | summary_large_image |
| twitter:site | @github |
| twitter:image | https://opensource.guide/assets/images/cards/default.png |
| twitter:title | Open Source Guides |
robots.txt (opens in a new tab)
0 rulesNo rules found
No matching rules.
Sitemaps
1 Registration details RDAP / WHOIS
| Registrar | MarkMonitor Inc. |
|---|---|
| Registered | 2016-09-06 |
| Expires | 2028-09-06 |
| Domain status | client delete prohibited、client transfer prohibited、client update prohibited |
| Nameservers | dns1.p06.nsone.net、dns2.p06.nsone.net、dns3.p06.nsone.net、dns4.p06.nsone.net |
| DNSSEC | unsigned |
 DNS records
| Type | Name | Value | TTL | Priority |
|---|---|---|---|---|
| A | opensource.guide | 185.199.108.153 | 3600 | — |
| A | opensource.guide | 185.199.109.153 | 3600 | — |
| A | opensource.guide | 185.199.110.153 | 3600 | — |
| A | opensource.guide | 185.199.111.153 | 3600 | — |
| NS | opensource.guide | dns1.p06.nsone.net | 3600 | — |
| NS | opensource.guide | dns2.p06.nsone.net | 3600 | — |
| NS | opensource.guide | dns3.p06.nsone.net | 3600 | — |
| NS | opensource.guide | dns4.p06.nsone.net | 3600 | — |
| CAA | opensource.guide | 0 issue "digicert.com" | 3600 | — |
| CAA | opensource.guide | 0 issue "letsencrypt.org" | 3600 | — |
| CAA | opensource.guide | 0 issue "sectigo.com" | 3600 | — |
 TLS and certificates
| Assessment | Normal configuration |
|---|---|
| Supported protocols | TLSv1.2、TLSv1.3 |
| Negotiated protocol | TLSv1.3 |
| Certificate subject | opensource.guide |
| Issuer | Let's Encrypt |
| Valid until | 2026-11-19T05:55 · Remaining when checked: 52 days |
| Verification details | Certificate trust: Passed · Hostname match: Passed |
 HTTP response headers
| Header | Value |
|---|---|
| content-type | text/html; charset=utf-8 |
| cache-control | max-age=600 |
| server | GitHub.com |
| access-control-allow-origin | * |
 Identified technologies
Recent Updates
- Website images
- Screenshots
- Network details
- Website Technologies
- Pages and Search Information
- HTTP Response Information
- TLS and certificates
- DNS Information
- Domain Registration
- Website profile
- Website Description
- Website Name
- Website profile
- Website Description
- Website Name
User reviews (0)