Website profiles · Technology insights · Alternatives

setpose.com

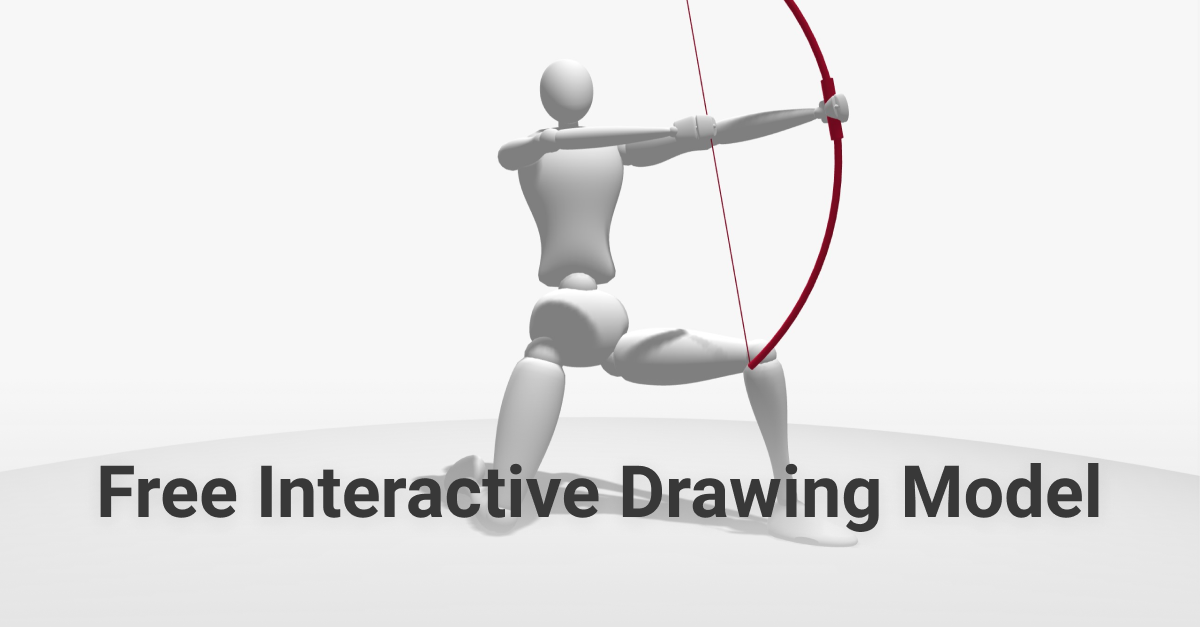
The easy to use pose maker for artists! Adjust the 3D drawing model to create your own custom poses. Combine them with many props to use as a drawing reference

Paid content
Visit website
Profile views 6 Outbound visits 1 Normal
SetPose Full homepage screenshot

At a glance

Category
Design & Creativity
Language
English
Paid-content signal
Paid contentObserved
Registered
2021
Hosting
Hetzner Online GmbHInferred
HTTPS certificate trusted
PassedObserved
Last updated

Website review

This review may include AI-generated content and is not individually verified. Domain, certificate and other facts come from the observed data on this page.

What is SetPose?

SetPose is a browser-based 3D pose maker for artists, hosted at SetPose. Instead of drawing from a static reference photo or a physical wooden mannequin, you pose a digital figure on screen and use it as a drawing reference. The page describes it as a free tool aimed at artists, with an optional Pro tier.

What you can do with it

  • Add one or more models to a scene, choosing from basic male, female, skeleton, anime and bodybuilder figures, plus animals such as a dog and horse.
  • Pose limbs and joints using bend, tilt, rotate, move and resize controls, with keyboard shortcuts for each and an inverse kinematics option for dragging limbs.
  • Apply preset poses from a library the page lists at 275, and save your own poses and scenes.
  • Adjust hair style, facial expressions and hand props, and add floor props.
  • Control the scene itself: floor colour, background, shadows, grid, camera position and angle, field of view, and light position, distance and intensity.
  • Export an image, export 3D, animate the scene, or run a timed drawing challenge with rounds of 30 seconds up to 10 minutes across categories such as sports, combat, film and TV, and sitting or lying down.

Who it suits

It fits figure-drawing practice, character design, storyboarding and anyone who wants a specific angle or gesture that a photo reference does not provide. A concrete scenario: you need a foreshortened figure seen from above, mid-stride, with one arm raised. Rather than hunting for a matching photo, you set the camera to a top position, pose the limbs, and export the image as your reference.

Trade-offs to weigh

A 3D mannequin gives you control over angle, lighting and proportion, but it will not show you real anatomy, muscle tension or the way fabric falls on a specific body. Treat it as a way to solve composition and gesture problems, not as a substitute for life drawing. There is also a practical limit to how many models a scene holds before the Pro upgrade is needed, and the free version carries ads.

Next step

Open the tool and try the timed challenge first — a few 1-minute rounds will quickly show you whether posing on screen suits how you work. If you want tutorials before committing, the site's guides section is the place to start.

How do I use SetPose to create custom poses for drawing?

SetPose is a browser-based 3D mannequin tool: you pose a figure on screen, then draw from it as reference. There is no account needed to start — open the site, pick a model, and begin manipulating joints.

SetPose

The basic workflow

  1. Add a model. Drag or click a model into the scene. The roster includes Basic Male and Female, a Skeleton, two Anime figures, a Bodybuilder, plus Dog and Horse, and older/detailed variants.
  2. Pose it. Click a body part and use the transform controls: Bend changes the angle between parts, Tilt handles side-to-side or spreading motion, Rotate turns a part around its own axis. Move shifts parts up/down or across the floor. Keyboard shortcuts (Z, X, Y, M, S, R, E) speed this up once you know them.
  3. Build the scene. Floor props, a floor color and background, camera position presets (Front, Top, Left, Right and so on), field of view, and light position/distance/intensity let you set the viewing angle and shadows you want to draw.
  4. Save or export. Reset the scene, share a pose via URL, run a timed challenge, export an image, or export 3D.

Where the shortcuts actually help

The joint controls are the part worth learning properly, because they map onto drawing problems:

  • Bend for elbows, knees, wrists, neck — anything with a hinge.
  • Rotate for the twist that makes a torso or forearm read as three-dimensional rather than flat.
  • Tilt for shoulders lifting, legs spreading, head leaning sideways.
  • Inverse Kinematics moves a limb chain by dragging the end, which is faster for natural reaching and stepping poses than adjusting each joint in turn.

Presets versus posing from scratch

Approach Best for Trade-off
Pose presets (275 hand poses plus body presets) Quick gesture studies, filling a sketchbook page fast Generic; you may spend as long adjusting as you saved
Manual joint posing Specific actions from imagination or a reference photo Slower, and awkward angles take practice
Timed drawing challenge Building speed and committing to a pose Deliberately restrictive rounds (30 seconds up to 10 minutes)

Presets are also a reasonable starting point when you want a base and then want to change just the arms or head.

A practical scenario

Say you want to draw a seated figure leaning on one arm, seen from slightly above. Set the camera to Top or Top right, use a sitting preset as the base, then use Bend on the elbow and knee, Tilt on the shoulder, and Move to drop the hips onto the floor plane. Add a floor prop if the hand needs something to rest on, then raise the light distance so the cast shadow doesn't obscure the anatomy you're trying to read.

What's limited

The free tool supports a set number of models in a scene; adding more requires Pro, and ads are removed on Pro as well. The page lists an upgrade path but no prices, so check the site directly if cost matters to you. Anime and bodybuilder figures are stylized rather than anatomical, so use the Basic or Detailed models when you're studying realistic proportion.

Next step

Start with one model, one preset, and the Bend control only. Once that feels natural, add Rotate and the camera presets, then try a timed round at three minutes. If you want to compare approaches, Line of Action and Quickposes run timed figure-drawing sessions from photos, which pair well with SetPose for the poses you can't find in a photo set.

Can I export or share the poses I create with SetPose?

Yes. SetPose includes built-in options for both exporting and sharing your work, so you are not limited to viewing poses only inside the browser.

Sharing

  • Share pose generates a link you can copy and send to someone else. They can open it to view the same pose.
  • Copy URL does the same job from the pose-sharing area.
  • Saved Poses and Saved Scenes let you keep work in your account and return to it later.

Exporting

  • Image export captures the current view as a picture, which is the most practical option for a drawing reference or for posting finished setups.
  • 3D export saves the actual 3D scene or model, useful if you want to keep working on the pose in another 3D program.
  • Animate is also listed, but it is a separate feature rather than a file export.

Which option fits your situation

Goal Best option
Send a pose to a friend or teacher Share pose / Copy URL
Use a pose as a drawing reference Image export
Continue editing in 3D software 3D export
Keep a personal library of poses Saved Poses / Saved Scenes

A practical workflow: build the pose, adjust camera, lighting and props, then use image export for your reference sheet. If you want feedback, send the share link instead, since the other person can rotate the scene rather than judging a single flat image.

One trade-off worth knowing: a shared link depends on the pose still being available in SetPose, while an exported image or 3D file is yours to keep. For long-term reference, export; for quick collaboration, share. If you need multiple models in one scene, the page indicates that is tied to the Pro upgrade, so check that before planning a complex group pose.

What are the differences between the free version and SetPose Pro?

The free version covers the core pose-making workflow; Pro mainly removes limits and unlocks scene-building extras. According to the site's own interface, the clearest free/Pro split is the number of models you can place in a scene: adding a second model is gated behind "Upgrade to pro to add more models to the scene." Free users also see advertising, since the interface offers "Remove ads: Upgrade to Pro."

What the free version includes

  • The full basic posing toolkit: bend, tilt, rotate, move, resize and extrude controls, each with keyboard shortcuts.
  • Inverse kinematics for moving limbs, plus undo and reset.
  • A model library with male, female, skeleton, anime, bodybuilder, dog and horse options.
  • 275 preset poses, including hand poses.
  • Scene tools: floor props, model settings, camera and environment controls, floor color, background, shadows, grid, camera positions, zoom and field of view.
  • Export options: image export, 3D export, share pose, and a timed drawing challenge with selectable round lengths and pose categories.

What Pro adds

  • More than one model in a scene, which matters for interaction poses, couples, crowds or comparing proportions.
  • An ad-free workspace.

The page also lists an "Animate" control and a "Try Pro for Free" link, but the supplied material does not state whether animation sits in the free tier or behind Pro. Treat that as unconfirmed rather than assuming either way.

Which one fits you

If you draw single figures from reference, the free tier is likely enough: one model, 275 presets, props, lighting and camera control already cover most figure-study needs. Pro becomes worth considering when your reference needs two or more interacting figures, or when ads break your concentration during long sessions. A practical test: try building the exact scene you need on the free tier first. If you hit the model limit or find the ads disruptive, that is your signal.

For a concrete example, a student doing 30-second gesture drawings from the timed challenge can stay free indefinitely. An illustrator blocking out a two-character fight scene will hit the model cap almost immediately.

To check the current terms yourself, see SetPose and its upgrade page.

How can SetPose help me practice figure drawing?

SetPose is a browser-based 3D figure-drawing tool: you pose a digital mannequin, then draw from it. Its main value for practice is that it removes the two biggest friction points of drawing from life — a model who has to hold still, and a pose you can't repeat.

What it gives you for practice

  • Controllable poses. You bend, tilt, rotate and move individual joints, so you can build a specific gesture rather than hunting for a photo that nearly matches. Preset poses (the page mentions 275) and preset categories like sports, combat, sitting and lying down let you skip setup when you just want to draw.
  • Repeatable reference. Saving poses and scenes means you can return to the same figure across several sessions — useful for a timed study you want to redo or compare against.
  • A built-in timed challenge. You set the round length (30 seconds up to 10 minutes), pick a pose type, and choose a number of rounds. That is the classic figure-drawing drill structure: short rounds to force gesture and proportion, longer rounds for structure and shading.
  • Camera and lighting control. You can change camera position, zoom, field of view, floor, background and shadows, plus light position, distance and intensity. This is what makes the same pose yield many different studies — silhouette practice from a side view, form and shadow from a strong single light.
  • Variety of models. Basic male and female figures, skeleton, anime, bodybuilder, plus dog and horse. The skeleton is the obvious pick if you are studying anatomy landmarks; the stylised models suit animation and character work.

A concrete way to use it

Run a 30-second round set on "All poses" for gesture warm-ups, then switch to a 5- or 10-minute round on a single saved pose to work on proportion and value. Change the light position between sessions on that same saved pose so you are not memorising one flat image.

Trade-offs worth knowing

Adjusting joints yourself takes time, and a self-made pose can look stiff or physically odd — the page lists "biological constraints" as a setting, which suggests it exists to keep joints plausible, so leave it on while learning. Drawing from a 3D mannequin also gives you simplified forms with no skin, clothing folds or real anatomy detail, so it is best treated as a supplement to life drawing and photo reference, not a replacement. The timed challenge and pose library are the fastest routes in; manual posing is the more instructive but slower one.

For a second opinion on the same approach, see Line of Action, which offers timed figure practice from photos, and PoseManacas for anatomy-focused 3D figures.

What types of models and props are available in SetPose?

SetPose offers a mix of human, animal and skeleton models plus a range of props for scene-building.

Models

  • Basic model: Male and Female
  • Skeleton
  • Anime 1 and Anime 2
  • Bodybuilder
  • Dog and Horse
  • Additional Detailed 1 and Detailed 2 models
  • A "Basic model (old)" option
  • Per-model settings include colour, biological constraints, height, width, height and depth resizing, hair style (none, middle part, curly, side part, wavy, ponytail, braid), expressions (neutral, smile, sad, angry, surprised, scared, yawn, smirk, disgusted, sleeping, wink, evil laugh, grimacing, exhausted) and hand props.

Props

  • Hand props, with custom left- and right-hand options
  • Floor props
  • Pose presets, including a library of 275 preset poses and separate hand poses
  • Scene elements: floor colour, background, floor shadows, infinite floor and grid

Practical takeaway: the model list covers stylised and realistic figure work, while props and pose presets speed up common reference setups. If you need more than one model in a scene, note that adding more models is listed as a Pro feature. A useful next step is to open the pose maker, add a model, then work through the presets and props to see which combination matches your drawing task.

Related questions

More questions →
How to Use a 3D Drawing Mannequin for Pose Reference: Step-by-Step

SetPose is a browser-based 3D pose maker that lets you build a custom drawing mannequin, pose it with bend/tilt/rotate/move controls, add props and lighting, then export a still image or 3D file as reference. It suits figure drawing practice, comic and storyboard blocking, and any time a wooden mannequin can't hold the angle you need. You can start posing without an account; the site's "Try Pro for Free" and "Upgrade to Pro" links indicate some features sit behind a paid tier, so treat the free experience as the starting point rather than assuming everything is unlimited.

What you need before you start

  • A browser and a mouse or trackpad (the tool is built around click-and-drag).
  • A rough idea of the pose, camera angle, and whether you want one figure or a group — this saves rework later.
  • No download required; the model, props, and camera all live in the scene.

Step 1: Add a mannequin model to the scene

Open the pose maker and add a model by dragging or clicking one from the model list. SetPose offers several body types so the reference matches your subject:

Model Use it when
Basic model (Male / Female) You want a clean, neutral figure for general figure drawing
Skeleton You're studying bone landmarks and joint placement
Anime 1 / Anime 2 Your drawing style is stylized with different proportions
Bodybuilder You need exaggerated muscle mass and volume
Dog / Horse The scene includes an animal
Detailed 1 / Detailed 2 You want more surface form than the basic block figure

Adding more than one model to a single scene is listed as a Pro feature ("Upgrade to pro to add more models to the scene"), so plan group compositions accordingly.

Step 2: Pose the mannequin with the core controls

Select a model, then click a body part and drag. Each control changes the joint in a different way, and each has a keyboard shortcut:

  • Bend (Z) — changes the angle between two parts, e.g. bending an elbow or nodding the head.
  • Tilt (X) — side-to-side or spreading movement, e.g. tilting the head or raising an arm laterally.
  • Rotate (Y) — turns a part around its own axis, e.g. turning the head or rotating a wrist.
  • Move up/down (M) and Move across the floor (S) — reposition the whole figure.
  • Resize (R) — drag a joint to change its size.
  • Extrude (E) — drag to extrude faces.
  • Inverse Kinematics — move a limb and the connected joints follow, which is faster for natural arm and leg placement than adjusting each joint separately.
  • Undo (Ctrl + Z) — step back through model edits.

Work from the torso outward: set the spine and hips first, then shoulders, then limbs, then hands and head. Small rotations at the shoulder change where the elbow and wrist end up, so fixing the big masses first avoids re-posing everything downstream.

Step 3: Speed up the scene with presets and props

  • Pose Presets — select a model and apply a preset to get a starting pose instead of building from neutral. The site references 275 preset poses, organized into categories including All, Basic, Sports, Combat, Film & TV, Emotions & Expressions, Sitting & Laying down, and Working.
  • Hand Poses — dedicated hand presets, since hands are the slowest part to pose manually.
  • Floor Props — add objects so the figure interacts with something (sitting on, leaning against, holding) rather than floating in space.
  • Model Settings — adjust model color, biological constraints, model height in cm, and per-part width/height/depth by clicking a body part and resizing it.
  • Expressions and hair — hair styles (middle part, curly, side part, wavy, ponytail, braid) and expressions (neutral, smile, sad, angry, surprised, scared, yawn, smirk, disgusted, sleeping, wink, evil laugh, grimacing, exhausted) let you match the reference to the emotion you're drawing.

Step 4: Set camera, lighting, and background for a clear reference

A good reference image is mostly a camera decision. In Camera and Environment you can control:

  • Camera position — Free, Back, Top, Top right, Left, Right, Front, plus zoom in/out.
  • Resolution — 0.25x through 3.00x.
  • Field of view — a wider FOV exaggerates foreshortening; a narrower one flattens the figure.
  • Floor color, background, floor shadows, infinite floor, and grid — turn the grid off for a clean reference, keep shadows on if you want to read form and contact with the ground.
  • Light position, light distance, light intensity — move the light to reveal the planes you're struggling to draw.

Match the camera to your intended drawing: if you're drawing a low-angle hero shot, set the camera low and check the foreshortening before you start rendering.

Step 5: Export or capture the pose as reference

  • Image export — capture the current view as a still image to draw from.
  • 3D export — export the scene as a 3D file if you want to keep working with it elsewhere.
  • Share pose — copy a URL to reopen or share the exact pose.
  • Saved Scenes / Saved Poses — store setups so you can return to a pose later.
  • Animate — available for motion reference.
  • Timed challenge — set time per round (30 seconds, 1 minute, 3, 5, or 10 minutes), pose type, and rounds (3, 6, 9, or 12) to run gesture-drawing drills directly in the tool.

Common snags and how to avoid them

  • The pose looks stiff. You're probably only using Bend. Add Tilt and Rotate at the shoulders, hips, and spine — real poses rarely sit on a single axis.
  • The arm won't reach. Use Inverse Kinematics to drag the limb into place, then fine-tune individual joints.
  • The reference is hard to draw from. Reduce resolution noise by choosing a clean background, turning off the grid, and setting a light angle that separates the near arm from the torso.
  • You can't add a second figure. Multiple models in one scene is listed as a Pro feature; check the upgrade page before building a two-person composition.
  • You lost a good pose. Use Share pose to copy the URL or save the scene before you keep experimenting.

When a 3D mannequin beats a wooden one

Switch to a 3D pose maker when you need angles a physical mannequin can't hold, when you want to change the camera and lighting without re-setting a still life, or when you want to drill gesture drawing with timed rounds. A wooden mannequin still works for quick, tactile studies where you don't want a screen between you and the figure.

How to Use a 3D Pose Maker for Drawing Reference: Step-by-Step

SetPose is a browser-based 3D pose maker for artists: you add a mannequin, pose it with bend/tilt/rotate/move controls, adjust camera and lighting, then export an image or 3D file as drawing reference. It suits figure drawing practice, comic and illustration planning, and any task where you need a specific human pose you can't photograph. You can start posing without an account; a Pro tier exists (linked as "Try Pro for Free" / "Upgrade to Pro") but the page doesn't state what it costs or exactly which features it locks, so treat those as unconfirmed.

Add a model and pick a base type

Open the pose maker and add a model by dragging or clicking one into the scene. Available base models include:

  • Basic model: Male, Female, Skeleton
  • Stylized: Anime 1, Anime 2, Bodybuilder
  • Animals: Dog, Horse
  • Legacy/extra: Basic model (old), Detailed 1, Detailed 2

Pick the type that matches your drawing style — a Skeleton for anatomy study, Anime for stylized work, Male/Female for standard figure reference. Note that adding more than one model to a scene is tied to Pro ("Upgrade to pro to add more models to the scene"), so plan single-model scenes unless you upgrade.

Pose the figure with the core controls

The tool exposes six direct manipulation modes, each with a keyboard shortcut. Select a body part, then apply the mode:

Control What it does Example Shortcut
Bend Changes angle between parts Nodding head, bending arm —
Tilt Side-to-side or spreading movement Tilting head, raising arm laterally X
Roll Tilt around the part's axis — Z
Rotate Turns a part around its own axis Turning head, rotating wrist Y
Move (vertical) Move up or down — M
Move (floor) Move across the floor — S
Resize Resize joints by dragging — R
Extrude Extrude faces by dragging — E

Two things make posing faster:

  • Inverse Kinematics — move a limb and the connected joints follow naturally instead of you rotating each segment by hand. Use this for arms and legs first, then fine-tune with Bend/Rotate.
  • Undo — Ctrl + Z reverses a model edit, so you can experiment freely.

If a pose looks stiff, the usual cause is rotating individual joints without IK; switch to IK for the limb, then correct the wrist or ankle angle manually.

Customize the scene to match your drawing setup

Once the pose reads correctly, adjust the environment so the reference matches the angle and mood you'll draw:

  • Camera — set position (Free, Back, Top, Top right, Left, Right, Front), zoom in/out, resolution (0.25x–3.00x), and field of view. A low FOV flattens perspective; a wide FOV exaggerates it for dynamic shots.
  • Lighting — control light position, distance, and intensity to create the shadow shapes you want to render.
  • Floor and background — floor color, background, floor shadows, infinite floor, and grid. Turn on the grid if you need to check proportions or perspective.
  • Model settings — model color, biological constraints, model height (cm), and per-part width/height/depth resizing. Biological constraints keep joints within plausible human limits.
  • Props and details — hair style (middle part, curly, side part, wavy, ponytail, braid), expressions (neutral, smile, sad, angry, surprised, scared, yawn, smirk, disgusted, sleeping, wink, evil laugh, grimacing, exhausted), and hand props. Hand poses are available separately, and the full preset library is listed as 275 poses.

Use presets and timed challenges to practice

If you don't need a custom pose, apply a Pose Preset instead: select a model, then choose from categories including All poses, Basic, Sports, Combat, Film & TV, Emotions & Expressions, Sitting & Laying down, and Working.

For deliberate practice, use the Timed drawing challenge:

  1. Set time per round (30 seconds, 1 minute, 3 minutes, 5 minutes, or 10 minutes).
  2. Choose pose types (same categories as presets).
  3. Set rounds (3, 6, 9, or 12).
  4. Start — draw each pose within the time limit.

Short rounds build gesture speed; longer rounds let you study anatomy and shading. This mirrors the classic timed figure-drawing drill, but with poses you can rotate to any angle afterward.

Export or share the result

When the pose is finished:

  • Image export — capture the current view as a still for direct reference.
  • 3D export — export the model as a 3D file if you need it in another tool.
  • Share pose — copy a URL to send the exact pose to someone else, or use the Share pose option in the scene menu.
  • Save — store scenes and poses for later reuse.
  • Animate — animate the scene if you need motion reference.

Reset the scene or reset individual settings if you want to start over without losing your saved work.

Common snags

  • Can't add a second model — multi-model scenes are a Pro feature per the page.
  • Pose looks unnatural — enable biological constraints and use IK for limbs before manual joint rotation.
  • Reference doesn't match your drawing angle — change camera position and FOV rather than re-posing; a top or side view often reveals proportion errors.
  • Pricing and limits — the site links to an upgrade page but doesn't publish prices or a full free-vs-Pro feature list here, so verify on the upgrade page before relying on any specific limit.
How to Pose an Online 3D Drawing Model for Figure Drawing Reference

SetPose is a browser-based 3D pose maker for artists: you add a mannequin to the scene, bend and rotate its joints, adjust the camera and lighting, then export a capture to draw from. It works for figure drawing, gesture practice, and comic or illustration reference. You don't need to install anything, but you do need to work through the scene controls in a specific order — model first, pose second, camera and props last — or you'll keep re-adjusting the view.

Add a model and pick the right base

Drag or click a model to add it to the scene. SetPose offers several base types, and the choice affects how useful the reference is:

Base model Best for
Male / Female Standard figure drawing, anatomy study
Skeleton Studying bone landmarks and joint placement
Anime 1 / Anime 2 Stylized characters, manga proportions
Bodybuilder Exaggerated muscle mass reference
Dog / Horse Animal figure reference

There are also older "Basic model" and "Detailed 1 / Detailed 2" options. Pick the closest match to your drawing style before posing — swapping the base later means redoing your work.

If you need more than one figure in a scene, note that adding additional models is a Pro feature ("Upgrade to pro to add more models to the scene").

Learn the four core joint controls

Every limb adjustment comes down to four operations, each with a keyboard shortcut:

  • Bend — changes the angle between two parts. Use it for elbows, knees, and the waist. Example: bending an arm at the elbow.
  • Tilt — side-to-side or spreading movement. Use it for raising an arm laterally or tilting the head. Shortcut: X.
  • Rotate — turns a part around its own axis. Use it for turning the head or rotating a wrist. Shortcut: Y.
  • Move — repositions the whole model, either up/down (M) or across the floor (S).

There's also Resize (drag joints, shortcut R) and Extrude (drag faces, shortcut E) for adjusting body proportions, plus Inverse Kinematics for moving limbs in different directions by dragging.

Verification: after each adjustment, orbit the camera slightly. A pose that looks natural from the front often reads as broken from the side — checking from two angles catches hyperextended joints and impossible twists early.

Common snag: using Rotate when you meant Tilt. If a limb spins in place instead of swinging outward, you're on the wrong control.

Save time with presets, then fine-tune

SetPose includes 275 preset poses and a separate set of hand poses. Select a model, then apply a preset from the Pose Presets panel as a starting point rather than building from a neutral stance.

Presets are organized by type: All poses, Basic, Sports, Combat, Film & TV, Emotions & Expressions, Sitting & Laying down, and Working. Pick the category closest to your scene, apply the preset, then adjust individual joints with Bend/Tilt/Rotate.

You can also save your own work: Saved Scenes and Saved Poses let you return to a setup later, and Share pose generates a copyable URL if you want to send a pose to someone else or reopen it on another device.

Set the camera, lighting, and props to match your reference

This is the step most people skip, and it's the one that determines whether the export is actually drawable.

Camera — choose a position (Free, Back, Top, Top right, Left, Right, Front) or zoom manually. Set resolution from 0.25x up to 3.00x and adjust field of view. A lower field of view compresses perspective, which is useful for portrait-style reference; a wider one exaggerates foreshortening for dynamic poses.

Lighting — control light position, distance, and intensity. Strong side lighting makes form and shadow shapes readable, which helps when you're translating the pose into line and value.

Environment — set floor color, background, floor shadows, and toggle an infinite floor or grid. A grid floor is helpful for judging ground contact and foot placement.

Props — floor props and hand props (plus hair styles and facial expressions) let you build a scene rather than an isolated figure. A character holding an object, for example, forces the hand and wrist into a more specific, less generic shape.

Export your reference and practice with it

Two export paths are available:

  • Capture — exports a 2D image of the current view. This is what you draw from directly.
  • 3D Export — exports the model itself for use elsewhere.

There's also an Animate option for adding motion to the scene.

For structured practice, use the Timed drawing challenge: set time per round (30 seconds, 1 minute, 3 minutes, 5 minutes, or 10 minutes), choose pose types (All, Basic, Sports, Combat, Film & TV, Emotions & Expressions, Sitting & Laying down, Working), and set the number of rounds (3, 6, 9, or 12). Short rounds with varied poses build gesture speed; longer rounds suit finished figure studies.

A practical workflow: set up a pose, export a capture, run a timed challenge using that pose category for warm-ups, then return to your saved scene for a longer study.

What to check before you start drawing

  • The pose reads correctly from at least two camera angles.
  • Ground contact looks right against the floor or grid.
  • Lighting produces clear shadow shapes rather than flat, even light.
  • The camera's field of view matches the perspective you want to draw.
  • You've saved the scene or copied the share URL if you plan to come back to it.

SetPose is free to use, with a Pro tier ("Try Pro for Free") that removes ads and unlocks additional models per scene.

How to Use SetPose: A Step-by-Step Tutorial for Creating 3D Drawing Poses

SetPose is a browser-based 3D pose maker for artists who need a drawing reference without a physical mannequin. You pick a model, pose it with bend/tilt/rotate/move controls or preset poses, adjust the scene (props, camera, lighting, background), then export a capture or 3D file. It suits figure drawing practice, pose studies, and building reference images for illustration. You can start posing without signing in; a "Try Pro for Free" upgrade path exists for extra features like adding more models to a scene and removing ads.

Before You Start

  • What you need: a browser and a mouse or touch input. No install is mentioned.
  • What you get for free: the pose maker, model library, preset poses, scene customization, image and 3D export, and the timed challenge. The page does not state a price or a login requirement for these, so treat access as "available on the site" rather than "guaranteed free forever."
  • Pro signals: "Try Pro for Free," "Upgrade to pro to add more models to the scene," and "Remove ads: Upgrade to Pro." If your scene needs multiple models or an ad-free workspace, expect that to sit behind the upgrade.

Step 1: Add a Model to the Scene

Drag or click a model to add it to the scene (the page shows both "Drag or click" and "Drag or tap" for touch).

Available basic models include:

  • Male, Female, Skeleton
  • Anime 1, Anime 2
  • Bodybuilder
  • Dog, Horse
  • Basic model (old), Detailed 1, Detailed 2

Pick the silhouette closest to your subject. A skeleton or detailed model helps with anatomy; anime models suit stylized work.

Step 2: Pose the Model with the Core Controls

Select a body part, then use the controls. Each has a keyboard shortcut:

Control What it does Example Shortcut
Bend Changes angle between parts Bending an arm —
Tilt Side-to-side or spreading movement Tilting the head, raising an arm laterally X
Roll Tilt variation — Z
Rotate Turns a part around its own axis Turning the head, rotating a wrist Y
Move Moves up or down — M
Move Moves across the floor — S
Resize Resize joints by dragging — R
Extrude Extrude faces by dragging — E
Draw Draw on models and props — —
Undo Undo model edit — Ctrl + Z

Inverse Kinematics is also available: use the controls to move the model's limbs in different directions, which is faster than rotating each joint individually for natural limb placement.

Expected result: the model holds the pose you set, and you can undo any edit with Ctrl + Z.

Step 3: Apply Preset Poses and Adjust Details

  • Pose Presets: select a model, then apply a preset. The library includes 275 preset poses, plus Hand Poses. The page marks "Access all 275 preset poses" with "Try Pro for Free," so some or all preset access may require the upgrade.
  • Model Settings: adjust model color, biological constraints, and model height (cm). You can click or tap a body part to resize it, and set width, height, and depth.
  • Appearance: hair style (none, middle part, curly, side part, wavy, ponytail, braid), expressions (neutral, smile, sad, angry, surprised, scared, yawn, smirk, disgusted, sleeping, wink, evil laugh, grimacing, exhausted), and hand props (none, left hand, right hand).

Step 4: Customize the Scene (Props, Camera, Lighting)

Floor Props and Model Settings are separate panels. Under Camera and Environment you can set:

  • Floor color, background, floor shadows, infinite floor, grid
  • Camera position: Free, Back, Top, Top right, Left, Right, Front, Zoom out, Zoom in
  • Resolution: 0.25x, 0.50x, 1.00x, 1.50x, 2.00x, 2.50x, 3.00x
  • Field of view
  • Light position, light distance, light intensity

Why this matters: camera angle and lighting change how readable a pose is for drawing. A top-down or side view can expose foreshortening; stronger light clarifies form and shadow shapes.

Step 5: Export Your Pose

Two export options are listed:

  • Image export — a flat capture for direct drawing reference.
  • 3D Export — a 3D file for use elsewhere.

You can also Share pose (copy URL) and use Saved Scenes / Saved Poses. Reset scene clears your work.

Verify it worked: open the exported image or 3D file and confirm the pose, camera angle, and lighting match what you set in the scene.

Step 6: Practice with the Timed Drawing Challenge

The Timed drawing challenge generates rounds for figure drawing practice:

  • Time per round: 30 seconds, 1 minute, 3 minutes, 5 minutes, 10 minutes
  • Types of poses: All poses, Basic, Sports, Combat, Film & TV, Emotions & Expressions, Sitting & Laying down, Working
  • Rounds: 3, 6, 9, 12

How to use it: choose a short round time for gesture drawing and a longer one for finished studies. Filter by pose type to target a specific skill, such as combat or seated poses.

Common Stops and How to Handle Them

  • You need more than one model in the scene: the page ties adding more models to the Pro upgrade. Work with one model per scene, or upgrade.
  • Preset poses are locked: the "Try Pro for Free" label sits next to the 275 preset poses. If presets are unavailable, pose manually with bend/tilt/rotate/move or inverse kinematics.
  • The pose looks stiff: switch to inverse kinematics for limb movement, then fine-tune with rotate and tilt.
  • The reference is hard to draw from: change camera position (Front, Side, Top) and raise light intensity to clarify form.
  • You lost your work: use Saved Scenes and Saved Poses, and share via URL before resetting.

Quick Reference: Full Workflow

  1. Add a model (drag or click).
  2. Pose with bend, tilt, rotate, move, or inverse kinematics.
  3. Apply a preset pose if available.
  4. Adjust model color, height, hair, and expression.
  5. Add floor props and set camera, resolution, field of view, and lighting.
  6. Export as image or 3D, or share the pose URL.
  7. Practice with the timed drawing challenge.
How to Use Ahrefs for Your First SEO Audit: A Step-by-Step Tutorial

If you're new to Ahrefs and want to run your first SEO audit, the fastest path is: open Site Explorer, enter your target URL, review the Overview for a health snapshot, then dig into Organic Keywords, Top Pages, and Site Audit to find specific problems. From there, build a short prioritized to-do list instead of trying to fix everything at once.

This tutorial walks through that workflow using a realistic starting scenario, explains what the numbers mean, and shows how to turn findings into actions.

Before You Start: Pick a Narrow Scope

A common beginner mistake is auditing an entire large website on day one. The reports become overwhelming, and you can't tell which issues matter.

Instead, choose one of these starting points:

  • A single important page (your homepage or a key product/service page)
  • A small site (under ~50 pages, e.g., a personal blog or small business site)
  • One section of a bigger site (e.g., /blog/)

For this tutorial, assume you're auditing a small business site with about 30 pages. The same steps scale up later.

You'll need an Ahrefs account to follow along. Ahrefs offers paid plans, and pricing and feature limits change over time, so check the current Pricing page for what's included in each tier before committing.

Step 1: Enter Your Target in Site Explorer

Site Explorer is Ahrefs' core tool for analyzing any website or URL.

  1. Open Site Explorer from the top navigation.
  2. In the search box, paste your domain (e.g., example.com).
  3. Choose the Exact URL or Domain mode depending on scope. For a full-site view, use Domain or Prefix; for a single page, use Exact URL.
  4. Press Enter.

You'll land on the Overview report. Don't try to absorb everything — focus on four numbers first.

Reading the Overview Snapshot

Metric What it tells you How to use it
Ahrefs Rank (AR) Relative strength of the site's backlink profile vs. others in the database Useful for comparing against competitors, not as a standalone goal
Organic traffic Estimated monthly visits from search A rough trend indicator, not exact analytics
Organic keywords Estimated number of keywords the site ranks for Shows breadth of visibility
Backlinks / Referring domains Total links and unique sites linking to you Referring domains matter more than raw backlink count

Important caveat: Ahrefs' traffic and keyword numbers are estimates based on its own data. They won't match Google Search Console or your analytics exactly. Treat them as directional, not absolute.

Step 2: See What You Already Rank For

Go to Organic Keywords in the left sidebar. This shows queries where your site appears in search results.

Sort by Traffic (descending) to see which pages bring the most estimated visitors. Then look for:

  • Keywords ranking in positions 4–15 — these are often the easiest wins. A small content or on-page improvement can push them onto page one.
  • Keywords with high volume but low position — potential opportunities if the topic is relevant.
  • Irrelevant keywords — if you rank for something off-topic, it may signal thin or mismatched content.

Write down 5–10 of the position 4–15 keywords. These become your first optimization targets.

Step 3: Find Your Best and Weakest Pages

Open Top Pages. This ranks your URLs by estimated organic traffic.

Look for two things:

  1. Your top performers — understand what topics and formats work. Can you create more content like this?
  2. Pages with traffic but poor rankings — these may need on-page fixes (title, headings, internal links).

If a page gets zero traffic and targets a topic you care about, it's a candidate for a rewrite or consolidation.

Step 4: Run a Technical Site Audit

Now move to Site Audit. This crawls your site and flags technical and on-page issues.

  1. Click Site Audit → New project.
  2. Enter your domain and set crawl settings (default is usually fine for a small site).
  3. Start the crawl and wait for it to finish.

Once complete, you'll see a Health Score and a list of issues grouped by category.

Which Issues to Fix First

Not all issues are equal. Prioritize in this order:

Priority Issue type Why it matters
1 Broken links (404s) Bad for users and crawl efficiency
2 Pages blocked from indexing They can't rank at all
3 Missing or duplicate title tags Directly affects click-through and relevance
4 Slow-loading pages Affects experience and rankings
5 Thin content Low value to users and search engines

Ignore low-impact warnings (like minor meta description length) until the big items are handled.

Step 5: Turn Findings Into a To-Do List

You now have raw data. Convert it into a short, actionable list. Example:

  1. Fix 3 broken links found in Site Audit.
  2. Rewrite title tags on 5 pages with duplicate titles.
  3. Improve 4 pages ranking in positions 6–12 by adding missing subtopics and internal links.
  4. Remove or update 2 thin pages with no traffic.

Keep the list to 5–10 items max for your first audit. Finishing a short list beats starting a long one.

Common Beginner Mistakes

  • Chasing every red flag. Site Audit flags many minor issues. Fix what affects rankings and users first.
  • Trusting estimates as exact numbers. Ahrefs data is modeled, not measured from your analytics.
  • Auditing a huge site too early. Start small to learn the interface.
  • Ignoring search intent. A page can be technically perfect but still fail if it doesn't match what searchers want.
  • Forgetting to re-crawl. After fixes, run Site Audit again to confirm improvements.

Where to Go Next

Once your first audit is done:

  • Compare with competitors using Site Explorer's Competing Domains and Content Gap reports.
  • Track keyword rankings over time with Rank Tracker.
  • Explore backlink opportunities in the Backlinks and Link Intersect reports.
  • Set up recurring Site Audit crawls so new issues surface automatically.

Your first audit isn't about perfection — it's about building a repeatable habit: enter a target, read the key reports, pick the highest-impact fixes, and act. Do that once a month and your site's health compounds.

Website Overview

The available information shows a mix of normal operation and configuration gaps. Depending on how the website is used, these gaps may affect secure access or the consistency of its public presentation.

Domain and Registration

Transfer-protection status is present, helping reduce the risk of unauthorized domain transfers. The domain has about 5 years of registration history; its current configuration provides more context than age alone. The registrar is Cloudflare, Inc., a widely used domain service provider. The domain uses the common .com extension, which is not an independent safety signal.

DNS and Email

Nameservers are provided by Cloudflare, indicating managed DNS hosting. MX records point to the setpose.com email service. No CNAME was found; the observed records resolve directly to addresses. SPF and DMARC are configured. DKIM status is unknown. TXT records include verification markers for Google. Such markers may also remain after a service stops being used.

TLS and Certificates

The certificate issuer is DigiCert Inc, a commercial certificate authority. The certificate uses an RSA 2048-bit public key, offering broad client compatibility. The server supplied a complete certificate chain. No organization name is present in the certificate; the available fields are consistent with domain validation. The certificate is valid for about 198 days in total, with 175 days remaining.

HTTP and Browser Security

The checked browser-security headers were not detected, leaving fewer explicit browser-side safeguards. No X-Powered-By header was found, reducing one common source of backend fingerprinting information. No obvious internal addresses or debug information were found in the headers. The Server header identifies Apache without an exact version. Cookie security attributes are unknown.

Technology Stack Analysis

The public page identifies jQuery, Google Analytics, Apache without precise versions, leaving fewer clues for version-specific scanning.

Search and Social Sharing

The title has 67 characters and may be truncated in search results. Twitter Card metadata is configured. JSON-LD includes Organization data, helping describe the organization as an entity. A meta description is present, with 159 characters. The observed directives allow indexing and link following.

Hosting and Email

DNSCloudflare
HostingHetzner Online GmbH
Emailsetpose.com
Approximate IP geolocation (inferred; a CDN or proxy may differ from the origin server) Germany flagNuremberg, Bavaria, Germany Inferred 162.55.254.32

Registration details

RDAP / WHOIS

RegistrarCloudflare, Inc.
Registered2021-10-01
Expires2027-10-01
Domain statusclient transfer prohibited
Nameserverskarina.ns.cloudflare.com、nile.ns.cloudflare.com
DNSSECunsigned

DNS records

DNS

TypeNameValueTTLPriority
Asetpose.com162.55.254.32300—
MXsetpose.commail.setpose.com30010
NSsetpose.comkarina.ns.cloudflare.com86400—
NSsetpose.comnile.ns.cloudflare.com86400—
TXTsetpose.comgoogle-site-verification=1GqG4DtY8PG8fgifIIfOWOiBqDHxpdyjL2BQIdSDyos300—
TXTsetpose.comv=spf1 a mx include:spf.totaalholding.nl ip4:185.94.230.246 -all300—
DMARC_dmarc.setpose.comv=DMARC1; p=quarantine;300—

TLS and certificates

TLS / SSL

AssessmentNormal configuration
Supported protocolsTLSv1.2、TLSv1.3
Negotiated protocolTLSv1.3
Certificate subjectsetpose.com
IssuerDigiCert Inc
Valid until2027-03-21T23:59 · Remaining when checked: 175 days
Verification detailsCertificate trust: Passed · Hostname match: Passed

HTTP response headers

HTTP

HeaderValue
content-typetext/html; charset=UTF-8
cache-controlno-store, no-cache, must-revalidate
serverApache
set-cookieRedacted

Identified technologies

jQueryGoogle AnalyticsApache

Pages, Search and Sharing

Meta descriptionThe easy to use pose maker for artists! Adjust the 3D drawing model to create your own custom poses. Combine them with many props to use as a drawing reference
Canonical URLhttps://setpose.com/
LanguageEnglish (default)
Twitter Cardsummary_large_image
All bots 1 allowed · 2 disallowed
  • Allow/
  • Disallow/scripts/offlinedarkmode.html
  • Disallow/scripts/offline.html

User reviews (0)

  • No reviews yet.