Website profiles · Technology insights · Alternatives

instapods.com

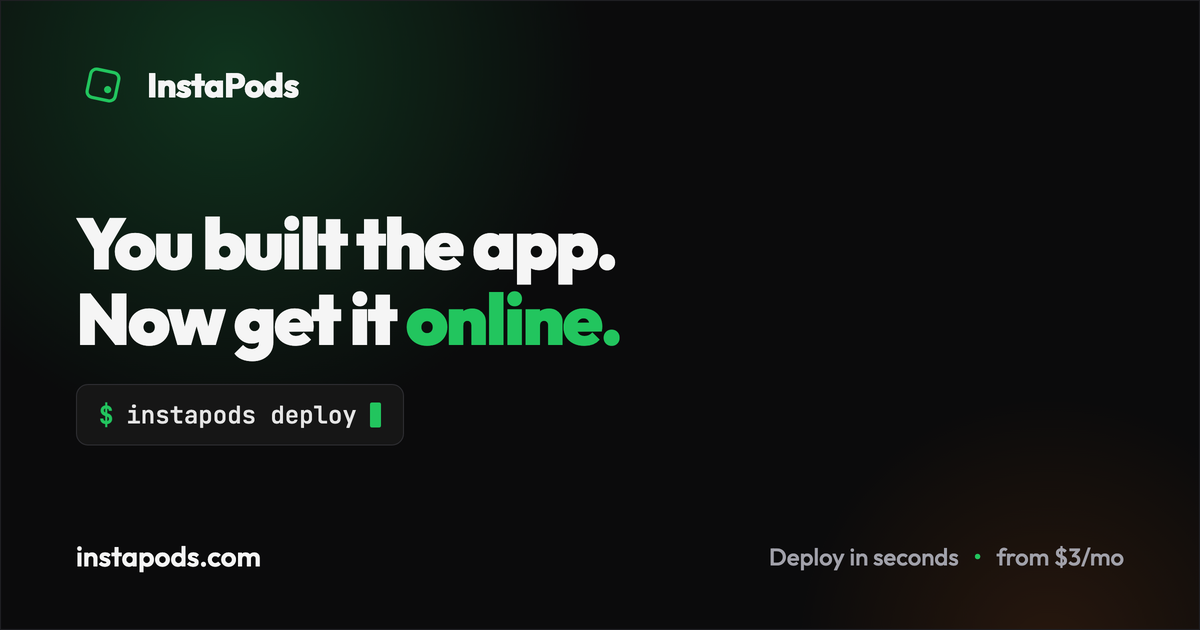
You built the app. Now get it online. InstaPods deploys your app in seconds - one command, real servers. From $3/mo with $10 credit when you add a card. Works with Cursor, Claude Code, Lovable, Bolt.

No paid content found
Visit website
Profile views 11 Outbound visits 1 Normal
InstaPods Full homepage screenshot

At a glance

Category
Artificial Intelligence
Language
English
Paid-content signal
No paid content foundObserved
Registered
2016
Hosting
OVH SASInferred
HTTPS certificate trusted
PassedObserved
Last updated

Website review

This review may include AI-generated content and is not individually verified. Domain, certificate and other facts come from the observed data on this page.

What is InstaPods?

InstaPods is a deployment service for people who have built an app with an AI coding tool and now need it running on a real server instead of localhost. Its pitch is that one command — or one request to an AI assistant — creates a "pod" that hosts your app with HTTPS, rather than making you assemble several separate services.

What it actually does

  • Deploys from the terminal with a single install command, or from an AI assistant connected to InstaPods' MCP server.
  • Publishes a Claude connector, so within Claude you can ask for a deploy and get back a live URL.
  • Bundles the pieces that usually mean signing up for several providers: hosting, DNS pointing, automatic SSL, and databases (MySQL, PostgreSQL, Redis).
  • Keeps apps always on — no sleeping or cold starts — including on the entry plan.
  • Gives full SSH access, so it is not a locked-down black box if you need a shell.

Who it suits

It fits the "vibe coding" workflow: you used Cursor, Claude Code, Lovable, Bolt or similar to produce a working app, and the deployment step is where momentum dies. The page quotes that frustration directly from r/vibecoding and an X user — those are users' observations, not the product's claims. The practical read: if your app is a conventional web app with a database, one pod replaces a stack of separate accounts. If you depend on a specific platform's edge functions, build pipeline or ecosystem integrations, consolidating into one pod may cost you flexibility.

A concrete next step

Take one small app currently running only on your machine. Before committing, check two things: whether your runtime and database choice are supported, and whether you can point a domain you already own at a pod without friction. Then deploy that one app and compare the effort against whatever you used previously. The $10 card credit is described as roughly three months on the entry tier, which is enough runway to judge it on a real project — but confirm current pricing and database availability on the relevant tier, since databases are listed from the mid tier upward.

Related tools worth knowing: Vercel and Supabase for the assemble-it-yourself route, and Render as another managed hosting option.

How do I deploy my app with InstaPods from my AI coding assistant?

You deploy from inside the assistant you already use, rather than switching to a terminal or a hosting dashboard. You connect InstaPods once, then ask the assistant to deploy. It creates a pod, uploads your code, optionally adds a database, and returns a live URL.

The flow, in practice:

  1. Connect InstaPods to your assistant. InstaPods publishes a Claude connector, so you add it in Claude and authorise it. For other tools, point the MCP client at https://app.instapods.com/api/mcp.
  2. Ask for the deploy in plain language — the page's own example is "deploy this."
  3. The assistant provisions the pod, pushes the code, attaches a database if you asked, and hands back the URL.
  4. Point your domain at it if you want a custom address; HTTPS is automatic.

There is also a terminal route: a one-line curl install script, which suits people who prefer a shell or want to script the step. Both paths land on the same real servers and a dashboard you can inspect afterwards — useful when you need to check logs or SSH in rather than trusting a black box.

Which route fits you

Situation Better route
You're already chatting with Claude or another MCP-capable assistant Connector / MCP — no context switch
You want it scripted, repeated, or in CI The curl install command
You need to debug after deploy Either, then the dashboard and SSH

A concrete scenario: you've been building a small app with Cursor and it runs on localhost. You add the MCP endpoint to Cursor, type "deploy this and add a Postgres database," and get a URL back. Later you notice a runtime error, open the dashboard, SSH in, and check the process. The deployment step took seconds; the debugging still takes as long as debugging takes.

Trade-offs worth knowing. Convenience here comes from bundling: one pod instead of separate app, database, DNS and TLS services. That reduces setup and the number of bills, but it also means less granular control than assembling best-of-breed pieces yourself, and your app's runtime is tied to this provider. Databases are included from the Build tier upward per the page, so check the tier before assuming a database comes with the cheapest plan.

Next step: decide whether you want the assistant-driven path or the scripted one, then make one small test deploy before moving a real project. If you'd rather compare hosting options first, Vercel and Render are common alternatives for the same job.

Is InstaPods cheaper than combining Vercel, Supabase, and Cloudflare?

It can be, especially at the low end — but "cheaper" depends on how much of that stack you actually need. InstaPods bundles hosting, databases, DNS/SSL and always-on execution into one pod, so the comparison is really "one bill vs. three or four."

Where InstaPods tends to win

  • You are running a single small app and want it always on. InstaPods says there is no sleeping or cold starts even on its lowest plan, so you are not paying a separate always-on compute tier.
  • You would otherwise pay for a managed Postgres (Supabase) plus a host (Vercel) plus DNS/proxy (Cloudflare) and still glue them together yourself.
  • You value fewer moving parts: one command, one dashboard, one place for env vars and SSL.

Where the combined stack can win

  • You only need a static frontend or serverless functions. Vercel's free/hobby tier plus Cloudflare's free DNS/TLS can cost nothing, which no bundled host beats.
  • You need heavy scale, edge caching, or a large managed database with generous free limits. Supabase's free tier and Cloudflare's free tier are hard to undercut for hobby projects.
  • You want best-of-breed pieces and don't mind wiring them together.

A quick way to decide

Your situation Likely cheaper
One small always-on app, DB included InstaPods
Static site / hobby project Vercel + Cloudflare free tiers
Production app needing edge + big managed DB Often the combined stack
You hate config/context switching InstaPods (paying for convenience)

Next step: estimate your real monthly usage — how many always-on services, how much database, whether you need a custom domain with SSL. If that's one app plus one database, price InstaPods against a paid Vercel plan plus a paid Supabase plan; the bundle usually comes out ahead. If your usage fits free tiers, the combined stack is cheaper.

One caveat: the "cheaper" claim only holds if you'd otherwise be on paid tiers. If you're comparing against free tiers, you're buying convenience, not savings. For official details, see InstaPods, Vercel, Supabase and Cloudflare.

Can I use my own domain with HTTPS on InstaPods?

Yes. InstaPods lists "Domains + Auto SSL" as a standard feature, described as applying to every pod and every domain: you point your domain at the pod, and HTTPS is issued automatically rather than configured by hand.

That matters most for the audience the page targets — people who built an app with Cursor, Claude Code, Lovable or Bolt and are stuck at the localhost stage. Getting a custom domain resolving with a valid certificate is usually the step where that group stalls, because it means touching DNS records and certificate provisioning. Here it's folded into the same deploy flow as the app itself.

A few practical considerations:

  • Expect a DNS propagation wait. Automatic HTTPS removes the certificate work, not the time for your registrar's records to update. Budget up to a few hours on a new domain.
  • Point the domain before or right after your first deploy. If your app needs the final hostname for cookies, OAuth redirect URIs or webhook callbacks, set the domain first so you don't have to redo that configuration.
  • Verify the certificate on the live URL once DNS resolves, and check that http:// redirects to https:// rather than serving both.

If you want to confirm the exact steps for your registrar, the deployment walkthrough is the place to start: InstaPods.

What happens to my app if I stop paying for InstaPods?

If you stop paying, the practical answer is that your app stops being served from InstaPods. The page says pods are always on with no sleeping or cold starts, which means the hosting is tied to an active subscription rather than a free tier that keeps running. Once billing lapses, expect the live URL to stop responding and the pod to be suspended or removed.

The bigger risk is your data and configuration. InstaPods bundles MySQL, PostgreSQL and Redis into the same pod, so if the pod is torn down, those databases go with it. Your code is likely recoverable because you built it locally or in your AI tool, but anything stored only in the hosted database — user accounts, uploaded content, orders — may not be. Full SSH access means you can pull a dump before you cancel, but only if you do it while the pod is still running.

A sensible checklist before you stop paying:

  • Export each database (mysqldump, pg_dump, Redis snapshot) and download the files.
  • Copy any environment variables, secrets and domain DNS settings.
  • Confirm whether your domain's SSL and DNS records point at InstaPods and will need repointing.
  • Check whether the $10 card credit or any prepaid balance affects your cancellation date.

For a concrete scenario: a solo builder ships a small side project on the Launch plan, gets a few hundred users, then decides to pause. If they dump the Postgres database and note their env vars first, moving to another host is an afternoon's work. If they just stop paying, they may lose the user table and have to rebuild from scratch.

One decision criterion: if your app holds data you cannot regenerate, treat cancellation as a migration project, not a billing toggle. If it is a throwaway prototype, letting the pod lapse is fine — your source code is the real asset.

Does InstaPods include databases like PostgreSQL or Redis without extra cost?

Yes. InstaPods lists MySQL, PostgreSQL, and Redis as included databases, with "no separate database bill." One caveat from its own page: adding a database is described as available on the Build tier and above, so on the cheapest entry plan you may not get that inclusion.

That distinction matters if you are choosing a plan mainly for the database. A small static site or simple API might be fine without one; a typical app with persistent data — user accounts, saved records, sessions, caching — will likely need a database and therefore the higher tier.

H3 Practical check before you deploy

  • Confirm the current plan that includes database add-ons, since tier names and limits change.
  • Decide which engine you need: PostgreSQL for relational data, MySQL if you are porting an existing app, Redis for caching, queues, or sessions.
  • Ask whether backups, storage size, and connection limits are part of the included database or billed separately.

H3 A concrete scenario You built a small app in Cursor and it works on localhost. You want a live URL plus a Postgres database for user data. According to the page, you connect InstaPods once, ask your assistant to deploy, and it creates the pod, uploads code, adds a database, and returns an HTTPS URL. The trade-off: convenience and a single bill versus less control than assembling separate providers yourself.

Next step: verify the current Build-tier requirement and database details on InstaPods before signing up, since pricing and plan features are the parts most likely to have changed.

Related questions

More questions →
Cybersecurity Basics: What It Protects and How to Apply It to Your Website

Cybersecurity is the practice of keeping your data, accounts, and services from being accessed, stolen, altered, or knocked offline by someone who shouldn't have them. For a personal site or small online presence, that reduces to a short list of concrete jobs: protect your login credentials, keep your software current, serve traffic over HTTPS, and lock down the domain and DNS layer that everything else depends on. You don't need an enterprise security team to cover the basics — but you do need to treat your registrar account and your hosting account as the two most valuable things you own, because whoever controls those controls the site.

What cybersecurity actually protects

It helps to separate the assets from the threats, because most small-site incidents come from a handful of causes.

Asset What can go wrong Primary protection
Accounts (registrar, hosting, email, CMS admin) Credential theft, password reuse, session hijacking Unique passwords + multi-factor authentication (MFA)
Data in transit Eavesdropping, tampering, browser warnings HTTPS/TLS certificate
Software (CMS, plugins, themes) Malware, backdoors, defacement Timely updates, minimal plugins
Domain and DNS records Unauthorized transfer, DNS hijacking, spoofed email Registrar account protection, registrar lock, DNSSEC
Availability DDoS, resource exhaustion Hosting/CDN/WAF layer

The pattern: each asset has one or two controls that remove most of the risk. You don't need all of them on day one, but skipping the account and domain layers is the mistake that's hardest to undo.

The threat categories a small site actually faces

  • Credential theft — reused or weak passwords, or credentials leaked from another breached service. This is the most common way small sites fall.
  • Phishing — fake login pages or "your domain is expiring" emails designed to capture your registrar or hosting password.
  • Malware and backdoors — usually arriving through an outdated CMS, plugin, or theme.
  • DDoS — flooding a site until it's unreachable; often handled by your host or a CDN rather than by you.
  • Misconfiguration — an open admin panel, directory listing, or default credentials left in place.

Notice that four of the five are about access, not exotic exploits. That's why the basics work.

Core protections to apply first

Use strong, unique passwords and a password manager

Every account tied to your site — registrar, host, CMS, email — should have a different password. A password manager makes this practical. The goal is that one leaked password can't be replayed anywhere else.

Turn on multi-factor authentication

MFA is the single highest-value control for your registrar and hosting accounts. Even if a password is stolen, an attacker without the second factor can't log in. Prefer an authenticator app or hardware key over SMS where the service supports it.

Serve everything over HTTPS

An HTTPS/TLS certificate encrypts traffic between visitors and your site and prevents browser "not secure" warnings. Most hosts and registrars offer a free certificate; the important part is that it's installed and that HTTP redirects to HTTPS.

Update promptly and keep the surface small

Apply CMS, plugin, and theme updates as they're released, and delete anything you're not using. Fewer components means fewer places for a known vulnerability to sit unpatched.

Apply least privilege

Give each person (and each integration) only the access they need. Don't run your site day-to-day from an administrator account, and don't hand out admin rights for tasks that don't require them.

Secure the domain and DNS layer

This layer is easy to overlook and expensive to lose, because a hijacked domain can point anywhere.

  • Protect the registrar account with a unique password and MFA. Your registrar account is the root of control over the domain.
  • Enable the registrar lock (often called a transfer lock or clientTransferProhibited) so the domain can't be moved without your action.
  • Keep registrant contact email secure — that inbox is often the recovery path for the domain.
  • Enable DNSSEC where your registrar and DNS provider support it, so responses can be cryptographically validated and spoofing is harder.
  • Watch for unauthorized DNS changes — if records you didn't touch appear, treat it as a compromise.

Porkbun is an ICANN-accredited domain registrar, which means it operates under ICANN's registrar rules — relevant here because those rules govern transfers, locks, and registrant contact requirements. Its site lists Stripe among its payment platforms. Beyond that, check your specific registrar's and DNS provider's current feature set for lock and DNSSEC support, since availability varies.

Warning signs and first steps if something looks wrong

Watch for: unexpected DNS records, visitors reporting malware warnings, unexplained admin accounts, a sudden traffic drop, or emails about transfers you didn't request.

If you suspect a compromise:

  1. Change passwords on registrar, hosting, and CMS accounts, starting with the registrar.
  2. Revoke active sessions and reset MFA where possible.
  3. Check DNS records against what you expect and revert unauthorized changes.
  4. Restore from a known-good backup if files were altered.
  5. Re-scan and update the software before reopening the site.

Containment first, then recovery — don't try to clean a live, still-compromised site.

What to outsource vs. manage yourself

Decide based on Manage yourself Outsource
Site size Small static or low-traffic site Growing or high-traffic site
Risk tolerance Low-stakes personal project Anything handling user data or payments
Time You can patch and monitor regularly You can't commit to ongoing upkeep
Threats Basic credential and update hygiene DDoS, WAF, and 24/7 monitoring needs

Hosting-level security, CDN, and WAF are usually worth outsourcing because they require scale and constant attention. Account hygiene, MFA, updates, and domain/DNS protection are things you should keep in your own hands regardless of size — they're cheap to do and costly to skip.

How does InstaPods compare to deploying with Vercel, Supabase, or Cloudflare?

InstaPods bundles your app, database, domain, and SSL into a single "pod" that runs on real servers, so you deploy with one command instead of stitching together separate services. It's aimed at people who already have a working app on localhost and want it online without configuring a stack. If your project depends on a specific platform's ecosystem (for example, edge functions or a particular managed database), the trade-off is different — this comparison covers where InstaPods fits and where it doesn't.

The core difference: one pod vs. a stitched stack

InstaPods' own framing is direct: "One pod. Not five services." The pitch is that you stop combining Vercel + Supabase + Cloudflare + DNS + environment variables as separate pieces.

Dimension InstaPods Typical multi-service setup (e.g., Vercel + Supabase + Cloudflare)
Deploy method One command (curl -fsSL https://instapods.com/install.sh | sh) or via AI assistant Per-service setup: frontend host, database, DNS, env vars
Database MySQL, PostgreSQL, Redis included; one command to add on Build ($7/mo) and above Usually a separate provider and separate bill
Domains + SSL Point your domain, HTTPS automatic on every pod and domain DNS + SSL configured per service
Always on No sleeping, no cold starts, runs 24/7 even on the $3 plan Varies by plan and platform
Access Full SSH shell access Depends on platform; often limited
AI tool integration Works with Cursor, Claude Code, Lovable, Bolt; published Claude connector Varies; often requires manual setup

The practical difference is the number of steps and the number of bills. InstaPods collapses app hosting, database, DNS, and SSL into one place; the multi-service route gives you more granular control but more configuration surface.

How deployment actually works

InstaPods offers two paths, both aimed at removing the "context switching from building to configuring" that its page quotes from r/vibecoding.

Terminal path:

  1. Run the install command: curl -fsSL https://instapods.com/install.sh | sh
  2. Expected result: your app is deployed to a real server with HTTPS.

AI assistant path:

  1. Connect InstaPods once (it's a published Claude connector; ChatGPT app is submitted but not yet live).
  2. Say "deploy this."
  3. Your assistant creates the pod, uploads the code, adds a database, and returns a live URL — no tab switching or terminal.

For MCP clients (ChatGPT, Cursor, Windsurf, or any MCP client), you can point them at https://app.instapods.com/api/mcp today without waiting for the ChatGPT app.

Where InstaPods fits — and where it doesn't

It fits if:

  • You built an app with an AI tool (Cursor, Claude Code, Lovable, Bolt) and it's stuck on localhost.
  • You want a database without a separate bill or provider.
  • You want always-on hosting without cold starts, even on the entry plan.
  • You want SSH access rather than a black-box dashboard.

Consider the alternatives if:

  • Your app relies on platform-specific features (edge runtime, particular serverless primitives) that a general pod doesn't replicate.
  • You need fine-grained control over each layer of the stack and don't mind managing them separately.
  • Your team already has infrastructure and workflows built around another provider.

Pricing and getting started

InstaPods starts from $3/mo, with $10 credit when you add a card — described as about 3 months on the Launch plan, cancel anytime. Databases (MySQL, PostgreSQL, Redis) are included via one command on Build ($7/mo) and above, with no separate database bill.

The decision comes down to how much configuration you want to own. If deployment is the part slowing you down and your app doesn't depend on a specific platform's proprietary features, InstaPods removes the most steps. If your stack is already tied to another ecosystem, compare on the dimensions above before migrating.

What Is InstaPods and What Problem Does It Solve?

InstaPods is a hosting platform that takes an app you've already built and puts it on a real server in seconds, using a single command. It targets a specific, common failure point: the app works on your machine (localhost) but has no home online. If you built something with an AI coding tool like Cursor, Claude Code, Lovable, or Bolt and now need it reachable on the internet, InstaPods is aimed at you. If you need fine-grained control over a multi-service cloud architecture, it is probably not the right fit.

The problem it addresses

The site frames the core issue with a line that will be familiar to anyone who has shipped a side project: "You built the app. Now it's stuck on localhost." Deployment is where momentum tends to die, and InstaPods collects community quotes making the same point:

  • "Building is fun. Deploying is where the vibe usually dies." (r/vibecoding)
  • "The deploy phase is way over my head." (r/vibecoding)
  • "I was stuck building apps that lived on my computer." (r/vibecoding)
  • "The biggest vibe killer is the context switching from building to configuring." (r/vibecoding)

The specific friction is assembly work: stitching together separate providers for hosting, database, CDN/DNS, and environment variables, then wiring them to each other. InstaPods' answer is to collapse that into one unit.

What "one pod" means

Instead of five services, InstaPods gives you a single pod that bundles the pieces most small apps need:

Capability What it provides
Hosting Real servers, always on — no sleeping, no cold starts, even on the $3 plan
Databases MySQL, PostgreSQL, and Redis; one command to add on Build ($7/mo) and above, no separate database bill
Domains + SSL Point your domain and HTTPS is automatic on every pod and domain
SSH access Full shell access

The "always on" detail matters if you've used free tiers that spin down after inactivity — InstaPods states your app runs 24/7 on every plan, including the cheapest one.

How you deploy

There are two paths, both designed to avoid leaving the tool you're already working in.

From the terminal, one command:

curl -fsSL https://instapods.com/install.sh | sh

From an AI assistant, via a connector. InstaPods is published in Claude's connector directory: connect it once, then say "deploy this," and the assistant creates the pod, uploads the code, adds a database, and returns a live URL. A ChatGPT app is listed as "coming soon" (submitted to OpenAI's app directory), but you don't have to wait — you can point ChatGPT, Cursor, Windsurf, or any MCP client at https://app.instapods.com/api/mcp today.

The expected result in both cases is the same: your app on a real server with HTTPS, without switching tabs or manually configuring infrastructure.

Pricing signals

The site states pricing starts from $3/mo, with $10 credit when you add a card — described as about 3 months on the Launch plan, cancel anytime. The Build plan is $7/mo and is the tier where one-command database additions are available. Treat these as the platform's own stated figures; check the site for current terms before committing.

Who it's for, and who it isn't

A good fit if you:

  • Built an app with an AI tool and just want it online
  • Want hosting, database, domain, and SSL handled as one thing
  • Value staying inside your editor or chat instead of configuring services
  • Need a persistent, always-on server rather than a sleeping free tier

Probably not the fit if you:

  • Need to compose and tune many independent cloud services yourself
  • Require infrastructure-as-code control over networking and scaling
  • Are deploying something that doesn't map to a single app + database model

The clearest way to decide: if your current blocker is "it works locally but I don't know how to get it online," InstaPods is built precisely for that gap.

Which AI Coding Tools and Clients Work with InstaPods?

InstaPods works with Cursor, Claude Code, Lovable, Bolt, and any tool that can point at its MCP server. The most direct integration is the published Claude connector, which lets you deploy from inside a Claude conversation. ChatGPT's dedicated app is not live yet, but you can connect ChatGPT, Cursor, Windsurf, or any other MCP client to InstaPods today using the MCP endpoint.

Supported tools and clients

Tool / client Status How you connect
Claude Live Add the published InstaPods connector from Claude's connector directory
Cursor Supported Point it at the InstaPods MCP server
Windsurf Supported Point it at the InstaPods MCP server
ChatGPT App submitted, not yet live Use the MCP server endpoint in the meantime
Lovable Supported Listed as a compatible tool
Bolt Supported Listed as a compatible tool
Any MCP client Supported Use the MCP server endpoint

The site also states it works with "any tool," so the list above is the named set rather than a hard limit.

What deploying from an AI tool actually does

Once connected, you ask your assistant to deploy. According to InstaPods, the assistant then:

  1. Creates the pod
  2. Uploads your code
  3. Adds a database
  4. Returns a live URL

The stated goal is that you don't switch tabs or drop into a terminal — the deploy happens from the chat you're already in.

Connecting Claude

This is the only integration with a fully published, directory-listed path.

  • Open Claude's connector directory and add InstaPods.
  • Ask Claude for a deploy.
  • Expected result: your app runs on a real server with HTTPS, described as taking seconds.

Because the connector is published in Claude's directory, you add it through Claude's own connector flow rather than pasting a URL.

Connecting ChatGPT, Cursor, Windsurf, or another MCP client

ChatGPT's app is submitted to OpenAI's app directory but not live, so the current route is the MCP server.

  • MCP server endpoint: https://app.instapods.com/api/mcp
  • Add that endpoint as an MCP server in your client.
  • Then request a deploy from that client.

The site explicitly names ChatGPT, Cursor, and Windsurf as clients you can point at this server today, and says any MCP client works.

The terminal alternative

If you'd rather not go through an AI tool at all, there's a one-command install:

curl -fsSL https://instapods.com/install.sh | sh

This is the fallback path when your tool isn't connected or you just want to deploy directly.

What you get on the other side

Whatever client triggers the deploy, the result is the same kind of pod:

  • Always on — no sleeping or cold starts, stated to apply even on the $3 plan
  • Databases included — MySQL, PostgreSQL, and Redis, added with one command on Build ($7/mo) and above, with no separate database bill
  • Domains and auto SSL — point a domain and HTTPS is automatic
  • SSH access — full shell access

Practical notes before you pick a path

  • If you already work in Claude, the connector is the shortest route because it's published and directory-listed.
  • If you work in Cursor, Windsurf, or ChatGPT, use the MCP endpoint — you don't have to wait for the ChatGPT app.
  • If your tool has no MCP support, the install script is the reliable option.
  • Pricing signals from the site: from $3/mo, with $10 credit when you add a card, described as about 3 months on the Launch plan, cancel anytime. Database add-ons are tied to Build ($7/mo) and above.

The core point: InstaPods isn't limited to one assistant. It exposes an MCP server so most modern AI coding clients can trigger a deploy, and Claude has the most finished integration today.

How to Deploy an App with InstaPods

InstaPods deploys your app to a real server in seconds using one command, and it can also be driven from inside an AI assistant like Claude. The fastest path is the install script: curl -fsSL https://instapods.com/install.sh | sh. If you already work in Claude, Cursor, or another MCP-capable client, you can connect InstaPods once and then just say "deploy this" — the assistant creates the pod, uploads your code, adds a database, and returns a live HTTPS URL. This guide covers both routes, what you get after deploying, and where people typically get stuck.

What you need before you start

  • An app that currently runs on localhost (the source material frames the problem exactly this way: "You built the app. Now it's stuck on localhost.")
  • A terminal, or an AI client that supports MCP connections
  • A card on file if you want the $10 credit — the site states $10 credit when you add a card, described as about 3 months on the Launch plan, cancel anytime
  • A domain only if you want a custom one; HTTPS is automatic either way

Option 1: Deploy from the terminal

  1. Run the install command:
    curl -fsSL https://instapods.com/install.sh | sh
    
  2. The script sets up the InstaPods tooling on your machine. From there you deploy your app to a pod — a single unit that includes the runtime, database options, domain handling, and SSL.
  3. Expected result: your app is reachable at a live URL over HTTPS, running on a real server rather than localhost.

The pitch behind this route is "one command, real servers" — the goal is to skip stitching together separate hosting, database, CDN, DNS, and environment-variable services.

Option 2: Deploy from your AI assistant

This is the route InstaPods leans into hardest: "Your AI can ship it for you."

Using the Claude connector

InstaPods is a published connector in Claude's connector directory. The flow:

  1. Add the InstaPods connector in Claude.
  2. Ask for a deploy in plain language — the site's example is saying "deploy this."
  3. Claude creates the pod, uploads the code, adds a database, and hands back a live URL.

The stated benefit is no tab switching and no terminal. If you've been in the situation one Reddit user described — "Just accepted Claude Code's all the way to a working app on localhost. Now have to figure out how to deploy it" — this collapses that gap into a single request.

Using ChatGPT, Cursor, Windsurf, or any MCP client

A ChatGPT app is listed as "coming soon" and submitted to OpenAI's app directory, but you don't have to wait. Point any MCP client at:

https://app.instapods.com/api/mcp

The site names Cursor, Claude Code, Lovable, Bolt, ChatGPT, and Windsurf as compatible tools, and says it works with "any tool."

What you get after deploying

Feature What it means
One pod Runtime, database, domain, and SSL in one unit instead of five services
Always On No sleeping or cold starts; runs 24/7 even on the $3 plan
Databases included MySQL, PostgreSQL, Redis — one command to add on Build ($7/mo) and above, no separate database bill
Domains + Auto SSL Point your domain and HTTPS is automatic for every pod and domain
SSH Access Full shell access if you need it

The pricing signal from the site: from $3/mo, with $10 credit when you add a card (about 3 months on Launch). Database add-ons are tied to the Build plan and above.

Common sticking points

  • Assuming the database is always free. The site ties one-command database adds to Build ($7/mo) and above, so check your plan before expecting MySQL, PostgreSQL, or Redis.
  • Waiting for the ChatGPT app. It's submitted but not live; use the MCP endpoint directly instead.
  • Overcomplicating the domain step. You don't configure certificates manually — point the domain and HTTPS is handled.
  • Treating it like a five-service stack. The whole point is consolidation; if you're still wiring up separate DNS and env-var services, you're working against the tool.

Which route to pick

  • Terminal install script — best if you're comfortable in a shell and want the deploy to happen outside any AI client.
  • Claude connector — best if you already build in Claude and want to stay in the chat.
  • MCP endpoint — best if you use Cursor, Windsurf, ChatGPT, or another MCP client and want the same in-chat deploy behavior.

All three end in the same place: a live HTTPS URL on a real server.

Website Overview

Identifiable technologies and additional version or configuration signals make the service easier to fingerprint, which may help targeted scanners narrow their checks. An established domain and managed infrastructure suggest continuity of operations and may support dependable delivery, although neither guarantees service quality.

Domain and Registration

Registered in 2016, this domain has about 10 years of history. That suggests continuity, although ownership and purpose may have changed. Transfer-protection status is present, helping reduce the risk of unauthorized domain transfers. The registrar is NameCheap, Inc., a widely used domain service provider. The domain uses the common .com extension, which is not an independent safety signal.

DNS and Email

The observed email authentication setup is incomplete: DMARC is missing. Nameservers are provided by Cloudflare, indicating managed DNS hosting. MX records point to the Google Workspace email service. No CNAME was found; the observed records resolve directly to addresses. TXT records include verification markers for Google. Such markers may also remain after a service stops being used.

TLS and Certificates

The public key uses EC with 256 bits. The server supplied a complete certificate chain. No organization name is present in the certificate; the available fields are consistent with domain validation. The certificate was issued by Let's Encrypt, commonly associated with automated certificate services. The certificate's total validity is about 89 days, consistent with a short renewal cycle.

HTTP and Browser Security

The Server header exposes the software version: nginx/1.24.0 (Ubuntu). This makes version-targeted checks easier, but is not proof of an exploitable vulnerability. The checked browser-security headers were not detected, leaving fewer explicit browser-side safeguards. No X-Powered-By header was found, reducing one common source of backend fingerprinting information. No obvious internal addresses or debug information were found in the headers. No explicit CDN or WAF marker was found in the response headers.

Technology Stack Analysis

The public page identifies nginx 1.24.0, with exact versions exposed for 1 technologies. These details can narrow vulnerability checks, although exposure alone is not a vulnerability.

Search and Social Sharing

The meta description has 199 characters and may be shortened in search results. Twitter Card metadata is configured. JSON-LD includes Organization data, helping describe the organization as an entity. The title has 43 characters, within a common display range. The observed directives allow indexing and link following.

Hosting and Email

DNSCloudflare
HostingOVH SAS
EmailGoogle Workspace
Approximate IP geolocation (inferred; a CDN or proxy may differ from the origin server) France flagRoubaix, North, France Inferred 137.74.204.201

Registration details

RDAP / WHOIS

RegistrarNameCheap, Inc.
Registered2016-04-30
Expires2027-04-30
Domain statusclient transfer prohibited
Nameserversleah.ns.cloudflare.com、nero.ns.cloudflare.com
DNSSECunsigned

DNS records

DNS

TypeNameValueTTLPriority
Ainstapods.com137.74.204.201300—
MXinstapods.comaspmx.l.google.com36001
MXinstapods.comalt1.aspmx.l.google.com36005
MXinstapods.comalt2.aspmx.l.google.com36005
MXinstapods.comalt3.aspmx.l.google.com360010
MXinstapods.comalt4.aspmx.l.google.com360010
NSinstapods.comleah.ns.cloudflare.com86400—
NSinstapods.comnero.ns.cloudflare.com86400—
TXTinstapods.comgoogle-site-verification=n5mAg9fnbhJEzgYwT0CS3QxYWcWbUr1fwdNpz445TGs3600—
TXTinstapods.comgoogle-site-verification=wguhlu1TQ2HxLBU5eaPjJ65W2bIGkQcvUIr6LLZGasw3600—
TXTinstapods.comv=spf1 include:_spf.google.com ~all3600—
DMARC_dmarc.instapods.comv=spf1 -all3600—

TLS and certificates

TLS / SSL

AssessmentNormal configuration
Supported protocolsTLSv1.2、TLSv1.3
Negotiated protocolTLSv1.3
Certificate subjectinstapods.com
IssuerLet's Encrypt
Valid until2026-12-15T11:04 · Remaining when checked: 70 days
Verification detailsCertificate trust: Passed · Hostname match: Passed

HTTP response headers

HTTP

HeaderValue
content-typetext/html
servernginx/1.24.0 (Ubuntu)

Identified technologies

nginx 1.24.0

Pages, Search and Sharing

Meta descriptionYou built the app. Now get it online. InstaPods deploys your app in seconds - one command, real servers. From $3/mo with $10 credit when you add a card. Works with Cursor, Claude Code, Lovable, Bolt.
Canonical URLhttps://instapods.com/
LanguageEnglish (default)
Twitter Cardsummary_large_image
All bots 1 allowed · 0 disallowed
  • Allow/
gptbot 1 allowed · 0 disallowed
  • Allow/
oai-searchbot 1 allowed · 0 disallowed
  • Allow/
chatgpt-user 1 allowed · 0 disallowed
  • Allow/
claudebot 1 allowed · 0 disallowed
  • Allow/
claude-user 1 allowed · 0 disallowed
  • Allow/
perplexitybot 1 allowed · 0 disallowed
  • Allow/
perplexity-user 1 allowed · 0 disallowed
  • Allow/
google-extended 1 allowed · 0 disallowed
  • Allow/
applebot-extended 1 allowed · 0 disallowed
  • Allow/

User reviews (0)

  • No reviews yet.