
 简体中文
简体中文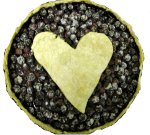
At a glance
- Category
- Food & Recipes
- Language
- English
- Paid-content signal
- No paid content foundObserved
- Registered
- 2004
- Hosting
- pair NetworksInferred
- HTTPS certificate trusted
- PassedObserved
- Last updated
Related questions
More questions →How to Make a Homemade Pie from Scratch: Easy Crust and Simple Filling
Make a homemade pie from scratch by starting with a four-ingredient crust, choosing a simple filling built on fresh ingredients, then rolling, filling, and baking with a few checks along the way. PieChef Jane Fisher's site is organized around exactly this path: an Easy Pie Crust lesson, dozens of pie recipes, and pie stories that each lead to a recipe. The approach suits beginners and anyone who has talked themselves out of pie baking because crust "is just too difficult" — Jane's answer is that it is "simple, quick and easy," summed up as "4 Ingredients, 4 Minutes."
Start with the crust, not the filling
The most common objection Jane hears is "I can't make a pie crust. It's just too difficult." Her site treats that fear as the first thing to clear, because everything else in a from-scratch pie depends on having a crust you can handle confidently.
The PieChef method is deliberately minimal: four ingredients, four minutes, demonstrated in a short video on the site. The exact ingredient list and video are on PieChef.com's "Make Your Own Pie Crust!" section — use that as your reference rather than guessing at ratios, since crust proportions are what make the dough workable.
What to expect from a four-ingredient, four-minute crust:
- Input: a small set of basic ingredients (the site's four) and a few minutes of hands-on time.
- Action: combine and work the dough briefly, following the video's sequence.
- Result: a dough ready to roll, without the long chilling and complicated steps that make crust feel intimidating.
If you have never made a crust, do this step alone once before attempting a full pie. A practice crust removes the pressure and shows you how the dough should feel.
Choose a simple filling
Jane's recipes are, in her words, "simple pies that use fresh ingredients, not complicated concoctions that will send you off to the gourmet market." That is the selection rule: if a filling requires a specialty shopping trip, it is not the everyday pie you are looking for.
Fillings featured on the site include:
| Filling | What the site says about it |
|---|---|
| Blueberry | Jane's blueberry pie is described as "celestial," tied to a story about blueberry picking at Celestia |
| Blueberry-peach | Shown as a pie with pie art decoration on the homepage |
| Pecan | "Rich, flavorful & satisfying" |
| Pumpkin | Covered in a story about how pumpkin pie is made "Down Under" |
| Chocolate | Includes a vegan chocolate pie made with tofu |
| Apple, strawberry, fruit | Listed among the site's recipe keywords |
Pick one filling for your first pie. A single-fruit pie or a nut pie like pecan keeps the process short and lets you focus on crust handling and baking.
Roll, fill, and bake
The site's structure gives you the sequence: Easy Pie Crust first, then a recipe, with pie-making equipment as a separate reference section. Follow the recipe you chose for quantities and bake times; the general flow is:
- Make the crust using the four-ingredient method.
- Roll the dough and fit it into your pie plate.
- Prepare the filling from fresh ingredients per the recipe.
- Add the top — a full crust, a lattice, or decoration. The blueberry-peach pie on the homepage shows pie art decoration as an option once you are comfortable.
- Bake according to the recipe, then let the pie cool so the filling can set.
Check the "Pie-Making Equipment" section before you start so you are not missing a pan, rolling surface, or tool mid-recipe.
Troubleshoot the common problems
- Crumbly dough that won't hold together: this is the crust fear in physical form. Return to the four-ingredient video and match your technique to it; brief, gentle handling is the point of the four-minute method.
- Soggy bottom: a from-scratch crust needs to be fitted and sealed against the filling per the recipe. If your first pie has a wet base, note what the recipe specified for the bottom crust and compare.
- Filling that doesn't set: fruit pies set as they cool. Judge the filling after cooling, not straight from the oven, and follow the recipe's stated doneness cues.
- Recipe feels too elaborate: apply Jane's own filter — if it sends you to the gourmet market, choose a simpler pie from the recipe list instead.
Adapt a family recipe into an everyday pie
Jane's recipes are largely handed down from relatives, and she shares the stories alongside them. That is a useful model for your own family recipes: keep the filling that matters to you, but pair it with the easy four-ingredient crust and strip out steps that exist only for show. The test is whether the pie still uses fresh, ordinary ingredients and can be made without a special shopping trip. If it can, it fits the PieChef approach.
For more, browse the Pie of the Month for a rotating recipe, read the pie stories (each leads to a recipe), and check the site index for the full set of recipes and equipment notes.
What Is Chocolate? From Cacao Bean to Dark, Milk, and White Chocolate
Chocolate is the solid or liquid food made from the seeds (beans) of the cacao tree, Theobroma cacao, after those beans are fermented, dried, roasted, and ground. What most people eat as "chocolate" is that ground cacao mass combined with sugar, and usually added cocoa butter, milk, or flavorings. The type you get—dark, milk, or white—depends on which of those ingredients are present and in what proportion. This guide explains the plant-to-bar chain and how to read a label so you can pick the right chocolate for eating, baking, or drinking.
From pod to bean to nib
Cacao grows as pods on the trunk and branches of the cacao tree. Each pod holds pulp and seeds. The seeds are the raw material; the pulp is mostly a medium for fermentation.
- Pod – the fruit; harvested when ripe.
- Bean (seed) – the fermented, dried seed inside the pod. This is what gets traded and processed.
- Nib – a broken piece of the roasted, winnowed bean. Nibs are the edible, crunchy form before grinding.
- Cocoa mass (liquor) – what you get when nibs are ground. Despite the name, it contains no alcohol; it is a thick paste of cocoa solids plus cocoa butter.
- Cocoa butter – the fat pressed out of cocoa mass.
- Cocoa powder – the solids left after most cocoa butter is pressed out.
So the "chocolate" in a bar is essentially ground bean plus extra cocoa butter and sugar. The bean is the origin of every flavor note; the processing decides which notes survive.
Harvest to bar: the main steps
The flavor of finished chocolate is built long before the bar is molded. The sequence below is the standard path; timing and temperature vary by maker.
- Harvest – pods are cut from the tree and opened to remove seeds and pulp.
- Fermentation – seeds and pulp are piled or boxed for several days. Microbes break down the pulp, heat builds up, and chemical changes inside the bean create the precursors of chocolate flavor. Skip or shorten this and the result tastes flat or bitter.
- Drying – fermented beans are dried, often in the sun, to a stable moisture level so they can be stored and shipped without molding.
- Roasting – dried beans are roasted. This develops aroma and makes the shell brittle. Roast level strongly shapes the final taste.
- Winnowing – the shell is cracked off, leaving the nib.
- Grinding – nibs are ground into cocoa mass. Heat and friction turn them from solid to liquid.
- Conching – the mass is stirred and aerated for hours or days. This smooths texture and drives off harsh, acidic notes.
- Tempering and molding – for bars, the chocolate is heated and cooled in a controlled way so the cocoa butter sets into a stable, glossy crystal form. Poor tempering gives a dull, streaky, soft bar.
Example task: if you want to taste the difference fermentation makes, compare two bars from the same brand and origin but different stated processing or roast—the label often tells you enough to make a fair comparison.
Dark, milk, and white: what actually differs
The three main categories are defined by ingredients, not by color alone.
| Type | Core ingredients | Cocoa content | Typical taste and use |
|---|---|---|---|
| Dark | Cocoa mass, cocoa butter, sugar (often little else) | Higher; varies widely by product | Intense, bitter-to-fruity; eating, baking, ganache |
| Milk | Cocoa mass, cocoa butter, sugar, milk or milk powder | Lower than most dark | Creamier, sweeter; eating, milk chocolate baking |
| White | Cocoa butter, sugar, milk solids (no cocoa solids) | No cocoa solids | Sweet, buttery, vanilla-forward; eating, decorating, some baking |
Two points that trip people up:
- White chocolate contains no cocoa solids, so it is not "dark chocolate without color." It is cocoa butter plus sugar and milk. Some regions set a minimum cocoa butter level for something to be legally sold as white chocolate.
- "Cocoa percentage" on a dark bar counts cocoa solids plus cocoa butter, not just the non-fat solids. A 70% bar is roughly 70% cocoa-derived ingredients and 30% sugar and other additions.
Why cocoa percentage and added ingredients change flavor and texture
Cocoa percentage is a rough guide, not a quality score.
- Higher cocoa percentage usually means less sugar, so the bar tastes more bitter and less sweet, with more pronounced origin flavors. It also tends to feel firmer and melt differently because the ratio of cocoa butter to sugar shifts.
- Added cocoa butter makes chocolate smoother and more fluid—useful for molding and enrobing, but it can dilute cocoa flavor if overused.
- Sugar adds sweetness and bulk; more sugar generally means a softer, sweeter, faster-melting bar.
- Milk solids add caramel and dairy notes and round off bitterness.
- Lecithin and other emulsifiers improve flow and texture; they are functional, not a sign of poor quality by themselves.
- Vanilla or other flavorings can mask or complement origin notes.
A 70% bar from one maker can taste very different from a 70% bar from another because origin, fermentation, roast, and conching all differ. Percentage tells you the sugar-to-cocoa balance, not how good it will taste to you.
How to read a chocolate label
Labels are your fastest way to predict what a bar will do in your hand or in a recipe.
- Ingredient order – ingredients are listed by weight. If sugar is first, the product is sugar-dominant. If cocoa mass or cocoa butter is first, it is cocoa-dominant.
- Cocoa percentage – look for a stated percentage on dark and some milk bars. If none is given, infer from the ingredient order.
- Cocoa solids vs. cocoa butter – some labels separate them. More cocoa butter means a softer, more fluid melt.
- Milk content – "milk chocolate" must contain milk ingredients; the amount affects creaminess.
- Added fats – vegetable fats other than cocoa butter appear in some products. They change melt and texture; check the ingredient list if that matters to you.
- Origin and processing notes – single-origin, fermentation, and roast details are flavor clues, not guarantees.
Choosing by use:
- Eating straight: match cocoa percentage to your bitterness tolerance; higher percentages for intense, lower for creamy.
- Baking: recipes often assume a specific cocoa percentage. Substituting a much higher or lower bar changes sweetness and structure, so adjust sugar or fat accordingly.
- Ganache and coatings: chocolate with more cocoa butter flows better; very high-cocoa, low-fat bars can seize or set too firm.
- Drinking chocolate: products range from cocoa powder blends to ground chocolate meant for melting into milk. Check whether the label says "drinking chocolate," "hot cocoa mix," or plain cocoa powder—they behave differently.
Quick answers to common questions
Is chocolate a spice? No. Cacao is the source of chocolate, and it is used as a flavoring, but chocolate itself is a processed food, not a culinary spice in the sense of cardamom or pepper.
Does dark chocolate have milk? Traditionally no, but some products labeled dark may contain trace milk from shared equipment. Check the label if that matters to you.
Why does chocolate bloom (white streaks)? Fat or sugar bloom from temperature changes. It affects appearance and texture, not safety.
Is white chocolate real chocolate? It is cocoa-butter-based and legally sold as chocolate in many places, but it contains no cocoa solids, so definitions vary by region.
Once you know that chocolate is fermented, roasted, ground cacao plus sugar and optional milk or cocoa butter, the label stops being a mystery: ingredient order and cocoa percentage tell you how sweet, how bitter, and how it will melt.
How to Bake an Easy Apple Pie with a Homemade 4-Ingredient Crust
You can bake an easy apple pie from scratch by making a four-ingredient crust first, then filling it with sliced apples and a little sugar and spice. PieChef Jane Fisher's site is built around exactly this approach: her "4 Ingredients, 4 Minutes" pie crust, dozens of simple fruit pies, and the promise that pie crust is "simple, quick and easy" rather than the hard part people fear. The steps below follow that method and add the apple-specific details the site leaves to the recipe pages.
Step 1: Make the 4-Ingredient Crust
Jane's site states the crust uses four ingredients and takes about four minutes, and she demonstrates it in a short video on the Easy Pie Crust page. The site does not list the four ingredients in the text provided, so check the Easy Pie Crust page or video before you start shopping. What the site does commit to is the method's difficulty level: it urges readers not to be afraid of pie crust and treats the "easy as pie" saying as something to prove.
Practical expectations for a four-ingredient crust:
- Keep everything cold. A crust this short on ingredients depends on cold fat and cold liquid to stay flaky. Chill the fat, use ice water, and handle the dough as little as possible.
- Mix until just combined. Overworking develops gluten and gives you a tough, shrinking crust.
- Rest before rolling. Wrap the dough and chill it for at least 30 minutes; this makes it easier to roll without tearing.
Step 2: Choose and Prepare the Apples
The site's recipe philosophy is simple pies with fresh ingredients, "not complicated concoctions that will send you off to the gourmet market." For an apple pie that means ordinary supermarket apples, used well.
| Choice | What to look for | Why it matters |
|---|---|---|
| Variety | A mix of tart and sweet apples | All-tart apples taste sharp; all-sweet apples turn bland and mushy |
| Firmness | Apples that hold their shape when cooked | Soft apples collapse into sauce |
| Quantity | Enough to mound slightly above the crust edge | Apples shrink as they bake; a flat fill leaves a gap under the top crust |
| Prep | Peeled (or not, to taste), cored, sliced evenly | Even slices cook at the same rate |
Toss the slices with sugar, a pinch of salt, and cinnamon or another spice to taste. Let them sit for 15–20 minutes so they release juice; if the mixture looks very wet, drain off the excess or thicken it with a spoonful of flour or cornstarch so the filling sets instead of running.
Step 3: Assemble the Pie
- Roll the chilled dough on a floured surface into a circle wider than your pie plate, then lift it by rolling it loosely around the rolling pin and unroll it over the plate. This avoids the tearing that comes from stretching the dough.
- Ease the crust into the corners of the plate without stretching it; stretched dough shrinks during baking.
- Pile in the apples, mounding them slightly in the center.
- Add a top crust, or cut the second round into strips for a lattice. Jane's site shows pie art and decorative tops on its fruit pies, so a lattice or cut-out design fits the house style.
- Seal the edges by pressing the top and bottom crusts together, then crimp or flute them.
- Cut several vents in the top crust so steam escapes; without vents, the filling bubbles out and the top can turn soggy.
Step 4: Bake and Check for Doneness
The site does not publish a temperature or time in the material provided, so use the standard approach and judge by appearance rather than the clock alone:
- Bake at a moderate-to-hot oven temperature until the crust is golden brown and the filling visibly bubbles through the vents.
- If the edges brown too fast, shield them with foil or a pie shield.
- The pie is done when the apples feel tender when pierced through a vent with a thin knife and the juices look thickened, not watery.
- Cool the pie completely before slicing; a hot filling has not set yet and will run.
Step 5: Troubleshoot the Common Problems
Soggy bottom. The usual causes are a wet filling, no vents, or an underbaked bottom crust. Drain excess apple juice, vent the top, and bake on a lower rack so the bottom crust gets direct heat.
Runny filling. Apples vary in water content. Let the sliced apples sit with the sugar and discard the excess liquid, or add a little flour or cornstarch to the filling before assembling.
Shrinking crust. Stretching the dough when fitting it into the plate is the main culprit. Roll, lift, and ease it in without pulling, and chill the lined plate for a few minutes before filling.
Torn crust when rolling. The dough is too warm or too dry. Chill it, and patch any tears with a scrap of dough pressed over the spot before baking.
Where to Go Next on PieChef
Jane's site pairs every pie story with a recipe, and it recommends starting with the Easy Pie Crust before moving on to the Pie of the Month. If apple pie goes well, the same crust and method carry over to the site's other fruit pies, including blueberry and peach. The site also has a Pie-Making Equipment page if you want to check what tools Jane considers worth having before your next bake.
How to Make a Simple Homemade Fruit Pie with an Easy 4-Ingredient Crust
You can bake a homemade fruit pie from scratch by making a four-ingredient crust first, then filling it with fruit that you've adjusted for sweetness, juiciness, and acidity. Jane Fisher of PieChef.com frames the crust as the real hurdle — "I can't make a pie crust. It's just too difficult" is the objection she hears most — and her answer is a crust built on four ingredients in about four minutes, demonstrated in a short video on the site. The steps below follow that approach and add the fruit-filling decisions the crust alone doesn't cover.
Step 1: Make the 4-Ingredient Crust
PieChef presents the crust as "4 Ingredients, 4 Minutes," with a video walkthrough. The site names the ingredient count but not the specific amounts, so use the video or the Easy Pie Crust page on PieChef.com for quantities before you start.
What you need: four crust ingredients (per the site's method), a mixing bowl, a rolling surface, and a pie pan.
What to do:
- Combine the four ingredients until the dough comes together. The goal is a dough you can roll, not a wet batter.
- Roll it out on a lightly floured surface and fit it into the pie pan.
- Keep a second portion of dough for the top crust or for decoration — Jane's blueberry-peach pie is shown with pie-art decoration on top.
How to check it worked: the dough holds together when pressed and rolls without tearing into pieces. If it cracks at the edges, it is likely too dry; work in a little more moisture and re-roll.
Common sticking points:
- Overworking the dough. Stop as soon as it holds together; extra handling makes a tough crust.
- Rolling too thin. A crust that tears during transfer is usually too thin or too warm. Chill it briefly, then transfer by rolling it loosely around the rolling pin.
- Fear of the process. Jane's own framing is that the crust is "simple, quick and easy" and that the difficulty is mostly in the expectation, not the technique.
Step 2: Choose and Prepare the Fruit
PieChef's recipes emphasize "simple pies that use fresh ingredients," and the site's recipe range covers apple, blueberry, peach, strawberry, pumpkin, pecan, and chocolate pies. For a fruit pie, the fruit choice drives everything else.
| Fruit type | What to expect | Adjustment |
|---|---|---|
| Firm fruit (apple, pear) | Holds shape, releases moderate juice | Standard sugar and thickener; slice evenly so pieces cook at the same rate |
| Juicy stone fruit (peach, plum) | Releases a lot of liquid | More thickener; consider draining excess juice before filling |
| Berries (blueberry, strawberry) | Softens quickly, can turn watery | More thickener and a gentler bake; strawberry is especially soft |
| Frozen fruit | Convenient, but adds ice-crystal water | Thaw and drain, or add extra thickener; do not increase sugar to compensate |
Sweetness and acidity: taste the fruit raw before you fill the crust. Underripe or tart fruit needs more sugar; very ripe fruit needs less. A small amount of acid — lemon juice is the usual choice — keeps a sweet filling from tasting flat. Adjust both to the fruit in front of you rather than to a fixed number.
Thickener: fruit pies set because starch or another thickener gels the released juice. Juicier fruits need more; firm fruits need less. If you are unsure, err slightly on the higher side for a first bake — a runny pie is harder to fix after the fact than a slightly firm one.
Step 3: Assemble and Seal
- Fit the bottom crust into the pan and let it settle without stretching it.
- Add the fruit filling, mounding it slightly in the center.
- Top with a second crust, a lattice, or cut-out decoration.
- Seal the edges by pressing the top and bottom crusts together, then crimp.
- Cut a few vents in a solid top crust so steam can escape.
Why vents matter: without them, trapped steam pushes the top crust up and can leave a gap between crust and filling. Vents also let you see when the filling is actively bubbling, which is one of the better doneness signals.
Step 4: Bake and Judge Doneness
PieChef does not publish a single oven temperature or time in the material available, so treat the following as general baking practice rather than site-specific instructions: bake at a moderate-to-high heat until the crust is golden and the filling bubbles visibly through the vents or at the edges.
Signs the pie is done:
- The crust is an even golden brown, including the bottom — lift the pan slightly and check the center underside.
- The filling bubbles, not just steams. Bubbling means the thickener has activated.
- The fruit gives easily when pierced through a vent with a thin knife.
If the edges brown too fast: cover the rim with foil or a crust shield partway through and continue baking the center.
Step 5: Cool Before Slicing
This is the step most often skipped. A fruit pie needs to cool so the filling can set; slicing while hot gives you a runny wedge even when the thickener was correct. Let the pie cool on a rack until the pan is comfortable to touch, and longer for juicy fruit pies. Serve warm rather than hot if you want clean slices.
Troubleshooting Common Fruit Pie Problems
- Watery filling: too little thickener, fruit that was too juicy, or slicing too soon. Increase thickener next time and cool fully.
- Soggy bottom crust: a very wet filling sitting on the crust for a long time before baking, or an underbaked bottom. Assemble and bake promptly, and check the underside for browning.
- Tough crust: overworked dough or too much handling during rolling.
- Pale, underdone top: oven heat too low or the pie pulled too early; wait for visible bubbling.
- Filling too sweet or flat: taste the raw fruit and adjust sugar and acid before baking, not after.
Where to Go Next on PieChef
PieChef.com organizes its content around the Easy Pie Crust, a Pie of the Month, dozens of recipes, pie stories, and pie-making equipment. The stories are linked to recipes — Jane's blueberry pie story, a pumpkin pie story from "Down Under," and a vegan chocolate pie made with tofu each lead to a recipe. If you want to build skill before branching out, start with the crust video and one fruit pie, then move to the Pie of the Month. The site also notes that it earns from qualifying Amazon purchases, so equipment links there are affiliate links.
How to Use Ahrefs for Your First SEO Audit: A Step-by-Step Tutorial
If you're new to Ahrefs and want to run your first SEO audit, the fastest path is: open Site Explorer, enter your target URL, review the Overview for a health snapshot, then dig into Organic Keywords, Top Pages, and Site Audit to find specific problems. From there, build a short prioritized to-do list instead of trying to fix everything at once.
This tutorial walks through that workflow using a realistic starting scenario, explains what the numbers mean, and shows how to turn findings into actions.
Before You Start: Pick a Narrow Scope
A common beginner mistake is auditing an entire large website on day one. The reports become overwhelming, and you can't tell which issues matter.
Instead, choose one of these starting points:
- A single important page (your homepage or a key product/service page)
- A small site (under ~50 pages, e.g., a personal blog or small business site)
- One section of a bigger site (e.g.,
/blog/)
For this tutorial, assume you're auditing a small business site with about 30 pages. The same steps scale up later.
You'll need an Ahrefs account to follow along. Ahrefs offers paid plans, and pricing and feature limits change over time, so check the current Pricing page for what's included in each tier before committing.
Step 1: Enter Your Target in Site Explorer
Site Explorer is Ahrefs' core tool for analyzing any website or URL.
- Open Site Explorer from the top navigation.
- In the search box, paste your domain (e.g.,
example.com). - Choose the Exact URL or Domain mode depending on scope. For a full-site view, use Domain or Prefix; for a single page, use Exact URL.
- Press Enter.
You'll land on the Overview report. Don't try to absorb everything — focus on four numbers first.
Reading the Overview Snapshot
| Metric | What it tells you | How to use it |
|---|---|---|
| Ahrefs Rank (AR) | Relative strength of the site's backlink profile vs. others in the database | Useful for comparing against competitors, not as a standalone goal |
| Organic traffic | Estimated monthly visits from search | A rough trend indicator, not exact analytics |
| Organic keywords | Estimated number of keywords the site ranks for | Shows breadth of visibility |
| Backlinks / Referring domains | Total links and unique sites linking to you | Referring domains matter more than raw backlink count |
Important caveat: Ahrefs' traffic and keyword numbers are estimates based on its own data. They won't match Google Search Console or your analytics exactly. Treat them as directional, not absolute.
Step 2: See What You Already Rank For
Go to Organic Keywords in the left sidebar. This shows queries where your site appears in search results.
Sort by Traffic (descending) to see which pages bring the most estimated visitors. Then look for:
- Keywords ranking in positions 4–15 — these are often the easiest wins. A small content or on-page improvement can push them onto page one.
- Keywords with high volume but low position — potential opportunities if the topic is relevant.
- Irrelevant keywords — if you rank for something off-topic, it may signal thin or mismatched content.
Write down 5–10 of the position 4–15 keywords. These become your first optimization targets.
Step 3: Find Your Best and Weakest Pages
Open Top Pages. This ranks your URLs by estimated organic traffic.
Look for two things:
- Your top performers — understand what topics and formats work. Can you create more content like this?
- Pages with traffic but poor rankings — these may need on-page fixes (title, headings, internal links).
If a page gets zero traffic and targets a topic you care about, it's a candidate for a rewrite or consolidation.
Step 4: Run a Technical Site Audit
Now move to Site Audit. This crawls your site and flags technical and on-page issues.
- Click Site Audit → New project.
- Enter your domain and set crawl settings (default is usually fine for a small site).
- Start the crawl and wait for it to finish.
Once complete, you'll see a Health Score and a list of issues grouped by category.
Which Issues to Fix First
Not all issues are equal. Prioritize in this order:
| Priority | Issue type | Why it matters |
|---|---|---|
| 1 | Broken links (404s) | Bad for users and crawl efficiency |
| 2 | Pages blocked from indexing | They can't rank at all |
| 3 | Missing or duplicate title tags | Directly affects click-through and relevance |
| 4 | Slow-loading pages | Affects experience and rankings |
| 5 | Thin content | Low value to users and search engines |
Ignore low-impact warnings (like minor meta description length) until the big items are handled.
Step 5: Turn Findings Into a To-Do List
You now have raw data. Convert it into a short, actionable list. Example:
- Fix 3 broken links found in Site Audit.
- Rewrite title tags on 5 pages with duplicate titles.
- Improve 4 pages ranking in positions 6–12 by adding missing subtopics and internal links.
- Remove or update 2 thin pages with no traffic.
Keep the list to 5–10 items max for your first audit. Finishing a short list beats starting a long one.
Common Beginner Mistakes
- Chasing every red flag. Site Audit flags many minor issues. Fix what affects rankings and users first.
- Trusting estimates as exact numbers. Ahrefs data is modeled, not measured from your analytics.
- Auditing a huge site too early. Start small to learn the interface.
- Ignoring search intent. A page can be technically perfect but still fail if it doesn't match what searchers want.
- Forgetting to re-crawl. After fixes, run Site Audit again to confirm improvements.
Where to Go Next
Once your first audit is done:
- Compare with competitors using Site Explorer's Competing Domains and Content Gap reports.
- Track keyword rankings over time with Rank Tracker.
- Explore backlink opportunities in the Backlinks and Link Intersect reports.
- Set up recurring Site Audit crawls so new issues surface automatically.
Your first audit isn't about perfection — it's about building a repeatable habit: enter a target, read the key reports, pick the highest-impact fixes, and act. Do that once a month and your site's health compounds.
Website Overview
An established domain and managed infrastructure suggest continuity of operations and may support dependable delivery, although neither guarantees service quality. An active inbound-mail setup with incomplete authentication may leave the domain more open to impersonation. Provider hosting alone does not close that gap.
Domain and Registration
Registered in 2004, this domain has about 21 years of history. That suggests continuity, although ownership and purpose may have changed. Transfer-protection status is present, helping reduce the risk of unauthorized domain transfers. The domain uses the common .com extension, which is not an independent safety signal.
DNS and Email
The observed email authentication setup is incomplete: DMARC is missing. Nameservers are provided by pair.com, indicating managed DNS hosting. MX records point to the pair.com email service. No CNAME was found; the observed records resolve directly to addresses. TXT records include verification markers for Google. Such markers may also remain after a service stops being used.
TLS and Certificates
The certificate uses an RSA 2048-bit public key, offering broad client compatibility. The server supplied a complete certificate chain. No organization name is present in the certificate; the available fields are consistent with domain validation. The certificate was issued by Let's Encrypt, commonly associated with automated certificate services. The certificate's total validity is about 89 days, consistent with a short renewal cycle.
HTTP and Browser Security
The checked browser-security headers were not detected, leaving fewer explicit browser-side safeguards. No X-Powered-By header was found, reducing one common source of backend fingerprinting information. No obvious internal addresses or debug information were found in the headers. The Server header identifies Apache without an exact version. No explicit CDN or WAF marker was found in the response headers.
Technology Stack Analysis
The public page identifies Google Analytics, Apache without precise versions, leaving fewer clues for version-specific scanning.
Search and Social Sharing
No Open Graph metadata was detected, so social previews may depend on platform inference. The title has 48 characters, within a common display range. A meta description is present, with 96 characters. The observed directives allow indexing and link following. No Generator meta tag is publicly exposed.
Hosting and Email
 Pittsburgh, Pennsylvania, United States
Inferred
216.92.188.9
Pittsburgh, Pennsylvania, United States
Inferred
216.92.188.9
Registration details
| Registrar | eNom, LLC |
|---|---|
| Registered | 2004-11-26 |
| Expires | 2026-11-26 |
| Domain status | client transfer prohibited |
| Nameservers | dns4.pair.com、ns0.ns0.com |
| DNSSEC | unsigned |
DNS records
| Type | Name | Value | TTL | Priority |
|---|---|---|---|---|
| A | piechef.com | 216.92.188.9 | 3600 | — |
| MX | piechef.com | mail1.g24.pair.com | 3600 | 50 |
| NS | piechef.com | dns4.pair.com | 3600 | — |
| NS | piechef.com | ns0.ns0.com | 3600 | — |
| TXT | piechef.com | google-site-verification=FLeBktBzLHc7np5_VItPGhF26Uva9IxN_5cYW9uW88g | 3600 | — |
| TXT | piechef.com | v=spf1 include:webmail.pair.com include:relay.pair.com include:pairlist.com a:www1.g24.pair.com a:mail1.g24.pair.com ~all | 3600 | — |
TLS and certificates
HTTP response headers
| Header | Value |
|---|---|
| content-type | text/html |
| server | Apache |
Identified technologies
Pages, Search and Sharing
| Meta description | PieChef Jane Fisher's best pie recipes & how to make pie crust: 4 ingredients, 4 minutes...easy! |
|---|---|
| Canonical URL | https://piechef.com/index.html |
| Language | English (default) |
| Twitter Card | Not detected |
Unknown
robots.txt (opens in a new tab)
8 rulesgooglebot 1 allowed · 0 disallowed
- Allow
/
petalbot 0 allowed · 1 disallowed
- Disallow
/
wikido 0 allowed · 1 disallowed
- Disallow
/
ahrefs 0 allowed · 1 disallowed
- Disallow
/
mj12bot 0 allowed · 1 disallowed
- Disallow
/
gptbot 0 allowed · 1 disallowed
- Disallow
/
bytedance 0 allowed · 1 disallowed
- Disallow
/
bytebot 0 allowed · 1 disallowed
- Disallow
/
No matching rules.
User reviews (0)