
 reactbits.dev
No paid content found
reactbits.dev
No paid content found
Categories: Development
An open source collection of 200+ high quality, animated, interactive & fully customizable React components and micro interactions for building stunning, memorable user interfaces.
 Visit website
 Updated: 2026-09-26 07:07
 Language: English (default)
 Access: Normal
 Profile views 0
 Outbound visits 0
Related questions
More questions →What Are Open-Source UI Element Libraries and How Do They Differ From UI Frameworks?
An open-source UI element library is a collection of individual, ready-made interface pieces—buttons, cards, inputs, toggles, loaders—that you copy into your own project and adapt. A UI framework, by contrast, is a structured system of components, conventions, and often a theming layer that governs how your whole interface is built. The practical difference: an element library gives you a snippet; a framework gives you a way of working. If you need a polished button in ten minutes, reach for the element library. If you're building a 40-screen product with a team, you probably want the framework.
What "open-source UI element library" actually means
The term gets used loosely, so it helps to separate the parts:
- Open-source: the code is publicly available, and the license tells you what you may do with it—copy, modify, redistribute, or use commercially.
- UI element: a single, self-contained piece of interface, usually small enough to read in one sitting. A button with hover states, a pricing card, a search field.
- Library: a browsable, searchable collection of those elements, typically contributed by many different people.
On a site like Uiverse, elements are shared by a community and written in plain CSS or Tailwind. You find one you like, copy the markup and styles, paste them into your project, and adjust colors, spacing, and text to fit. There's no package to install and no build step required—which is exactly the appeal, and also the source of most of the confusion.
Element library vs. UI framework: the core differences
| Dimension | Open-source UI element library | UI framework / design system |
|---|---|---|
| Unit of reuse | A single snippet you copy | A component you import or call |
| Installation | None; paste into your code | Package install, config, sometimes a provider |
| Consistency | Depends on you; each element may look different | Enforced by shared tokens and APIs |
| Theming | Manual edits per element | Central theme/config file |
| Updates | You own the copy; no upstream updates | Version bumps bring fixes and changes |
| Accessibility | Varies per contributor; must be checked | Usually tested and documented |
| Best for | Prototypes, landing pages, small sites, one-off needs | Multi-page apps, teams, long-lived products |
| Learning curve | Low—read the CSS | Higher—learn the API and conventions |
The table isn't a verdict. It's a map of trade-offs. Element libraries win on speed and freedom; frameworks win on consistency and maintenance.
Licensing and attribution: what to check before you paste
This is where people get into trouble, and it's worth slowing down for.
- Find the license. Every element or collection should state one. Common open-source licenses include MIT, Apache-2.0, and BSD. Some projects use copyleft licenses like GPL, which can impose obligations if you redistribute your code.
- Understand what the license permits. MIT and Apache-2.0 are permissive: you can typically use the code in commercial and closed-source projects. Copyleft licenses may require you to release derivative source under the same terms.
- Check attribution requirements. Permissive licenses usually require you to keep the copyright notice and license text somewhere in your project. That's a real obligation, not a formality.
- Look for per-element terms. On community sites, the site's overall terms and the individual contributor's stated wishes may differ. If a contributor asks for credit, honor it.
- When in doubt, ask or avoid. If a snippet has no license at all, you don't have clear permission to reuse it. Treat "no license" as "not open source," even if the code is publicly visible.
This article is general information, not legal advice. For commercial products with real exposure, have someone qualified review the licenses you're relying on.
How to use a community element in your project: a practical workflow
Here's a repeatable process that avoids most of the usual mess.
1. Start from a real need, not a browsing session
Decide what you need first—"a compact primary button with a loading state"—then search. Browsing aimlessly produces a pile of pretty snippets that don't fit together.
2. Copy the smallest version that works
Take the markup and the styles. Strip anything you don't need: demo wrappers, extra animations, decorative layers. Less code means fewer surprises.
3. Convert it to your conventions
If your project uses design tokens or CSS variables, replace hard-coded values:
/* Before: hard-coded */
.button { background: #4f46e5; border-radius: 8px; }

/* After: token-based */
.button { background: var(--color-primary); border-radius: var(--radius-md); }
This one step is what keeps a copied element from looking like a foreign object in your UI.
4. Check accessibility before you ship
Community elements vary widely here. Verify at minimum:
- Keyboard focus is visible and the element is reachable by Tab.
- Color contrast meets WCAG AA (4.5:1 for normal text).
- Interactive elements use semantic HTML (
<button>, not a clickable<div>). - Form inputs have associated labels.
- Motion respects
prefers-reduced-motion.
5. Test in context
Paste it into a real page with real content. Long labels, small screens, and dark mode break more copied elements than anything else.
6. Note where it came from
Keep a short comment or an internal credits file: source, license, date. Future you—and your legal reviewer—will be grateful.
Where element libraries genuinely shine
- Prototypes and demos: you need something clickable today, not a design system.
- Landing pages and marketing sites: a handful of distinctive elements, each custom.
- Filling gaps: your framework lacks one specific component, and you don't want to build it from scratch.
- Learning: reading well-made CSS is one of the fastest ways to improve.
- Small projects: a personal site doesn't need a theming architecture.
Where they fall short
- Consistency at scale: ten elements from ten contributors rarely look like one product.
- Maintenance: you own every copy. When your design changes, you edit each one.
- Accessibility debt: you inherit whatever the contributor did or didn't do.
- No upstream fixes: a bug fixed in the original won't reach your copy.
- Integration friction: different naming conventions, different units, different assumptions about resets.
When to choose which
Choose an element library when the scope is small, the timeline is short, or you need a few distinctive pieces rather than a whole system.
Choose a framework or design system when multiple people build multiple screens over months, when consistency is a product requirement, or when accessibility and theming need to be guaranteed rather than checked.
A hybrid works well for many teams: adopt a framework for the structural components—forms, navigation, layout—and borrow individual elements for the places where you want personality. Just route every borrowed element through the same token and accessibility checks, so it lands as part of your system rather than beside it.
The short version: open-source UI element libraries are a fast, flexible way to get good-looking interface pieces into a project. They are not a substitute for a design system, and the license and accessibility details are the part worth reading carefully.
What Is a Component Library and How Do You Choose One for React?
A component library is a collection of prebuilt UI pieces — buttons, cards, navigation, hero sections — that you drop into an app instead of writing from scratch. For React projects, the practical choice is usually between a package you install (Base UI, visx) and source you copy into your repo (shadcn/ui, Aceternity UI, Magic UI). Pick the copy-in model when you want full control over styling and no dependency lock-in; pick the package model when you want versioned updates and don't plan to fork the internals. Aggregators like 21st let you search across many of these libraries at once and pull a single component in as a prompt or source file.
Component library vs. UI framework vs. design system
These three get used interchangeably, but they solve different problems:
| Term | What it gives you | Example |
|---|---|---|
| Component library | Individual UI pieces you assemble yourself | shadcn/ui, Aceternity UI, Magic UI |
| UI framework | A full set of components plus layout, theming, and behavior conventions | (heavier, opinionated stacks) |
| Design system | Rules, tokens, and governance for how UI should look and behave across teams | Internal to a company |
A component library is the smallest unit. It doesn't dictate your app structure — it hands you a button and lets you decide where it goes. That's why most React teams now mix several libraries rather than adopting one framework.
The main React/Tailwind options
21st's own index lists the libraries it aggregates, with component counts, which is a useful snapshot of the ecosystem's shape:
- shadcn/ui — 87 components. The de facto convention: source copied into your repo, built on Tailwind and Radix primitives.
- Aceternity UI — 87 components. Known for animated, marketing-oriented pieces.
- Magic UI — 62 components. Similar animated/marketing focus.
- Origin UI — 44 components.
- Geist — 87 components (Vercel's design language).
- Base UI — 29 components. Unstyled primitives, closer to a package model.
- Kokonut UI — 49 components.
- 8bitcn — 106 components.
- Kibo UI — 26 components.
- visx — 36 components. Data-visualization primitives from Airbnb.
- ReUI — 95 components.
- HextaUI — 113 components.
21st itself is not a single library — it's an aggregator. Its page describes "12,000+ crafted React components, templates, and shadcn themes," split into roughly 2,000+ marketing blocks (animated heroes, shaders, gradients, footers) and 2,100+ UI components (buttons, AI chats, cards, navigation, sign-ins). Each component carries an author credit, and the site reports being used by 3,819,076 builders.
Copy-paste source vs. npm package
This is the decision that matters most, because it determines your maintenance burden.
Copy-in source (shadcn/ui model):
- You own the code. Edit anything, no override hacks.
- No version drift from an upstream package — but also no automatic fixes.
- Bundle only includes what you actually copied.
- Works well with AI agents, because the agent edits a file in your repo rather than fighting a dependency.
npm package (Base UI, visx model):
- Upgrades arrive via your package manager.
- You customize through props, slots, and theme overrides.
- Bundle impact depends on tree-shaking; check that your bundler handles it.
- Breaking changes land on the maintainer's schedule, not yours.
21st leans hard into the copy-in model and extends it: every component "ships as a prompt." You copy the prompt and paste it into Claude Code, Codex, or Lovable, and the tool writes the component into your project. The page shows the same prompt producing a terminal install in Claude Code, a diff-based PR in Codex, and an inline preview in Lovable. The output is React + Tailwind following shadcn/ui conventions — real source in your repo, not a black box.
How to evaluate a library before committing
Run these checks in order; the first one that fails usually ends the evaluation.
- Styling fit. Does it use Tailwind and match your token setup? If it ships its own CSS-in-JS or a separate theme system, budget time for reconciliation.
- Install effort. Copy one component into a scratch project and see what breaks. A component that needs three peer dependencies and a config change is a different commitment than a single file.
- Bundle impact. Build the scratch project and inspect the output. Animated components often pull in motion libraries; confirm the cost is acceptable.
- Licensing. Check the license on the library and on any component you pull from an aggregator. Aggregated components have individual authors, so terms can vary.
- Accessibility. Tab through the component with a keyboard and run it past a screen reader. Copy-in libraries vary widely here — some wrap accessible primitives, some don't.
- Maintenance signal. Look at recent activity and whether the component you want is a one-off or part of a maintained set.
Where AI-agent compatibility fits
If you use an AI coding agent, "can the agent install this?" becomes a real selection criterion. A component that ships as a prompt or a single source file is trivial for an agent to place and adapt. A component buried in a package with runtime theming is harder — the agent has to know the API, and mistakes surface as type errors rather than visible diffs.
21st's model is built around this: the prompt is the distribution format, and the agent adapts the component to your theme as it writes the file. The page notes 25,431 installs in a week, which suggests the workflow is being used at volume.
Common pitfalls
- Mixing too many libraries. Pulling buttons from one, cards from another, and navigation from a third produces inconsistent spacing, radii, and motion. Pick a primary library and treat others as exceptions.
- Version drift. With copy-in source, you won't get upstream fixes automatically. If a library patches an accessibility bug, you won't know unless you check.
- Accessibility gaps. Animated and marketing-oriented libraries sometimes skip focus management and ARIA. Test before shipping to production.
- Aggregator licensing surprises. When you pull a component from an aggregator, confirm the terms for that specific component, not just the aggregator's site.
- Assuming free. 21st has a pricing page, so check current terms before building a workflow around it.
A practical starting point
For most React + Tailwind projects: start with shadcn/ui as your base convention, add a marketing-oriented library (Aceternity or Magic UI) for landing-page sections, and use an aggregator like 21st when you need something specific and don't want to browse five sites. Keep the copy-in model for anything you'll customize heavily, and reserve npm packages for primitives you won't touch.
What Is Lerna and How Does It Manage JavaScript Monorepos?
Lerna is a build system for managing and publishing multiple JavaScript or TypeScript packages from a single repository. It fits teams that keep several interdependent packages together and need coordinated versioning, publishing, and task running. If you only have one package, or your packages never share code or releases, Lerna adds overhead without much benefit.
The core problem Lerna solves
A monorepo puts many packages in one repository. That makes sharing code easy, but it creates coordination work:
- Which packages changed since the last release?
- What version should each changed package get?
- In what order should packages be published so dependencies exist first?
- How do you run a build or test across all packages without doing it manually?
Lerna addresses these by understanding the dependency graph between your packages and acting on it.
How Lerna manages a monorepo
Versioning
Lerna tracks which packages changed and updates their versions together or independently. It supports two common modes:
- Fixed mode: all packages share one version number and are released together.
- Independent mode: each package gets its own version, so you can release only what changed.
The choice matters. Fixed mode is simpler and suits tightly coupled packages. Independent mode gives finer control but requires more discipline.
Publishing
When you publish, Lerna determines the correct order based on inter-package dependencies, so a package that depends on another is published after its dependency. It can also create git tags and update changelogs as part of the release.
Running tasks across packages
Lerna can run a command (build, test, lint) across multiple packages, and it can scope that to only the packages affected by recent changes. This is the part that saves the most time in large repos, because you avoid rebuilding everything on every change.
Lerna and Nx
Lerna is now part of the Nx ecosystem. The relationship matters when you choose tooling:
- Lerna handles the monorepo versioning and publishing workflow.
- Nx provides the broader task running, caching, and project graph capabilities.
In practice, Lerna can use Nx under the hood for task execution and caching. If you already use Nx, Lerna fits as the release layer. If you only need publishing and versioning, Lerna can stand alone.
Lerna vs. plain npm/yarn workspaces
| Concern | npm/yarn workspaces | Lerna |
|---|---|---|
| Linking local packages | Yes | Yes (builds on workspaces) |
| Coordinated versioning | No | Yes |
| Ordered publishing | No | Yes |
| Changelog generation | No | Yes |
| Running tasks across packages | Limited | Yes, with affected-package scoping |
Workspaces solve dependency linking. Lerna solves the release and task-orchestration layer on top. Many projects use both: workspaces for installation, Lerna for versioning and publishing.
When Lerna is the right choice
Consider Lerna when:
- You maintain multiple packages that depend on each other.
- You need repeatable, ordered releases rather than manual
npm publishper package. - You want to run builds or tests only for packages affected by a change.
- You are already in or moving toward the Nx ecosystem.
Look elsewhere when:
- You have a single package.
- Your packages are released independently by different teams with no shared release process.
- You only need local linking and never publish.
Where to start
Begin with the Lerna documentation at lerna.js.org. The typical first steps are initializing Lerna in an existing repository, defining your package locations, and choosing fixed or independent versioning before your first release. Getting the versioning mode right early avoids a painful migration later.
What Are React Components and How Do You Use Them?
A React component is a reusable piece of UI defined as a JavaScript function (or, historically, a class) that returns markup. You build an interface by composing many small components, passing data in through props and tracking change with state. If you're starting a project or adding to one, you'll usually write your own components for app-specific logic and pull in prebuilt ones from a library or registry for common UI like buttons, heroes, and cards. The sections below cover how components work, when to use which style, and how to add one and confirm it renders.
The core idea: a function that returns UI
A component takes an input object called props and returns what should appear on screen. State is data a component owns and can change over time; when it changes, React re-renders that component.
function Greeting({ name }) {
  return <h1>Hello, {name}</h1>;
}

// Used like an HTML tag:
<Greeting name="Ada" />
Two rules matter in practice:
- Props flow down, events flow up. A parent passes data to a child via props; the child signals change by calling a function the parent handed it.
- Components must be pure with respect to their inputs. Given the same props and state, they should render the same output. Side effects (fetching, subscriptions) belong in hooks like
useEffect.
Function components vs. class components
Modern React uses function components with hooks. Class components still appear in older codebases and some libraries, so you should recognize them even if you don't write them.
| Dimension | Function component + hooks | Class component |
|---|---|---|
| Syntax | Plain function returning JSX | class extends React.Component with a render() method |
| State | useState, useReducer |
this.state and this.setState |
| Side effects | useEffect |
Lifecycle methods (componentDidMount, etc.) |
this binding |
Not applicable | Requires binding or arrow methods |
| Current default | Yes | Legacy, still supported |
If you're starting fresh, use function components. Reach for a class only when maintaining existing code or integrating a library that requires it.
Composition: build big UI from small pieces
The main way you scale a React app is by splitting UI into small components and combining them. Three patterns cover most cases:
- Passing
childrenlets a wrapper render whatever you nest inside it:function Card({ children }) { return <div className="card">{children}</div>; } <Card><Greeting name="Ada" /></Card> - Lifting state up means moving shared state to the closest common parent so two siblings can stay in sync, rather than duplicating it in each.
- Keeping components focused — one component, one job — makes them easier to reuse and test.
Where prebuilt components come from
You rarely build everything yourself. Two distribution models dominate:
- Package libraries ship compiled code you import from
node_modules. You get updates by bumping a version, but you don't own or edit the source. - Registries and copy-in source give you the actual component file, which lands in your repo and becomes yours to edit. This is the model behind shadcn/ui conventions, where components are React + Tailwind source rather than an opaque dependency.
21st is a registry in the second category. Its library lists 12,000+ crafted React components, templates, and shadcn themes, organized into categories such as 2,000+ marketing blocks (animated heroes, shaders, backgrounds, footers) and 2,100+ UI components (buttons, AI chats, cards and grids, navigation, sign-ins). Components are attributed to named authors, and the site states they ship as prompts you can copy into your tooling — its examples show the same prompt producing a diff in Codex, a file in Claude Code, and a live preview in Lovable. The site also reports 25,431 installs in a week for one component and a builder count of 3,819,076, which gives a rough sense of activity rather than a quality guarantee.
Because these components are source you place in your project, the trade-off is the reverse of a package library: you can edit anything, but you also own maintenance and updates.
Adding a component to your project and verifying it
The exact command depends on the registry, but the shape of the task is consistent. Using a copy-in component as the example:
- Confirm prerequisites. You need a React project with Tailwind and the
cnutility (a class-merging helper) available, since registry components typically import from@/lib/utils. - Get the source. Either run the registry's install command or paste the component's prompt into your AI tool so it writes the file into your components directory. Expect a new file such as
components/ui/shimmer-button.tsx. - Import and render it. Add the import to a page and place the component in the tree.
- Verify. Run your dev server and check that the component appears and responds to interaction. If the registry ships a preview, compare against it.
A minimal check after install:
import { ShimmerButton } from "@/components/ui/shimmer-button";

export default function Page() {
  return <ShimmerButton>Get started →</ShimmerButton>;
}
If it renders and the hover/interaction behavior matches the preview, the install succeeded.
Troubleshooting common problems
- Missing imports or unresolved
@/paths. The@alias must be configured in your bundler ortsconfig. If the component imports@/lib/utilsand that file doesn't exist, create it or fix the alias. - Prop type errors. If the component expects a required prop and you omit it, you'll get a warning or a crash. Check the component's signature and pass what it declares.
- Styling looks wrong. Registry components assume Tailwind is set up and that your theme tokens (colors, radii) exist. Missing Tailwind config or theme variables produce unstyled output rather than an error.
- Excessive re-renders. A component re-rendering on every keystroke or parent update usually means state lives too high or a new object/function is created each render. Move state closer to where it's used, or memoize with
useMemo/useCallbackwhen profiling shows it matters. - "Hooks can only be called inside a component." You called a hook at the top level of a module or inside a condition. Hooks must run unconditionally at the top of a component or custom hook.
Choosing between writing and installing
Write your own component when the logic is specific to your app, when you need tight control over behavior, or when a library's abstraction would fight your design. Install from a registry when the UI is generic (buttons, heroes, cards), when you want to read and edit the source, and when you're comfortable owning updates. Use a package library instead when you'd rather receive fixes automatically and don't need to modify internals. The right choice depends on how much control versus maintenance you want — not on which option is universally better.
Website Overview
Several search or sharing settings need attention. Together they may make snippets, preview images or preferred URLs less consistent across platforms.
Domain and Registration
Transfer-protection status is present, helping reduce the risk of unauthorized domain transfers. The domain has about 2 years of registration history; its current configuration provides more context than age alone. The registrar is Porkbun LLC, a widely used domain service provider. The domain uses the common .dev extension, which is not an independent safety signal.
DNS and Email
Nameservers are provided by Cloudflare, indicating managed DNS hosting. MX records point to the porkbun.com email service. No CNAME was found; the observed records resolve directly to addresses. SPF and DMARC are configured. DKIM status is unknown. TXT records include verification markers for Google. Such markers may also remain after a service stops being used.
TLS and Certificates
The public key uses EC with 256 bits. The server supplied a complete certificate chain. No organization name is present in the certificate; the available fields are consistent with domain validation. The certificate was issued within the Google Trust Services cloud or CDN ecosystem. The certificate's total validity is about 90 days, consistent with a short renewal cycle.
HTTP and Browser Security
The checked browser-security headers were not detected, leaving fewer explicit browser-side safeguards. No X-Powered-By header was found, reducing one common source of backend fingerprinting information. The cf-ray response header indicates a CDN or caching proxy in the delivery path. No obvious internal addresses or debug information were found in the headers. The Server header identifies cloudflare without an exact version.
Technology Stack Analysis
The public page identifies Google Analytics, Cloudflare without precise versions, leaving fewer clues for version-specific scanning.
Search and Social Sharing
The meta description has 180 characters and may be shortened in search results. No homepage canonical URL was detected. If duplicate URLs exist, consolidation may be less explicit. Twitter Card metadata is configured. The title has 45 characters, within a common display range. The observed directives allow indexing and link following.
 Hosting and Email
 Cloudflare
 Hosting
 Location
 unknown
104.21.82.132
Location
Location unknown
104.21.82.132
 Pages, Search and Sharing
| Meta description | An open source collection of 200+ high quality, animated, interactive & fully customizable React components and micro interactions for building stunning, memorable user interfaces. |
|---|---|
| Canonical URL | Not detected |
| Language | English (default) |
| Twitter Card | summary_large_image |
Social Sharing Preview
17 fields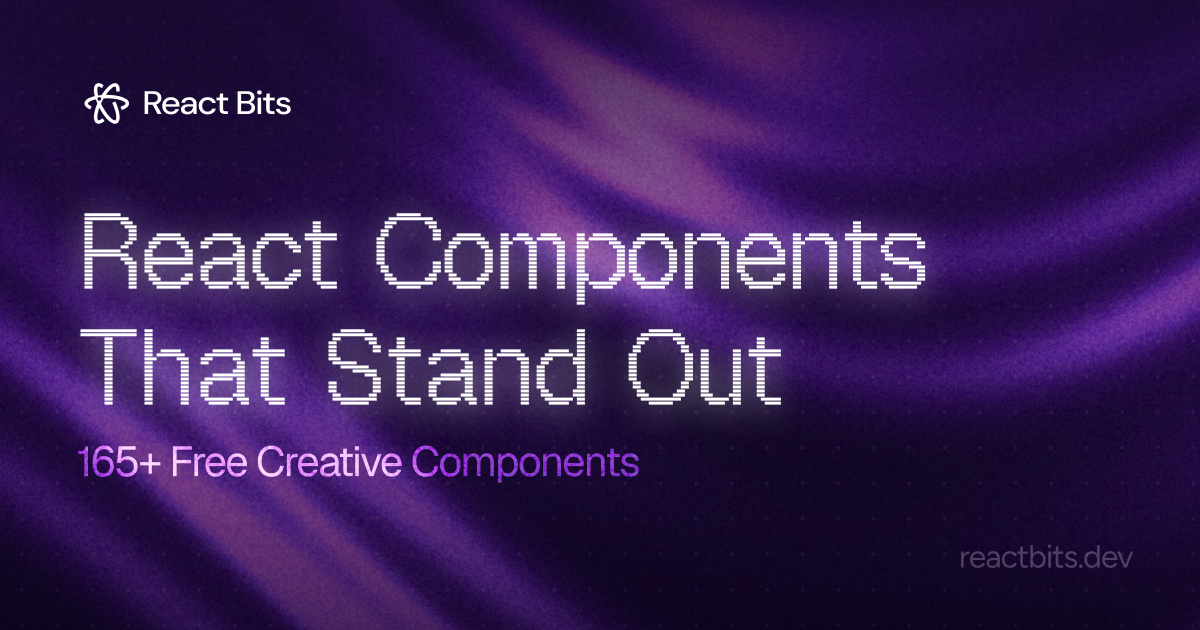

Sharing metadata
| og:url | https://reactbits.dev |
|---|---|
| og:type | website |
| og:image | https://reactbits.dev/og.png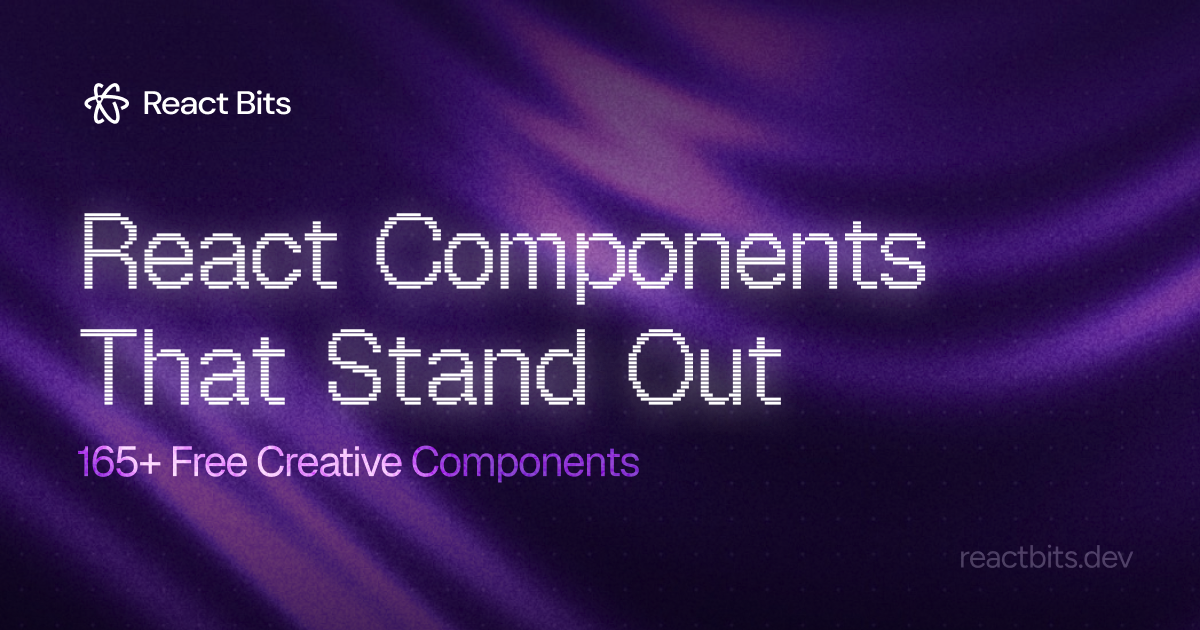 |
| og:title | React Bits |
| og:locale | en_US |
| og:image:alt | The React Bits landing page design, showcasing the logo and a subtitle! |
| og:site_name | React Bits |
| og:description | An open source collection of 200+ high quality, animated, interactive & fully customizable React components and micro interactions for building stunning, memorable user interfaces. |
| og:image:width | 1200 |
| og:image:height | 630 |
| twitter:card | summary_large_image |
| twitter:site | @davidhaz |
| twitter:image | https://reactbits.dev/og.png |
| twitter:title | React Bits |
| twitter:creator | @davidhaz |
| twitter:image:alt | The React Bits landing page design, showcasing the logo and a subtitle! |
| twitter:description | An open source collection of 200+ high quality, animated, interactive & fully customizable React components and micro interactions for building stunning, memorable user interfaces. |
robots.txt (opens in a new tab)
1 rulesAll bots 1 allowed · 0 disallowed

 All bots

/
No matching rules.
Sitemaps
1 Registration details RDAP / WHOIS
| Registrar | Porkbun LLC |
|---|---|
| Registered | 2024-08-06 |
| Expires | 2027-08-06 |
| Domain status | client delete prohibited、client transfer prohibited |
| Nameservers | brenda.ns.cloudflare.com、milan.ns.cloudflare.com |
| DNSSEC | unsigned |
 DNS records
| Type | Name | Value | TTL | Priority |
|---|---|---|---|---|
| A | reactbits.dev | 104.21.82.132 | 300 | — |
| A | reactbits.dev | 172.67.158.57 | 300 | — |
| AAAA | reactbits.dev | 2606:4700:3036::6815:5284 | 300 | — |
| AAAA | reactbits.dev | 2606:4700:3036::ac43:9e39 | 300 | — |
| MX | reactbits.dev | fwd1.porkbun.com | 300 | 10 |
| MX | reactbits.dev | fwd2.porkbun.com | 300 | 20 |
| NS | reactbits.dev | brenda.ns.cloudflare.com | 86400 | — |
| NS | reactbits.dev | milan.ns.cloudflare.com | 86400 | — |
| TXT | reactbits.dev | brevo-code:7ab1d7aa81349326051d132cb2ad9005 | 300 | — |
| TXT | reactbits.dev | google-site-verification=V8vOqo5AWDT9QxSEvc-4HiHtTnRHJ4M9Its9KgGdFFc | 300 | — |
| TXT | reactbits.dev | v=spf1 include:_spf.porkbun.com ~all | 300 | — |
| DMARC | _dmarc.reactbits.dev | v=DMARC1; p=quarantine; rua=mailto:[email protected],mailto:[email protected]; ruf=mailto:[email protected]; fo=1 | 300 | — |
 TLS and certificates
| Assessment | Normal configuration |
|---|---|
| Supported protocols | TLSv1.2、TLSv1.3 |
| Negotiated protocol | TLSv1.3 |
| Certificate subject | reactbits.dev |
| Issuer | Google Trust Services |
| Valid until | 2026-10-31T15:11 · Remaining when checked: 35 days |
| Verification details | Certificate trust: Passed · Hostname match: Passed |
 HTTP response headers
| Header | Value |
|---|---|
| content-type | text/html |
| cache-control | public, max-age=0, must-revalidate |
| server | cloudflare |
 Identified technologies
User reviews (0)