
 vheer.com
 Paid content
 Multilingual
Categories: Artificial Intelligence
Create unlimited AI images and videos for free with Vheer. Generate from text or images, edit photos, and export watermark-free results with no signup.
 Visit website
 Updated: 2026-09-26 23:52
Language: English (default)
Updated: 2026-09-26 23:52
Language: English (default)
 Access: Normal
 Profile views 1
 Outbound visits 0
Related questions
More questions →How to Use a Free AI Image Generator Without Signing Up
You can generate an AI image from text without creating an account by opening a no-sign-up tool like imagefree.net, typing a descriptive prompt into the text box, and clicking generate. The result appears as an AI-generated image you can download for personal or social media use. This works best when your prompt names a subject, setting, style, and lighting, because the tool has no other context to work from.
What "No Sign-up" Actually Means
"No sign-up" means you reach the prompt box without registering an email or password. It does not automatically mean unlimited, watermark-free, or high-resolution output. Free tools vary, and any limits are usually stated on the page or in a pricing link rather than in the generator itself. imagefree.net lists a Pricing page, so if you need higher limits or commercial terms, check there rather than assuming the free tier covers everything.
Treat the free tier as a way to test whether the tool fits your task before committing to anything.
Step-by-Step: From Prompt to Image
1. Open the generator and find the prompt box
Go to the site and locate the text field labeled Prompt. This is where your description goes. No account step should appear before it on a no-sign-up tool.
2. Write a prompt with four ingredients
A prompt that produces a usable image usually specifies:
- Subject — who or what is in the image
- Setting — where it takes place
- Style — photo, illustration, cinematic, etc.
- Lighting or mood — soft neon, golden hour, dramatic shadows
The site's own example shows this pattern:
"A weathered street musician playing violin on a rainy cobblestone alley, soft neon reflections, cinematic, shallow depth of field"
Every phrase adds a decision the tool would otherwise make for you. "Street violinist in the rain" leaves the style and lighting open; the full prompt does not.
3. Generate and check the result
Submit the prompt and wait for the image. Compare it against what you intended:
- Wrong subject or missing element → add or reorder nouns
- Wrong look → add a style word (photo, watercolor, 3D render)
- Flat or dull → add lighting (backlit, soft neon, overcast)
4. Revise rather than restart
Change one thing at a time so you can tell what caused the improvement. If the composition is right but the mood is wrong, keep the subject and setting and only swap the lighting terms.
5. Download the image
Save the finished file and check it at the size you actually need — a social post and a print piece have very different requirements.
Writing Better Descriptions
The site's "Writing Better Descriptions" section points in the same direction as the example prompt: specificity beats length. A short, concrete prompt usually outperforms a long, vague one.
| Weak prompt | Stronger prompt |
|---|---|
| a dog | a golden retriever puppy sitting in tall grass, soft morning light, shallow depth of field |
| city at night | rain-slicked city street at night, neon signs reflecting on wet asphalt, cinematic |
| fantasy art | a floating island with waterfalls, painted in a soft watercolor style, warm sunset light |
Use the prompt examples on the page as templates. Swap the subject and keep the structure — subject, setting, style, lighting — and you can reuse the pattern for avatars, social graphics, or concept art.
Common Limits to Expect
Free no-sign-up generators typically constrain one or more of the following:
- Resolution — output may be smaller than you need for print
- Watermarks — some tools add one on the free tier
- Daily or per-session caps — a set number of images before you wait or pay
- Queue priority — free generations may be slower at peak times
None of these are stated as universal rules, so verify on the specific tool you use. If a limit blocks your task, the pricing page is the place to confirm what changes.
When This Approach Fits
Use a no-sign-up free generator when you want to test an idea, make a quick avatar or social image, or explore prompts before investing in a paid tool. Move to a paid tier or a different tool when you need consistent high resolution, no watermark, commercial rights, or volume beyond the free cap.
How to Compress Images for the Web Without Losing Visible Quality
You can cut most images to a fraction of their original file size without any visible quality loss by doing three things in the right order: resize the image to the dimensions it will actually display at, pick the right format for the content, then apply compression at a quality level that survives a side-by-side check. The single biggest mistake is skipping step one — an oversized image compressed at maximum quality is still far heavier than a correctly sized one.
Why file size and quality are a trade-off, not a fixed setting
Every compressed image is a negotiation between three variables: how many pixels you keep, how precisely each pixel is described, and how much the format is allowed to guess.
- Dimensions decide how many pixels exist at all. Halving width and height removes 75% of the pixel data before any compression happens.
- Quality level decides how aggressively the encoder discards detail it thinks you won't notice.
- Format decides the kind of discarding allowed — some formats throw away color precision, others only remove redundancy.
Because these interact, "quality 80" means something different on a 4000px photo than on a 600px thumbnail. Tune dimensions first, then quality.
Pick the format before you touch the quality slider
| Format | Best for | Compression type | Transparency | Notes |
|---|---|---|---|---|
| JPEG | Photographs, gradients, complex scenes | Lossy | No | Smallest for photos; artifacts appear around sharp edges and text |
| PNG | Logos, icons, screenshots, flat color, anything needing transparency | Lossless (or lossy via quantization) | Yes | Often 5–10× larger than JPEG for photos; excellent for flat graphics |
| WEBP | Almost everything, as a modern default | Both lossy and lossless | Yes | Typically 25–35% smaller than JPEG at comparable quality; broad browser support |
| SVG | Logos, icons, diagrams, charts | Vector (resolution-independent) | Yes | Stays crisp at any size; not suitable for photos |
| GIF | Short simple animations only | Lossless, 256 colors | Yes (1-bit) | Superseded by WEBP/MP4 for animation in nearly all cases |
Practical rule: photos → JPEG or lossy WEBP; flat graphics and transparency → PNG or lossless WEBP; anything vector → SVG.
The four levers, in the order you should pull them
1. Resize to display size (biggest win, zero quality cost)
If your layout renders an image at 800px wide, serving a 2400px original wastes roughly 89% of the pixels. Resize to the largest size it will ever be displayed at, and add a 2× version only if you need retina sharpness.
2. Choose the format
Match the format to the content type using the table above. Converting a photographic PNG to JPEG or WEBP alone can shrink it by 80% or more.
3. Set the quality level
For JPEG and lossy WEBP, most photographs hold up well between quality 70 and 85. Below ~60, banding appears in skies and blur around text. Above ~90, file size climbs steeply for gains nobody can see.
4. Strip metadata
EXIF data, camera info, and embedded thumbnails can add tens of kilobytes. Remove them unless you specifically need copyright or orientation data — and note that stripping orientation can rotate an image, so verify after export.
When lossy compression is fine, and when it isn't
Lossy is acceptable when:
- The image is a photograph or has natural texture.
- It's decorative or below the fold.
- Slight softening won't be noticed at final display size.
Use lossless or vector instead when:
- The image contains text, UI elements, or thin lines (lossy creates ringing artifacts).
- It's a logo, icon, or diagram — SVG or PNG keeps edges clean.
- It will be edited again later; repeated lossy saves compound degradation.
- It's a screenshot of code or a chart where color accuracy matters.
Compressing vs. resizing: don't confuse them
Compressing reduces the bytes needed to describe the same pixels. Resizing reduces the number of pixels. They're independent, and resizing usually delivers the larger saving. A 3000×2000 photo at quality 95 might be 2 MB; the same photo resized to 1200×800 at quality 80 might be 180 KB. Doing only the quality reduction gets you maybe 40% off; doing both gets you over 90%.
A repeatable workflow
- Determine the maximum display width in your layout (inspect the element or check your CSS).
- Export at that width (plus a 2× variant if needed).
- Convert to the right format — WEBP as a modern default, JPEG as a fallback, PNG/SVG for graphics.
- Apply quality 75–85 for lossy formats and compare against the original.
- Strip metadata and re-check orientation.
- Verify before publishing (see below).
- Serve the right file with
srcsetso small screens don't download the large variant.
How to verify quality before you publish
- View at 100% at final display size, not zoomed in — artifacts you can't see at real size don't matter.
- Toggle between original and compressed in a viewer or an online compressor's before/after preview.
- Check the worst-case areas: skies, smooth gradients, sharp edges, and any text.
- Compare file sizes and ask whether the extra kilobytes buy visible improvement. If not, go smaller.
- Test on a mid-range phone, where banding and blur are often more obvious than on a desktop monitor.
Common mistakes
- Compressing a full-resolution image and calling it optimized.
- Using PNG for photographs.
- Setting quality to 100 "to be safe" — it inflates size with no visible benefit.
- Re-saving a JPEG repeatedly, stacking artifacts each time.
- Forgetting that GIF animations are usually better as WEBP or video.
- Ignoring metadata, which can silently add weight.
Quick reference
| Goal | Do this |
|---|---|
| Photo on a webpage | Resize to display width → WEBP (fallback JPEG) → quality 75–85 |
| Logo or icon | SVG; fall back to PNG if vector isn't possible |
| Screenshot with text | PNG or lossless WEBP |
| Transparent photo cutout | Lossy WEBP or PNG |
| Short animation | WEBP or MP4, not GIF |
The order matters more than any single setting: resize, then choose format, then tune quality, then strip metadata, then verify at real display size. Follow that sequence and you'll routinely land at 10–20% of the original file size with no quality your visitors can detect.
What to Look for in a Video Platform Beyond Hosting and Sharing
If you're evaluating a video platform for a small business or marketing team, hosting and sharing are just the entry point. The features that actually determine whether a platform fits your workflow fall into four areas: privacy and playback control, collaboration and review tools, marketing and analytics capabilities, and practical limits like storage and mobile support. Most general-purpose tools (cloud storage, social networks, free hosts) cover hosting well but leave gaps in the other three. This guide walks through what each area means in practice, so you can map features to your own situation instead of comparing endless checklists.
Start by separating three jobs: hosting, editing, and marketing
Video platforms tend to bundle three distinct functions, and confusion usually comes from mixing them up:
- Hosting — storing a file, generating a player, delivering it reliably to viewers. This is the baseline.
- Editing — trimming, assembling, adding captions or branding. Some platforms include basic editors; others expect you to edit elsewhere and upload the result.
- Marketing and business features — privacy controls, lead capture, calls to action, analytics, team review workflows. These are what separate a "video host" from a "video platform."
A useful exercise: write down your last five video tasks (a product demo, a client pitch, a social clip, an internal training, a landing page embed). For each one, note which of the three jobs it required. If most of your tasks stop at hosting, a lighter tool may be enough. If several involve review cycles, gated access, or measuring viewer behavior, a fuller platform earns its cost.
Privacy and playback control: the business-vs-social divide
On social platforms, everything is public by default and wrapped in ads and recommendations. For business use, that's often the opposite of what you want. Look for:
- Granular privacy settings — can you restrict a video to specific people, a password, a domain, or an embed location? Can you make it unlisted but still embeddable?
- Ad-free playback — your product demo shouldn't end with a competitor's ad or an unrelated recommendation.
- Customizable embeds — control over player color, logo, and whether related videos appear. This matters when the video sits on your own site and represents your brand.
- Domain-level restrictions — the ability to limit playback to your own website prevents your content from being re-embedded elsewhere.
If your videos are purely promotional and public, these controls matter less. If you share client work, internal training, or pre-release material, they become the deciding factor.
Collaboration and review: the most common gap
This is where general-purpose tools most often fall short. A shared drive lets people comment on a file, but it doesn't give you a structured review process. A dedicated platform typically offers:
- Timestamped comments — feedback attached to a specific moment in the video, so "the logo looks off" points to an exact frame.
- Versioning — uploading a new cut while keeping the old one, so reviewers can see what changed.
- Approval status — a clear "approved" or "needs changes" state rather than a scattered email thread.
- Role-based access — reviewers who can comment but not download or reshare.
When this becomes relevant: as soon as more than two people need to sign off on a video, or when you're producing videos on a recurring schedule. For a solo operator publishing once a month, a simple comment thread may be sufficient.
Analytics and lead capture: beyond view counts
A raw view count tells you almost nothing actionable. Business-oriented platforms go further:
| Feature | What it tells you | When it matters |
|---|---|---|
| Watch time / engagement graph | Where viewers drop off | Improving content or editing |
| Viewer identity | Who watched (when gated) | Sales follow-up, internal training |
| Lead capture forms | Email collected before or during playback | Demand generation |
| Calls to action | Click-through to a page or booking link | Converting viewers |
| Embed/domain reports | Where your video is being watched | Tracking campaign performance |
If your goal is brand awareness, basic view counts may be fine. If you're using video to generate leads or train staff, the deeper metrics are the reason to choose a platform over a free host.
Practical limits that affect daily use
Feature lists rarely mention the constraints that cause friction later. Check these before committing:
- Storage and bandwidth limits — how much you can upload, and whether high viewership triggers overage fees.
- Upload size and length caps — relevant if you work with long recordings or high-resolution footage.
- Mobile app support — can you upload, review, and respond to comments from a phone? For teams that shoot on mobile, this is a real workflow factor.
- Export and portability — can you download your originals and embed codes if you leave? Lock-in is a hidden cost.
- Integrations — does it connect to the tools you already use (your website builder, CRM, or project tracker)?
Deciding between a full platform and a lighter tool
Use these rough conditions as a starting point:
A lighter tool (free host, cloud storage, social platform) is likely enough if:
- You publish occasionally and mostly to public channels.
- One person handles video end to end.
- You don't need gated access or viewer-level analytics.
A dedicated platform is worth evaluating if:
- Multiple people review or approve videos.
- You need privacy controls, ad-free playback, or branded embeds.
- You're using video for lead generation, training, or client delivery.
- You publish frequently enough that manual workarounds cost more than a subscription.
Pricing and plan details change often, so check the platform's current plans page directly rather than relying on secondhand comparisons. The right approach is to list your actual requirements first, then match them against what each option offers — not the other way around.
How to Generate AI Images from Text for Free Without Signing Up
You can turn a text prompt into an AI-generated image in a few minutes using a free, no-sign-up text-to-image tool like imagefree.net: open the site, type a description into the prompt box, and generate. This works best when your prompt names a subject, setting, lighting, style, and composition rather than a vague idea. No account is required to start, but free tools typically come with trade-offs in resolution, watermarking, or usage rights that you should check before relying on the output.
What "No Sign-Up" Actually Means
A no-sign-up generator lets you reach the prompt box and produce an image without creating an account, verifying an email, or logging in. That removes the usual friction: no password to store, no onboarding flow, and no personal details to hand over before you see whether the tool fits your needs.
It does not automatically mean the tool is unlimited, watermark-free, or free of usage restrictions. The site markets itself as a free AI image generator with no sign-up required, but you should treat "free" and "no sign-up" as separate claims from "no limits" and "commercial rights included." Check the tool's own terms for how you may use the images.
Step-by-Step: From Prompt to Image
1. Open the generator and find the prompt box
Go to the site and locate the text input labeled Prompt. This is where your description goes. Nothing else is required to begin — that is the point of a no-sign-up tool.
2. Write a prompt that covers five things
A strong text-to-image prompt usually specifies:
- Subject — who or what is in the image (a street musician, a fox, a product bottle)
- Setting — where it happens (a rainy cobblestone alley, a studio backdrop)
- Lighting — the mood and light source (soft neon reflections, golden hour, harsh flash)
- Style — the visual treatment (cinematic, watercolor, photorealistic, 3D render)
- Composition — framing and camera behavior (shallow depth of field, close-up, wide shot)
You do not need all five every time, but the more of them you include, the less the tool has to guess.
3. Generate and review
Submit the prompt and wait for the image. Compare the result against your intent:
- If the subject is wrong or missing, name it more explicitly and put it early in the prompt.
- If the mood is off, add or change the lighting and style words.
- If the framing is wrong, add composition terms like "close-up," "wide angle," or "centered."
4. Refine, don't restart
Keep the parts that worked and change one or two variables at a time. Changing everything at once makes it hard to tell which word caused the improvement. Regenerate with the adjusted prompt and repeat until the image is close enough to use.
A Worked Example
The site's own example shows how the five elements combine:
"A weathered street musician playing violin on a rainy cobblestone alley, soft neon reflections, cinematic, shallow depth of field"
Break it down:
| Element | In the prompt |
|---|---|
| Subject | weathered street musician playing violin |
| Setting | rainy cobblestone alley |
| Lighting | soft neon reflections |
| Style | cinematic |
| Composition | shallow depth of field |
To adapt this template, swap the subject and setting while keeping the structure: "[subject] in [setting], [lighting], [style], [composition]." For example, "a ceramic coffee cup on a wooden desk, warm morning window light, minimalist product photography, top-down view."
Writing Better Descriptions
- Lead with the subject. Tools weight earlier words more heavily, so put the most important element first.
- Use concrete nouns over abstractions. "A red fox" beats "a feeling of wildness."
- Borrow real photography and art terms. Words like "bokeh," "golden hour," "macro," and "flat lay" carry specific visual meaning.
- Keep it readable. A dense wall of comma-separated keywords can work, but a clear sentence-like phrase is easier to debug when results go wrong.
- Iterate in small steps. One or two changed words per attempt gives you useful feedback.
Free-Tool Limits to Check Before You Rely on the Output
Before using a generated image in a project, confirm:
- Resolution — is the output large enough for your intended use (web, print, social)?
- Watermarking — does the free tier add a visible mark?
- Usage rights — can you use the image commercially, or only personally?
- Rate or volume limits — is generation capped per session or per day?
- Consistency — can you reproduce a similar style across multiple images?
The site presents itself as free and no-sign-up, and it lists a pricing page, which suggests paid tiers may exist alongside the free option. If your project depends on high resolution, no watermark, or commercial rights, check those terms directly rather than assuming the free tier covers them.
When This Approach Fits — and When It Doesn't
Use a no-sign-up text-to-image tool when you want to:
- Test an idea quickly without committing to an account
- Generate a one-off image for a draft, mood board, or social post
- Learn how prompt wording affects output
Look elsewhere when you need:
- Guaranteed commercial licensing and documented rights
- High-resolution files for print
- Consistent characters or styles across a large batch
- Reproducible results over time
For quick, low-stakes image generation, the no-sign-up route is the fastest path from text to picture. For anything you plan to publish or sell, verify the tool's terms first — the convenience of skipping sign-up should not be confused with a license to use the result however you like.
Website Overview
An established domain and managed infrastructure suggest continuity of operations and may support dependable delivery, although neither guarantees service quality. Page metadata, canonical configuration and social previews work together to provide more consistent search and sharing presentation.
Domain and Registration
Registered in 2014, this domain has about 11 years of history. That suggests continuity, although ownership and purpose may have changed. Transfer-protection status is present, helping reduce the risk of unauthorized domain transfers. The domain uses the common .com extension, which is not an independent safety signal.
DNS and Email
The observed email authentication setup is incomplete: DMARC is missing. Nameservers are provided by Cloudflare, indicating managed DNS hosting. MX records point to the Zoho Mail email service. No CNAME was found; the observed records resolve directly to addresses. TXT records include verification markers for Google. Such markers may also remain after a service stops being used.
TLS and Certificates
The public key uses EC with 256 bits. The server supplied a complete certificate chain. No organization name is present in the certificate; the available fields are consistent with domain validation. The certificate was issued within the Google Trust Services cloud or CDN ecosystem. The certificate's total validity is about 90 days, consistent with a short renewal cycle.
HTTP and Browser Security
X-Powered-By exposes backend information: Next.js. The checked browser-security headers were not detected, leaving fewer explicit browser-side safeguards. The cf-ray response header indicates a CDN or caching proxy in the delivery path. No obvious internal addresses or debug information were found in the headers. The Server header identifies cloudflare without an exact version.
Technology Stack Analysis
The public page identifies Next.js, Cloudflare without precise versions, leaving fewer clues for version-specific scanning.
Search and Social Sharing
Twitter Card metadata is configured. JSON-LD includes Organization data, helping describe the organization as an entity. The page declares 10 language or regional alternatives using hreflang. The title has 62 characters, within a common display range. A meta description is present, with 151 characters.
 Hosting and Email
 Cloudflare
 Hosting
 Zoho Mail
 Location
 unknown
104.21.33.117
Location
Location unknown
104.21.33.117
 Pages, Search and Sharing
| Meta description | Create unlimited AI images and videos for free with Vheer. Generate from text or images, edit photos, and export watermark-free results with no signup. |
|---|---|
| Canonical URL | https://vheer.com |
| Language | English (default) · Multilingual |
| Twitter Card | summary_large_image |
Social Sharing Preview
15 fields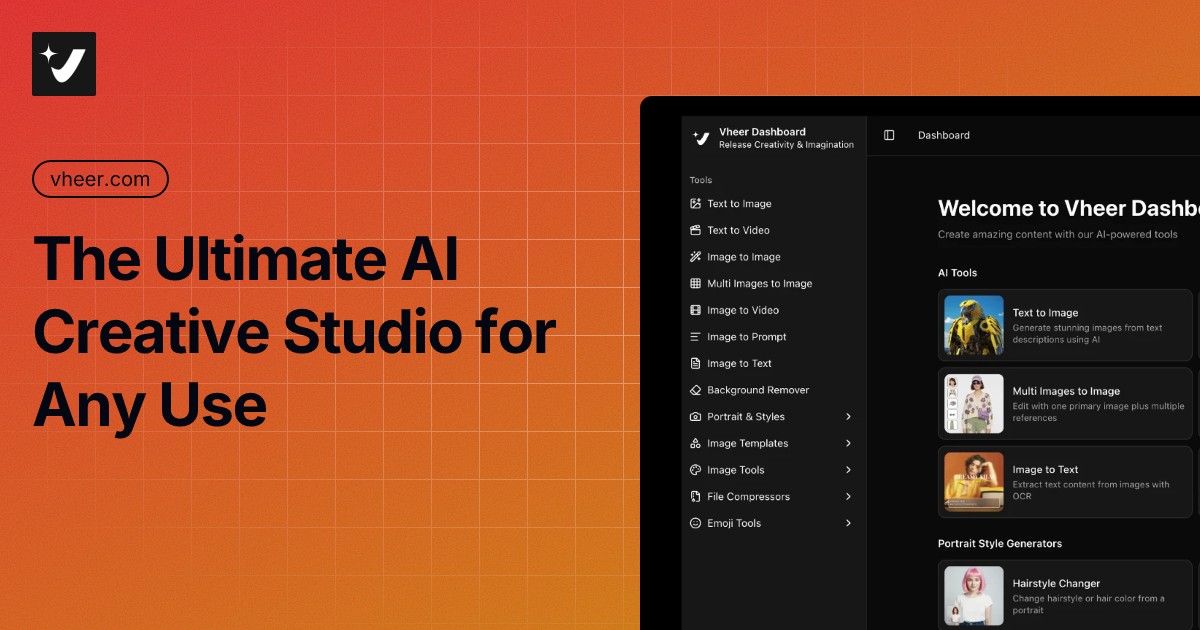

Sharing metadata
| og:url | https://vheer.com |
|---|---|
| og:type | website |
| og:image | https://vheer.com/images/og_vheer.jpg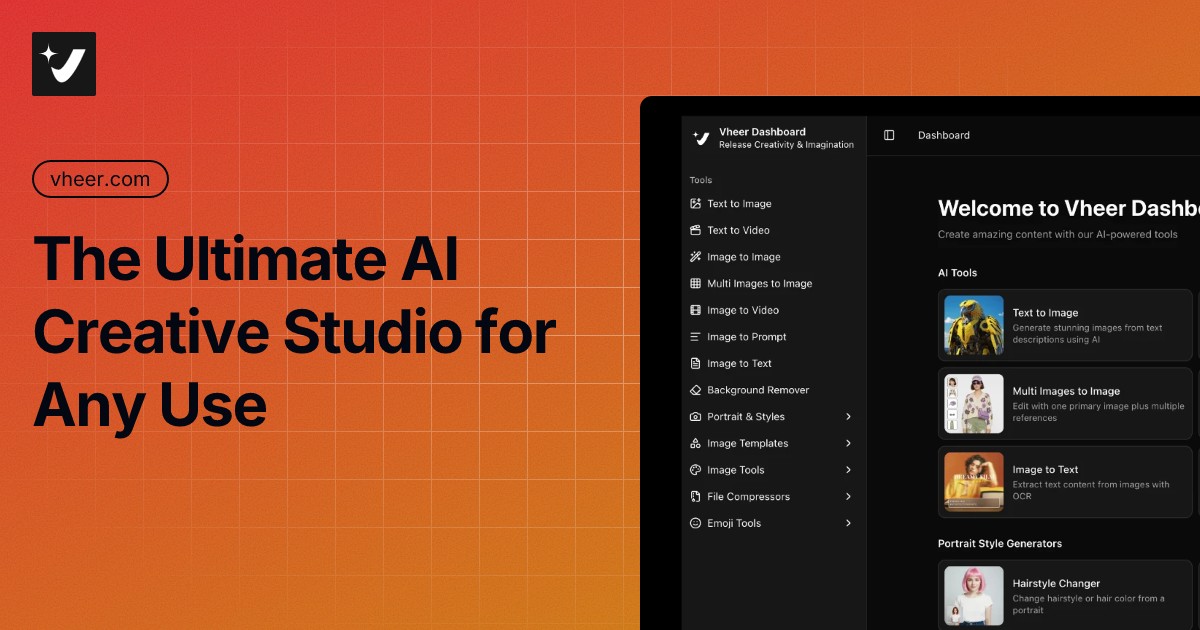 |
| og:title | Free AI Image & Video Generator - Unlimited, No Signup | Vheer |
| og:locale | en_US |
| og:image:alt | Free AI Image & Video Generator - Unlimited, No Signup | Vheer |
| og:site_name | Vheer |
| og:description | Create unlimited AI images and videos for free with Vheer. Generate from text or images, edit photos, and export watermark-free results with no signup. |
| og:image:width | 1200 |
| og:image:height | 630 |
| twitter:card | summary_large_image |
| twitter:image | https://vheer.com/images/og_vheer.jpg |
| twitter:title | Free AI Image & Video Generator - Unlimited, No Signup | Vheer |
| twitter:creator | @vheer |
| twitter:description | Create unlimited AI images and videos for free with Vheer. Generate from text or images, edit photos, and export watermark-free results with no signup. |
robots.txt (opens in a new tab)
16 rulesAll bots 3 allowed · 7 disallowed

 All bots

//_next/static//_next/image
/api//auth//admin//.next//private//thankyou/all-landings- Interval
Crawl delay 1 seconds
googlebot 1 allowed · 0 disallowed
/- Interval
Crawl delay 0 seconds
bingbot 1 allowed · 0 disallowed
/- Interval
Crawl delay 1 seconds
slurp 1 allowed · 0 disallowed
/- Interval
Crawl delay 1 seconds
duckduckbot 1 allowed · 0 disallowed
/
baiduspider 1 allowed · 0 disallowed
/
yandexbot 1 allowed · 0 disallowed
/
No matching rules.
Sitemaps
1 Registration details RDAP / WHOIS
| Registrar | NameSilo, LLC |
|---|---|
| Registered | 2014-11-24 |
| Expires | 2026-11-24 |
| Domain status | client transfer prohibited |
| Nameservers | damon.ns.cloudflare.com、sue.ns.cloudflare.com |
| DNSSEC | unsigned |
 DNS records
| Type | Name | Value | TTL | Priority |
|---|---|---|---|---|
| A | vheer.com | 104.21.33.117 | 300 | — |
| A | vheer.com | 172.67.162.85 | 300 | — |
| AAAA | vheer.com | 2606:4700:3035::6815:2175 | 300 | — |
| AAAA | vheer.com | 2606:4700:3035::ac43:a255 | 300 | — |
| MX | vheer.com | mx.zoho.com.cn | 600 | 10 |
| MX | vheer.com | mx2.zoho.com.cn | 600 | 20 |
| NS | vheer.com | damon.ns.cloudflare.com | 86400 | — |
| NS | vheer.com | sue.ns.cloudflare.com | 86400 | — |
| TXT | vheer.com | google-site-verification=xEPTppD4sulNf5zU2Sj-JssAm2Z39IovmG3ATF5bh84 | 300 | — |
| TXT | vheer.com | v=spf1 include:zohomail.com.cn include:mailgun.org ~all | 300 | — |
| TXT | vheer.com | zoho-verification=zb80066826.zmverify.zoho.com.cn | 300 | — |
 TLS and certificates
| Assessment | Normal configuration |
|---|---|
| Supported protocols | TLSv1.2、TLSv1.3 |
| Negotiated protocol | TLSv1.3 |
| Certificate subject | vheer.com |
| Issuer | Google Trust Services |
| Valid until | 2026-12-11T13:33 · Remaining when checked: 75 days |
| Verification details | Certificate trust: Passed · Hostname match: Passed |
 HTTP response headers
| Header | Value |
|---|---|
| content-type | text/html; charset=utf-8 |
| cache-control | private, no-cache, no-store, max-age=0, must-revalidate |
| server | cloudflare |
 Identified technologies
User reviews (0)