Website profiles · Technology insights · Alternatives

memtest.org No paid content found

Categories: Other

Memtest86+ is an advanced, free, open-source, stand-alone memory tester for 32- and 64-bits architecture computers. Compatible with BIOS & UEFI.

Visit website

Updated: 2026-10-02 07:55 Language: English (default) Access: Normal

Profile views 1 Outbound visits 0
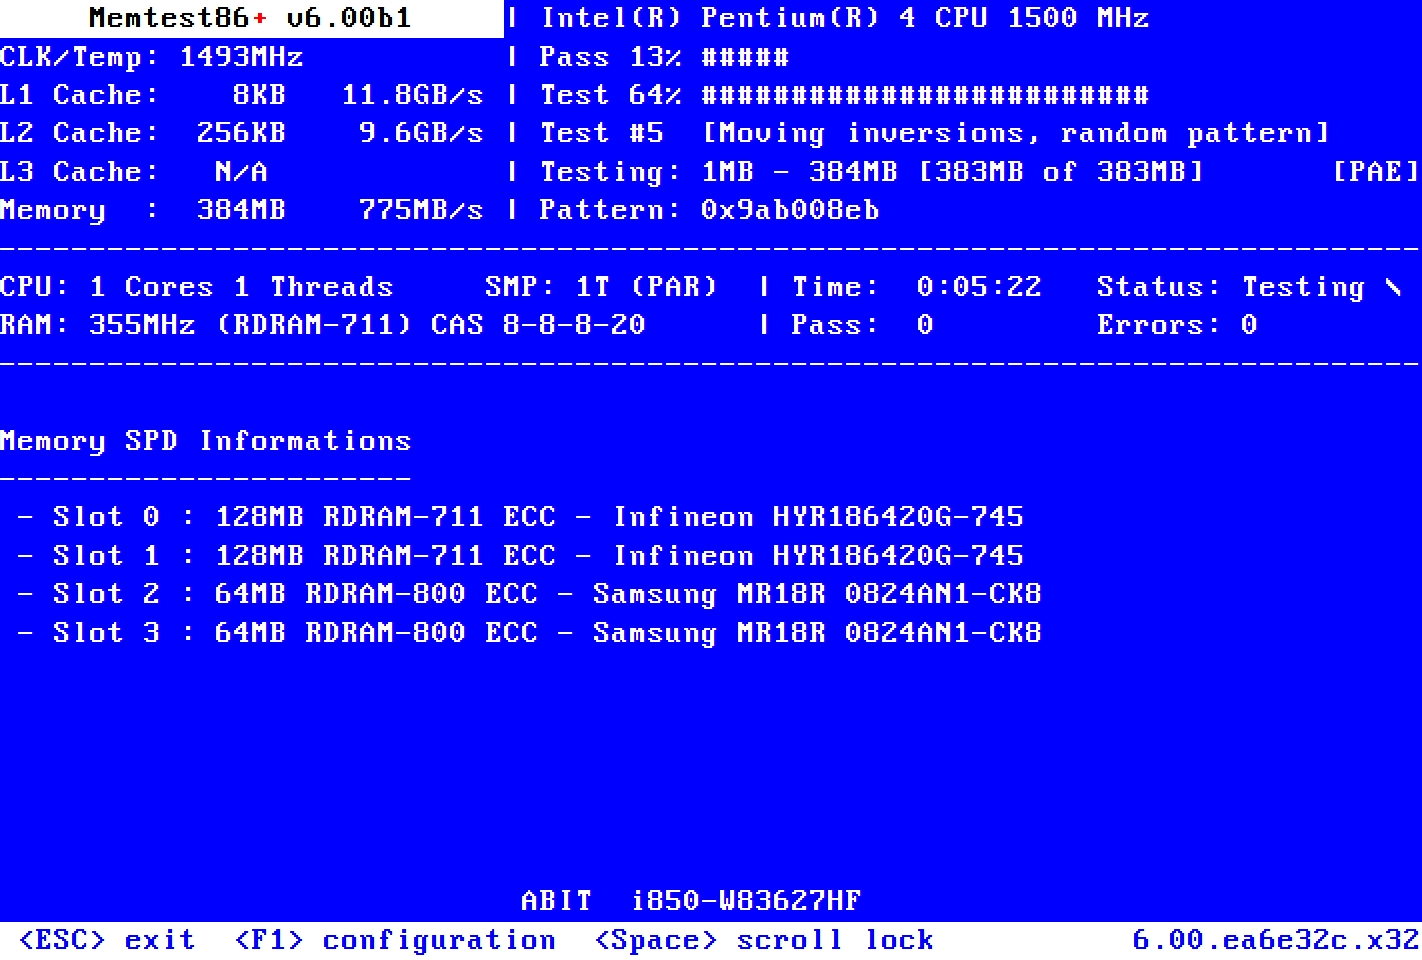
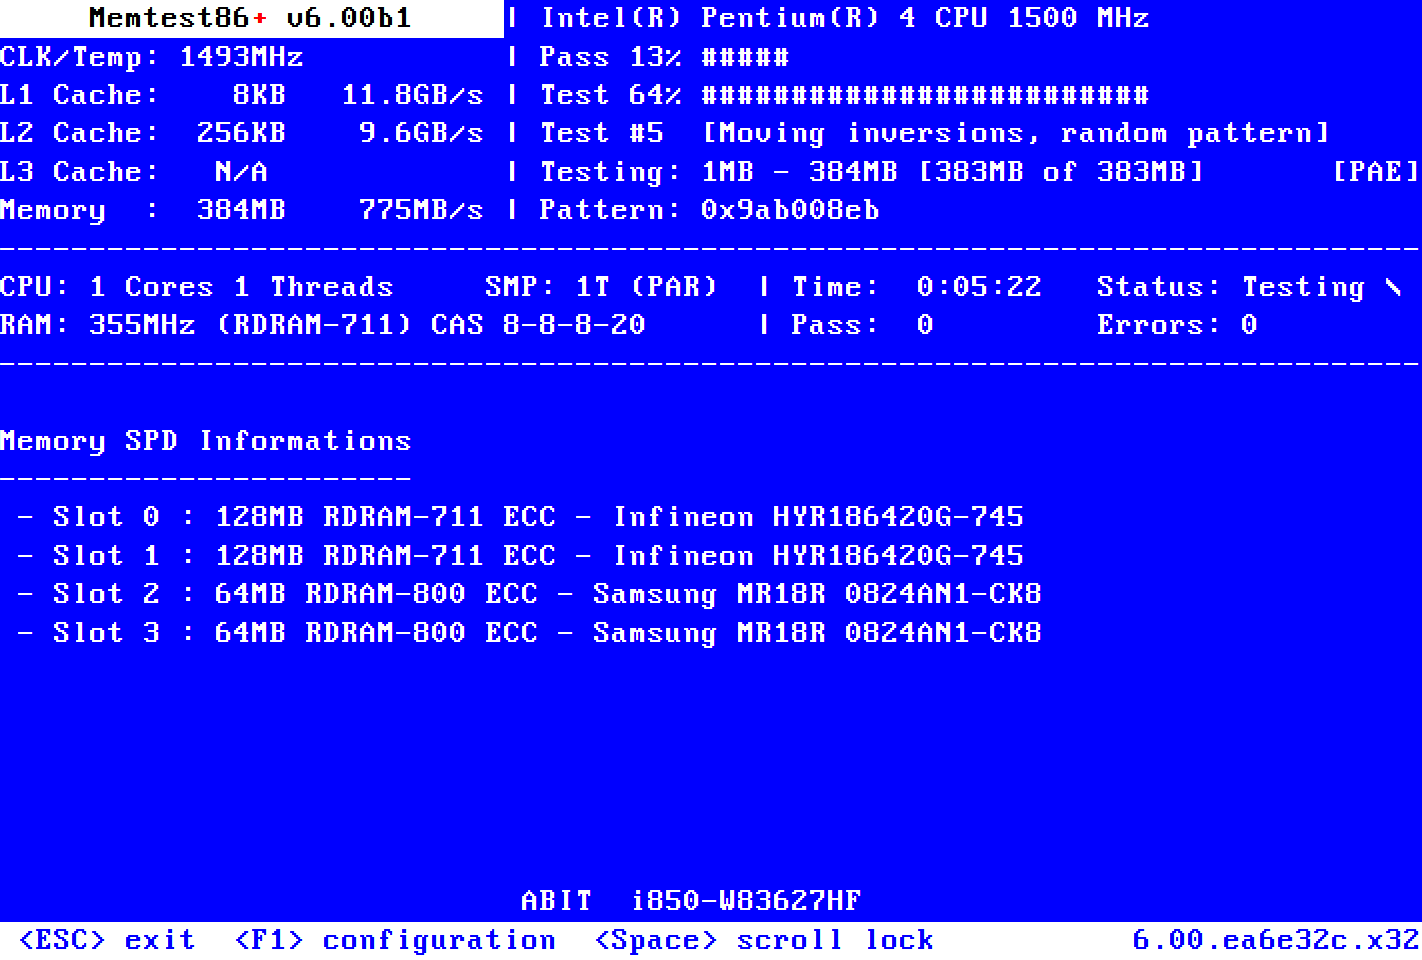
Memtest86+ Full homepage screenshot
Editorial Review

Website Review

What is Memtest86+?

Memtest86+ is a free, open-source, stand-alone memory tester for 32-bit and 64-bit x86 computers (and some LoongArch64 systems), distributed under the GNU GPL v2.0. It boots directly from removable media — independent of Windows, Linux or macOS — and runs its own set of test algorithms against your RAM, which the page describes as more thorough than the memory check built into a typical BIOS or UEFI.

It is not the same product as Memtest86, which the page notes has been closed-source freemium software owned by PassMark since 2013. The two share a name history, not a codebase.

What it is actually for

  • Diagnosing instability. If a PC crashes, freezes or throws blue screens, the page treats RAM as one of the most common causes and testing it as the first thing to try.
  • Validating new or overclocked hardware. Before putting a new PC or server into production, or after overclocking CPU or RAM, a clean run gives you a baseline that no memory faults are present.
  • Confirming a suspected faulty module. A failing result points at RAM rather than the operating system, drivers or storage.

What using it involves

You write the image to a USB flash drive — the Windows USB Installer on Windows, dd or a similar raw-write utility on Linux, and a burner such as balenaEtcher on macOS — then reboot and pick the drive from the boot menu. It runs outside any operating system, so a machine that will not boot an OS can still be tested.

The practical trade-off is time and interpretation. A thorough pass takes hours on a large machine, and the tool reports pass/fail and error addresses rather than telling you which stick to replace. On a multi-module system you may need to re-test modules individually to isolate the culprit.

Next step

If you are chasing intermittent crashes, run it overnight before replacing anything: a clean result redirects you toward drivers, storage or power, while errors give you a concrete reason to reseat or swap modules. Start at Memtest86+.

Choosing between the two tools

Memtest86+ Memtest86 (PassMark)
Licensing Open source, GPL v2.0 Closed-source freemium
Cost Free Free tier plus paid editions
Boot modes BIOS legacy, UEFI, or via a Linux-protocol bootloader Not described here

If licence terms or auditability matter — for example in a managed fleet — the open-source option is the simpler fit. If you want vendor support and a polished commercial interface, the freemium tool is the alternative.

How do I create a bootable Memtest86+ USB drive on Windows, Linux, or macOS?

Memtest86+ is distributed as a bootable image, so the job is to write that image to a USB stick in raw form and then boot the machine from it. The method differs slightly by operating system, but the outcome is the same.

Windows

Download and launch the Windows USB Installer, plug in a standard FAT32-formatted USB drive, and follow its prompts. Reboot and select the USB drive from your boot menu. This is the simplest route because the installer handles the image writing for you.

Linux

Write the ISO image directly to the raw device. The dd command works, or use a utility that does the same job, such as balenaEtcher. Point it at the whole disk (for example /dev/sdX), not a partition (for example /dev/sdX1).

macOS

balenaEtcher is the recommended way to burn the image to a USB flash drive. As on Linux, the image must go to the raw device rather than a mounted volume.

Platform Recommended method Key caution
Windows Windows USB Installer Use a FAT32-formatted drive
Linux dd or balenaEtcher Write to the raw device, not a partition
macOS balenaEtcher Unmount the volume before writing

Practical notes

  • Writing the image erases everything on the USB drive, so use one you can spare.
  • On x86 systems, Memtest86+ can boot directly via BIOS (legacy or UEFI) or through a bootloader supporting the Linux boot protocol.
  • If the machine won't boot from the stick, check the boot order and whether the image was written to the raw device.

A useful next step: after creating the drive, test it on a machine you don't depend on first, then run it on the system you actually want to check. Expect a thorough pass to take a while, so plan to leave it running.

For download links and the full README, see Memtest86+.

What should I do if Memtest86+ reports RAM errors?

If Memtest86+ reports errors, treat them as a real hardware signal rather than a software glitch. The tool is designed to detect faulty RAM with multiple algorithms, so a reported failure usually means at least one memory module is not reliably storing data. Your first goal is to confirm the error and narrow down which module or configuration is responsible.

Immediate steps

  1. Re-run the test once more. Boot from the same USB drive and let it complete at least one full pass. A single error can occasionally come from a bad boot medium or an unstable overclock, so a second run helps confirm the result.
  2. Write down the details. Note the test number, the failing address range, and whether errors cluster in one region or appear randomly. This pattern helps distinguish a failing stick from a timing or voltage problem.
  3. Reset to defaults. If you have overclocked your CPU or RAM, or enabled an extreme XMP/EXPO profile, load BIOS/UEFI defaults and test again. Instability from overclocking is a common cause of errors that disappear at stock settings.
  4. Test modules one at a time. Remove all but one stick, run the test, then repeat for each module in the same slot. This isolates a single faulty stick from a slot or compatibility issue.
  5. Swap slots. If a module fails in one slot, try it in another. If it passes elsewhere, the motherboard slot or its seating may be the problem.
  6. Re-seat and clean. Reseat the modules firmly and check for dust or bent pins. Poor contact can mimic a memory fault.

What the results usually mean

Observation Likely cause Practical next step
Errors only with overclock/XMP enabled Unstable memory profile Run at default or a lower profile; test again
One module fails in every slot Faulty module Replace it under warranty
A module fails only in one slot Motherboard slot or seating issue Try another slot; inspect the slot
Errors across multiple modules Incompatible kit, wrong voltage, or motherboard issue Check QVL compatibility; test a known-good stick
Errors appear only after long runtime Heat or marginal stability Improve cooling; re-test

When to replace rather than troubleshoot

If a module fails consistently at stock settings, in more than one slot, and with a clean re-seat, it is faulty. Contact the manufacturer for a warranty replacement. For a new build or a server going into production, do not deploy until a full pass completes with zero errors.

A useful next step

Before replacing anything, run one more complete pass with a single module at BIOS defaults. That one test separates a genuine dead stick from an overclock or seating problem, and it gives you the exact evidence a warranty claim needs.

How is Memtest86+ different from Memtest86?

Memtest86+ and Memtest86 are two separate memory testing tools that share a confusingly similar name. Memtest86+ is a free, open-source stand-alone memory tester released under GPL v2.0. According to the project's own page, it is not an edition of Memtest86, which has been closed-source "freemium" software owned by PassMark Software since 2013. So the practical difference is licensing and stewardship, not just branding.

Practical differences

Aspect Memtest86+ Memtest86
Licensing Free and open-source (GPL v2.0) Closed-source, freemium
Maintainer Community project (v6 code base originated as PCMemTest by Martin Whitaker, based on v5 by Sam Demeulemeester) PassMark Software
Cost Free Free tier plus paid editions
Audience Users who want an open, freely redistributable tester Users who want vendor-supported tooling

Both boot outside your operating system to test RAM directly, and both are aimed at the same job: diagnosing faulty memory that causes crashes, freezes, BSODs, and instability. Memtest86+ states it provides a more thorough check than BIOS memory tests, and it supports IA-32, x86-64, and LoongArch64 systems, loading via legacy BIOS, UEFI, or a Linux-protocol bootloader.

Which to choose

Pick Memtest86+ if open-source licensing matters to you, if you want to inspect or redistribute the tool, or if you simply want a no-cost tester without paid-tier prompts. Consider PassMark's Memtest86 if you specifically want commercial vendor support. For most home troubleshooting—random crashes, a new build, or a fresh overclock—either will tell you whether your RAM is faulty; the deciding factor is usually the license, not the test result.

A useful next step: before running a long test, make sure your USB drive is FAT32-formatted (for the Windows installer route) or write the ISO directly to the raw device with dd or a utility like balenaEtcher on Linux and macOS, then select the drive from your boot menu.

Should I run Memtest86+ on a new PC or after overclocking RAM?

Yes. Memtest86+ is designed for exactly these two moments: checking a brand-new machine before you trust it with real work, and validating stability after changing CPU or RAM settings. Its page explicitly frames testing as a way to "ensure initial stability" before putting a new PC or server into production, and after overclocking the CPU or RAM.

Why it's worth the time

Memory errors are a common cause of crashes, freezes and general instability. A BIOS memory test is much shallower than what Memtest86+ runs, so a machine that passes POST can still fail under load. The tool is a stand-alone, free, open-source tester for IA-32, x86-64 and LoongArch64 systems, licensed under GPL v2, and it runs directly from BIOS (legacy or UEFI) or through a Linux-protocol bootloader.

What each scenario actually needs

Scenario What you're checking Practical approach
New PC or server Whether the RAM is faulty out of the box or mismatched with the board Run at stock settings before installing your OS or data
After overclocking RAM or CPU Whether the new settings are genuinely stable, not just bootable Run a full pass; a quick pass only proves it boots
Random crashes, BSODs, freezes Whether RAM is the culprit before replacing other parts Test RAM first, since it's a common cause

Practical notes

  • Build the USB stick first. On Windows, use the provided USB installer with a FAT32 drive; on Linux, dump the ISO to the raw device with dd or a tool like balenaEtcher; on macOS the page recommends balenaEtcher.
  • Plan for downtime. A thorough test takes time, so run it when you don't need the machine — ideally before you migrate data onto a new build.
  • Test at the settings you intend to use. If you plan to run an overclock daily, that's the configuration to validate, not the stock one.

Next step

Decide based on consequence: if the machine will hold data you can't easily recreate, or will run unattended, test before it goes into service. If you only changed a fan curve or a case, skip it.

One clarification worth knowing: Memtest86+ is not an edition of Memtest86, which has been closed-source freemium software owned by PassMark since 2013. If you're following a guide, make sure it matches the tool you actually downloaded.

What are common causes and fixes for Memtest86+ booting issues?

Memtest86+ boot failures usually come from the boot medium itself, the firmware settings, or the way the image was written — not from the RAM being tested.

Common causes and fixes

  • Image written as a file instead of a raw dump. On Linux and macOS the ISO must be dumped directly to the device (e.g. with dd or balenaEtcher). Copying the ISO onto a mounted filesystem produces a USB drive that will not boot. On Windows, use the official USB installer on a FAT32-formatted drive, then pick that drive from the boot menu.
  • Secure Boot enabled. A self-built or unsigned boot stick can be rejected by UEFI firmware. Either disable Secure Boot temporarily or use a signed build where available.
  • Wrong boot mode. Memtest86+ supports both legacy BIOS and UEFI on x86, but a stick prepared for one mode may not appear in the other. Try switching between UEFI and CSM/legacy in firmware settings.
  • Boot order or fast boot. Fast Boot can skip removable devices entirely. Enter the firmware boot menu manually (often F12, F10, F8 or Esc at power-on) and select the USB entry explicitly.
  • Incompatible or very new hardware. Very recent chipsets and CPUs sometimes need a newer build than the one on the stick. A nightly or dev build is the usual workaround.
  • Faulty or marginal USB drive/port. Try another stick and a rear-panel USB 2.0 port; front-panel hubs and extension cables are frequent culprits.

A quick decision path

  1. Re-create the stick with a raw-dump tool rather than a file copy.
  2. Reboot straight into the firmware boot menu and select the USB device by name.
  3. If it still fails, toggle Secure Boot and the UEFI/legacy mode.
  4. If nothing boots, test a different USB drive and port.
  5. If the hardware is brand new, try a nightly build before assuming a hardware fault.

For reference material and the official installer links, see Memtest86+. For the raw-write utility recommended for macOS and Linux, see balenaEtcher.

One practical note: if the machine boots Memtest86+ but reports errors, that is a memory or settings problem rather than a boot problem — reseat the modules, drop memory speed or XMP/EXPO, and retest before replacing anything.

Related questions

More questions →
How to Use DDR5 Price Trends to Choose the Right Gaming RAM Kit

Pick your DDR5 kit by locking three specs first — capacity, speed, and CAS latency — then use price history to decide when to buy. For most gaming builds, 2×16 GB at 6000 MHz CL30 is the balance point: it's the most-tracked configuration on WhereIsMyRam, currently showing 131 kits in stock at a $470 average against a $595 historical average. If you want to spend less, 6000 MHz CL36 sits at $438 average (down from $547). If you're chasing low latency or high bandwidth, expect to pay $478–$526 for CL28 or 6400 MHz CL32 kits. The market is in a broad decline — 7-day drops of 0.5–5.3% and 30-day drops of 0.2–15.0% across categories — so the timing question matters as much as the spec question.

Step 1: Narrow by capacity, speed, and latency

DDR5 gaming kits are sold as matched pairs, and the spec string tells you everything: 2×16 GB · 6000 MHz · CL 30. Read it left to right.

  • Capacity (2×16 GB): 32 GB total is the current gaming standard. It covers modern titles, background apps, and streaming without forcing you into 64 GB territory.
  • Speed (MHz): Higher frequency means more data transferred per second. 6000 MHz is the mainstream target; 6400–7200 MHz is the enthusiast band; 8000 MHz exists but at a steep price and inventory risk.
  • CAS latency (CL): Lower is better at the same speed. CL30 beats CL36 at 6000 MHz. CL28 is the low-latency premium tier.

The trap is treating these as independent. A 7200 MHz CL34 kit and a 6000 MHz CL30 kit can deliver similar real-world gaming results, but the 7200 kit costs more and may be harder to stabilize. Start with the tier that matches your budget, then compare within it.

Step 2: Know which tier you're actually shopping

WhereIsMyRam groups kits into labeled tiers. Here's what each one costs right now, based on the tracker's category data:

Tier label Spec Avg price Historical avg 30-day change In stock
Best gaming balance 6000 MHz · CL30 $470 $595 2.6% 131
Affordable performance 6000 MHz · CL36 $438 $547 6.9% 101
Low latency focused 6000 MHz · CL28 $478 $712 1.8% 48
High bandwidth 6400 MHz · CL32 $480 $611 4.2% 100
Entry level 5600 MHz · CL36 $465 $610 13.1% 20
Enthusiast OC 6800 MHz · CL34 $500 $838 11.9% 10
Very high frequency 7000 MHz · CL32 $1,100 $1,100 10.0% 1
High frequency stable 7000 MHz · CL34 $650 $683 0.2% 10
Extreme enthusiast 7200 MHz · CL34 $526 $695 2.7% 31

Two things jump out. First, the "entry level" 5600 MHz CL36 kit at $465 costs more than the faster 6000 MHz CL36 at $438 — a clear sign that the entry tier is overpriced relative to its specs. Second, the 7000 MHz CL32 kit at $1,100 with a single unit in stock is an outlier, not a market signal; one seller's listing shouldn't set your expectations.

Why 6000 MHz CL30 is the default recommendation

It's the largest category by inventory (131 kits), it has the deepest discount from its historical average ($470 vs. $595), and it sits at the intersection of speed and latency where most gaming benchmarks stop showing meaningful gains. The CL28 version costs only $8 more on average and drops further from its $712 historical average — if you can find one in stock, it's arguably the better value right now. But with 48 kits vs. 131, your selection is narrower.

Step 3: Read the price trend before you buy

A price tracker's value isn't the current price — it's the direction and the comparison to history. WhereIsMyRam shows both 7-day and 30-day percentage changes plus an average price against a historical average.

How to interpret the signals:

  • Price below historical average + negative 30-day change: The market is falling. You can buy now at a good price, or wait for a further drop. The 6000 MHz CL36 tier fits here — $438 vs. $547 historical, down 6.9% over 30 days.
  • Price below historical average + flat or slightly negative 7-day change: The decline is slowing. This is often the practical buy window, because waiting risks a rebound. The 6000 MHz CL30 tier shows this pattern: 0.9% down over 7 days, 2.6% over 30 days.
  • Price near historical average + small change: No urgency either way. The 7000 MHz CL34 kit at $650 vs. $683 historical with a 0.2% 30-day change is essentially flat.
  • Steep 30-day drop (10%+): Either a genuine correction or a signal that the category is being cleared out. The 6800 MHz CL34 tier dropped 11.9% over 30 days and 3.8% over 7 — still falling, so there's no rush.

The site's headline reads "Price crash • Exceptional deals right now — act fast," with a 7-day market change of -6.1% and a 30-day change of -15.0%. That's a broad market signal, not a per-kit one. Use it as context, then check the specific tier you want.

Step 4: Check inventory and spot anomalies

Stock count is a risk indicator, not just availability.

  • High stock (100+ kits): Competitive pricing, easy returns, no pressure. The 6000 MHz CL30 and CL36 tiers and the 6400 MHz CL32 tier all sit here.
  • Medium stock (30–50 kits): Still healthy, but specific models may sell out. The CL28 and 7200 MHz CL34 tiers are here.
  • Low stock (10 or fewer): Price can be stale or inflated because there's little competition. The 6800 MHz CL34 (10 kits) and 7000 MHz CL34 (10 kits) tiers are thin.
  • Single unit (1 kit): Treat the price as noise. The 7000 MHz CL32 kit at $1,100 with 1 in stock is the clearest example — it's not a tier you can reliably shop.

Also watch for a kit priced far above its tier average. If a 6000 MHz CL30 listing is $700 while the tier average is $470, that's a seller-specific markup, not a market price.

Step 5: Time your purchase with charts and alerts

WhereIsMyRam provides price charts at whereismyram.com/us/price-chart. Use them to:

  1. Set a target price for your chosen tier — for example, $450 for a 6000 MHz CL30 kit, slightly below the current $470 average.
  2. Watch the 7-day line for a flattening trend. A steep drop means wait; a flat line after a drop means the floor is forming.
  3. Act when the price crosses your target and stock is still above 50 kits. Below that, availability risk starts to outweigh a few dollars of savings.

The tracker refreshes stock frequently (the page shows a "last stock refresh" of 5 minutes), so prices you see are current, not cached from weeks ago.

A practical decision path

  1. Set your budget. Under $450 points to 6000 MHz CL36; $450–500 opens 6000 MHz CL30, CL28, and 6400 MHz CL32; $500+ is enthusiast territory.
  2. Pick your tier from the table above, favoring high-stock categories.
  3. Check the 30-day change. If it's still falling steeply (10%+), wait a week and re-check. If it's flattening (under 3%), the price is near its floor.
  4. Compare the current average to the historical average. A gap of 15%+ below history is a strong buy signal.
  5. Confirm stock is above 50 kits before committing.

The market is currently in a downtrend across nearly every tier, which means patience is cheap — but the deepest discounts (CL36 at 6.9% below its 30-day starting point, entry-level at 13.1%) are in the tiers with the weakest specs. The best combination of spec, price, and availability right now is the 6000 MHz CL30 tier: 131 kits, $470 average, $125 below its historical average, and a slowing decline that suggests the floor is close.

What Is a Data Parsing Tool and How Do You Choose One for Your Data Format?

A data parsing tool is software that reads raw, often messy input—delimited text, log files, fixed-width records, or semi-structured documents—and converts it into structured data you can analyze, store, or feed into another program. Choosing one comes down to three questions: does it handle your specific input format, can you express your extraction rules without fighting the tool, and does its output fit where the data needs to go next? Everything below is a practical way to answer those questions before you commit to a purchase.

What "parsing" actually means in practice

Parsing is the step between having a file and having usable fields. A parser identifies boundaries (where one record ends and the next begins), extracts values (columns, key-value pairs, nested blocks), and normalizes them (dates, numbers, whitespace, encodings).

The input usually falls into one of these families:

Input type Typical example Main parsing challenge
Delimited text CSV, TSV, pipe-separated exports Quoted fields, embedded delimiters, inconsistent line endings
Fixed-width Legacy mainframe or instrument output Column positions shift between file versions
Log files Application, server, or device logs Variable message bodies, multi-line entries
Semi-structured JSON, XML, INI, HTML tables Nesting, optional fields, schema drift
Free-form / irregular Reports, PDFs converted to text No reliable delimiters; needs pattern rules

Knowing which family your data belongs to narrows the field immediately. A tool that excels at CSV may be the wrong choice for nested JSON, and a regex-heavy log parser may be overkill for clean tabular exports.

Core capabilities to look for

Configurable extraction rules

You want rules you can define, save, and re-run—not a one-time manual cleanup. Good signs: named fields, reusable rule sets, the ability to preview results against a sample before applying them to a whole batch.

Format handling breadth

Check whether the tool supports your format natively or only through workarounds. If your data is fixed-width, confirm it handles column definitions. If it's delimited, confirm it handles quoting and escaping correctly.

Output options

The parser's output should match your downstream tool. Common targets: CSV or tabular files, JSON, database inserts, or in-memory structures passed to a programming language. If you plan to post-process in Visual Basic or MATLAB, confirm the tool can emit data in a form those environments read easily—plain text, CSV, or a documented API.

Error handling and validation

Ask what happens when a record doesn't match the rules. Does the tool skip it, flag it, or fail the whole run? For production use, you want visibility into failures, not silent data loss.

Repeatability

The real test of a parsing tool is the second run: can you apply the same rules to next month's file with no manual rework? If the answer depends on the file looking identical, your rules are brittle.

Common use cases

  • Converting raw exports into analysis-ready tables. A delimited or fixed-width file becomes a clean CSV you can load into a spreadsheet or statistics package.
  • Preparing data for programming workflows. Parsed fields feed into scripts written in Visual Basic, MATLAB, Python, or similar, replacing hand-written string-splitting code.
  • Log and telemetry extraction. Pulling timestamps, IDs, and status codes out of high-volume text for monitoring or reporting.
  • Format migration. Moving data out of a legacy fixed-width system into a modern structured format.

Evaluation criteria: a practical checklist

Before buying or adopting any tool, run it against your own data—not a demo file.

  1. Format fit. Does it parse your actual file, including its quirks (odd encodings, blank lines, trailing delimiters)?
  2. Rule expressiveness. Can you describe your extraction logic clearly, or are you writing fragile patterns that break on the next sample?
  3. Integration. Does the output connect to your language or database without a conversion step you'll have to maintain?
  4. Learning curve. Estimate the time to get your first correct parse. A powerful tool you can't configure is worse than a simple one you can.
  5. Licensing and purchase terms. Understand what you're buying: per-seat, per-server, perpetual, or subscription. Check whether updates and support are included. If pricing isn't published, request a quote and ask specifically about deployment limits and renewal terms.
  6. Support and documentation. For a tool you'll depend on, documentation quality and vendor responsiveness matter as much as features.

A quick test protocol

Take three real samples: a typical file, an edge case, and a file from a different time period. Parse all three with the same rules. If the tool handles the edge case and the older file without rule changes, it's a strong candidate. If it needs a new rule per file, keep looking.

Common pitfalls

  • Brittle rules for irregular data. Rules tuned to one sample often fail on the next. Prefer rules based on stable structure (field order, key names) over incidental formatting.
  • Skipping real-sample testing. Demo data is clean by design. Always test with your messiest production file.
  • Ignoring encoding. Character encoding mismatches silently corrupt text. Verify the tool handles your file's encoding.
  • Overlooking the output stage. A parser that produces data your next tool can't read just moves the problem.
  • Underestimating maintenance. Every parsing rule is code you'll maintain. Fewer, more general rules age better than many specific ones.

How to decide

If your data is clean and tabular, a lightweight delimited-text parser is enough. If it's fixed-width or log-based, prioritize configurable column or pattern rules and clear error reporting. If you'll post-process in a programming environment, weight integration and output format heavily. And whatever you choose, validate it against your own files and confirm the licensing terms in writing before purchase—especially if the vendor doesn't publish pricing.

The right parsing tool isn't the most feature-rich one; it's the one that turns your specific raw files into structured data reliably, repeatably, and with the least ongoing effort.

How to Pick the Best DDR5 RAM Kit for Gaming Without Overpaying

For most gaming builds, the best value sits at 2×16 GB, 6000 MHz, CL30 — it's the configuration where DDR5's price-to-frames ratio peaks. Buy above that only if you have a specific reason (heavy overclocking, a platform that rewards higher bandwidth, or a deal that makes the upgrade nearly free). The rest of this guide walks through the trade-offs and how to time your purchase using live price data.

Why 6000 MHz CL30 Is the Gaming Sweet Spot

DDR5 performance for gaming comes down to two numbers working against each other:

  • Frequency (MHz) — how many cycles per second. Higher is better, but returns diminish fast.
  • CAS Latency (CL) — how many cycles the memory waits before responding. Lower is better, but a higher frequency with the same CL can still be faster in real terms.

The rough rule: a kit's effective responsiveness scales with frequency divided by CL. That's why 6000 MHz CL30 and 6400 MHz CL32 land in a similar performance band, while a 5600 MHz CL36 kit is meaningfully slower for gaming.

At 6000 MHz CL30, current tracker data shows:

Kit In stock 7-day change 30-day change Avg. price
2×16 GB · 6000 MHz · CL30 ("best gaming balance") 131 +0.9% +2.6% $470
2×16 GB · 6000 MHz · CL36 ("affordable performance") 101 +1.1% +6.9% $438
2×16 GB · 6000 MHz · CL28 ("low latency focused") 48 +0.5% +1.8% $478

The CL30 kit costs about $32 more than the CL36 kit but delivers lower latency — a reasonable premium. The CL28 kit adds only ~$8 over CL30, so if it's in stock, it's arguably the better buy of the three.

Matching the Kit to Your Use Case

Mainstream gaming (1080p / 1440p)

Go with 2×16 GB, 6000 MHz, CL30. It's the most widely validated configuration, has the deepest stock (131 units in the data above), and won't bottleneck a mid-to-high-end GPU.

Budget-conscious builds

6000 MHz CL36 at $438 average saves you roughly $30–40 with a small latency penalty. The 30-day trend (+6.9%) suggests this tier has been climbing, so it's less of a bargain than it was a month ago.

High-refresh / competitive gaming

6400 MHz CL32 ($480 avg.) or 6800 MHz CL34 ($500 avg.) can help in CPU-bound scenarios. Note the 6800 MHz kit has only 10 units in stock and a 30-day change of +11.9% — availability is thin and prices are rising.

Enthusiast overclocking

7200 MHz CL34 ($526 avg., 31 in stock) is the practical ceiling before prices jump. Beyond this, you're paying for headroom most games won't use.

Where Extreme Kits Stop Making Sense

Look at the top of the frequency ladder:

Kit In stock 7-day 30-day Avg. price
7000 MHz · CL32 1 0.0% +10.0% $1,100
7000 MHz · CL34 10 +2.3% +0.2% $650
7200 MHz · CL34 31 +1.1% +2.7% $526

The 7000 MHz CL32 kit at $1,100 costs more than double the 7200 MHz CL34 kit ($526) while offering lower frequency and only marginally better latency. With a single unit in stock, it's a collector's item, not a gaming purchase. The 7000 MHz CL34 at $650 is also poor value next to the 7200 MHz option.

Rule of thumb: once you pass ~$550 for a 2×16 GB kit, you're paying for binning and brand prestige, not frames.

Using Price History to Time Your Buy

The tracker's headline signals matter more than any single listing:

  • 7-day: −6.1% and 30-day: −15.0% across the market, with a "price crash" flag and 1,856 references tracked.
  • Stock refresh every ~5 minutes, so the numbers you see are current.

A 15% monthly decline means waiting has been paying off — but a crash flag also means deals are live now. The practical approach:

  1. Check the 30-day trend for your target kit. If it's still falling (like the 5600 MHz CL36 at −13.1%), wait a bit longer.
  2. Check the 7-day trend. If it's flattening or turning positive (like the 6000 MHz CL36 at +1.1% / +6.9%), the bottom may be near — buy.
  3. Check stock. A kit with 1–10 units (7000 MHz CL32, 6800 MHz CL34) can sell out or spike; a kit with 100+ units gives you room to wait.

How to Filter and Compare on the Tracker

On whereismyram.com, the workflow is:

  1. Open the Price charts page (/us/price-chart) for the United States market view.
  2. Use the DDR5 Categories list to filter by configuration — the presets are organized by capacity, frequency, and CL (e.g., "2×16 Gb · 6000 MHz · CL 30").
  3. Apply the Advanced filter to narrow by your target frequency and latency range.
  4. Compare the avg. price, 7d/30d change, and in-stock count side by side before deciding.

The category labels (like "Best gaming balance" or "Enthusiast overclocking tier") give a quick read on positioning, but always verify against the raw numbers — a "low latency focused" label doesn't guarantee the best price-per-frame.

Quick Decision Checklist

  • Default pick: 2×16 GB, 6000 MHz, CL30 — best balance of price, stock, and gaming performance.
  • Save ~$30: 6000 MHz CL36, accepting slightly higher latency.
  • Step up if cheap: 6000 MHz CL28 (only ~$8 over CL30) or 6400 MHz CL32.
  • Avoid: 7000 MHz CL32 at $1,100, and any kit above ~$550 unless you have a specific overclocking goal.
  • Timing: buy when the 7-day trend flattens after a 30-day decline; wait while both are still falling.
  • Verify: check stock count and last refresh before committing — thin stock means volatile pricing.
What Are Open-Source UI Element Libraries and How Do They Differ From UI Frameworks?

An open-source UI element library is a collection of individual, ready-made interface pieces—buttons, cards, inputs, toggles, loaders—that you copy into your own project and adapt. A UI framework, by contrast, is a structured system of components, conventions, and often a theming layer that governs how your whole interface is built. The practical difference: an element library gives you a snippet; a framework gives you a way of working. If you need a polished button in ten minutes, reach for the element library. If you're building a 40-screen product with a team, you probably want the framework.

What "open-source UI element library" actually means

The term gets used loosely, so it helps to separate the parts:

  • Open-source: the code is publicly available, and the license tells you what you may do with it—copy, modify, redistribute, or use commercially.
  • UI element: a single, self-contained piece of interface, usually small enough to read in one sitting. A button with hover states, a pricing card, a search field.
  • Library: a browsable, searchable collection of those elements, typically contributed by many different people.

On a site like Uiverse, elements are shared by a community and written in plain CSS or Tailwind. You find one you like, copy the markup and styles, paste them into your project, and adjust colors, spacing, and text to fit. There's no package to install and no build step required—which is exactly the appeal, and also the source of most of the confusion.

Element library vs. UI framework: the core differences

Dimension Open-source UI element library UI framework / design system
Unit of reuse A single snippet you copy A component you import or call
Installation None; paste into your code Package install, config, sometimes a provider
Consistency Depends on you; each element may look different Enforced by shared tokens and APIs
Theming Manual edits per element Central theme/config file
Updates You own the copy; no upstream updates Version bumps bring fixes and changes
Accessibility Varies per contributor; must be checked Usually tested and documented
Best for Prototypes, landing pages, small sites, one-off needs Multi-page apps, teams, long-lived products
Learning curve Low—read the CSS Higher—learn the API and conventions

The table isn't a verdict. It's a map of trade-offs. Element libraries win on speed and freedom; frameworks win on consistency and maintenance.

Licensing and attribution: what to check before you paste

This is where people get into trouble, and it's worth slowing down for.

  1. Find the license. Every element or collection should state one. Common open-source licenses include MIT, Apache-2.0, and BSD. Some projects use copyleft licenses like GPL, which can impose obligations if you redistribute your code.
  2. Understand what the license permits. MIT and Apache-2.0 are permissive: you can typically use the code in commercial and closed-source projects. Copyleft licenses may require you to release derivative source under the same terms.
  3. Check attribution requirements. Permissive licenses usually require you to keep the copyright notice and license text somewhere in your project. That's a real obligation, not a formality.
  4. Look for per-element terms. On community sites, the site's overall terms and the individual contributor's stated wishes may differ. If a contributor asks for credit, honor it.
  5. When in doubt, ask or avoid. If a snippet has no license at all, you don't have clear permission to reuse it. Treat "no license" as "not open source," even if the code is publicly visible.

This article is general information, not legal advice. For commercial products with real exposure, have someone qualified review the licenses you're relying on.

How to use a community element in your project: a practical workflow

Here's a repeatable process that avoids most of the usual mess.

1. Start from a real need, not a browsing session

Decide what you need first—"a compact primary button with a loading state"—then search. Browsing aimlessly produces a pile of pretty snippets that don't fit together.

2. Copy the smallest version that works

Take the markup and the styles. Strip anything you don't need: demo wrappers, extra animations, decorative layers. Less code means fewer surprises.

3. Convert it to your conventions

If your project uses design tokens or CSS variables, replace hard-coded values:

/* Before: hard-coded */
.button { background: #4f46e5; border-radius: 8px; }

/* After: token-based */
.button { background: var(--color-primary); border-radius: var(--radius-md); }

This one step is what keeps a copied element from looking like a foreign object in your UI.

4. Check accessibility before you ship

Community elements vary widely here. Verify at minimum:

  • Keyboard focus is visible and the element is reachable by Tab.
  • Color contrast meets WCAG AA (4.5:1 for normal text).
  • Interactive elements use semantic HTML (<button>, not a clickable <div>).
  • Form inputs have associated labels.
  • Motion respects prefers-reduced-motion.

5. Test in context

Paste it into a real page with real content. Long labels, small screens, and dark mode break more copied elements than anything else.

6. Note where it came from

Keep a short comment or an internal credits file: source, license, date. Future you—and your legal reviewer—will be grateful.

Where element libraries genuinely shine

  • Prototypes and demos: you need something clickable today, not a design system.
  • Landing pages and marketing sites: a handful of distinctive elements, each custom.
  • Filling gaps: your framework lacks one specific component, and you don't want to build it from scratch.
  • Learning: reading well-made CSS is one of the fastest ways to improve.
  • Small projects: a personal site doesn't need a theming architecture.

Where they fall short

  • Consistency at scale: ten elements from ten contributors rarely look like one product.
  • Maintenance: you own every copy. When your design changes, you edit each one.
  • Accessibility debt: you inherit whatever the contributor did or didn't do.
  • No upstream fixes: a bug fixed in the original won't reach your copy.
  • Integration friction: different naming conventions, different units, different assumptions about resets.

When to choose which

Choose an element library when the scope is small, the timeline is short, or you need a few distinctive pieces rather than a whole system.

Choose a framework or design system when multiple people build multiple screens over months, when consistency is a product requirement, or when accessibility and theming need to be guaranteed rather than checked.

A hybrid works well for many teams: adopt a framework for the structural components—forms, navigation, layout—and borrow individual elements for the places where you want personality. Just route every borrowed element through the same token and accessibility checks, so it lands as part of your system rather than beside it.

The short version: open-source UI element libraries are a fast, flexible way to get good-looking interface pieces into a project. They are not a substitute for a design system, and the license and accessibility details are the part worth reading carefully.

What Is a Bug in Software and How Do You Track It?

A software bug is any flaw, error, or unintended behavior in a program that causes it to produce a wrong or unexpected result. Bugs get reported, recorded, prioritized, fixed, and verified — and a bug tracker like MantisBT is the system that holds that process together. If you need to understand what a bug actually is and how a team moves one from "something's broken" to "fixed and confirmed," this covers the definition, the lifecycle, and the practical steps.

What counts as a bug

A bug is not only a crash. It is any gap between what the software is supposed to do and what it actually does. Common categories:

  • Functional errors — a button does nothing, a total calculates wrong, a form saves the wrong value.
  • Crashes and hangs — the program stops responding or exits unexpectedly.
  • Performance problems — a page that should load instantly takes 30 seconds.
  • Usability and display issues — text overlaps, a label is misleading, a layout breaks on mobile.
  • Security and data issues — unauthorized access, data loss, or corruption.

Common causes include coding mistakes, unclear or changing requirements, integration problems between components, and environment differences (the developer's machine behaves differently from the user's).

The bug lifecycle: from report to resolution

Most trackers, including MantisBT, follow a similar path. A typical sequence:

  1. Reported — someone (tester, developer, or client) files the issue with details.
  2. Acknowledged / assigned — a maintainer reviews it and assigns it to a person or team.
  3. In progress — the assignee works on a fix.
  4. Resolved — a fix is submitted; the issue is marked resolved.
  5. Verified / closed — the reporter or a tester confirms the fix works, then closes it.
  6. Reopened — if the fix doesn't hold, the issue goes back into the cycle.

Not every bug follows every step in order, and teams often add states like "feedback" or "won't fix." The point of the lifecycle is that every bug has a visible status, so nobody has to guess whether it's been handled.

How a bug tracker captures a bug

A bug tracker is the shared record of every issue, its status, and who owns it. MantisBT is an open source, web-based issue tracker built on PHP that supports MySQL, MS SQL, and PostgreSQL databases, and runs on Linux, Windows, and macOS servers. It describes itself as balancing simplicity and power — users can get started in minutes and begin managing projects while collaborating with teammates and clients.

When a bug is filed in a tracker like MantisBT, the record typically holds:

  • A summary and description of the problem
  • Steps to reproduce and the expected vs. actual result
  • Severity and priority so the team knows what to fix first
  • Assignee, status, and project so ownership is clear
  • Comments and history as the issue moves through its lifecycle

That structure is what turns a vague complaint into something a developer can act on.

Keeping the team informed: notifications and access control

Two features matter most once more than one person is involved.

Email notifications keep the team and clients updated on issue updates, resolutions, or comments — so people don't have to poll the tracker to know what changed.

Access control lets you set per-project, role-based permissions, so different users see and do different things. That matters when clients, contractors, and internal staff all touch the same project.

MantisBT also emphasizes customizability — you can adjust issue fields, notifications, and workflow to match how your team actually works rather than forcing a fixed process.

How to report a clear, actionable bug

A good report saves everyone a round of back-and-forth. Before filing, gather:

  1. What you did — the exact steps, in order, that led to the problem.
  2. What you expected — the correct behavior.
  3. What actually happened — the wrong behavior, including any error message.
  4. Where and when — the version, environment, browser or device, and whether it happens every time.
  5. Evidence — a screenshot, log excerpt, or short recording if it helps.

Then file it in the tracker with a specific summary (not "it's broken" but "Save button returns 500 error on the profile page"). Assign a severity, and let the lifecycle take over.

Choosing whether a tracker fits

If your team is small and informal, a shared spreadsheet can work for a while. Once you have multiple projects, external clients, or more than a couple of contributors, a dedicated tracker earns its place: it centralizes status, automates notifications, and enforces access rules.

MantisBT is a reasonable fit if you want an open source, self-hosted option under the GPL, need role-based access control per project, and value customizable fields and workflows. It's worth evaluating against your own requirements — the project offers a demo and downloads so you can try it before committing. If you'd rather not run your own server, hosting options are also listed among its resources.

Website Overview

An established domain and managed infrastructure suggest continuity of operations and may support dependable delivery, although neither guarantees service quality.

Domain and Registration

Registered in 2003, this domain has about 22 years of history. That suggests continuity, although ownership and purpose may have changed. Transfer-protection status is present, helping reduce the risk of unauthorized domain transfers. The domain uses the common .org extension, which is not an independent safety signal.

DNS and Email

Nameservers are provided by ovh.net, indicating managed DNS hosting. MX records point to the x86.fr email service. DNSSEC is enabled, allowing validating resolvers to authenticate signed DNS data. No CNAME was found; the observed records resolve directly to addresses. SPF and DMARC are configured. DKIM status is unknown.

TLS and Certificates

The certificate uses an RSA 2048-bit public key, offering broad client compatibility. The server supplied a complete certificate chain. No organization name is present in the certificate; the available fields are consistent with domain validation. The certificate was issued by Let's Encrypt, commonly associated with automated certificate services. The certificate's total validity is about 89 days, consistent with a short renewal cycle.

HTTP and Browser Security

The checked browser-security headers were not detected, leaving fewer explicit browser-side safeguards. No X-Powered-By header was found, reducing one common source of backend fingerprinting information. No obvious internal addresses or debug information were found in the headers. The Server header identifies Apache without an exact version. No explicit CDN or WAF marker was found in the response headers.

Technology Stack Analysis

The public page identifies Bootstrap, Google Analytics, Apache without precise versions, leaving fewer clues for version-specific scanning.

Search and Social Sharing

No homepage canonical URL was detected. If duplicate URLs exist, consolidation may be less explicit. Twitter Card metadata is configured. The title has 48 characters, within a common display range. A meta description is present, with 144 characters. The observed directives allow indexing and link following.

Hosting and Email

DNSovh.net
HostingScaleway SAS
Emailx86.fr
Location France flagParis, Paris Department, France 212.129.20.209

User reviews (0)

  • No reviews yet.

Pages, Search and Sharing

Meta descriptionMemtest86+ is an advanced, free, open-source, stand-alone memory tester for 32- and 64-bits architecture computers. Compatible with BIOS & UEFI.
Canonical URLNot detected
LanguageEnglish (default)
Twitter Cardsummary

No robots.txt found

No sitemaps found

Registration details RDAP / WHOIS

RegistrarOVH sas
Registered2003-12-21
Expires2026-12-21
Domain statusclient delete prohibited、client transfer prohibited
Nameserversdns13.ovh.net、ns13.ovh.net
DNSSECsigned

DNS records

TypeNameValueTTLPriority
Amemtest.org212.129.20.2093600—
MXmemtest.orgmail.x86.fr36001
NSmemtest.orgdns13.ovh.net3600—
NSmemtest.orgns13.ovh.net3600—
TXTmemtest.org1|www.memtest.org600—
TXTmemtest.orgv=spf1 mx ~all600—
DSmemtest.org38150 8 2 7f9e153441c4a089c7ea2e1ea9d554ae9397261dcd0a3b19ef4065a2659a0bd63600—
DMARC_dmarc.memtest.orgv=DMARC1;p=none;pct=100;rua=mailto:[email protected];3600—

TLS and certificates

AssessmentNormal configuration
Supported protocolsTLSv1.2、TLSv1.3
Negotiated protocolTLSv1.3
Certificate subjectmemtest.org
IssuerLet's Encrypt
Valid until2026-11-15T00:32 · Remaining when checked: 43 days
Verification detailsCertificate trust: Passed · Hostname match: Passed

HTTP response headers

HeaderValue
content-typetext/html; charset=UTF-8
serverApache

Identified technologies

BootstrapGoogle AnalyticsApache