
 简体中文
简体中文
screen.studio
Screen recorder for macOS. Create engaging product demos, courses, tutorial and social media videos. Add automatic zoom on mouse actions, smooth mouse movement, and other powerful effects and animations. Designed for macOS.
More topics (29)
At a glance
- Category
- Social & Community
- Language
- English
- Paid-content signal
- No paid content foundObserved
- Registered
- 2022
- Hosting
- VercelInferred
- HTTPS certificate trusted
- PassedObserved
- Last updated
Related questions
More questions →Which Mac screen recorder should you use for demos, tutorials, and social clips?
Pick the recorder based on what you publish, not on the longest feature list. If your output is a polished product demo, course lesson, or social clip where the viewer must always see what you're pointing at, a recorder that handles zoom, motion, and framing for you (like Screen Studio) removes most of the editing work. If you mainly need to send a quick link to a teammate, a lightweight share tool is faster. The deciding factors are: does it zoom and follow the cursor automatically, how does it frame your webcam, what macOS it needs, and how the finished file gets out.
Match the tool to the output first
The same recording can end up as a 40-second vertical clip or a 12-minute tutorial, and those two jobs stress different features.
| Output | What matters most | What you can ignore |
|---|---|---|
| Product demo | Automatic zoom on clicks, cursor never hidden by webcam, sharp text when zoomed | Long-form chaptering |
| Course / tutorial | Clear readability at every zoom level, stable motion, easy re-edits | Vertical export |
| Social clip (TikTok, Reels, Shorts) | Fast turnaround, framing that survives a crop, motion that looks filmed | Deep timeline control |
Screen Studio's page frames its audience exactly this way: "Thousands of people use Screen Studio for product demos, courses, tutorials, and social posts," and its own tagline is "Record once. Post everywhere." That's a signal it's built for the multi-output workflow rather than single-purpose capture.
Automatic zoom and cursor-following: built in or manual?
This is the feature that separates an editor-style recorder from a plain capture tool, and it's where most of your post-recording time goes.
Screen Studio describes two behaviors worth checking against any alternative:
- Automatic zoom — "Screen Studio looks at what you did while recording, like where you clicked, and zooms in on the moments that matter." You don't mark the zoom points yourself.
- Manual zoom — "Want to show one specific part of the screen? Add a zoom and point it right there." So you can override when the automatic choice is wrong.
It also offers two zoom styles (Classic and Loupe), and states "Every animation is created automatically. Adding a zoom is as easy as dropping it on the timeline." If a tool requires you to keyframe every zoom by hand, budget that time before you commit.
A related detail that affects demos specifically: "Zooms are balanced so your webcam never covers the cursor." If you record with a webcam bubble, check whether the tool repositions it as the zoom moves — otherwise your cursor disappears behind your own face at the exact moment you're explaining something.
Readability when you zoom in
Zooming in is only useful if the text stays legible. Screen Studio addresses this with post-processing and a real-time upscaler: "6.5× upscale — Our own real-time upscaler. Trained on over 5,000 macOS screenshots and SwiftUI apps we generated, it runs entirely on your Mac." Two things to note: the upscaling runs locally (not uploaded), and the claim is specific to screen content, which is the hard case — UI text and thin fonts degrade faster than photos.
When comparing tools, test this directly: record a dense app screen, zoom to your maximum, and read the smallest label. That single test tells you more than a spec sheet.
Camera, screen, or both
Screen Studio supports "Your camera, your screen, or both," so you can record a talking-head intro, a pure screen capture, or a picture-in-picture layout. Decide before you download whether you need:
- Webcam-only for intros and course modules
- Screen-only for silent demos
- Both, with the webcam framed so it doesn't fight the content
Check macOS requirements before downloading
Screen Studio's page states macOS 13.1 or later recommended. Confirm your Mac meets that before you plan around it — an older machine may still run it, but the recommendation is the supported baseline. The page also offers an "Email me a link" option: "Get a link you can open once back on your Mac," which is useful if you're reading about it on a phone or a non-Mac and want to continue on the machine you'll actually record on.
Motion quality: "filmed, not captured"
One of Screen Studio's section headings is "Movement that feels filmed, not captured," and it lists "smooth mouse movement" as a feature. This matters for demos because raw cursor motion is jittery and distracting. If smooth motion is something you'd otherwise fix in a separate editor, confirm whether a candidate tool does it during or after capture.
How to decide
- Write down your primary output (demo, tutorial, or social clip) and how often you publish.
- Test the zoom workflow. Record a two-minute task with clicks, then check whether zooms appear automatically and whether you can adjust them.
- Test readability at max zoom on a text-heavy screen.
- Check the webcam/cursor overlap if you record with a camera bubble.
- Verify macOS version against the 13.1-or-later recommendation.
- Confirm the export path fits where you publish — the page's "Record once. Post everywhere" positioning implies multiple destinations, so check the formats you actually need.
If steps 2–4 come back clean, an editor-style recorder like Screen Studio is the better fit for polished demos and tutorials. If you only ever need a fast share link and never zoom, a simpler capture tool will get you there with less overhead.
Screen Studio is used by people at Stripe, Notion, GitHub, Shopify, Framer, Supabase, and others, according to its page — useful as a signal that it fits professional demo workflows, but not a substitute for testing it against your own screen content.
How to Create Video Tutorials on a Mac With a Screen Recorder
To create a video tutorial on a Mac, you record your screen while narrating the steps, then use the recorder's editing tools to zoom into key moments, frame your webcam, and export a finished clip. Screen Studio is built for this workflow on macOS 13.1 or later: it handles automatic zoom, smooth mouse movement, smart framing, and upscaling so a tutorial comes out polished without frame-by-frame editing. The steps below apply whether you're recording a product demo, a course lesson, or a social clip.
Before you record: set up the screen and the plan
Most messy tutorials are decided before recording starts. Fix these first:
- Clean the desktop. Close unrelated tabs, hide personal files, and turn off notifications so nothing private or distracting appears in frame.
- Set resolution and scaling. Record at the resolution you'll publish at. If you plan to zoom in close, a higher-resolution capture gives the upscaler more to work with.
- Check your microphone. Record a 10-second test and play it back. Audio problems are the most common reason a tutorial has to be re-recorded.
- Write the step order. List the exact actions you'll demonstrate. A tutorial that follows a fixed sequence needs fewer edits and fewer retakes.
Record the demonstration
While recording, the goal is footage that reads clearly at normal speed.
- Slow the mouse down. Move deliberately between targets rather than darting. Screen Studio's smooth mouse movement is designed to make captured motion feel filmed rather than jittery, but slow input still produces the cleanest result.
- Pause on each click. A short beat after a click gives the viewer time to follow and gives automatic zoom a clear moment to target.
- Narrate as you go. Explain what you're doing and why, not just what you're clicking. This is what separates a tutorial from a silent screen capture.
- Record in one pass if you can. Screen Studio's automatic zoom looks at what you did while recording — such as where you clicked — and zooms into the moments that matter, so a continuous take gives it more context than a heavily chopped one.
Make the important parts readable
The core problem in a tutorial is that viewers can't see what you're pointing at. Screen Studio addresses this with two zoom types and automatic animation.
| Tool | What it does | When to use it |
|---|---|---|
| Automatic zoom | Detects where you clicked and zooms into those moments | Most of the tutorial, so you don't hand-place every zoom |
| Manual zoom | You add a zoom and point it at a specific area | One section that needs a precise close-up |
| Classic zoom | A standard animated zoom | General emphasis |
| Loupe zoom | A magnified circular view | Small UI details, like a single button or field |
| 6.5× upscale | Real-time upscaler trained on macOS screenshots and SwiftUI apps, running on your Mac | Keeping text sharp when you zoom in close |
Adding a zoom is as simple as dropping it on the timeline — every animation is created automatically, so you're choosing where to zoom, not keyframing how. Smart framing also balances zooms so your webcam never covers the cursor.
Add camera, cursor, and motion polish
- Camera, screen, or both. You can record your webcam, your screen, or both together, depending on whether the tutorial benefits from a face on screen.
- Let the motion feel natural. Smooth mouse movement and automatic animation are what make the result look filmed rather than captured.
- Keep the frame balanced. If you're using a webcam overlay, check that it doesn't sit on top of the area you're demonstrating.
Export and check before publishing
Screen Studio's framing is designed so you can record once and post everywhere — the same recording can be reframed for YouTube, a course platform, or a social clip. Before you publish:
- Watch the full export end to end. Confirm the zoom lands on the right element at the right time.
- Check audio-video sync. Drift is easiest to catch in a section with rapid clicking and talking.
- Confirm text legibility. Pause on the closest zoom and make sure the smallest text is still readable.
- Match the aspect ratio to the destination. A tutorial for a course platform and a clip for social media may need different framing.
Common snags
- Zoom lands on the wrong spot. This usually traces back to unclear clicks during recording — a deliberate pause on the target gives automatic zoom a better anchor.
- Text is blurry when zoomed. Capture at a higher resolution so the upscaler has more source detail.
- Webcam covers the action. Reposition the camera overlay or rely on smart framing to keep the cursor visible.
- Audio sounds off. Re-test the microphone before a full re-record rather than trying to fix it in post.
Screen Studio is a macOS screen recorder for product demos, courses, tutorials, and social posts, and it's used by people at companies including Stripe, Notion, GitHub, Shopify, and Framer. If your goal is a tutorial that looks finished without a manual editing pass, that automatic-zoom-and-framing workflow is the part worth evaluating first.
How to Create Product Demos With a Mac Screen Recorder
You can record a polished product demo on a Mac by planning the moments worth zooming into, capturing screen and webcam together, and letting automatic zoom follow your clicks. Screen Studio is built for this workflow on macOS 13.1 or later: it handles zooms, motion, sound, and framing so a single recording comes out ready to post. The steps below apply to any demo where you want viewers to read UI text and follow your cursor without manual keyframing.
1. Plan the demo flow before you hit record
Decide which parts of the product deserve a closer look. Automatic zoom in Screen Studio reacts to what you did while recording — for example where you clicked — so the cleaner your click path, the better the automatic zooms land.
- List the 3–5 moments that carry the demo (signup, core action, result).
- Note which UI areas are too small to read at full-screen scale; those become zoom targets.
- Keep the cursor path deliberate: move to the element, click, pause, then move on.
2. Record screen and webcam together
Screen Studio supports your camera, your screen, or both in one take. Recording both means you can show your face while the product does the work, and smart framing keeps the webcam from covering the cursor when zooms kick in.
- Start the recording, then perform the flow you planned.
- Click the elements you want the automatic zoom to catch.
- Speak through each step as if narrating to a first-time user.
3. Let automatic zoom do the first pass
After recording, Screen Studio animates every zoom and lays out the frame for you. Zooms are balanced and animated automatically, so you are not hand-tuning easing curves.
- Automatic zoom — based on your recorded actions, such as clicks, it zooms into the moments that matter.
- Manual zoom — when you want one specific part of the screen, drop a zoom on the timeline and point it there.
- Adding a zoom is as easy as dropping it on the timeline.
4. Choose a zoom style and fix readability
Screen Studio offers two zoom types, and both are animated for you:
| Zoom type | Use it when |
|---|---|
| Classic zoom | You want a clean, conventional push-in on a UI area |
| Loupe zoom | You want a magnified detail view of a small element |
For text that still looks soft when zoomed in, Screen Studio applies post-processing and upscaling built for screen recordings. Its 6.5× upscaler was trained on over 5,000 macOS screenshots and SwiftUI apps, and it runs entirely on your Mac — so small labels stay sharp even at close zoom.
5. Smooth the motion so it feels filmed, not captured
Raw screen captures look mechanical because the cursor jumps. Screen Studio adds smooth mouse movement so the pointer glides between targets, which reads as intentional rather than twitchy. Combined with balanced zooms and smart framing, the result is movement that feels filmed rather than captured.
6. Export one recording into multiple cuts
Record once, post everywhere. The same demo recording can be trimmed into:
- A longer tutorial or course segment that walks through every step.
- A short social clip for TikTok, YouTube, or Instagram that leads with the payoff moment.
- A product demo cut that opens on the core action and ends on the result.
Because zooms, framing, and motion are already applied, you are re-cutting rather than re-recording.
Common snags
- Automatic zoom misses a moment. Add a manual zoom on the timeline and point it at the area instead.
- Webcam hides the cursor. Smart framing balances zooms so your camera never covers the pointer — check the framing after the first pass.
- Text is blurry at high zoom. Rely on the built-in upscaling rather than zooming past what the source resolution supports.
- Demo drags. Cut the setup and lead with the moment viewers came to see.
What you need
- A Mac running macOS 13.1 or later (recommended).
- Screen Studio installed; if you are on a different machine, the site offers to email you a link you can open once back on your Mac.
- A planned click path and, optionally, a webcam.
Screen Studio is used by people at Stripe, Notion, GitHub, Shopify, Framer, and others for product demos, courses, tutorials, and social posts — a signal that the automatic-zoom workflow holds up for demo-style content specifically.
What Is Automatic Zoom in a Screen Recorder and How Does It Work?
Automatic zoom is a feature that watches what you did during a screen recording — where you clicked, where the cursor moved — and generates zoom animations on those moments for you, instead of you placing every zoom by hand. On macOS, Screen Studio is a screen recorder built around this: it animates each zoom and lays out the frame automatically, so you pick the parts worth a closer look and the tool handles the motion. It suits product demos, courses, tutorials, and social clips where the viewer needs to read small UI text. It is not a substitute for deciding what matters — you still choose the moments.
How automatic zoom decides where to zoom
The mechanism is behavioral, not content-based. Screen Studio looks at what you did while recording — for example, where you clicked — and zooms in on the moments that matter. That means the trigger is your input, not a scene analysis of the pixels.
In practice this produces a predictable pattern:
- Clicks become zoom targets. A click is a strong signal that something on screen changed or needs attention.
- Cursor activity defines the region. The zoom centers on where the action happened, not on the whole display.
- The animation is generated, not drawn. Screen Studio states that every animation is created automatically, and that adding a zoom manually is as easy as dropping it on the timeline.
The practical consequence: if you record a demo where the important step is a menu you read rather than click, automatic zoom may not flag it. You would add that zoom yourself.
Automatic vs. manual zoom: when each is better
Screen Studio offers both, and they are not competing features — they cover different moments.
| Automatic zoom | Manual zoom | |
|---|---|---|
| Trigger | Your recorded actions, such as clicks | You add a zoom and point it at a specific part of the screen |
| Best for | Demos and tutorials with many small interactions | One specific region you want to highlight |
| Effort | None after recording | One placement on the timeline |
| Risk | May miss moments that aren't click-driven | You have to notice the moment yourself |
A reasonable workflow: record normally, let automatic zoom handle the interaction-heavy stretches, then add manual zooms for the one or two places where the point is visual rather than clickable.
Why smart framing matters more than the zoom itself
A zoom that lands on the right spot can still look wrong if the frame is unbalanced. Screen Studio addresses this with smart framing: zooms are balanced so your webcam never covers the cursor.
That detail matters because the failure mode is common. When a webcam overlay sits in a corner and a zoom pushes the cursor toward that corner, the cursor disappears behind your face — and the viewer loses the thread of the demo. Balanced framing keeps both visible.
Screen Studio also offers two zoom styles, Classic zoom and Loupe zoom, so the look of the zoom is a choice rather than a fixed behavior.
Keeping zoomed-in content sharp
Zooming into a screen recording magnifies whatever compression and pixel softness is already there. Screen Studio handles this with post-processing and upscaling built for screen recordings, and with a 6.5× upscale — described as its own real-time upscaler, trained on over 5,000 macOS screenshots and SwiftUI apps, running entirely on your Mac.
The claim to test is simple: zoom in close on small text and check whether it stays readable. That is the difference between a zoom that clarifies and one that just makes blur bigger.
What to verify before you publish
Run through these on the exported file, not just the timeline preview:
- Zoom timing — does each zoom land before the viewer needs it, or after they've already squinted?
- Clarity at maximum zoom — pause on the tightest zoom and read the smallest text.
- Cursor visibility — check every zoom where the cursor moves toward the webcam overlay.
- Coverage — did automatic zoom catch the moments you cared about, or do you need to add manual zooms?
Requirements and availability
Screen Studio is a screen recorder for macOS, with macOS 13.1 or later recommended. It is used for product demos, courses, tutorials, and social posts. The site references subscription and pricing but does not list figures on the page, so check current pricing directly before deciding. If you're on a Mac and your recordings involve a lot of small on-screen interactions, automatic zoom removes the most tedious part of editing; if your content is mostly full-screen talking-head or large-UI footage, the benefit is smaller.
Best Screen Recorder for Mac: Which One Fits Demos, Tutorials, and Social Clips
The best Mac screen recorder depends on what you're making. If your priority is polished product demos, tutorials, and social clips with automatic zoom, smooth mouse movement, and smart framing, Screen Studio is built specifically for that. If you need simple, fast screen sharing with minimal editing, a lighter tool may be enough. This guide compares the key dimensions so you can match a recorder to your workflow.
What actually separates Mac screen recorders
Most Mac recorders capture your screen. The differences show up in what happens after the recording stops — how much manual editing you need to make the result look intentional.
The dimensions that matter most:
- Automatic zoom — does the tool detect where you clicked and zoom in on its own, or do you place every zoom manually?
- Motion smoothing — are mouse movements and cursor paths cleaned up, or do they look raw?
- Framing — does the tool handle layout (camera position, cursor visibility) for you, or do you arrange it yourself?
- Post-processing — upscaling, sharpening, and clarity when you zoom in close.
- Editing model — timeline-based zoom placement vs. fully automatic.
- macOS compatibility — which macOS versions are supported.
Screen Studio: automatic zoom, motion, and framing
Screen Studio is a macOS screen recorder positioned around the hard parts of making a recording look finished. According to the site, it handles "zooms, motion, sound, and framing" so that "every demo and tutorial comes out polished."
Automatic and manual zoom
Screen Studio looks at what you did while recording — for example, where you clicked — and zooms in on the moments that matter. You can also add a zoom manually when you want to highlight one specific part of the screen. Adding a zoom is described as "as easy as dropping it on the timeline."
Two zoom styles are available:
- Classic zoom
- Loupe zoom
Every animation is created automatically, and zooms are balanced so your webcam never covers the cursor (smart framing).
Clarity and upscaling
Screen Studio includes a real-time upscaler trained on over 5,000 macOS screenshots and SwiftUI apps, running entirely on your Mac. The site claims 6.5× upscale, with post-processing and upscaling built for screen recordings to keep everything sharp even when you zoom in close.
Camera and screen
You can record your camera, your screen, or both.
Who it's for
The site lists product demos, courses, tutorials, and social posts as the main use cases, and names "Record once. Post everywhere." as a principle — meaning one recording can be repurposed across YouTube, TikTok, Instagram, and similar channels. It's used by people at Stripe, Notion, GitHub, Shopify, Framer, and others, per the page.
Requirements
macOS 13.1 or later is recommended. There's also an option to get a link emailed to you that you can open once back on your Mac.
Matching a recorder to your use case
| Use case | What you need most | Where Screen Studio fits |
|---|---|---|
| Product demos | Automatic zoom on clicks, clean framing, polished output | Built for this — automatic zoom, smart framing, camera + screen |
| Courses and tutorials | Readable zooms, clarity when zoomed in, low editing time | 6.5× upscaling, automatic animations, timeline zoom placement |
| Social clips (TikTok, Instagram, YouTube) | Vertical-friendly framing, fast turnaround, reusable footage | "Record once. Post everywhere." positioning |
| Quick screen sharing | Minimal setup, no editing | A lighter recorder may be sufficient |
If your recordings are mostly quick internal shares where polish doesn't matter, the automatic-zoom and upscaling features won't earn their keep. If your recordings are customer-facing or published, the time saved on manual zoom and motion editing is the main argument.
What to check before you commit
- Pricing and subscription terms — the site references subscription and pricing but the page evidence here doesn't include specific prices or plans. Check the current pricing page directly before deciding.
- macOS version — confirm your Mac meets the recommended macOS 13.1 or later.
- Editing style — if you prefer full manual control over every zoom and cut, an automatic-first tool may feel restrictive; if you want speed, it's the opposite.
- Output destinations — confirm the export formats and aspect ratios match where you publish.
FAQ
Does Screen Studio zoom automatically? Yes. It looks at what you did while recording, such as where you clicked, and zooms in on the moments that matter. You can also add manual zooms.
Can I record my webcam and screen at the same time? Yes — camera, screen, or both.
What macOS version do I need? macOS 13.1 or later is recommended.
Is it good for social media clips? The site positions it for product demos, courses, tutorials, and social posts, with a "record once, post everywhere" approach.
How much does it cost? The page references subscription and pricing but doesn't list specific figures in the available evidence. Check the site's pricing page for current terms.
Website Overview
Several search or sharing settings need attention. Together they may make snippets, preview images or preferred URLs less consistent across platforms. An active inbound-mail setup with incomplete authentication may leave the domain more open to impersonation. Provider hosting alone does not close that gap.
Domain and Registration
The domain has about 4 years of registration history; its current configuration provides more context than age alone. The registrar is Squarespace Domains II LLC, a widely used domain service provider. The domain uses the common .studio extension, which is not an independent safety signal.
DNS and Email
The observed email authentication setup is incomplete: DMARC is missing. Nameservers are provided by Google Cloud DNS, indicating managed DNS hosting. MX records point to the Google Workspace email service. DNSSEC is enabled, allowing validating resolvers to authenticate signed DNS data. No CNAME was found; the observed records resolve directly to addresses.
TLS and Certificates
The certificate uses an RSA 2048-bit public key, offering broad client compatibility. The server supplied a complete certificate chain. No organization name is present in the certificate; the available fields are consistent with domain validation. The certificate was issued by Let's Encrypt, commonly associated with automated certificate services. The certificate's total validity is about 89 days, consistent with a short renewal cycle.
HTTP and Browser Security
The response lacks these common security headers: X-Content-Type-Options, Referrer-Policy, Permissions-Policy. CORS permits any origin to read this response. This is common for public resources; sensitive responses need narrower handling. No X-Powered-By header was found, reducing one common source of backend fingerprinting information. No obvious internal addresses or debug information were found in the headers. The Server header contains the custom value Vercel.
Technology Stack Analysis
The public page identifies Next.js, Tailwind CSS, Vercel without precise versions, leaving fewer clues for version-specific scanning.
Search and Social Sharing
The meta description has 223 characters and may be shortened in search results. No homepage canonical URL was detected. If duplicate URLs exist, consolidation may be less explicit. Twitter Card metadata is configured. JSON-LD includes Organization data, helping describe the organization as an entity. The title has 54 characters, within a common display range.
Hosting and Email
 Google Cloud DNS
 Vercel
 Google Workspace
 Walnut, California, United States
Inferred
76.76.21.21
Walnut, California, United States
Inferred
76.76.21.21
Registration details
| Registrar | Squarespace Domains II LLC |
|---|---|
| Registered | 2022-05-04 |
| Expires | 2027-05-04 |
| Domain status | active |
| Nameservers | ns-cloud-a1.googledomains.com、ns-cloud-a2.googledomains.com、ns-cloud-a3.googledomains.com、ns-cloud-a4.googledomains.com |
| DNSSEC | signed |
DNS records
| Type | Name | Value | TTL | Priority |
|---|---|---|---|---|
| A | screen.studio | 76.76.21.21 | 13805 | — |
| MX | screen.studio | aspmx.l.google.com | 14400 | 1 |
| MX | screen.studio | alt1.aspmx.l.google.com | 14400 | 5 |
| MX | screen.studio | alt2.aspmx.l.google.com | 14400 | 5 |
| MX | screen.studio | alt3.aspmx.l.google.com | 14400 | 10 |
| MX | screen.studio | alt4.aspmx.l.google.com | 14400 | 10 |
| NS | screen.studio | ns-cloud-a1.googledomains.com | 21600 | — |
| NS | screen.studio | ns-cloud-a2.googledomains.com | 21600 | — |
| NS | screen.studio | ns-cloud-a3.googledomains.com | 21600 | — |
| NS | screen.studio | ns-cloud-a4.googledomains.com | 21600 | — |
| TXT | screen.studio | google-site-verification=Q0IfRw5LFcBr9LMw7kgHcCXQ5lq5CAmfoVmlsH0rQmY | 14400 | — |
| TXT | screen.studio | v=spf1 include:_spf.google.com ~all | 14400 | — |
| DS | screen.studio | 52760 8 2 23e56a7c180001148492e88a6bbcde279220b04859fee11f7efe2ac3f71f82ca | 3600 | — |
TLS and certificates
HTTP response headers
| Header | Value |
|---|---|
| content-type | text/html; charset=utf-8 |
| cache-control | public, max-age=0, must-revalidate |
| server | Vercel |
| strict-transport-security | max-age=63072000 |
| content-security-policy | frame-ancestors 'self' |
| x-frame-options | SAMEORIGIN |
| access-control-allow-origin | * |
Identified technologies
Pages, Search and Sharing
| Meta description | Screen recorder for macOS. Create engaging product demos, courses, tutorial and social media videos. Add automatic zoom on mouse actions, smooth mouse movement, and other powerful effects and animations. Designed for macOS. |
|---|---|
| Canonical URL | Not detected |
| Language | English (default) |
| Twitter Card | summary_large_image |
Social Sharing Preview
19 fields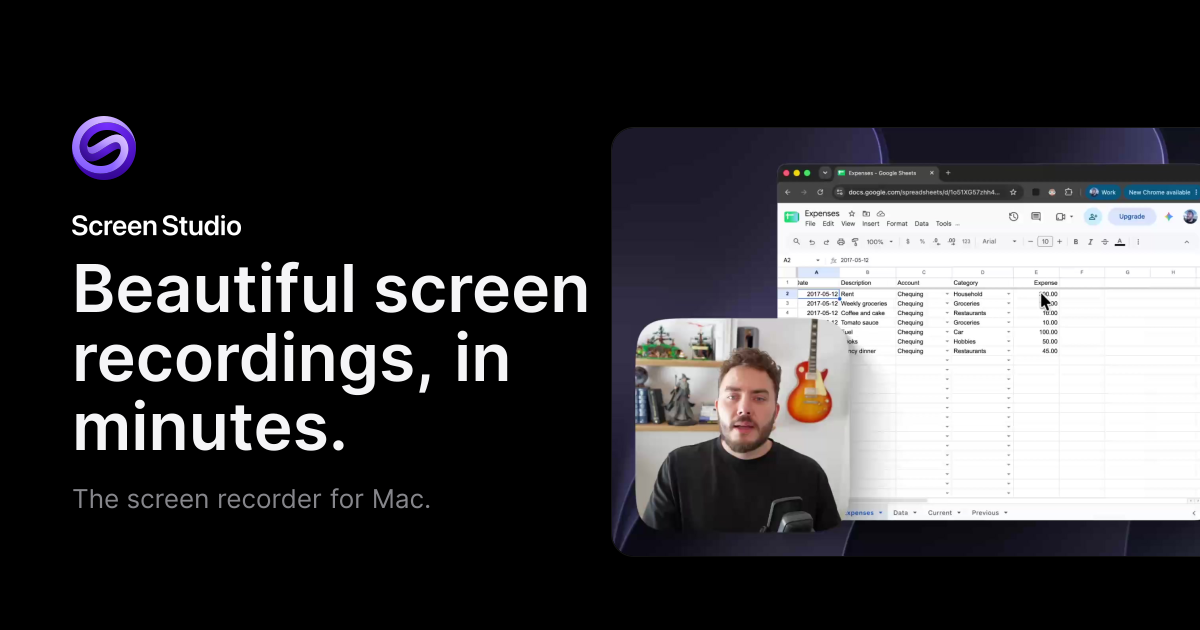

robots.txt (opens in a new tab)
4 rulesAll bots 0 allowed · 2 disallowed
- Disallow
/api/ - Disallow
/share/
slackbot-linkexpanding 1.0 (+https://api.slack.com/robots) 1 allowed · 0 disallowed
- Allow
/
slackbot-linkexpanding 1 allowed · 0 disallowed
- Allow
/
No matching rules.
Sitemaps
1Recent Updates
- Website images
- Screenshots
- Network details
- Website Technologies
- Pages and Search Information
- HTTP Response Information
- TLS and certificates
- DNS Information
- Domain Registration
- Website profile
- Website Description
- Website Name
- Website profile
- Website Description
- Website Name
User reviews (0)