
 Visit website
 Updated: 2026-09-30 16:12
 Language: English (default)
 Access: Normal
 Profile views 1
  Outbound visits 0
 Website Review
What is The Virtual OS Museum?
The Virtual OS Museum is a downloadable Linux virtual machine that packages more than 1,700 pre-installed operating systems and standalone applications into a single emulation environment. Instead of hunting down disk images, configuring emulators and troubleshooting boot settings yourself, you run one VM and pick an OS from a custom launcher. The catalogue spans stored-program computing from the Manchester Baby of 1948 to present-day systems, covering mainframes, minicomputers, Unix workstations, home computers, DOS and Windows releases, classic Mac OS, mobile and embedded platforms, and research systems such as Smalltalk environments and Oberon.
What you actually get
- A Linux VM designed to run under QEMU, VirtualBox or UTM, with hypervisor installers and shortcuts for Windows, macOS and Linux.
- Emulators and OSes pre-installed and pre-configured, so you are not assembling a stack before you can boot anything.
- An emulator-independent launcher, so the same interface works across the underlying emulation layers.
- A snapshot feature that reverts a broken or corrupted emulated installation to a working state — the practical safety net when you are experimenting with unfamiliar systems.
- Full and lite download variants, useful if disk space or bandwidth is tight.
Who it suits
It fits three overlapping audiences. Curious generalists get a low-friction way to see what early GUIs, mainframe operating systems and obscure platforms actually looked and felt like. Retrocomputing enthusiasts get breadth without maintaining dozens of separate emulator setups. Teachers, writers and students can demonstrate a specific system — Xerox Star's desktop metaphor, CTSS, early Unix, OS/2, BeOS — without a lab of period hardware.
The trade-off is scale versus depth. A single large VM is convenient, but you are trusting someone else's configuration choices, and emulation fidelity varies by platform. If you need cycle-accurate behaviour or original hardware quirks, dedicated emulators or real machines remain the better route.
How to start
Download the lite version first if you mainly want to browse, then take a snapshot before you modify anything inside an emulated system. Pick one era you care about — say, 1980s home computers or Unix workstations — and explore that cluster rather than sampling randomly; the context makes the differences between systems legible. For background on specific machines you encounter, the Computer History Museum is a solid companion.
How do I run the Virtual OS Museum on my own computer?
The Virtual OS Museum is distributed as a pre-built Linux virtual machine, so "running it" means installing a hypervisor on your computer and opening the museum VM inside it. Everything else — the emulators, the operating systems, and the launcher — is already set up inside that VM.
What you need on your machine
- A hypervisor: the page names QEMU, VirtualBox, and UTM as the supported options.
- A reasonably modern laptop or desktop (the museum's own framing), plus enough disk space for a large VM.
- An operating system that the chosen hypervisor supports: the project mentions installers and shortcuts for Windows, macOS, and Linux.
The basic path
- Download the museum VM from the Downloads section of The Virtual OS Museum. It offers both a full and a lite version, so pick based on how much disk space you can spare versus how many systems you want on hand.
- Install your hypervisor if you don't already have one. UTM is the natural fit on Apple silicon Macs; VirtualBox is the easy route on Windows and Intel Macs; QEMU works across platforms but expects more comfort with command-line tools.
- Import or open the VM in the hypervisor using the bundled installer and shortcuts for your platform.
- Boot the VM and use the custom launcher to start individual operating systems. The launcher is emulator-independent, so you don't configure each emulator by hand.
- Use the launcher's snapshot feature before you experiment. If an emulated installation breaks, you revert to a working state instead of rebuilding it.
Choosing between the full and lite versions
| Situation | Better fit |
|---|---|
| You want the widest catalogue, including obscure and research systems | Full version |
| You have limited free disk space or a slower machine | Lite version |
| You mainly want to browse a few well-known OSes | Lite version, then expand later |
A realistic first session
Say you want to see the earliest Unix or the Xerox Star GUI. You boot the museum VM, open the launcher, pick the system from the catalogue, and it starts inside the VM — no emulator installation, no disk images to hunt down, no configuration files. That convenience is the main trade-off: you accept a large download and a virtualized environment in exchange for skipping hours of setup and the risk of corrupting emulated installs.
If you only need one or two vintage systems, running them individually under an emulator you configure yourself may use less disk space. If you want to sample broadly across 1948 to the present, the museum VM is the lower-effort route.
Can I recover a virtual machine if I break an operating system installation while experimenting?
Yes. The Virtual OS Museum is built around exactly that problem: a custom emulator-independent launcher includes a snapshot feature to quickly revert broken installations back to a working state, and the OSes and emulators ship pre-installed and pre-configured. So if you trash a boot configuration, delete a system file, or leave an OS in a non-booting state, you can roll back rather than rebuild the environment from scratch.
That matters because the usual failure mode when exploring historical systems is not curiosity—it is setup. Reinstalling an emulator, finding the right disk image, and redoing configuration is what stops most people. Snapshot-and-revert turns experimentation into something you can do casually.
Where snapshots help most
- Destructive experiments: editing startup files, repartitioning, or changing kernel and driver settings in early Unix, DOS or mainframe environments.
- Learning by breaking: deliberately corrupting a system to see how it fails, then restoring it.
- Multi-OS sessions: trying several platforms in one sitting without each mistake costing an evening.
Where they don't
Snapshots usually restore a machine's state, not your host files. Keep any notes, scripts or extracted files outside the VM, and treat a snapshot as a safety net rather than a backup. If you want to preserve a working setup long-term, keep a separate copy of the VM.
A practical routine
- Boot the OS you want to explore and confirm it works.
- Take a snapshot and label it before changing anything.
- Experiment freely; when it breaks, revert instead of debugging.
- Re-snapshot only once you reach a state worth keeping.
If you prefer a different approach, general-purpose virtualisation tools such as VirtualBox and QEMU support snapshots too, though you supply and configure the guest systems yourself. For a large pre-built catalogue spanning 1948 to the present, the museum's own launcher removes most of that setup work.
Which historical operating systems and platforms are included in the museum?
The Virtual OS Museum aims to cover “just about every well-known OS and platform” plus many obscure ones, spanning 1948 to the present. Its catalogue is organised by era and machine class rather than as one flat list.
H3 What the catalogue covers
- Earliest mainframes: Manchester Baby test/demo programs; Mark 1 Scheme A/B/C/T, described as the earliest system software that could be considered an OS; various EDSAC software.
- Later mainframes and minicomputers: CTSS, MVS, VM/370, TOPS-10/20, ITS, Multics, RSX, RSTS and more.
- Workstations and Unix variants: PERQ OSes, SunOS, IRIX, OSF/1, A/UX, NeXTSTEP, Plan 9, various BSDs, plus Linux distributions across the decades.
- Home computers: CP/M variants, Apple II, Commodore 8-bit machines, Atari 8-bit, MSX, Tandy TRS-80, BBC Micro, ZX Spectrum, Sharp MZ and more.
- Personal computer operating systems: DOS variants, OS/2, BeOS, Windows from 1.0 to early Longhorn betas, classic Mac OS through Mac OS X 10.5 PPC.
- Mobile and embedded: PalmOS, EPOC/Symbian, Windows CE, Newton OS, early Android and iOS where emulation permits, QNX.
- Research and obscure systems: ZetaLisp, Smalltalk environments, Oberon, Plan 9 and many others.
The page summarises the scale as 1,700+ installs, 250+ platforms and 570+ distinct OSes.
H3 How to use this
If you have a specific system in mind, treat those categories as your search map: a mainframe OS, a Unix workstation OS, a home-computer OS or a mobile OS each sit in a different part of the collection. If you are unsure where to start, CTSS, the Xerox Star Pilot/ViewPoint GUI and the early Unix versions are the page’s own examples of historically pivotal systems. For a broader timeline of computing, the Computer History Museum is a useful companion.
Do I need to install and configure emulators separately to use the museum?
No. The Virtual OS Museum is built so that the emulators and the operating systems are already installed and pre-configured inside a single Linux VM. You install one VM on your machine, then use the included launcher to start individual systems, rather than hunting down emulator builds and OS images yourself.
What that means in practice
- The museum ships as a Linux VM you run under QEMU, VirtualBox or UTM, and it includes hypervisor installers and shortcuts for Windows, macOS and Linux.
- A custom emulator-independent launcher sits in front of everything, so you pick an OS from a menu instead of configuring each emulator.
- All OSes and emulators come pre-installed and pre-configured according to the page.
- A snapshot feature in the launcher lets you revert a broken installation to a working state — useful because old systems are easy to corrupt once you start poking at them.
Where you still do some work
You do need a hypervisor on your own computer (QEMU, VirtualBox or UTM) and enough disk space and memory for the VM — the museum provides installers and shortcuts, but the host-side install is still yours. Expect a sizable download, since the catalogue covers 1,700+ installs across 250+ platforms and 570+ distinct OSes from 1948 onward.
A typical first session
Say you want to see Xerox Star Pilot/ViewPoint or an early Unix. You install the VM once, open the launcher, choose the system, and take a snapshot before experimenting. If you break the emulated install, you revert rather than rebuild it.
Decision criterion
Choose this if your interest is using historical systems — CTSS, Multics, ITS, Plan 9, BeOS, early Windows and Mac OS, PalmOS, and many obscure platforms — rather than learning to configure emulators. If you specifically want to build and tune emulator setups yourself, a general retrocomputing resource such as Internet Archive may suit you better for individual images, though you would assemble the emulation layer on your own.
What are the differences between the full and lite versions of the museum?
The page describes both a full and a lite version of the museum VM but does not spell out the differences in the supplied material, so the safest answer is: the full version is the one to choose if you want the whole catalogue, and the lite version is the lighter download for people who don't need everything. Beyond that, treat any specific claim about what each contains as unverified until you check the download page.
How to decide
- If your goal is browsing broadly across the 1,700+ installs and 570+ distinct OSes the museum advertises, take the full version.
- If you mainly want to sample a handful of well-known systems, or you're tight on disk space and bandwidth, start with the lite version and expand later.
- If you're unsure, download the lite version first. It's the lower-commitment test of whether the launcher and emulation setup works on your machine before you commit to the larger file.
What the lite version likely trades away
Based on how these packages usually work, the reduction is almost certainly in the number of pre-installed OSes and emulator configurations rather than in the launcher itself. The page's selling points — the emulator-independent launcher, the snapshot/revert feature, and the hypervisor installers for Windows, macOS and Linux — read as core to the project, not as extras reserved for one edition.
A practical first session
Whichever you pick, install the VM, open the launcher, and boot two or three systems from very different eras to confirm the snapshot feature behaves as described. If you break an emulated install while poking around, revert and continue — that's the workflow the museum is built around.
For the exact contents of each edition, check the Downloads section on The Virtual OS Museum. If you want background on the systems you'll meet there, Computer History Museum is a useful companion.
 Hosting and Email
 Cloudflare
 Hosting
 Google LLC
 Location
 North Charleston, South Carolina, United States
 Pages, Search and Sharing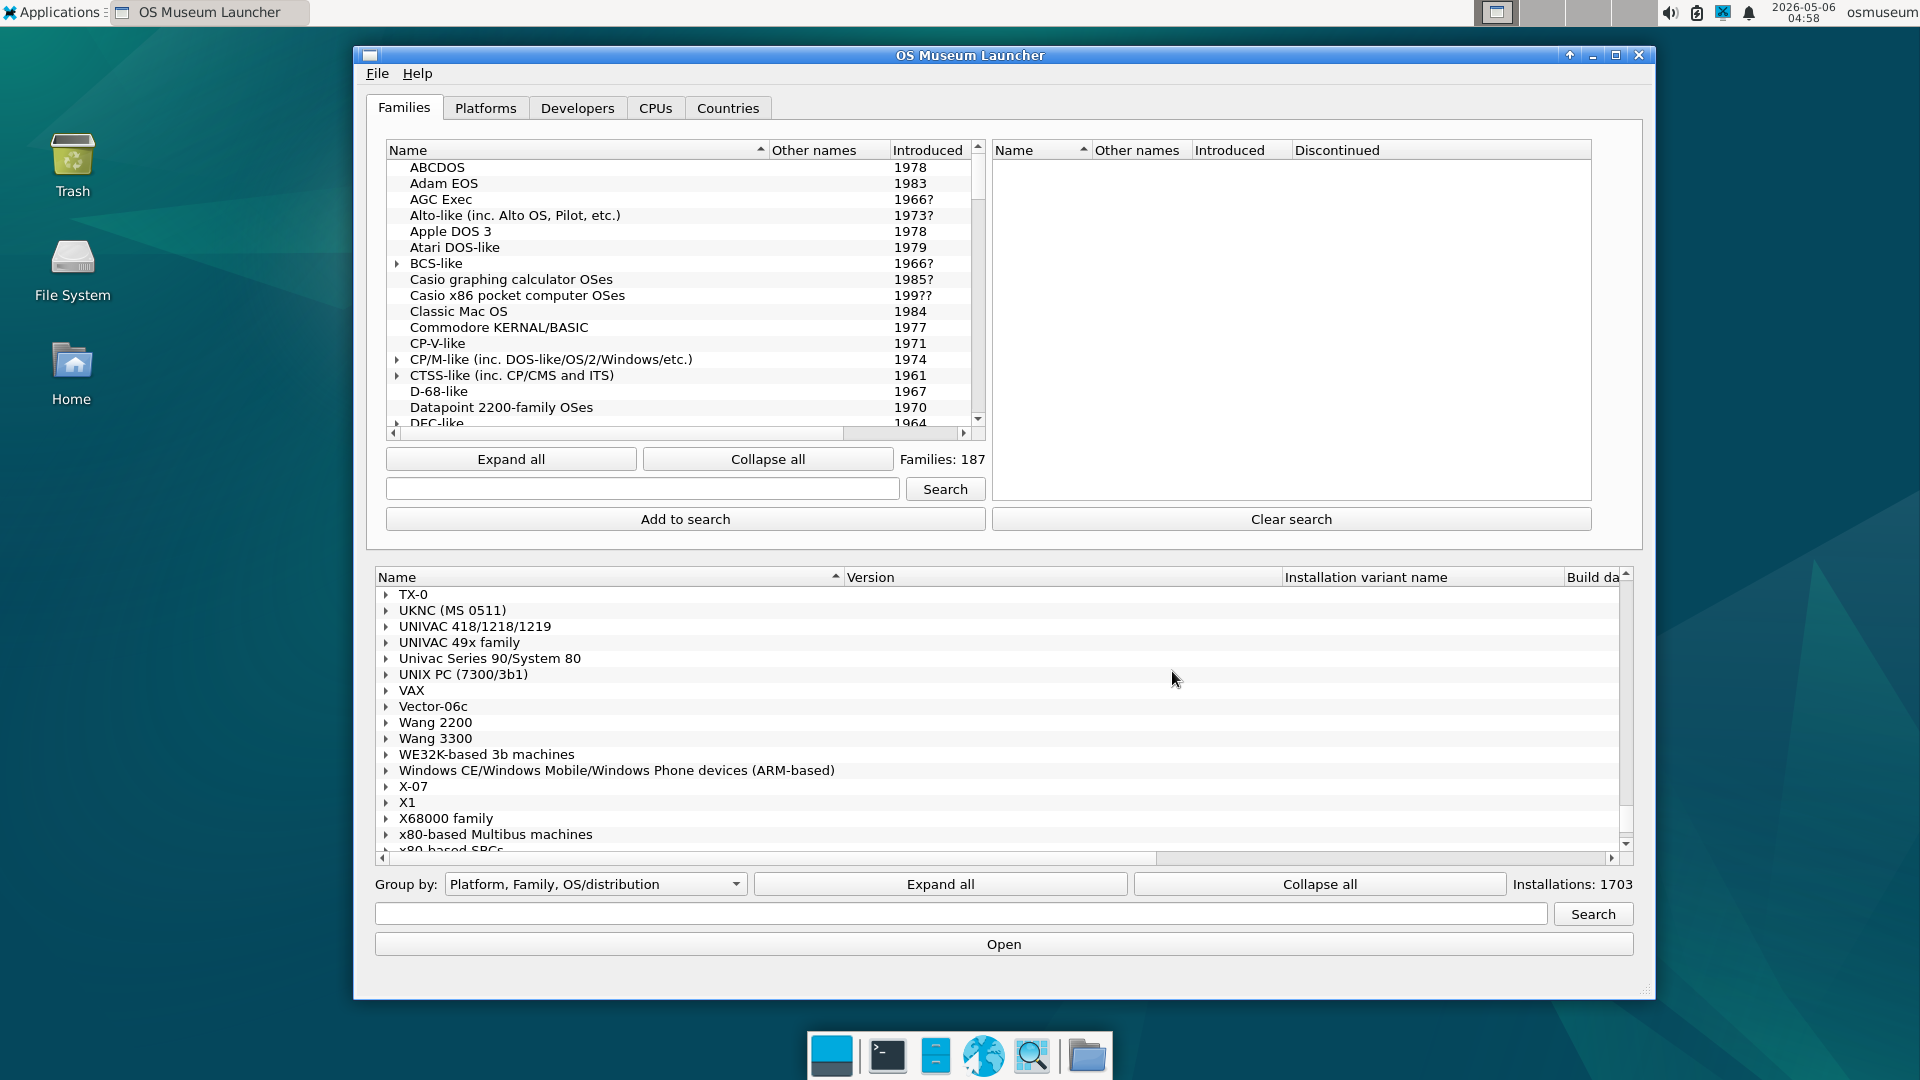


 All bots

 Registration details

 Identified technologies
User reviews (0)