
 简体中文
简体中文 English
Website review
This review may include AI-generated content and is not individually verified. Domain, certificate and other facts come from the observed data on this page.
What is Visuall?
Visuall is a browser-based AI video and image studio built around a single canvas. Instead of generating one clip from one prompt, it lays out a project as visible steps: your story idea, an AI-generated scene plan, keyframe images, and the model that animates each shot. You approve the frames you like before they move, and when you change one shot, only that shot is regenerated — the rest is reused.
What that looks like in practice
The canvas breaks a video into boxes you can see and edit:
- Story — you describe the film, or start from a template and let the canvas agent draft it.
- Scenes — the story is split into timed shots (a 10-second piece might become three scenes of 4s, 3s and 3s, each with its own camera direction).
- Keyframes — still frames are generated first so you can approve composition and look before anything is animated.
- Animate — approved frames are turned into clips by a chosen video model, with different models available per shot.
- Stitch — clips are joined into one finished video.
The page's own example walks through a 32-second episode built from four scenes and 11 boxes, with narration generated alongside the visuals.
Who it suits
The workflow rewards people who care about control rather than one-shot luck. If you are making a product film, a vertical reel, or a short narrative piece and you want to fix a bad shot without redoing the whole project, the per-shot structure is the point. It is less suited to someone who wants a single prompt-and-done clip with no intermediate decisions.
What to check before committing
Because the canvas charges per step, cost depends on how many scenes, keyframes and animations a project contains — the site points to a per-step cost breakdown on its pricing page. The practical next step is to build one short test project end to end, count the steps it actually used, and compare that against your normal output. If you already work in another editor, Runway and OpenAI's Sora sit in the same broad space, though their workflows differ in how much manual frame control they expose.
How do I start creating a video with Visuall without a credit card?
Start by opening the Visuall canvas and beginning a free project; the site advertises starting free with 35 credits and no credit card required. From there, describe the film you want, let the canvas agent propose a scene plan, approve the keyframes you like, and then animate them with a video model. Because each step is a visible box, you can change one shot and re-run only that part while the rest is reused.
A practical first run
- Describe the story in one paragraph. For example: "A skier races down a snowy mountain at sunrise and carves into the valley." The canvas turns that into scenes.
- Review the scene plan. You might get an aerial dolly, a low tracking shot, and a wide shot, each with its own duration.
- Generate and approve keyframes. The page shows FLUX.2 at 16:9 as an example; approve the frames that look right.
- Animate the approved frames. The page shows Kling 3 at 5 seconds per clip as an example model.
- Stitch the clips into the final video. The "A day in Rome, 44 BC" example shows 11 boxes, 225 credits, and about two minutes of waiting.
The main trade-off is control versus speed. Approving frames before animation gives you more say over the look, but it adds a review step. If you need a quick eight-second clip for a feed, you can move faster; if you are making a campaign film, the approve-then-film workflow is where the canvas earns its keep.
For step-by-step costs, see Visuall's pricing page.
Which AI video models can I choose for each shot on Visuall?
Visuall lets you pick the model per shot rather than locking a whole project to one engine. On the canvas, each scene box carries its own model choice, so a single video can mix generators where it helps.
Models named on the page
- Veo 3.1 — listed as one of the filming options for scenes.
- Seedance 2.0 — the second named option for filming scenes.
- Gemini Omni — the third named option; in the Rome walkthrough, Gemini Omni Flash is what turns an approved frame into an 8-second clip that talks, with sound.
- Kling 3 — shown in the canvas example as the model animating approved keyframes into 5-second shots.
- FLUX.2 / FLUX.3 — used on the image side, not for filming: FLUX.2 generates keyframes in the example, and FLUX.3 draws a consistent face across shots in the Rome breakdown.
What that means in practice
The model choice sits at the shot level, next to the keyframe and the scene description. You approve a still frame first, then animate it with whichever model fits that shot — a talking clip with audio, a short atmospheric insert, a fast action beat. Because only the boxes you change get re-run, swapping a model on one shot does not force you to regenerate the rest.
A concrete example: for a 30-second product film, you might use a dialogue-capable model for the two shots where a person speaks, and a different model for the three silent b-roll shots. If one shot's motion looks wrong, you change that shot's model or prompt and leave the other four untouched.
How to decide
Start by asking what each shot has to do:
| Shot need | Sensible starting point |
|---|---|
| On-screen speech with sound | A model that generates talking clips, as Gemini Omni Flash does in the walkthrough |
| Silent action or scenery | Any of the filming options; test two and compare motion |
| Consistent character across shots | Fix the image first with a keyframe model, then animate |
| Cheap iteration on one weak shot | Re-run only that shot's box |
Next step: open the canvas, describe one short scene, and generate the same shot with two different filming models before committing to a full sequence.
Can I approve keyframes before animating them and re-run only the changed shots?
Yes. Visuall is built around exactly that workflow: you approve keyframes before they are animated, and when you change one shot, only that shot is regenerated. Everything else on the canvas is reused, which the site describes as free.
How the approval step fits together
The canvas treats a video as a visible chain of boxes rather than a single prompt:
- Story — you describe the film in plain language, or start from a template.
- Scenes — the canvas agent proposes a scene plan with shots and durations.
- Keyframes — a still image model (the page shows FLUX.2 at 16:9) generates the frames for each shot.
- Approve — you review those frames before anything moves.
- Animate — an approved frame is turned into a clip (the example uses Kling 3 at 5 seconds).
- Final video — the clips are stitched together.
Because each stage is a separate box, re-running is scoped. Change the wording of one scene, swap the model for one shot, or reject a single keyframe, and the rest of the chain stays as it was.
What this is good for
- Brand and campaign work, where a client needs to sign off on a look before motion is committed.
- Character consistency across scenes — the site's Rome example describes a character once so the image model keeps the same face, then places that face into each location.
- Mixed-format output — a long campaign film and a short vertical clip can live on the same canvas.
The trade-off to weigh
Approval checkpoints add a step. If you want a fast, throwaway clip and don't care about continuity, stopping at every frame is friction. The approach pays off when a shot is expensive to redo, when several people need to agree, or when a character has to look the same in shot one and shot ten.
Practical next step
Before committing a full project, run a two-scene test: generate keyframes, approve one and reject the other, then animate only the approved one. That tells you whether the reuse behaviour matches how you actually iterate — and the pricing page breaks down what each step costs, which matters because keyframe generation, animation and stitching are billed separately.
For comparison, other tools that separate stills from motion include Runway and Luma AI.
How many credits does a typical video project cost on Visuall?
A typical video project on Visuall is measured in credits per step, not one flat fee, and the page's own worked example puts a short multi-scene episode at 225 credits. That example — a 32-second "Rome in 44 BC" piece assembled from four scenes, built in 11 boxes, with roughly two minutes of waiting — is the clearest concrete figure available, so treat 225 credits as a realistic mid-range project rather than a minimum.
What drives the number up
Cost scales with how many separately generated assets your project contains:
- Story and scene planning steps, which are cheap but not free.
- Keyframe images, generated per frame you approve (the example uses FLUX.2 at 16:9).
- Animation, charged per shot — the sample story breaks into three scenes of 4s, 3s and 3s.
- Stitching, to join clips into one finished video.
The important structural detail is that only what you change is regenerated. If you re-run a single shot, the rest is reused, so iterating on one bad frame costs far less than rebuilding the project. A three-shot 10-second clip should therefore land well below the 225-credit example, while a longer film with many shots and retries will climb past it.
How to estimate your own
Sketch the shot list first, then count the steps you'll actually generate: scenes, keyframes, animations, stitch. Multiply by the per-step rates rather than guessing from runtime, since a 5-second shot and a 10-second shot may not differ much if they're one generation each.
Visuall publishes a per-step breakdown at Visuall under "See what each step costs", which is the right place to confirm current rates before committing to a long project. The free starting allowance of 35 credits is enough to test the workflow on a single scene, but not to complete a 225-credit episode — so treat the first run as a cost calibration, not a finished deliverable.
Can Visuall generate videos with narration and sound from a single prompt?
Yes. Visuall is built around a text-to-video flow where narration and sound are part of the generated clip rather than something you add later. You describe the film or scene in the canvas agent, it plans the shots, you approve the keyframes, and then the animate step turns those frames into video with audio included. The page's own walkthrough shows a model — Gemini Omni Flash — turning each approved frame into an 8-second clip "that talks, with sound," and a final Stitch step joining those clips into one longer video with the voice carried through.
How the sound actually gets in
The workflow is step-by-step, not a single one-shot render:
- Story — you write the premise, either freehand or from a template.
- Scenes — the agent breaks it into a shot list with durations.
- Keyframes — still images are generated (the page shows FLUX.2, and FLUX.3 in its Rome example) and you approve the ones you like.
- Animate — approved frames become clips; this is where talking and sound enter, depending on the model chosen.
- Stitch — clips are joined into the finished piece, narration included.
The practical benefit is control: because only what you change gets re-run and the rest is reused, you can fix one scene's dialogue or audio without regenerating the whole film. For a single prompt to produce full narration, you need the prompt to carry the spoken lines or the narration text — the page's Rome example writes out what the character says, one line per scene, rather than hoping the model invents dialogue.
Where it fits and where it doesn't
| You want | Visuall's canvas suits it | A plain one-prompt generator suits it |
|---|---|---|
| Multi-scene film with consistent character and voice | Yes — approve frames, reuse unchanged shots | Poorly — consistency drifts |
| A quick 8-second talking clip | Yes, but the approval step adds a beat | Faster |
| Fixing one shot's audio after review | Yes — re-run only that box | Usually means a full re-render |
| Zero-decision, fire-and-forget output | No — the flow expects your sign-off | Yes |
If narration quality is the deciding factor, test it on your actual script before committing: generate one scene with your longest line of dialogue and listen for timing, lip-sync and voice consistency. That single test tells you more than any feature list. Visuall's own pricing page breaks costs down per step, which is worth checking first, since narration-heavy projects burn more credits than silent ones.
 Cloudflare
 Amazon CloudFront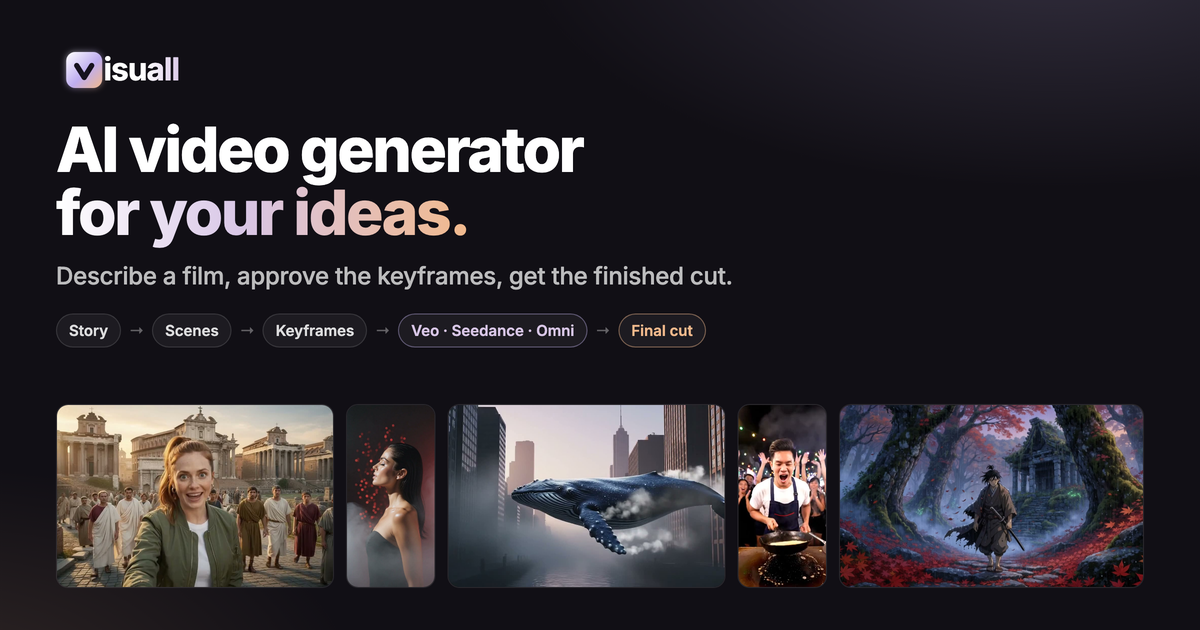

User reviews (0)