Website profiles · Technology insights · Alternatives

a2rd.org

Residential Building Design Publication offers expert insights, innovative design ideas, and practical advice for architects, builders, and homeowners....

No paid content found
Visit website
Profile views 0 Outbound visits 0 Normal
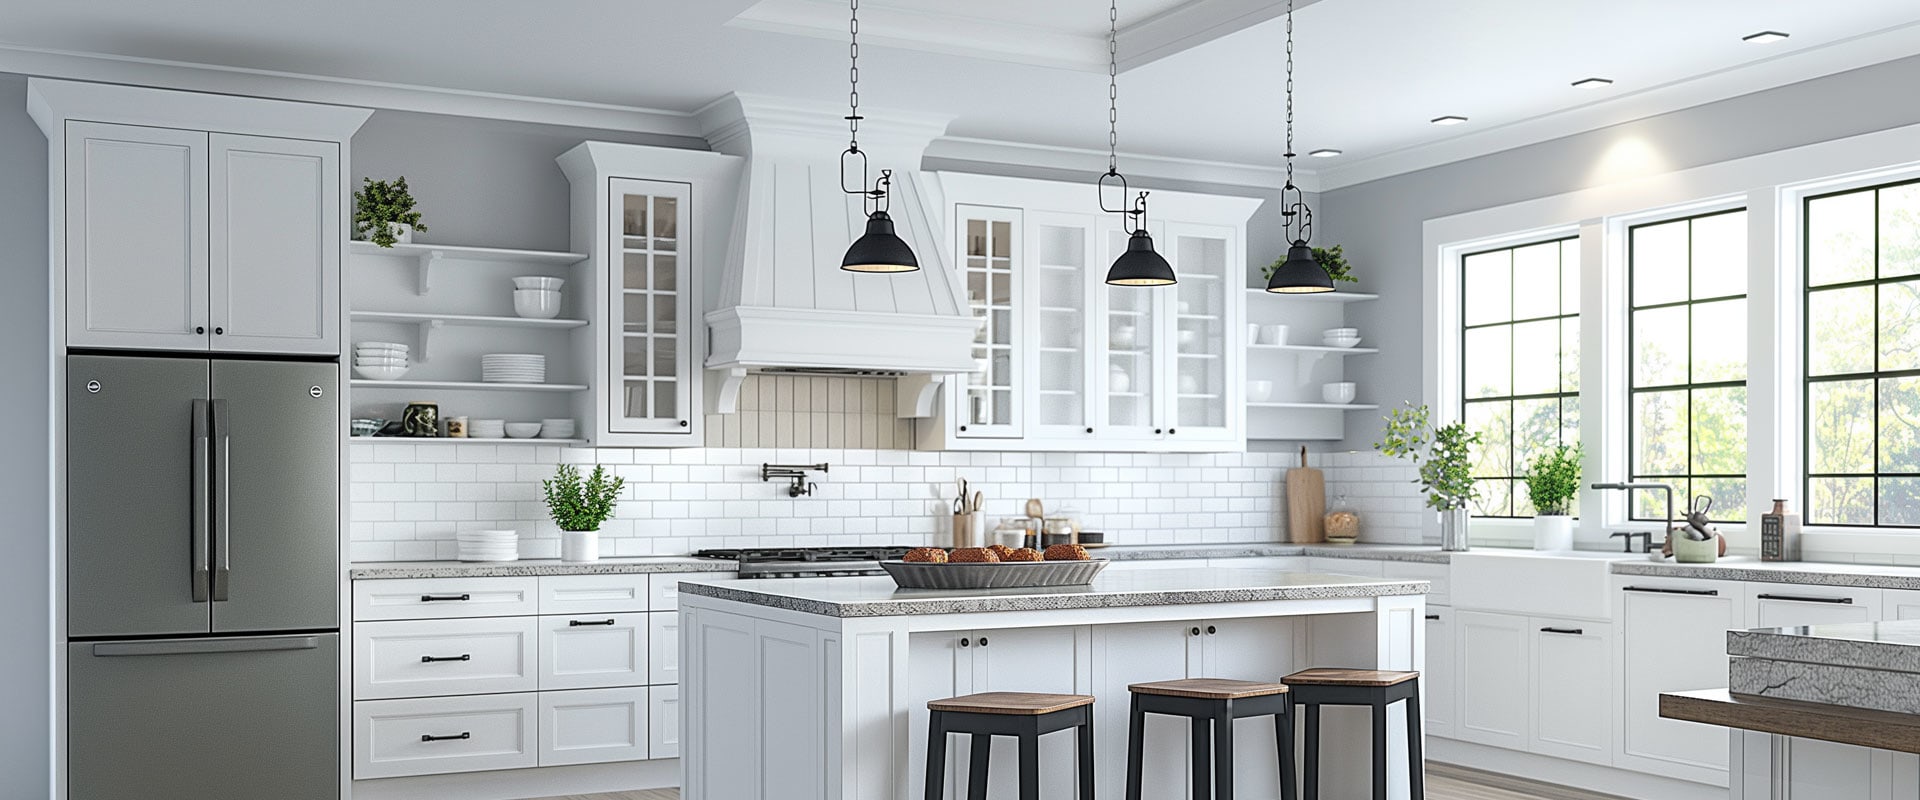
Residential Building Design Publication Full homepage screenshot

At a glance

Category
Design & Creativity
Language
English
Paid-content signal
No paid content foundObserved
Registered
2024
Hosting
CloudflareInferred
HTTPS certificate trusted
PassedObserved
Last updated

Website review

This review may include AI-generated content and is not individually verified. Domain, certificate and other facts come from the observed data on this page.

What is Residential Building Design Publication?

Residential Building Design Publication (Residential Building Design Publication) is an online magazine-style resource for home renovation and construction, aimed at architects, builders and homeowners. Its content is organised around practical decision-making rather than design inspiration alone: recent articles cover deck and patio construction, DIY versus hiring professionals, and identifying common roof problems.

What it covers

The site's topic structure is broad and budget-conscious. Main areas include:

  • Exterior work: roofing (asphalt versus metal, roof problems, insurance coverage for replacement), decks, patios, landscaping and outdoor lighting
  • Interior work: kitchens, bathrooms, flooring, painting, cabinet refacing and home decor
  • Money and contractors: renovation budgeting, comparing quotes, avoiding hidden fees, negotiating with and vetting contractors, handling disputes and delays
  • Planning and compliance: permits, project design, safety during renovations
  • Efficiency and sustainability: eco-friendly materials, energy-efficient upgrades, reducing waste, heat pumps and HVAC services

Who it suits

A homeowner weighing a roof replacement will find the cost-factor and material-comparison articles more immediately useful than the decor pieces. A first-time renovator benefits most from the contractor and budgeting sections, which address the parts of a project that most often go wrong. Trade readers can use it as a general reference, though the depth is consumer-oriented rather than technical.

How to use it

Pick your stage first: if you are still deciding scope, start with the planning and budget sections; if you already have quotes, go to the contractor-comparison and hidden-fee material. For a second opinion on specific trades, established authorities such as NAHB or This Old House can complement what you read here.

Should I DIY my home renovation or hire a professional contractor?

The decision usually comes down to three things: what the work involves, what your local rules require, and how much time you can genuinely give it. Hire a professional contractor for anything structural, electrical, plumbing, gas, roofing or work needing permits and inspections; DIY suits cosmetic, reversible projects you can finish and redo if needed. Residential Building Design Publication covers both paths, including a direct DIY-versus-hiring comparison and guidance on finding and vetting contractors, so it is a reasonable starting point for weighing the trade-off.

A quick way to split projects

Project type Better default Why
Painting, tiling a backsplash, swapping fixtures, cabinet refacing DIY Low risk, mistakes are cosmetic and fixable
Deck or patio construction, bathroom remodels Mixed: design and main build hired, finishing DIY Structural and waterproofing errors are expensive
Roofing, electrical, plumbing, gas, load-bearing walls Hire Safety, code compliance and insurance depend on it
Whole-house or multi-room renovation Hire with a project manager Sequencing trades and timelines is a full-time job

What each route actually costs you

Hiring buys speed, code compliance and a warranty, but you pay for coordination and you need to manage the relationship: get several itemised quotes, check reviews and past work, and agree in writing on scope, payment stages and how delays are handled. DIY saves labour costs but consumes evenings and weekends, and the hidden expense is often rework or buying tools you use once. A realistic test: if the project touches water, wiring or the structure, or if a mistake would make the room unusable for weeks, the savings rarely justify the risk.

A useful next step

Write a one-page scope: what you will do, what you will outsource, your budget ceiling and deadline. Then get two or three quotes for the outsourced portion before committing to the DIY part, since contractor availability often determines the schedule. For background on permits, budgeting and comparing quotes, Residential Building Design Publication and HomeAdvisor offer practical starting material, though local building authorities remain the definitive source on what requires a licensed professional.

How do I choose between asphalt and metal roofing for my home?

Choose based on how long you plan to stay, your budget timing and how much maintenance you'll accept: asphalt is the lower-cost, shorter-life, easier-to-repair default, while metal costs more upfront but lasts longer and needs less routine upkeep. The publication's own article list frames this as "Should You Stay With Asphalt or Upgrade to Metal Roofing," which is the right way to see it—an upgrade decision, not a like-for-like swap (Residential Building Design Publication).

A quick comparison

Factor Asphalt shingles Metal roofing
Upfront cost Lower Higher
Service life Shorter; typically one replacement cycle in a long ownership Longer; often outlasts the house
Maintenance More frequent inspection and repair Fewer routine issues, but check fasteners and seams
Repairs Simple, local patching Needs a specialist; smaller jobs can be harder to match
Weight and structure Heavier per square Often lighter, which can matter on older framing
Noise and heat Standard Can be louder in rain unless insulated; reflective finishes help in hot climates
Curb appeal Familiar, flexible styles Distinct look; some styles mimic shingles or tile

Who each option suits

  • Asphalt fits a tight budget, a home you may sell within a decade, or a roof where the structure and flashing are sound and you just need reliable cover.
  • Metal fits a long-term owner, a home prone to heavy snow, wildfire embers or frequent storms, or a property where you want to stop thinking about the roof for decades.

A practical next step

Get two or three written quotes for each material on the same roof, itemising tear-off, underlayment, flashing, ventilation and disposal, so the gap reflects the material rather than different scopes. Then compare that gap against how long you expect to stay—divide the extra cost by the added years of service to see the annual difference.

Also confirm local rules before deciding: some neighbourhoods or historic districts restrict metal, and insurance premiums sometimes differ by roof material. If you're still gathering information, the publication's roofing section covers material choice, installation prep and common problems (Residential Building Design Publication).

How can I find and vet a reputable contractor for my renovation?

Start by narrowing the field to licensed contractors with recent, verifiable local work, then interview two or three and compare written quotes line by line. Most renovation problems trace back to skipping the vetting or hiring on price alone.

A practical vetting sequence

  1. Confirm the basics. Ask for the license or registration number and check it against your local authority's database. Request a certificate of insurance showing both general liability and workers' compensation, and call the insurer to confirm it's current.
  2. Look at recent, similar work. Ask for three to five references from projects like yours within the last year or two, and visit at least one in person. Ask those homeowners whether the crew showed up when promised, how change orders were handled, and whether they'd hire the contractor again.
  3. Check reviews with a critical eye. Read patterns rather than single ratings: recurring complaints about communication or cleanup matter more than one angry outlier. The publication's "Reading Reviews and Ratings" and "Interviewing Potential Contractors" sections cover this kind of research in more depth.
  4. Interview with specifics. Bring your scope, budget range and timeline. Ask who will actually be on site each day, how they handle subcontractors, and what happens if the schedule slips.
  5. Compare written quotes. Require itemized bids covering labor, materials, permits and cleanup. A suspiciously low bid often means omitted work or allowances that will grow later; the publication's "Avoiding Hidden Fees" and "Comparing Contractor Quotes" articles address this directly.
  6. Put it in writing. A clear contract should specify payment tied to milestones, a change-order process, warranty terms, and a start and completion date. Avoid large upfront deposits.

Quick comparison of hiring routes

Route Best for Watch out for
General contractor Multi-trade projects, permits, scheduling Higher markup; confirm who supervises daily
Specialist (roofer, electrician) Single-scope work Coordination gaps if several trades are involved
DIY with hired help Small, well-understood jobs Insurance and permit responsibility falls on you

The publication's "DIY vs Hiring Professionals" article is a useful starting point for that last decision, and its "Handling Disputes and Delays" section is worth reading before you sign.

As a next step, write a one-page scope of work and a short list of questions for references, then use the same questions for every candidate so comparisons are fair. For broader design and planning context, Residential Building Design Publication organizes its renovation guidance by project stage.

How do I create a realistic renovation budget and avoid hidden fees?

Start with a contingency line and a written scope, then get at least three itemized quotes before signing anything. A realistic renovation budget is built from line items and allowances, not a single lump-sum guess. The site's category structure supports this approach: it separates "Creating a Renovation Budget," "Getting Quotes and Estimates," "Comparing Contractor Quotes," "Avoiding Hidden Fees," and "Negotiating with Contractors" — treat those as sequential steps rather than browsing topics, as covered in Residential Building Design Publication.

Build the budget in four layers

  1. Hard costs: materials, fixtures, labor, permits, and disposal. Price fixtures yourself so you know real retail numbers before a contractor marks them up.
  2. Allowances: specify what happens if a chosen tile or appliance costs more than the allowance. Ask for the allowance amount in writing per item.
  3. Contingency: 10–15% for cosmetic work, 15–20% for structural or older homes. This is not padding; it is the line that absorbs surprises like hidden water damage.
  4. Living costs: temporary kitchen setup, eating out, storage, and delays. These are real expenses that homeowners routinely forget.

Where hidden fees hide

Fee type What to ask
Permits and inspections Who pulls the permit, and is the fee included?
Disposal and dumpsters Is hauling priced per load or flat?
Change orders What is the hourly or unit rate for added work?
Subcontractor markup Are plumbing and electrical quoted directly or through the general contractor?
Schedule overruns Is there a daily rate for delays, and who pays?

Practical next step

Write a one-page scope with measurements, materials, and finish level, then send the identical document to three contractors. Compare quotes line by line, not by total. A low total with vague allowances is usually the more expensive choice.

For example, a homeowner budgeting a bathroom remodel should price the tile, vanity, and fixtures themselves, set a 15% contingency, and confirm in writing whether the contractor's quote includes permit fees and debris removal. If a quote omits those, add them before comparing.

What energy-efficient upgrades and eco-friendly materials are worth the investment?

Prioritize upgrades that cut ongoing energy use or prevent expensive damage before choosing materials for appearance. The site's most relevant starting points are its sections on eco-friendly materials and practices and energy-efficient home upgrades, alongside its practical guides such as Residential Building Design Publication's article on DIY versus hiring professionals.

Where the money tends to work hardest

  • Insulation and air sealing: Usually the best first spend, because they make every later heating or cooling upgrade work better. Attic and rim-joist gaps are common culprits.
  • Windows and doors: Worth it where drafts, condensation or single glazing are obvious. Otherwise, weatherstripping and draught-proofing deliver much of the benefit for far less.
  • Heating and cooling: A heat pump or modern HVAC system can be a strong investment, but only after the building envelope is tightened. Sizing and installation quality matter more than the badge on the unit.
  • Roofing: If a roof is near the end of its life, choosing a reflective or longer-lived material can combine replacement and efficiency in one project. The site's roofing material and roof-problem guides help judge timing.
  • Water heating and lighting: Lower-ticket, low-risk changes with quick payback; sensible early wins while larger projects are planned.

Choosing eco-friendly materials

Judge materials on durability, maintenance, local availability and end-of-life, not just recycled content. A long-lasting product with modest green credentials often beats a short-lived "eco" one. For renovations, the site's guidance on reducing waste and repurposing furniture is a useful complement to material choice.

Upgrade Best suited to Main trade-off
Insulation and air sealing Almost every home, especially older ones Disruption and hidden-work access
Heat pump or HVAC replacement Homes with aging systems and a tight envelope Upfront cost and correct sizing
Window and door replacement Draughty or single-glazed openings High cost relative to draught-proofing
Roofing upgrade Roofs nearing replacement Timing and material weight/details
Low-cost measures (lighting, draught-proofing) Tight budgets, renters Smaller savings per item

A practical next step

Start with a home energy assessment or a walk-through that lists drafts, insulation gaps and equipment age. Then rank projects by annual savings, expected lifespan and whether the work is already due. For anything beyond simple draught-proofing, use the site's contractor-research and quote-comparison guidance before committing, and check whether local incentives apply.

Related questions

More questions →
What “Breaking the Bank” Means for Home Renovation Budgets

“Breaking the bank” means spending more than you can afford—exhausting your savings or taking on debt you can’t comfortably repay. In home renovation, it rarely happens in one dramatic moment. It builds through underestimated costs, change orders, and small upgrades that each seem reasonable. You are at risk of breaking the bank when a project would leave you without an emergency fund, force you to borrow at high interest, or delay essential non-housing expenses. The practical defense is a written budget with a contingency line, a hard spending ceiling, and a habit of pricing changes before approving them.

When a renovation actually breaks the bank

A single large expense—a roof replacement or a kitchen gut—is not automatically “breaking the bank” if you planned and saved for it. The phrase describes a budget outcome, not a price tag. Use these tests:

  • Savings test: After the project, do you still hold at least a few months of living expenses? If not, you are close to the line.
  • Debt test: Can you repay any borrowing on your normal income without cutting essentials? High-interest debt for cosmetic work is a warning sign.
  • Scope test: Are you approving changes without knowing their full installed cost, including labor, permits, and finishing?
  • Timing test: Would an overrun delay property taxes, insurance, or medical costs? Housing upgrades should not crowd out obligations.

One-time planned spending is different from continuous overrun. A new roof you saved for is a budgeted event. A renovation that keeps adding “while we’re in there” items is the pattern that drains reserves.

Common hidden costs that push budgets over

The publication’s renovation categories—budget-friendly renovations, ways to save, avoiding hidden fees, and comparing contractor quotes—point to the same lesson: the visible price is rarely the whole price. Watch for:

Hidden cost Why it surprises homeowners How to plan for it
Permits and inspections Fees and scheduling delays add cost and time Ask the contractor who pulls permits and what the fee covers
Rework after discovery Opening a wall can reveal wiring, rot, or moisture problems Keep a contingency fund and agree in writing how discoveries are priced
Material price changes Quotes may expire or exclude volatile items Confirm how long a quote is valid and whether substitutions are allowed
Finishing and cleanup Trim, paint, disposal, and site protection are easy to omit Ask for a line-item quote, not a lump sum
Change orders Small additions approved verbally get billed later Require written pricing before work proceeds

The site’s guidance on getting quotes and estimates and avoiding hidden fees supports a simple rule: compare contractors on the same scope, in writing, including what is excluded.

Set a ceiling and a contingency before work starts

  1. Define the must-haves. List what the project must achieve—for example, a watertight roof or a functional bathroom—separately from nice-to-haves.
  2. Get at least two itemized quotes. Use the same scope so differences reflect price and approach, not missing work.
  3. Set a hard ceiling. Decide the maximum you will spend, then subtract a contingency of roughly 10–20% for surprises. The contingency is not spending money; it is protection.
  4. Write the change-order rule. No added work without a written price and your approval. This single habit prevents most budget creep.
  5. Track spending weekly. Compare committed costs, not just paid invoices, against the ceiling.
  6. Verify before final payment. Walk the work, confirm the punch list is complete, and check that permits are closed.

If a quote already exceeds your ceiling, the project is not affordable as scoped. Reduce scope rather than borrowing against the contingency.

Lower the cost without sacrificing what matters

The site’s budget-friendly renovation and cheap-alternatives sections suggest several levers:

  • Phase the work. Do structural and safety items first; defer cosmetic upgrades.
  • Keep the layout. Moving plumbing or load-bearing walls is expensive; refreshing finishes is cheaper.
  • Choose mid-range materials where they are hidden. Spend on what you touch and see daily; save on what is covered.
  • Refinish instead of replace. Cabinet refacing and repainting often cost less than full replacement.
  • Do safe DIY tasks only. Painting and simple landscaping are reasonable; electrical, gas, and structural work are not.
  • Get competing quotes for the same scope. The publication’s contractor-research guidance emphasizes reading reviews, interviewing candidates, and comparing like-for-like estimates.

For decisions about doing work yourself versus hiring, the site’s DIY vs. hiring professionals article is the relevant starting point: the right choice depends on the task’s risk, your skills, and whether permits or inspections are required.

A quick decision rule

Before approving any renovation spending, ask: If this costs 20% more than quoted, can I still pay it without touching emergency savings or high-interest credit? If the answer is no, the project—or that upgrade—is at risk of breaking the bank. Cut scope, phase the work, or wait until the reserve exists.

DIY vs Hiring Professionals for Home Renovation: How to Decide

The decision usually comes down to four checks: whether the job needs a permit or licensed trade, whether you own or can safely rent the right tools, whether your skill level matches the failure cost, and whether your timeline tolerates a learning curve. If any answer is "no" or "not sure," hiring a professional is the safer default. DIY pays off on cosmetic, reversible work where a mistake costs time rather than structure, wiring, or water damage. This guide walks through those checks using the project categories covered by the Residential Building Design Publication (a2rd.org), then shows how to compare real costs and vet contractors when you do hire.

Start With the Permit and Safety Screen

Before comparing prices, sort the project by regulatory and safety risk. The publication's renovation section separates planning tasks like obtaining permits and licenses from hands-on work, which is a useful reminder that permission comes before demolition.

Project type Typical DIY suitability Why
Painting, decorating, repurposing furniture Strong Reversible, low failure cost, minimal tool investment
Cabinet refacing, low-cost interior upgrades Moderate Tolerates imperfection; requires patience and precise measuring
Flooring installation Moderate Doable for some materials; subfloor prep and moisture issues are common failure points
Deck and patio construction Conditional Structural loads, footings, and attachment to the house raise the stakes
Roof repair or replacement Weak Fall risk, weather exposure, and warranty implications
Electrical, plumbing, HVAC work Weak Often permit- and license-gated; errors can be dangerous or uninsurable

The site's article list includes "Identifying Common Roof Problems" and roof replacement cost breakdowns, which reflects how often roofing turns into a professional job: problems are hard to diagnose from the ground, and the cost drivers are material, access, and labor rather than something a homeowner can offset with effort.

Two practical rules follow. First, confirm with your local building department whether the work needs a permit; the publication treats permits and licenses as a planning step, not an afterthought. Second, check your insurance policy before starting anything structural or water-related. Unpermitted work can complicate claims and resale, and that risk usually outweighs DIY savings.

Compare True Costs, Not Just Quotes

The publication's budget section groups material costs, contractor quotes, hidden fees, and ways to save, which maps onto the cost comparison you actually need.

DIY cost stack:

  • Materials, including a waste allowance for cuts and mistakes
  • Tool purchase or rental — the item most often left out of DIY budgets
  • Disposal fees for old materials
  • Your time, valued honestly against the hours the job will take
  • Rework if the first attempt fails

Professional cost stack:

  • Labor and materials in the quote
  • Permits and inspection fees, where required
  • Contingency for surprises found after opening walls or removing old roofing
  • Change-order costs if scope shifts mid-project

The publication's guidance on avoiding hidden fees and comparing contractor quotes points to the same discipline: ask every bidder to itemize labor, materials, permits, and disposal so quotes are comparable line by line. A single lump-sum number hides exactly the differences that decide which bid is actually cheaper.

A worked example makes the trade-off concrete. Suppose a homeowner wants to reface kitchen cabinets. DIY saves the labor line but requires a router or specialized bits, precise door alignment, and several weekends; a botched alignment means buying replacement doors, which can erase the savings. Hiring a professional moves that risk to someone with insurance and a warranty. For a project like repainting a bedroom, the same logic flips: labor is the dominant cost, the skill barrier is low, and a mistake is a second coat of paint.

Weigh Time, Skill, and Long-Term Quality

The publication's "DIY vs Hiring Professionals" article sits alongside communication and project-management guidance, which signals that the decision is as much about management capacity as about handiness.

Ask yourself:

  • Time: Can you absorb the project over weekends without stalling halfway? A half-finished bathroom is worse than an unstarted one.
  • Skill match: Have you done this exact task before, or a close cousin? Watching videos is preparation, not experience.
  • Quality durability: Will a mediocre result show in five years — for example, a poorly sealed shower or a deck that moves with the seasons?
  • Maintenance: The publication's "Maintaining Your Home After Renovations" category is a reminder that some savings now become recurring repair costs later.

For energy-related upgrades, the site's coverage of heat pumps and energy-efficient upgrades is a useful caution: equipment selection and sizing affect performance and running costs, so the installation decision deserves more scrutiny than a cosmetic one.

Vet Contractors Before You Sign

When the screen points to hiring, the publication's contractor section lays out a sequence worth following: research contractors, read reviews and ratings, interview candidates, get quotes, then manage communication and quality through the build.

Practical steps:

  1. Research and read reviews for contractors who do your specific project type, not generalists.
  2. Interview at least three and ask for references from jobs completed at least a year ago, so you hear about durability, not just the punch list.
  3. Request itemized quotes covering labor, materials, permits, and disposal, per the site's guidance on comparing quotes and avoiding hidden fees.
  4. Agree on communication and acceptance criteria in writing — who you contact, how often you get updates, and what "done" means at each stage.
  5. Keep a contingency for surprises uncovered mid-project, and confirm in advance how change orders will be priced.

The publication's sections on handling disputes and delays and on ensuring quality work are worth reading before signing, because those clauses are easiest to negotiate when you still have leverage.

A Decision Checklist

Run each project through these questions; a single "no" on the first three is a strong signal to hire.

  • Does the work require a permit or a licensed trade in your area?
  • Do you own or can you safely rent the tools, and do you know how to use them?
  • Have you completed a similar task before with a result you were happy with?
  • Can you finish within a timeline that doesn't leave the home unusable?
  • Have you budgeted for tools, disposal, and possible rework — not just materials?
  • If it goes wrong, can you absorb the cost without touching structural, electrical, or water systems?

Cosmetic, reversible projects that pass all six are good DIY candidates. Anything touching structure, roofing, or building systems is better handled by a vetted professional, with the quote comparison and interview steps above as your filter.

How to Use Ahrefs for Your First SEO Audit: A Step-by-Step Tutorial

If you're new to Ahrefs and want to run your first SEO audit, the fastest path is: open Site Explorer, enter your target URL, review the Overview for a health snapshot, then dig into Organic Keywords, Top Pages, and Site Audit to find specific problems. From there, build a short prioritized to-do list instead of trying to fix everything at once.

This tutorial walks through that workflow using a realistic starting scenario, explains what the numbers mean, and shows how to turn findings into actions.

Before You Start: Pick a Narrow Scope

A common beginner mistake is auditing an entire large website on day one. The reports become overwhelming, and you can't tell which issues matter.

Instead, choose one of these starting points:

  • A single important page (your homepage or a key product/service page)
  • A small site (under ~50 pages, e.g., a personal blog or small business site)
  • One section of a bigger site (e.g., /blog/)

For this tutorial, assume you're auditing a small business site with about 30 pages. The same steps scale up later.

You'll need an Ahrefs account to follow along. Ahrefs offers paid plans, and pricing and feature limits change over time, so check the current Pricing page for what's included in each tier before committing.

Step 1: Enter Your Target in Site Explorer

Site Explorer is Ahrefs' core tool for analyzing any website or URL.

  1. Open Site Explorer from the top navigation.
  2. In the search box, paste your domain (e.g., example.com).
  3. Choose the Exact URL or Domain mode depending on scope. For a full-site view, use Domain or Prefix; for a single page, use Exact URL.
  4. Press Enter.

You'll land on the Overview report. Don't try to absorb everything — focus on four numbers first.

Reading the Overview Snapshot

Metric What it tells you How to use it
Ahrefs Rank (AR) Relative strength of the site's backlink profile vs. others in the database Useful for comparing against competitors, not as a standalone goal
Organic traffic Estimated monthly visits from search A rough trend indicator, not exact analytics
Organic keywords Estimated number of keywords the site ranks for Shows breadth of visibility
Backlinks / Referring domains Total links and unique sites linking to you Referring domains matter more than raw backlink count

Important caveat: Ahrefs' traffic and keyword numbers are estimates based on its own data. They won't match Google Search Console or your analytics exactly. Treat them as directional, not absolute.

Step 2: See What You Already Rank For

Go to Organic Keywords in the left sidebar. This shows queries where your site appears in search results.

Sort by Traffic (descending) to see which pages bring the most estimated visitors. Then look for:

  • Keywords ranking in positions 4–15 — these are often the easiest wins. A small content or on-page improvement can push them onto page one.
  • Keywords with high volume but low position — potential opportunities if the topic is relevant.
  • Irrelevant keywords — if you rank for something off-topic, it may signal thin or mismatched content.

Write down 5–10 of the position 4–15 keywords. These become your first optimization targets.

Step 3: Find Your Best and Weakest Pages

Open Top Pages. This ranks your URLs by estimated organic traffic.

Look for two things:

  1. Your top performers — understand what topics and formats work. Can you create more content like this?
  2. Pages with traffic but poor rankings — these may need on-page fixes (title, headings, internal links).

If a page gets zero traffic and targets a topic you care about, it's a candidate for a rewrite or consolidation.

Step 4: Run a Technical Site Audit

Now move to Site Audit. This crawls your site and flags technical and on-page issues.

  1. Click Site Audit → New project.
  2. Enter your domain and set crawl settings (default is usually fine for a small site).
  3. Start the crawl and wait for it to finish.

Once complete, you'll see a Health Score and a list of issues grouped by category.

Which Issues to Fix First

Not all issues are equal. Prioritize in this order:

Priority Issue type Why it matters
1 Broken links (404s) Bad for users and crawl efficiency
2 Pages blocked from indexing They can't rank at all
3 Missing or duplicate title tags Directly affects click-through and relevance
4 Slow-loading pages Affects experience and rankings
5 Thin content Low value to users and search engines

Ignore low-impact warnings (like minor meta description length) until the big items are handled.

Step 5: Turn Findings Into a To-Do List

You now have raw data. Convert it into a short, actionable list. Example:

  1. Fix 3 broken links found in Site Audit.
  2. Rewrite title tags on 5 pages with duplicate titles.
  3. Improve 4 pages ranking in positions 6–12 by adding missing subtopics and internal links.
  4. Remove or update 2 thin pages with no traffic.

Keep the list to 5–10 items max for your first audit. Finishing a short list beats starting a long one.

Common Beginner Mistakes

  • Chasing every red flag. Site Audit flags many minor issues. Fix what affects rankings and users first.
  • Trusting estimates as exact numbers. Ahrefs data is modeled, not measured from your analytics.
  • Auditing a huge site too early. Start small to learn the interface.
  • Ignoring search intent. A page can be technically perfect but still fail if it doesn't match what searchers want.
  • Forgetting to re-crawl. After fixes, run Site Audit again to confirm improvements.

Where to Go Next

Once your first audit is done:

  • Compare with competitors using Site Explorer's Competing Domains and Content Gap reports.
  • Track keyword rankings over time with Rank Tracker.
  • Explore backlink opportunities in the Backlinks and Link Intersect reports.
  • Set up recurring Site Audit crawls so new issues surface automatically.

Your first audit isn't about perfection — it's about building a repeatable habit: enter a target, read the key reports, pick the highest-impact fixes, and act. Do that once a month and your site's health compounds.

Home Improvement Projects Explained: What Counts and Where to Start

Home improvement covers any planned work that repairs, upgrades, or extends how your home functions and looks—from repainting a room to replacing a roof or building a deck. Where you should start depends on three things: whether the work is maintenance or a real upgrade, whether it needs permits or a professional, and whether your budget can absorb surprises. A practical first step is to sort your project into one of the common categories below, then decide DIY versus professional and set a budget before you buy anything.

The main categories of home improvement

Most projects fall into a handful of buckets. Naming the bucket helps you find the right guidance, estimate costs, and know what skills or trades are involved.

Category Typical projects What usually drives cost
Interior renovation Kitchen remodeling, bathroom renovation, cabinet refacing, flooring installation Materials, layout changes, plumbing/electrical work
Exterior renovation Roof replacement or repair, siding, doors, windows Material choice, access and tear-off, structural repairs found mid-job
Outdoor living Deck and patio construction, landscaping, outdoor lighting Site prep, footings, drainage, material grade
DIY decor and small fixes Painting, repurposing furniture, minor repairs Tools and materials only; your time
Energy and efficiency upgrades Insulation, heat pumps, energy-efficient upgrades Equipment, installation, financing terms
Maintenance Roof inspections, sealing, seasonal upkeep Labor and small materials; catching problems early

The publication this guide draws on organizes its coverage along similar lines—interior renovations, exterior renovations, DIY landscaping and outdoor lighting, deck and patio construction, budget-friendly renovations, roofing, HVAC, and green renovations—which is a useful checklist for scoping your own project.

Maintenance first, upgrades second

Before planning a visible upgrade, check whether something is quietly failing. Roof problems are a common example: a small leak or worn flashing is far cheaper to fix than a replacement, and roof replacement cost is driven by material, the condition of the existing roof, and how much tear-off and repair is needed. The same logic applies to exterior doors and windows—if the frame or seal is failing, repairing it may deliver more comfort per dollar than a cosmetic change.

A simple sequence that avoids wasted spending:

  1. Inspect the area you want to change (roof, exterior walls, plumbing under the sink, deck structure).
  2. Fix what's broken before cosmetic work—new flooring over a leaking pipe is money thrown away.
  3. Then upgrade with the remaining budget.

DIY or hire a professional?

The decision is less about confidence and more about risk, permits, and time. Use these conditions as a filter:

  • Lean DIY when the work is reversible, cosmetic, and doesn't touch structural, electrical, or gas systems—painting, decor, repurposing furniture, simple landscaping, outdoor lighting.
  • Lean professional when the work involves structural changes, roofing, HVAC, electrical panels, plumbing relocations, or anything your local authority requires a permit and inspection for.
  • Consider a hybrid for larger projects: you handle demolition, painting, and sourcing materials while licensed trades handle the technical scope.

Two practical checks before deciding: confirm whether a permit is required (call your local building department—requirements vary by location and project), and honestly estimate your available time. A project that stalls halfway often costs more to finish than hiring out from the start.

Where renovation budgets break

Budgets rarely fail because of the headline price. They fail at the edges. Watch for these:

  • Hidden conditions. Opening a wall or roof can reveal rot, old wiring, or water damage. Keep a contingency of roughly 10–20% of the project cost for exactly this.
  • Scope creep. "While we're at it" additions—extra outlets, a nicer countertop, a bigger deck—add up fast. Write your scope down and treat changes as separate decisions.
  • Cheap materials that don't last. Low-cost alternatives can be smart, but not when they fail within a few years in a high-wear area.
  • Unclear quotes. Ask contractors to itemize labor and materials so you can compare like for like and spot hidden fees.

A renovation budget should list: materials, labor, permits, equipment rental, disposal, contingency, and a small buffer for finishing touches.

Choosing and vetting a contractor

The research stage is where most problems are prevented. A workable process:

  1. Find candidates through referrals and reputable directories.
  2. Read reviews and ratings, paying attention to patterns in complaints rather than single reviews.
  3. Interview two or three contractors and ask how they handle changes, delays, and cleanup.
  4. Get itemized quotes from each and compare on the same scope.
  5. Check licensing and insurance where required, and put the scope, payment schedule, and timeline in writing.

During the project, agree on a communication routine—who you contact, how often, and how change orders are approved—so quality issues and delays get handled early rather than at the end.

A starting checklist

  • Pick your category (interior, exterior, outdoor, efficiency, maintenance).
  • Inspect for existing problems before upgrading.
  • Decide DIY vs. professional using risk, permits, and time.
  • Set a budget with a 10–20% contingency and a written scope.
  • Research contractors, compare itemized quotes, and confirm licensing and permits.

Work through these in order and most home improvement decisions become straightforward: you'll know what the project is, who should do it, and what it should cost before work begins.

Doors in Home Renovation: How to Choose, Install, and Upgrade

Choose doors by location first, then material and hardware: interior doors prioritize fit, sound control, and finish; entry doors prioritize security, weather sealing, and insulation; exterior/outdoor doors prioritize weather resistance and durability. Installation is a reasonable DIY task only when the opening is square, the wall is sound, and you are replacing a door of the same size and swing; if the frame is out of square, the opening must be resized, or the door is an entry door with security and sealing requirements, hire a professional. The sections below cover selection, upgrade planning, DIY vs. professional installation, common failure points, and how to fold the work into a renovation plan.

Choosing the Right Door for Each Location

The same door style can behave very differently depending on where it is installed. Use location as the first filter.

Location What matters most Material considerations Typical upgrade trigger
Interior (bedroom, bathroom, closet) Fit, privacy, sound, finish Hollow-core for budget and light use; solid-core for sound and durability Sticking, hollow sound, dated finish, poor privacy
Entry Security, weather sealing, insulation, curb appeal Solid construction, quality lockset, weatherstripping Drafts, difficult locking, warping, visible wear
Exterior/outdoor (patio, deck, garden) Weather resistance, durability, operation Materials rated for moisture and sun exposure Swelling, rot, failed seals, hard operation

Two practical checks before buying:

  • Measure the opening, not just the old door. Record width, height, and thickness at several points. A door that is slightly too large can be trimmed; one that is too small cannot be enlarged.
  • Confirm the swing and handing. A door hung to swing the wrong way is a common and avoidable return.

Hardware is part of the door decision, not an afterthought. Hinges, locksets, handles, and closers should be selected together with the door so that weight, prep, and finish match.

Planning an Upgrade: What to Check Before You Buy

Upgrading a door is rarely just a slab swap. Work through these factors in order:

  1. Opening dimensions and frame condition. Check whether the frame is square, plumb, and free of rot or movement. A sound frame makes a same-size replacement straightforward; a failing frame turns the job into a reframing project.
  2. Hardware compatibility. New hinges and locksets may require different mortises or prep than the existing door. Confirm that the replacement door or slab is prepared to match, or plan to adjust the prep.
  3. Insulation and sealing. For entry and exterior doors, weatherstripping, thresholds, and sweeps do much of the real work. Budget for these as part of the upgrade.
  4. Budget scope. Decide whether you are replacing the slab only, the slab and frame, or the full assembly including trim and hardware. Each step changes both cost and difficulty. The publication's renovation-budget and cost-saving sections are useful for framing this scope before you request quotes.
  5. Permits and building rules. Exterior door changes, especially in older homes, may touch structural or egress requirements. Check local requirements before ordering.

DIY or Hire a Professional?

Door installation sits on the boundary between DIY and professional work. Use these conditions to decide.

Reasonable DIY conditions:

  • Replacing an interior door of the same size and swing in a square, sound frame
  • Swapping hardware, weatherstripping, or a threshold
  • Painting or refinishing an existing door

Hire a professional when:

  • The frame is out of square, damaged, or the opening needs resizing
  • The door is an entry door where security, locking, and sealing must work together
  • The door is heavy (solid-core, exterior, or glazed) and needs two people plus proper support
  • Exterior work involves flashing, thresholds, or wall openings

The publication's DIY vs. hiring professionals article makes the same general point: match the task to your tools, time, and tolerance for rework. A door that is hung slightly out of alignment is not just cosmetic — it affects sealing, security, and how long the hardware lasts.

Common Installation Failures and How to Avoid Them

  • Out-of-square frame. Always check the opening with a level and square before installing. If the frame is off, fix the frame first; forcing a door into a twisted opening causes sticking and gaps.
  • Misaligned hinges. Hinge mortises must line up precisely. Measure and mark rather than eyeballing, and test-fit before final fastening.
  • Poor sealing. Gaps at the sides, top, or threshold let in air and moisture. Install weatherstripping and a threshold that contact the door evenly along its full perimeter.
  • Wrong swing or handing. Confirm the swing direction against the room layout and furniture before ordering.
  • Skipping the test fit. Hang the door and check operation before final trim and finish. Correcting alignment is far easier at this stage.

Fitting Doors Into Your Renovation Plan

Doors interact with flooring, trim, painting, and sometimes electrical work (for example, a doorbell or smart lock). Sequence them so that the door is installed after flooring and framing are stable but before final paint and trim touch-ups. When talking to contractors, bring a simple list:

  • Location and quantity of each door
  • Measured opening size, thickness, and swing
  • Slab-only vs. full assembly replacement
  • Hardware and sealing included or excluded
  • Who handles trim, paint, and disposal of the old door

The publication's sections on getting quotes, comparing contractor quotes, and communication and project management are directly applicable here — a clear door scope reduces change orders and hidden fees. For broader renovation planning, its planning-and-preparation and budget-friendly renovation categories provide the surrounding framework.

Used together, these steps let you choose doors by location, plan an upgrade with the right scope, and decide confidently whether to install yourself or bring in a professional.

Website Overview

Identifiable technologies and additional version or configuration signals make the service easier to fingerprint, which may help targeted scanners narrow their checks. Page metadata, canonical configuration and social previews work together to provide more consistent search and sharing presentation.

Domain and Registration

Transfer-protection status is present, helping reduce the risk of unauthorized domain transfers. The domain has about 1 years of registration history; its current configuration provides more context than age alone. The registrar is NameCheap, Inc., a widely used domain service provider. The domain uses the common .org extension, which is not an independent safety signal.

DNS and Email

The observed email authentication setup is incomplete: DMARC is missing. Nameservers are provided by Cloudflare, indicating managed DNS hosting. MX records point to the Cloudflare Email Routing email service. No CNAME was found; the observed records resolve directly to addresses. DNSSEC signatures were not detected, so this additional DNS authenticity protection is not confirmed.

TLS and Certificates

The public key uses EC with 256 bits. The server supplied a complete certificate chain. No organization name is present in the certificate; the available fields are consistent with domain validation. The certificate was issued within the Google Trust Services cloud or CDN ecosystem. The certificate's total validity is about 90 days, consistent with a short renewal cycle.

HTTP and Browser Security

The checked browser-security headers were not detected, leaving fewer explicit browser-side safeguards. No X-Powered-By header was found, reducing one common source of backend fingerprinting information. The cf-ray response header indicates a CDN or caching proxy in the delivery path. No obvious internal addresses or debug information were found in the headers. The Server header identifies cloudflare without an exact version.

Technology Stack Analysis

The public page identifies WordPress 5.8.3, jQuery, Bootstrap, Tailwind CSS, Cloudflare, with exact versions exposed for 1 technologies. These details can narrow vulnerability checks, although exposure alone is not a vulnerability.

Search and Social Sharing

The Generator tag identifies WordPress 5.8.3, making the publishing system easier to fingerprint. Twitter Card metadata is configured. The title has 39 characters, within a common display range. A meta description is present, with 154 characters. The observed directives allow indexing and link following.

Hosting and Email

DNSCloudflare
HostingCloudflare
EmailCloudflare Email Routing
Approximate IP geolocation (inferred; a CDN or proxy may differ from the origin server) Location unknown Inferred 104.21.93.226

Registration details

RDAP / WHOIS

RegistrarNameCheap, Inc.
Registered2024-11-11
Expires2027-11-11
Domain statusclient transfer prohibited
Nameserversdina.ns.cloudflare.com、quentin.ns.cloudflare.com
DNSSECunsigned

DNS records

DNS

TypeNameValueTTLPriority
Awww.a2rd.org104.21.93.226300—
Awww.a2rd.org172.67.216.82300—
AAAAwww.a2rd.org2606:4700:3033::ac43:d852300—
AAAAwww.a2rd.org2606:4700:3036::6815:5de2300—
MXa2rd.orgroute1.mx.cloudflare.net360058
MXa2rd.orgroute3.mx.cloudflare.net360070
MXa2rd.orgroute2.mx.cloudflare.net360098
NSa2rd.orgdina.ns.cloudflare.com86400—
NSa2rd.orgquentin.ns.cloudflare.com86400—
TXTa2rd.orgv=spf1 include:_spf.mx.cloudflare.net ~all3600—

TLS and certificates

TLS / SSL

AssessmentNormal configuration
Supported protocolsTLSv1.2、TLSv1.3
Negotiated protocolTLSv1.3
Certificate subjecta2rd.org
IssuerGoogle Trust Services
Valid until2027-01-19T17:12 · Remaining when checked: 89 days
Verification detailsCertificate trust: Passed · Hostname match: Passed

HTTP response headers

HTTP

HeaderValue
content-typetext/html;charset=utf-8
cache-controlpublic, max-age=604800
servercloudflare

Identified technologies

WordPress 5.8.3jQueryBootstrapTailwind CSSCloudflare

Pages, Search and Sharing

Meta descriptionResidential Building Design Publication offers expert insights, innovative design ideas, and practical advice for architects, builders, and homeowners....
Canonical URLhttps://www.a2rd.org
LanguageEnglish (default)
Twitter Cardsummary_large_image
All bots 4 allowed · 13 disallowed
  • Allow/
  • Allow/wp-content/*.css
  • Allow/wp-includes/*.js
  • Allow/wp-includes/*.css
  • Disallow/wp-content/plugins/
  • Disallow/wp-content/themes/
  • Disallow/*/attachment/
  • Disallow/tag/*/feed/
  • Disallow/page/
  • Disallow/?s=
  • Disallow/search
  • Disallow/*trackback*
  • Disallow/feed/
  • Disallow/*/feed/rss/$
  • Disallow/*/*/trackback/$
  • Disallow/*/*/*/feed/$
  • Disallow/*/*/*/trackback/$
slurpbot 0 allowed · 1 disallowed
  • Disallow/Sitemap
googlebot 0 allowed · 1 disallowed
  • Disallow/Sitemap
sogou 0 allowed · 1 disallowed
  • Disallow/Sitemap
bingbot 0 allowed · 1 disallowed
  • Disallow/Sitemap
exabot 0 allowed · 1 disallowed
  • Disallow/Sitemap
msiecrawler 0 allowed · 1 disallowed
  • Disallow/
webcopier 0 allowed · 1 disallowed
  • Disallow/
httrack 0 allowed · 1 disallowed
  • Disallow/
orthogaffe 0 allowed · 1 disallowed
  • Disallow/
zao 0 allowed · 1 disallowed
  • Disallow/
sitecheck.internetseer.com 0 allowed · 1 disallowed
  • Disallow/
teleportpro 0 allowed · 1 disallowed
  • Disallow/
webzip 0 allowed · 1 disallowed
  • Disallow/
linko 0 allowed · 1 disallowed
  • Disallow/
microsoft.url.control 0 allowed · 1 disallowed
  • Disallow/
xenu 0 allowed · 1 disallowed
  • Disallow/
download ninja 0 allowed · 1 disallowed
  • Disallow/
wget 0 allowed · 1 disallowed
  • Disallow/
k2spider 0 allowed · 1 disallowed
  • Disallow/

User reviews (0)

  • No reviews yet.