Website profiles · Technology insights · Alternatives

arnismc.com

Generate Minecraft worlds from real-world locations. Free, official, open-source tool to recreate your hometown, city, or any place on Earth in Minecraft.

No paid content found
Visit website
Profile views 5 Outbound visits 0 Normal
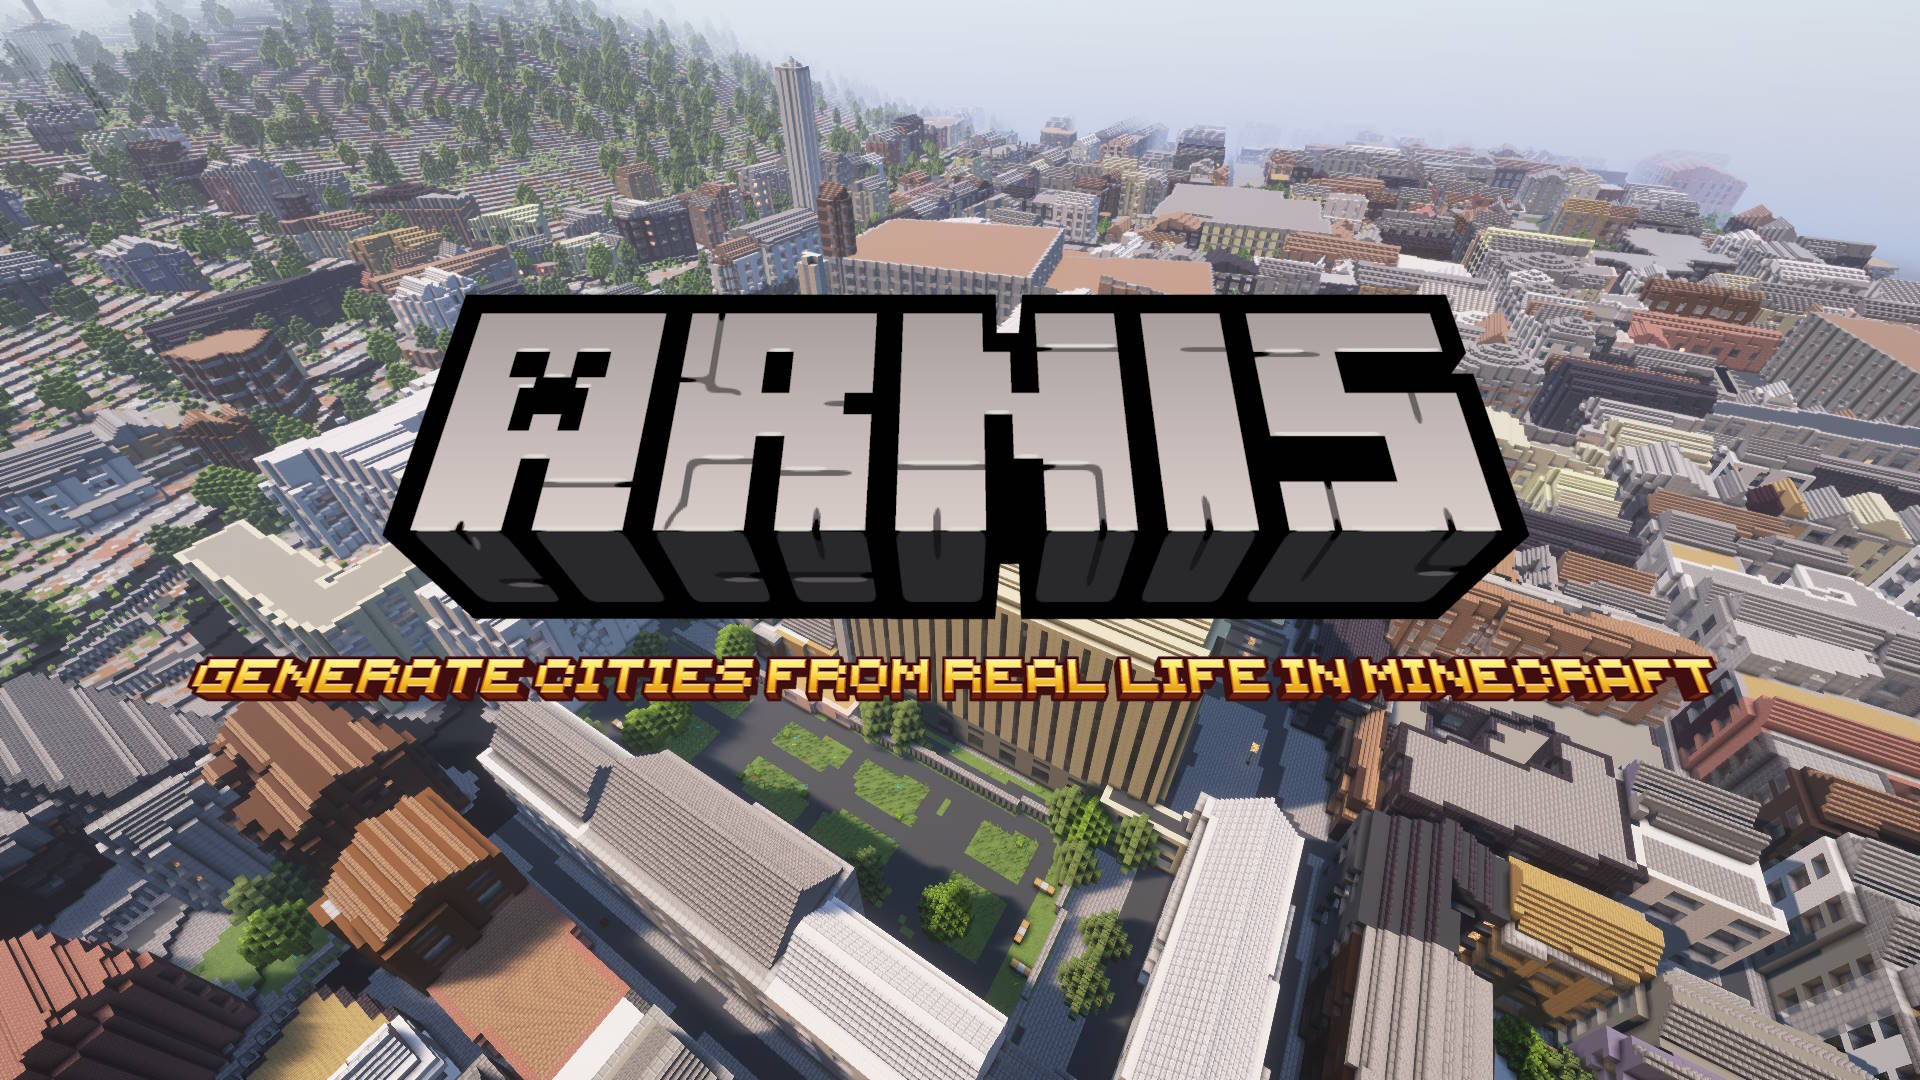
Arnis - Generate Real-World Minecraft Maps | Official, Free & Open Source Full homepage screenshot

At a glance

Category
Games & Board Games
Language
English
Paid-content signal
No paid content foundObserved
Registered
2025
Hosting
SYNLINQInferred
HTTPS certificate trusted
PassedObserved
Last updated

Website review

This review may include AI-generated content and is not individually verified. Domain, certificate and other facts come from the observed data on this page.

What is Arnis?

Arnis is a free, open-source desktop application that turns real-world geographic data into playable Minecraft Java and Bedrock Edition worlds. You pick a location on an interactive map, draw a rectangle around the area you want, and Arnis generates streets, buildings, landmarks and terrain from that spot so you can walk through your hometown, a city you have visited, or a famous landmark inside Minecraft. The project is licensed under Apache 2.0 and downloads are hosted on its official GitHub repository.

The intended workflow is three steps: select your area, choose whether to generate a new world or write into an existing one, then click "Start Generation" and explore the result. That makes it most useful for players who want a recognizable, real place rather than a random seed — for example, rebuilding your neighborhood to play survival in it, or touring a city you plan to visit.

A few practical trade-offs worth knowing before you start:

  • Desktop vs. browser. Arnis itself is a desktop app for Windows, Linux and macOS. If you are on a phone or tablet, or do not want to install anything, the site points to MapSmith, a browser-based generator that needs no download.
  • Size and time. The page states there is no hard limit on area, but practically the size affects how long generation takes. MapSmith is described as handling regions up to 500 km² (roughly eight times the size of Manhattan) using optimized servers, which is faster than a typical home computer.
  • Cost. Arnis is free. The online generation service is the paid option, so budget for that only if mobile or no-install generation matters to you.

As a next step, decide which route fits your device: download Arnis from the official GitHub release page for full control and offline use, or try the browser generator first if you just want to test whether a particular location looks good in Minecraft. Start with a small area — a few city blocks — to judge how detailed the output is before committing to a whole region.

How do I generate a Minecraft world from a real location using Arnis?

You generate a world by selecting a real area on a map, pointing Arnis at a Minecraft world, and letting it build the terrain and structures from geographic data. Arnis is a free, open-source desktop app that turns real-world map data into playable Minecraft Java and Bedrock Edition worlds, recreating streets, buildings, landmarks and terrain. The official site is Arnis.

The basic workflow

  1. Select your area. Use the interactive map and the rectangle selection tool to choose any location on Earth.
  2. Choose your world. Generate a new Minecraft world or select an existing one as the target.
  3. Generate and explore. Click "Start Generation" and wait while the selected area is built into your world.

What to expect

The results are recognizable at the level of layout rather than photorealism: road networks, building footprints, coastlines and elevation follow the underlying map data, so a hometown or city center will read as the right shape and scale. The site's own gallery shows examples including New York, the Grand Canyon, Heidelberg, London, Paris and the Taj Mahal.

Size is the main practical constraint. There is no hard limit, but large areas take longer and produce heavier worlds, so start with a neighborhood or small town before attempting a whole city.

Desktop vs. browser

Arnis desktop app MapSmith (browser)
Setup Download for Windows, Linux or macOS None
Devices Desktop only Phone, tablet, any device
Area size No hard limit, but practical limits apply Up to 500 km²
Speed Depends on your computer Optimized servers, generally faster
Cost Free and open source (Apache 2.0) Paid online service

If you play Bedrock on a phone or tablet, the browser route avoids installing anything. If you want to iterate on a small area repeatedly, or prefer not to depend on a paid service, the desktop app is the better fit.

A concrete first run

Pick a compact, familiar area — your own neighborhood, roughly a few square kilometers — and generate it into a fresh world. That gives you a fast result to judge: check whether your street and nearby landmarks land where you expect. Once the scale and orientation look right, expand the rectangle for a larger region.

Practical notes

  • Edition matters. Confirm whether you want a Java or Bedrock world before generating, since the target world differs.
  • Download safely. Downloads are hosted on the official GitHub repository; the site advises verifying you are on the official page.
  • Licensing. Arnis is free and open source under Apache 2.0. The online generator is a separate paid service, and the developer notes that donations support ongoing work.

Can I use Arnis on my phone or tablet without downloading anything?

Yes — with one distinction. The Arnis desktop application itself is a download for Windows, Linux, or macOS, so it does not run on a phone or tablet. For mobile use, the site points to MapSmith, a browser-based generator: you select an area and generate a world online with no installation, which the site describes as suitable for phones and tablets and for Minecraft Bedrock players on the go.

Practical points from the site's own description:

  • No download needed for the online route. MapSmith runs in the browser on any device.
  • Larger areas online. The online service advertises regions up to 500 km², roughly eight times the size of Manhattan.
  • Faster generation. The site says its optimized servers generate worlds significantly faster than typical home computers.
  • Caveat on cost. Arnis is free and open source (Apache 2.0), but the site notes there is a paid online generation service if you want to generate worlds on mobile devices. So "without downloading anything" is possible, but not necessarily free.

A concrete scenario: you're on a phone and want your hometown in Bedrock Edition before a trip. Open MapSmith in the mobile browser, select the area, generate, and download the result — no desktop involved. If you'd rather avoid the paid online service and you have a computer available, the desktop app is the free alternative, with the trade-off of installing it and generating locally.

Next step: decide based on your device and budget. Mobile-only or no install → use the online generator. Have a desktop and want the free, open-source tool → download the app. Either way, get it from the official source: Arnis or its GitHub repository linked from that page.

What real-world places and landmarks can I recreate in Minecraft with Arnis?

Arnis is built to recreate almost any real-world location, not just famous landmarks. Its page names New York, the Grand Canyon, Heidelberg, London, Paris and the Taj Mahal as examples, and the tool works from OpenStreetMap data, so streets, buildings, landmarks and terrain come from the map rather than a fixed list of supported places. In practice that means your own hometown, a city you have visited, a mountain range or a coastline are all fair game.

What tends to work well

  • Dense cities with mapped streets and buildings, where the road and building geometry gives you a recognisable skyline.
  • Coastlines, rivers and terrain features, since elevation and water data shape the landscape.
  • Landmarks and large structures that are mapped in enough detail to appear as something other than a blank block.
  • Your own neighbourhood, which is often the most satisfying use: you can walk the same streets you know.

What to keep in mind

  • Detail depends on OpenStreetMap coverage. A well-mapped city will look far richer than a rural area where few features are recorded.
  • Very large areas take longer and produce heavier worlds; the site notes there is no hard limit but that practical size matters.
  • Famous sites are shown as examples of what the generator can produce, not as guaranteed one-click presets.

If you want to try it without installing anything, the online option on the same site handles browser-based generation, including on phones. Otherwise, the desktop app is the route for Windows, Linux and macOS. Start with a small area you know well — a few square kilometres — to judge how the output matches your expectations before committing to a whole city.

Is Arnis free, and what does the paid online generation service offer?

Arnis is free. The desktop application is open source under the Apache 2.0 License, and you can download it for Windows, Linux or MacOS at no cost. The project is developed in the author's spare time, so donations are welcomed but not required.

The paid service is MapSmith, a browser-based generator for people who would rather not install anything. It runs on any device, including phones and tablets, which suits Minecraft Bedrock players who want to generate a world without a computer.

What MapSmith adds

Feature Free desktop app Paid online service (MapSmith)
Installation Required None
Devices Windows, Linux, MacOS Any browser, including mobile
Area size No hard limit in principle, subject to practical constraints Large regions up to 500 km²
Generation speed Depends on your own hardware Optimised servers, typically faster than a home computer

Who each option suits

  • Choose the free desktop app if you have a reasonably capable computer, want to generate repeatedly without paying per world, or prefer an open-source tool you can inspect and contribute to.
  • Choose MapSmith if you play Bedrock on a phone or tablet, or want a large region generated quickly without tying up your own machine.

One practical note: the free app's area limit is described as having no hard ceiling but real practical constraints, so very large selections may become slow or unwieldy on modest hardware. If your goal is a single large region and you don't want to wait, the online service is the more direct route.

A good next step is to decide based on your device first. If you're on desktop, download the free release from the official GitHub repository; if you're on mobile, try MapSmith in the browser. Start with a small area — your neighbourhood or a few city blocks — to see how the output looks before committing to a large region.

How large an area can I generate, and how long does it take?

Arnis does not impose a hard limit on the area you can generate — the practical ceiling depends on your own hardware, since generation runs locally on your computer. The page's FAQ states there is no hard limit but that size is a practical constraint, and it does not publish a specific time estimate for desktop generation. Its browser-based companion, MapSmith, is described as handling large regions up to 500 km², roughly eight times the size of Manhattan, using servers the site says are significantly faster than typical home computers.

What that means in practice

  • Desktop Arnis: a single neighbourhood or small town is the comfortable range. A city-sized selection can work, but expect long generation times and heavy memory use on an ordinary laptop.
  • MapSmith (online): the stated 500 km² figure is the only concrete size the page gives, and it is tied to the online service rather than the desktop app.
  • Time is not a fixed number: it scales with area, with how much building and road detail OpenStreetMap has for that location, and with terrain complexity. Dense central London or Manhattan takes far longer per square kilometre than open desert.

A useful next step

Test before committing. Generate a small rectangle around one familiar district first — say 2–5 km² — and time it. That gives you a realistic per-area rate for your machine, which you can multiply up before attempting a whole city. If you specifically need a very large region or you are on a phone or tablet, the online route is the more sensible starting point; if you want no size ceiling tied to someone else's servers and you have a capable desktop, run it locally.

Note that the FAQ answer on the site is truncated, so the full practical guidance on size and duration may continue beyond what is shown. For the complete text, check the FAQ section directly at Arnis.

Related questions

More questions →
How to Generate a Real-World Minecraft World from Any Location

You can turn any place on Earth into a playable Minecraft world by using Arnis, a free and open-source desktop application that converts real-world geographical data into Minecraft Java and Bedrock Edition worlds. The process has three steps: select an area on an interactive map, choose a new or existing world, then click "Start Generation." If you can't or don't want to install anything, a browser-based option called MapSmith generates worlds online, including on mobile.

What Arnis Does

Arnis recreates streets, buildings, landmarks, and terrain from real-world locations inside Minecraft. It pulls from geographical data (the site credits OpenStreetMap contributors) and lets you customize settings before generating. It runs on Windows, Linux, and macOS, and is licensed under Apache 2.0.

Two things worth knowing up front:

  • It's a desktop application for the main workflow, with downloads hosted on the official GitHub repository. The site explicitly warns to download only from that official GitHub page.
  • There's also a paid online generation service for generating worlds on mobile devices. The desktop app itself is free; the online service is a separate, paid option. Don't assume the browser route is free just because the desktop tool is.

Step-by-Step: Generate a World in Arnis

1. Select your area

Open the interactive map and use the rectangle selection tool to choose any location on Earth. This defines the region that will be converted into your Minecraft world.

2. Choose your world

Decide whether to generate a brand-new world or select an existing one to add the real-world area into. This matters if you want your hometown to sit alongside builds you've already made.

3. Generate and explore

Click "Start Generation" and wait as the selected area is generated. When it finishes, open the result in Minecraft Java or Bedrock Edition and explore.

Expected result: a playable world containing the streets, buildings, landmarks, and terrain of the area you selected.

Generating Online Instead (No Install)

If you're on a phone or tablet, or simply don't want to install software, MapSmith generates Minecraft worlds directly in your browser on any device. According to the site, it offers:

Feature What it means for you
Large areas Regions up to 500 km², roughly eight times the size of Manhattan
Mobile ready Generate from a phone or tablet — useful for Bedrock players on the go
Fast generation Optimized servers that generate significantly faster than typical home computers
No setup No download; select an area and go

This is the paid online service mentioned in the FAQ, so treat it as a convenience option rather than a free replacement for the desktop app.

Common Issues and How to Think About Them

The area is too large or generation is slow. The site notes there is no hard limit on area size, but practically the size affects generation. If a huge selection is dragging, shrink the rectangle and generate in smaller pieces.

You're not sure which edition you'll get. Arnis targets both Minecraft Java and Bedrock Edition, so check which edition you actually play before generating, and confirm the output matches.

You downloaded from somewhere other than GitHub. The site is explicit: all downloads are hosted on the official GitHub repository, and you should always verify you're downloading from the official GitHub page for safety.

You want it on mobile but don't want to pay. The desktop app is free but not mobile-native; the browser tool is the mobile path and is a paid service. There's no stated free mobile option, so plan around that.

Quick Decision Guide

  • Want the free, full-featured route on a computer: download Arnis from the official GitHub repository.
  • On mobile or can't install anything: use MapSmith in the browser, understanding it's a paid service.
  • Recreating a specific place: use the rectangle selection tool to frame exactly the streets, landmarks, or terrain you care about.
  • Adding to an existing build: choose to generate into an existing world rather than a new one.
What Is Arnis and How Do You Generate Real-World Minecraft Maps?

Arnis is a free, open-source desktop application that converts real-world geographical data into playable Minecraft Java and Bedrock Edition worlds. You pick any location on Earth on an interactive map, draw a rectangle around the area you want, and generate it into a Minecraft world that recreates streets, buildings, landmarks, and terrain. If you don't want to install anything — or you're on a phone or tablet — MapSmith, the browser-based companion service, generates worlds online instead. The desktop app is the right choice if you want the full toolset and don't mind a download; MapSmith is the right choice for mobile players or a one-off world without setup.

What Arnis actually does

Arnis takes real-world map data and turns it into Minecraft terrain and structures. According to the official site, it recreates "streets, buildings, landmarks, and terrain from any location on Earth," and outputs worlds for both Minecraft Java and Bedrock Edition. The site's gallery shows generated results for locations including New York, the Grand Canyon, Heidelberg, London, Paris, and the Taj Mahal — all produced "within minutes."

Two things follow from that description:

  • It's a world generator, not a mod. You get a Minecraft world as output, which you then open in your normal Minecraft installation.
  • It's location-driven. The input that matters most is where you select on the map, plus whatever customization settings the app exposes.

Generating a world in the desktop app

The official workflow is three steps:

  1. Select your area — Choose any location on Earth using the interactive map and the rectangle selection tool.
  2. Choose your world — Generate a new world, or select an existing one.
  3. Generate and explore — Click "Start Generation" and watch the selected area get built into Minecraft.

What to expect at each step: after drawing your rectangle, the app knows the bounding area to convert; choosing a world determines whether you're creating something fresh or writing into an existing save; and generation is the compute-heavy step where the real-world data becomes blocks. The site describes generation as happening "within minutes" for the showcased locations.

Verification: the practical check is to open the generated world in Minecraft and confirm the area matches the location you selected — recognizable street layouts, building footprints, and terrain shape are the signals that the conversion worked.

Generating online with MapSmith

If you'd rather not download anything, MapSmith generates Minecraft worlds directly in a browser on any device. The site lists four advantages:

Feature What it means for you
Large areas Regions up to 500 km² — roughly eight times the size of Manhattan
Mobile ready Generate from a phone or tablet; aimed at Bedrock players on the go
Fast generation Optimized servers, described as significantly faster than typical home computers
No setup No download; select an area and go

This is the path to take if you're on mobile, if you're on a device where you can't install desktop software, or if you just want to test the tool before committing to a download.

Practical limits: size, time, and platforms

  • Area size: The FAQ states there is "no hard limit," but practically the size is constrained — the page text cuts off at that point, so treat very large selections as something to test rather than assume. MapSmith advertises up to 500 km².
  • Generation time: Showcased locations generate "within minutes." Larger or denser areas will take longer; MapSmith claims faster generation than a typical home computer because it runs on optimized servers.
  • Platforms: The desktop app is available for Windows, Linux, and macOS. Output targets both Minecraft Java and Bedrock Edition.
  • Cost: Arnis itself is completely free and open source under the Apache 2.0 License. The site notes there is a paid online generation service for generating worlds on mobile devices — so the desktop app and the online service are not the same thing on price. Donations are welcomed to support development.

Downloading safely

All downloads are hosted on the official GitHub repository, and the site explicitly warns: "For your safety, always ensure you are downloading from the official GitHub page." Since the project is open source, the GitHub release page is also where you can inspect the code and track versions. Avoid mirrors or third-party download sites.

Which option should you pick?

  • Choose the desktop app if you're on Windows, Linux, or macOS, want the free open-source tool, and are fine installing software.
  • Choose MapSmith if you're on mobile, want no installation, need a large area (up to 500 km²), or want faster generation on server hardware — and you accept that online generation is a paid service.
  • Choose either if you just want to see your hometown, city, or a landmark rebuilt in Minecraft; both start from the same idea of selecting a real-world area and converting it into a playable world.
What Are Open-Source UI Element Libraries and How Do They Differ From UI Frameworks?

An open-source UI element library is a collection of individual, ready-made interface pieces—buttons, cards, inputs, toggles, loaders—that you copy into your own project and adapt. A UI framework, by contrast, is a structured system of components, conventions, and often a theming layer that governs how your whole interface is built. The practical difference: an element library gives you a snippet; a framework gives you a way of working. If you need a polished button in ten minutes, reach for the element library. If you're building a 40-screen product with a team, you probably want the framework.

What "open-source UI element library" actually means

The term gets used loosely, so it helps to separate the parts:

  • Open-source: the code is publicly available, and the license tells you what you may do with it—copy, modify, redistribute, or use commercially.
  • UI element: a single, self-contained piece of interface, usually small enough to read in one sitting. A button with hover states, a pricing card, a search field.
  • Library: a browsable, searchable collection of those elements, typically contributed by many different people.

On a site like Uiverse, elements are shared by a community and written in plain CSS or Tailwind. You find one you like, copy the markup and styles, paste them into your project, and adjust colors, spacing, and text to fit. There's no package to install and no build step required—which is exactly the appeal, and also the source of most of the confusion.

Element library vs. UI framework: the core differences

Dimension Open-source UI element library UI framework / design system
Unit of reuse A single snippet you copy A component you import or call
Installation None; paste into your code Package install, config, sometimes a provider
Consistency Depends on you; each element may look different Enforced by shared tokens and APIs
Theming Manual edits per element Central theme/config file
Updates You own the copy; no upstream updates Version bumps bring fixes and changes
Accessibility Varies per contributor; must be checked Usually tested and documented
Best for Prototypes, landing pages, small sites, one-off needs Multi-page apps, teams, long-lived products
Learning curve Low—read the CSS Higher—learn the API and conventions

The table isn't a verdict. It's a map of trade-offs. Element libraries win on speed and freedom; frameworks win on consistency and maintenance.

Licensing and attribution: what to check before you paste

This is where people get into trouble, and it's worth slowing down for.

  1. Find the license. Every element or collection should state one. Common open-source licenses include MIT, Apache-2.0, and BSD. Some projects use copyleft licenses like GPL, which can impose obligations if you redistribute your code.
  2. Understand what the license permits. MIT and Apache-2.0 are permissive: you can typically use the code in commercial and closed-source projects. Copyleft licenses may require you to release derivative source under the same terms.
  3. Check attribution requirements. Permissive licenses usually require you to keep the copyright notice and license text somewhere in your project. That's a real obligation, not a formality.
  4. Look for per-element terms. On community sites, the site's overall terms and the individual contributor's stated wishes may differ. If a contributor asks for credit, honor it.
  5. When in doubt, ask or avoid. If a snippet has no license at all, you don't have clear permission to reuse it. Treat "no license" as "not open source," even if the code is publicly visible.

This article is general information, not legal advice. For commercial products with real exposure, have someone qualified review the licenses you're relying on.

How to use a community element in your project: a practical workflow

Here's a repeatable process that avoids most of the usual mess.

1. Start from a real need, not a browsing session

Decide what you need first—"a compact primary button with a loading state"—then search. Browsing aimlessly produces a pile of pretty snippets that don't fit together.

2. Copy the smallest version that works

Take the markup and the styles. Strip anything you don't need: demo wrappers, extra animations, decorative layers. Less code means fewer surprises.

3. Convert it to your conventions

If your project uses design tokens or CSS variables, replace hard-coded values:

/* Before: hard-coded */
.button { background: #4f46e5; border-radius: 8px; }

/* After: token-based */
.button { background: var(--color-primary); border-radius: var(--radius-md); }

This one step is what keeps a copied element from looking like a foreign object in your UI.

4. Check accessibility before you ship

Community elements vary widely here. Verify at minimum:

  • Keyboard focus is visible and the element is reachable by Tab.
  • Color contrast meets WCAG AA (4.5:1 for normal text).
  • Interactive elements use semantic HTML (<button>, not a clickable <div>).
  • Form inputs have associated labels.
  • Motion respects prefers-reduced-motion.

5. Test in context

Paste it into a real page with real content. Long labels, small screens, and dark mode break more copied elements than anything else.

6. Note where it came from

Keep a short comment or an internal credits file: source, license, date. Future you—and your legal reviewer—will be grateful.

Where element libraries genuinely shine

  • Prototypes and demos: you need something clickable today, not a design system.
  • Landing pages and marketing sites: a handful of distinctive elements, each custom.
  • Filling gaps: your framework lacks one specific component, and you don't want to build it from scratch.
  • Learning: reading well-made CSS is one of the fastest ways to improve.
  • Small projects: a personal site doesn't need a theming architecture.

Where they fall short

  • Consistency at scale: ten elements from ten contributors rarely look like one product.
  • Maintenance: you own every copy. When your design changes, you edit each one.
  • Accessibility debt: you inherit whatever the contributor did or didn't do.
  • No upstream fixes: a bug fixed in the original won't reach your copy.
  • Integration friction: different naming conventions, different units, different assumptions about resets.

When to choose which

Choose an element library when the scope is small, the timeline is short, or you need a few distinctive pieces rather than a whole system.

Choose a framework or design system when multiple people build multiple screens over months, when consistency is a product requirement, or when accessibility and theming need to be guaranteed rather than checked.

A hybrid works well for many teams: adopt a framework for the structural components—forms, navigation, layout—and borrow individual elements for the places where you want personality. Just route every borrowed element through the same token and accessibility checks, so it lands as part of your system rather than beside it.

The short version: open-source UI element libraries are a fast, flexible way to get good-looking interface pieces into a project. They are not a substitute for a design system, and the license and accessibility details are the part worth reading carefully.

Website Overview

The available information shows a mix of normal operation and configuration gaps. Depending on how the website is used, these gaps may affect secure access or the consistency of its public presentation.

Domain and Registration

Transfer-protection status is present, helping reduce the risk of unauthorized domain transfers. The domain has about 1 years of registration history; its current configuration provides more context than age alone. The domain uses the common .com extension, which is not an independent safety signal.

DNS and Email

Nameservers are provided by ns14.net, indicating managed DNS hosting. MX records point to the arnismc.com email service. No CNAME was found; the observed records resolve directly to addresses. SPF and DMARC are configured. DKIM status is unknown. TXT records include verification markers for Google. Such markers may also remain after a service stops being used.

TLS and Certificates

The certificate uses an RSA 2048-bit public key, offering broad client compatibility. The server supplied a complete certificate chain. No organization name is present in the certificate; the available fields are consistent with domain validation. The certificate was issued by Let's Encrypt, commonly associated with automated certificate services. The certificate's total validity is about 89 days, consistent with a short renewal cycle.

HTTP and Browser Security

X-Powered-By exposes backend information: PleskLin. The checked browser-security headers were not detected, leaving fewer explicit browser-side safeguards. No obvious internal addresses or debug information were found in the headers. The Server header identifies nginx without an exact version. No explicit CDN or WAF marker was found in the response headers.

Technology Stack Analysis

The public page identifies Google Analytics, nginx without precise versions, leaving fewer clues for version-specific scanning.

Search and Social Sharing

The title has 73 characters and may be truncated in search results. Twitter Card metadata is configured. JSON-LD includes Organization data, helping describe the organization as an entity. A meta description is present, with 154 characters. The observed directives allow indexing and link following.

Hosting and Email

DNSns14.net
HostingSYNLINQ
Emailarnismc.com
Approximate IP geolocation (inferred; a CDN or proxy may differ from the origin server) Germany flagGermany Inferred 45.82.120.87

Registration details

RDAP / WHOIS

RegistrarInterNetX GmbH
Registered2025-09-13
Expires2027-09-13
Domain statusclient transfer prohibited
Nameserversa.ns14.net、b.ns14.net、c.ns14.net、d.ns14.net
DNSSECunsigned

DNS records

DNS

TypeNameValueTTLPriority
Aarnismc.com45.82.120.8786400—
MXarnismc.commail.arnismc.com8640010
NSarnismc.coma.ns14.net86400—
NSarnismc.comb.ns14.net86400—
NSarnismc.comc.ns14.net86400—
NSarnismc.comd.ns14.net86400—
TXTarnismc.comgoogle-site-verification=vv7qxKOcMj34Em73xfbrNYgqBK-aELuVI7WieYZj53Q86400—
TXTarnismc.comv=spf1 mx ip4:45.82.120.87 ~all86400—
DMARC_dmarc.arnismc.comv=DMARC1; p=none;86400—

TLS and certificates

TLS / SSL

AssessmentNormal configuration
Supported protocolsTLSv1.2、TLSv1.3
Negotiated protocolTLSv1.3
Certificate subjectarnismc.com
IssuerLet's Encrypt
Valid until2026-11-26T02:21 · Remaining when checked: 56 days
Verification detailsCertificate trust: Passed · Hostname match: Passed

HTTP response headers

HTTP

HeaderValue
content-typetext/html
servernginx

Identified technologies

Google Analyticsnginx

Pages, Search and Sharing

Meta descriptionGenerate Minecraft worlds from real-world locations. Free, official, open-source tool to recreate your hometown, city, or any place on Earth in Minecraft.
Canonical URLhttps://arnismc.com
LanguageEnglish (default)
Twitter Cardsummary_large_image
All bots 1 allowed · 0 disallowed
  • Allow/

User reviews (0)

  • No reviews yet.