Website profiles · Technology insights · Alternatives

beta.cubical.xyz No paid content found

Categories: Games & Board Games

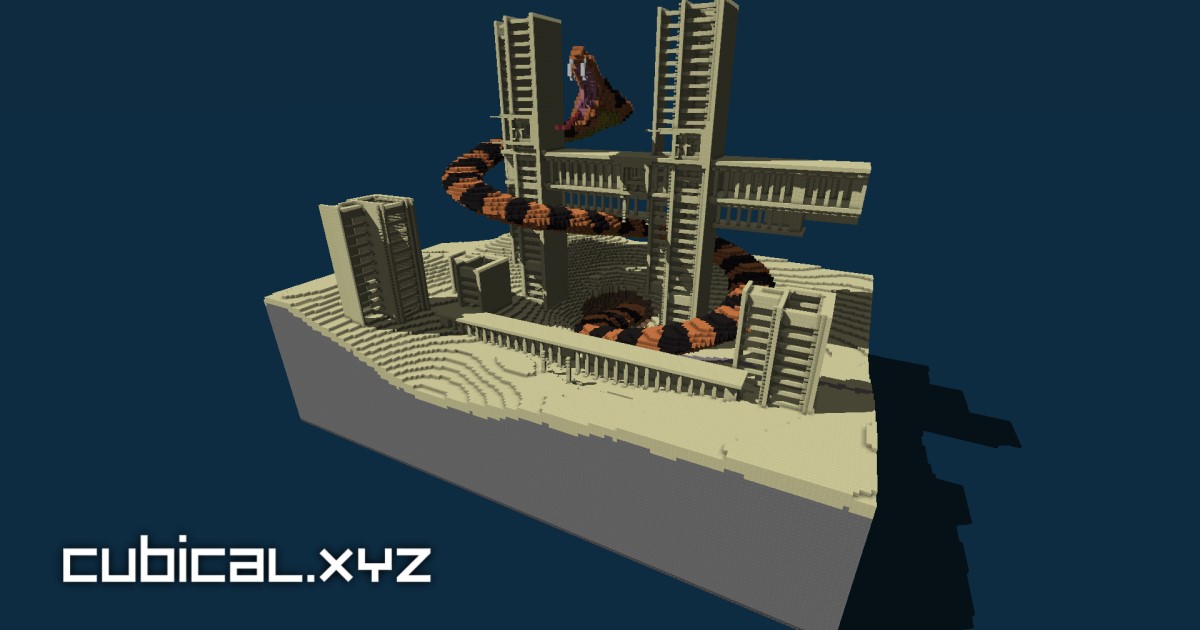
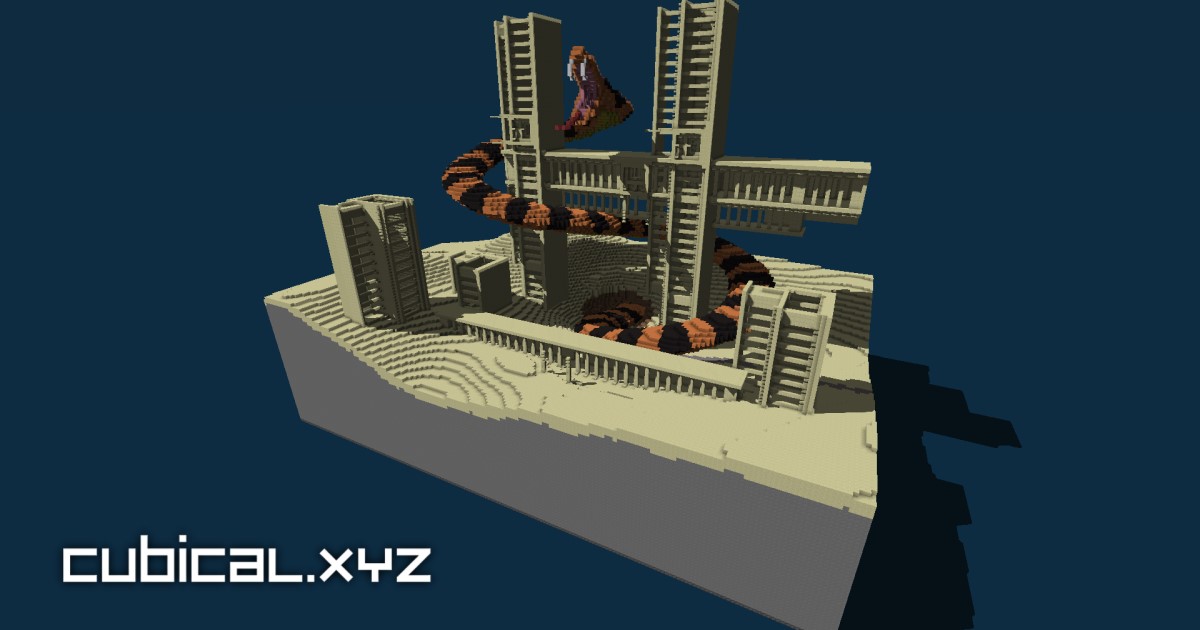
Easily create, edit, convert and share your Minecraft builds for free, right from your browser! Includes advanced building tools, generators, player view and more!

Visit website

Updated: 2026-10-03 16:28 Language: English (default) Access: Normal

Profile views 9 Outbound visits 2
beta.cubical.xyz Full homepage screenshot
Editorial Review

Website Review

What is Cubical?

Cubical is a browser-based tool for creating, editing, converting and sharing Minecraft builds as 3D schematics. Because it runs in the browser, you don't install anything — you open the page and work on a build directly.

Its pitch centers on three verbs: build, edit, convert. That covers a few practical jobs:

  • Planning a build before committing blocks in-game, so you can iterate on shape and layout without grinding materials.
  • Viewing an existing schematic in 3D, including a player-view mode for checking how something looks from ground level.
  • Converting between schematic formats when a build needs to move between tools or Minecraft versions.
  • Sharing a build with others through the site rather than passing files around.

The page also mentions advanced building tools and generators, and the visible interface hints at keyboard-driven controls with rebindable keys.

Who it suits: players who want a quick visual check or a rough draft without launching the game, and anyone who needs a format conversion in a hurry. For large, complex projects, expect a browser editor to feel different from a full desktop tool — verify performance and format support with your own files before relying on it.

Next step: open Cubical and try one real schematic you already have. If it loads, renders and re-exports cleanly, that single test tells you more than any feature list.

How do I import an existing Minecraft build into Cubical?

Cubical is a browser-based 3D schematic tool for Minecraft builds — you create, edit, convert and share structures without installing anything. Importing an existing build means getting your structure into a format Cubical can read, then loading it into the editor.

Common import routes

  • Schematic files (.schem, .schematic, .nbt): If your build already exists as a saved schematic — from WorldEdit, Litematica, or another planner — this is the direct path. Open Cubical in your browser and look for the load/import option, then select the file from your device.
  • From a live world: If the build only exists inside a Minecraft world, you first need to export that region as a schematic. Tools like WorldEdit (//copy then //schem save) or structure blocks produce files you can then bring into Cubical. Cubical itself is a planner/editor, not a world reader, so this export step happens outside it.
  • Cross-tool conversion: Cubical advertises conversion between formats, which matters if your file came from an older tool using .schematic while you want the newer .schem format (or vice versa). Convert on import rather than rebuilding by hand.

A practical scenario

Say you built a redstone door in survival and want to refine it. You select the region with WorldEdit, save it as a .schem, download that file, open Cubical, and import it. You can then edit block-by-block, check it with the player view, and re-export. This avoids rebuilding the whole thing in a fresh editor.

What to watch for

  • Format compatibility: Older .schematic files may not carry newer block types or block-entity data cleanly. If blocks look wrong after import, the source format is the usual culprit.
  • Size and performance: Very large builds can be heavy in a browser tab. Import smaller sections if the editor feels sluggish.
  • Version differences: Blocks added in recent Minecraft versions may not render if your file or the tool targets an older version.

For deeper format help, the official Minecraft Wiki's schematic pages explain the file types, and WorldEdit documents the copy/save commands used to produce them.

Can I export my Cubical project as a Minecraft schematic file?

Yes. Cubical is built around converting builds between formats, and exporting a project as a Minecraft schematic is one of its core functions. The site describes itself as a "3D Schematic Tool" for building, editing and converting, with the workflow running in the browser rather than through a desktop install.

H3 Practical workflow

  1. Create or open your build in the editor.
  2. Use the convert/export option to produce a schematic file.
  3. Download it and drop it into your world's schematics folder (or your mod/plugin's expected directory).

H3 What to check before you rely on it

  • Schematic format version: Minecraft's older .schematic format and newer .schem/.nbt structure formats are not interchangeable. Confirm which your target mod or plugin expects.
  • Block palette support: Very new blocks or modded blocks may need a matching mod present when you paste.
  • Size limits: Large builds can hit memory or paste limits in the receiving tool, not necessarily in Cubical.

H3 Who this suits

  • Survival and creative players who want to plan a build before gathering materials.
  • Server owners moving structures between worlds.
  • Map makers iterating on a design in 3D and then importing it.

If your goal is simply to get a build into a world, exporting is the right move; if you need to collaborate or version-control the design, keep the project file too, since a schematic is a flattened snapshot rather than an editable project.

For related tools, Minecraft covers the game itself, and Planet Minecraft hosts community builds and schematics you can compare against.

What advanced building tools does Cubical offer for editing structures?

Cubical is a browser-based 3D schematic tool for Minecraft builds, so its "advanced building tools" are aimed at editing and reshaping structures rather than just viewing them. From the site description, the notable capabilities are:

  • A full 3D editor — you work with your build in a three-dimensional view instead of only inspecting it.
  • Generators — tools for producing or populating parts of a structure programmatically, useful for repetitive shapes like walls, floors or patterns.
  • Player view — lets you see the build from a player's perspective, which helps judge scale and how it will actually look in-game.
  • Conversion and sharing — you can convert between schematic formats and share builds, which matters when moving a design into a server or another tool.
  • Keyboard bindings — the page shows a key-binding prompt with Unbind/Default/Accept/Cancel options, indicating a customizable hotkey system for editing actions.

The trade-off is typical of browser tools: you gain instant access and no installation, but very large or complex builds may be more comfortable in a desktop application. For a concrete case, a survival player planning a large base could rough out the layout in the editor, use player view to check sightlines and ceiling heights, then convert and share the schematic with friends before gathering materials.

A useful next step is to open a small test build first and try the generators and player view on it, so you learn the key bindings and limits before committing to a big project.

If you want to compare options, other established Minecraft planning tools include Planet Minecraft for browsing and sharing builds and Minecraft for the official game itself.

How does the player view help me preview my build in-game?

The player view gives you a first-person or player-scale camera inside your schematic, so you can judge what a build will look like from eye level rather than from an overhead editing angle. That matters because a design that reads well in a top-down grid can feel cramped, oversized or confusing once you are actually standing in it.

What it is good for

  • Checking ceiling heights and doorway widths before you commit to building in survival.
  • Seeing whether corridors, staircases and room proportions feel right at walking pace.
  • Spotting details that only appear at eye level, such as floor patterns or wall trim.
  • Previewing how a façade or interior will read from the direction a visitor would approach.

How it fits into a normal workflow

Most people sketch the layout in the editor, switch to the player view for a walkthrough, then return to editing to fix anything that felt wrong. It is a feedback loop rather than a separate tool: you build, you look, you adjust. If your build is large, the player view is also a fast way to sanity-check that you have not left gaps, floating blocks or unreachable areas.

Trade-offs to keep in mind

The player view is a preview, not a substitute for the real game. Lighting, biome colours, mob behaviour and redstone timing all behave differently once the structure is placed in a world, so treat it as a proportion and layout check rather than a final verdict. Very detailed interiors can also be slow to navigate at walking speed, so for big projects it helps to preview one section at a time.

A practical next step

Pick a single room you are unsure about, walk through it in the player view, and note one concrete change, such as raising a ceiling by one block or widening a door. Then make that change in the editor and walk it again. For related building and conversion tools, Cubical is the main site for this tool.

Do I need to install anything to use Cubical in my browser?

No. Cubical runs entirely in your browser at Cubical, so there is nothing to download or install. You open the site, and the 3D schematic tool loads in the page itself.

The one thing you do need is a modern desktop browser with WebGL support, since the editor renders Minecraft builds in 3D. Chrome, Edge, Firefox and Safari all work; older or locked-down browsers may struggle with the 3D view. If you are on a managed work computer, check that hardware acceleration and WebGL are not disabled.

As a practical test, open the site and load a project. If the 3D view appears and you can rotate it, your setup is ready. If the canvas stays blank or the page feels sluggish, try another browser or enable hardware acceleration before assuming you need extra software.

Related questions

More questions →
How to Create and Export Animated Sprites with Piskel

Piskel is a free, open-source, browser-based editor for animated sprites and pixel art. You can design characters, animations, and tiles directly in your browser, then export them as animated GIFs, PNG spritesheets, or ZIP files. It works best in a desktop browser in landscape orientation, and offline desktop versions are available for Windows, OSX, and Linux if you prefer not to work in the browser.

Getting Started

Open piskelapp.com in a desktop browser. You have two starting points:

  • Start from scratch — create a blank sprite and set your own canvas size.
  • Try an example — load one of the built-in sprite examples (characters, tilesets, layered backgrounds, Gameboy retro graphics) to see how a finished sprite is structured before making your own.

If you're on a phone or tablet, Piskel will warn you that it's best used in a desktop browser in landscape orientation. You can open it anyway, but the drawing tools are designed around a mouse and a wider canvas.

Drawing Pixel Art Frame by Frame

Piskel's workflow is frame-based: each frame is a single still image, and the animation plays them in sequence.

  1. Set up your canvas. Choose a small pixel grid (classic sprites are often 16×16, 32×32, or 64×64). Small canvases keep individual pixels visible and editable.
  2. Draw with the pen tool. Click individual pixels to place color. This is the core action for pixel art — every pixel is a deliberate decision.
  3. Fill areas with the fill tool. Use it to flood a region with a single color instead of clicking pixel by pixel.
  4. Pick and manage colors. Choose from the color palette, or select an existing color from your canvas to reuse it consistently across frames.
  5. Add frames. Duplicate the current frame and modify it slightly to create motion — this is how walk cycles, blinking, and idle animations are built.

The key habit for animation: keep changes between consecutive frames small. A two-pixel shift in a leg position reads as movement; a ten-pixel jump reads as a glitch.

Previewing and Tuning the Animation

Piskel shows a live preview of your animation in real time as you draw, so you don't have to export to check whether the motion works.

  • Adjust frame delay on the fly. Each frame's delay controls how long it stays on screen. Shorter delays make fast motion; longer delays make slow, deliberate movement.
  • Watch the loop. Because the preview loops continuously, you'll immediately see whether the first and last frames connect smoothly or whether there's a visible jump.

Tune the delay while watching the preview rather than guessing — the same frames can feel completely different at different speeds.

Exporting Your Work

Piskel supports several export modes depending on what you need the file for:

Export format Best for
Animated GIF Sharing the animation on its own, posting online
PNG spritesheet Importing into a game engine that expects a single image with all frames
ZIP Larger projects where frames or layers are kept as separate files

Choose GIF when the animation is the final product. Choose a spritesheet PNG or ZIP when the sprite is an asset that another program will read.

Options for Kids and Offline Use

  • Piskel for Kids is a child-friendly version of the editor, designed to be safe and distraction-free. It's aimed at kids, teachers, and parents who want the same pixel art workflow without extra interface elements.
  • Offline versions are free desktop applications for Windows, OSX, and Linux, available from the download page. Use these if you need to work without an internet connection or want a dedicated application window.

Common Sticking Points

  • Working on a small screen. The editor is built for desktop and landscape orientation; drawing precision suffers on a phone.
  • Frames that don't loop cleanly. If the animation snaps when it restarts, the last frame doesn't lead back into the first — adjust the final frame's pose or delay.
  • Exporting the wrong format. A GIF is for viewing; a spritesheet is for importing into a game. Picking the wrong one means re-exporting later.

All of Piskel's code is open-source and available on GitHub, so the tool itself can be inspected, modified, or self-hosted if you need that level of control.

Anarchy vs Towny vs Skyblock: Which Minecraft Server Mode Fits Your Play Style?

The three modes differ mainly in how much protection you get, how much you must cooperate, and how often other players can ruin your plans. Anarchy gives you total freedom with no rules and no safety net, so it suits players who enjoy constant PVP risk and self-reliance. Towny adds land claims, towns, and shared rules, so it suits players who want to build safely and work with a group. Skyblock isolates you on a small floating island where you start from almost nothing, so it suits players who prefer steady progression and low direct conflict. If you want open-world danger, pick Anarchy. If you want community and protected builds, pick Towny. If you want a controlled solo-to-co-op challenge, pick Skyblock.

The core loop of each mode

Anarchy: no rules, no protection

Anarchy servers usually have no land claims, no staff intervention, and no reset. The core loop is simple: gather resources, hide your base, gear up, and fight or flee. Everything you build can be found and destroyed. That is not a bug; it is the point.

What this means in practice:

  • Protection: none. Coordinates leak, bases get raided.
  • Cooperation: optional and temporary. Alliances form and break.
  • Conflict: constant and unrestricted, including traps, griefing, and spawn camping.
  • Progression: you define it. There is no quest line or rank ladder.

Towny: claims, towns, and shared rules

Towny is a land-claim and town plugin style. You join or create a town, and the town owns claimed land. Inside claims, other players generally cannot break blocks or open containers unless the town allows it.

The core loop:

  • Protection: strong inside town claims, weak in the wilderness.
  • Cooperation: central. Towns share resources, taxes, and defense.
  • Conflict: possible between towns and in unclaimed land, but usually regulated by server rules.
  • Progression: build your town, expand claims, climb town ranks, and sometimes run for mayor or nation leadership.

Skyblock: start with almost nothing

Skyblock drops you on a small island, often with a tree, a chest, and a single block of ice or lava. You generate resources slowly and expand outward.

The core loop:

  • Protection: usually high on your own island; other players often cannot reach or edit it.
  • Cooperation: optional. Many servers allow island co-op, but solo play works.
  • Conflict: low on most Skyblock servers. Competition is usually economic or leaderboard-based rather than direct PVP.
  • Progression: clear and incremental. You unlock farms, generators, and better gear over time.

How the three modes compare

Factor Anarchy Towny Skyblock
Land protection None Strong in claims Strong on your island
Required cooperation None High Low to medium
Direct PVP risk Very high Medium, often rule-bound Low on most servers
Time to first safe base Long, you must hide it Short, claim land Short, island is private
Best for PVP and survival risk Community builders Solo progression and farming
Worst for Players who hate losing builds Lone wolves who dislike rules Players who want open-world exploration

Matching a mode to your play style

Ask yourself three questions.

1. How do you feel about losing your base? If losing hours of work to another player sounds exciting rather than devastating, Anarchy fits. If it sounds like a waste of time, Towny or Skyblock is safer.

2. Do you want to talk to other players regularly? Towny rewards communication: applying to a town, paying taxes, coordinating builds. Skyblock can be played almost silently. Anarchy interaction is often hostile or transactional.

3. How much time can you commit per session? Anarchy punishes long absences because your base may be found while you are offline. Towny and Skyblock are more forgiving; claims and private islands usually persist.

Cross-platform and Bedrock access

If you play on Bedrock, mobile, or console, check whether the mode you want supports cross-platform play. Some networks run Bedrock and Java together, but plugin behavior can differ. Land claims, island protection, and PVP mechanics may work slightly differently on Bedrock. Before committing to a long build, confirm that your platform can use the same protection commands as Java players.

Common beginner misconceptions

  • "Anarchy means no one helps anyone." False. Anarchy players often trade, team up, and share coordinates within trusted groups. The difference is that nothing enforces those agreements.
  • "Towny means I am completely safe." Only inside claims. Wilderness travel, nether trips, and unclaimed outposts still carry risk.
  • "Skyblock is always single-player." Many servers offer island co-op, visitor permissions, and community markets. You can be as social or as isolated as you like.
  • "I need to pick one mode forever." Most networks let you play multiple modes with the same account. Try each for a few hours before deciding.

A quick decision path

  1. I want danger and no rules → Anarchy
  2. I want a protected base and a town community → Towny
  3. I want a private island and steady progress → Skyblock
  4. I am on Bedrock and want cross-platform play → confirm mode support first, then choose based on the three questions above.

Pick the mode that matches your tolerance for risk and your appetite for cooperation. You can always switch later, but starting in the right mode saves you from losing your first base to a mechanic you did not expect.

What Is a Minecraft Viewer and How Do You Use One?

A Minecraft viewer is a tool that loads a Minecraft build or schematic file and renders it as an interactive 3D model you can rotate, zoom, and inspect — without launching the game. You use one when you want to check what a downloaded build actually looks like, verify a schematic before importing it into a world, or show a structure to someone who doesn't have Minecraft installed. Browser-based viewers such as the one at beta.cubical.xyz handle this directly in the page, so nothing needs to be installed.

What a viewer does that an editor doesn't

The distinction matters because the tools often live in the same app. A viewer is read-only: it answers "what is this and does it look right?" An editor changes blocks, and a planner lays out new builds from scratch. If your only goal is inspection, you don't need the editing or generation features — you need fast loading, accurate rendering, and smooth camera controls.

Cubical's toolset is described as covering build, edit, and convert, with a player view among its features. That means the same site can serve as a pure viewer if you only open files and look at them.

Supported file types and how loading works

Schematic formats vary by tool and Minecraft version, so the practical rule is: match the format to what your viewer accepts.

Format Typical origin Notes
.schematic Older WorldEdit / MCEdit workflows Widely supported legacy format
.schem Modern WorldEdit / Sponge schematics Common for current Java Edition builds
.nbt Structure blocks, some exports Structure data rather than a full schematic

The general loading flow is the same across viewers:

  1. Get the file onto your machine. Download the schematic from wherever it was shared.
  2. Open the viewer and start an import. In Cubical this happens in the browser; the page shows a loading state (the source page displays a "Loading random project..." indicator) while a project is being read.
  3. Confirm the render. Once loaded, the build appears as a 3D model you can orbit.

Expected result: the structure appears at correct scale with its blocks intact. If it loads but looks wrong, the problem is usually the file, not the viewer.

Moving around the 3D view

Viewer camera controls are near-universal, even when the exact keys differ:

  • Rotate / orbit — drag with the primary mouse button to spin the model.
  • Zoom — scroll wheel to move closer or further out.
  • Pan — usually a middle-mouse drag or a modifier key plus drag, to slide the view sideways.
  • Reset view — most viewers offer a way back to the default angle when you get lost.

Cubical's page includes a key-binding interface ("Press keys to set binding for action") with Accept, Cancel, and Unbind options, which means camera and action controls can be remapped rather than being fixed. If the default controls feel wrong, that's where you change them.

When a build won't load or looks broken

Most failures trace back to one of a few causes:

  • Wrong format for the viewer. A .nbt structure file is not the same thing as a .schematic; try converting or re-exporting.
  • Version mismatch. Blocks added or removed between Minecraft versions can render as missing or substituted.
  • Truncated or corrupted download. Re-download the file before assuming the viewer is at fault.
  • Very large builds. Big structures take longer to parse and may strain a browser tab; the loading indicator staying up is a sign to wait rather than reload.

If a file loads in one viewer but not another, the file is probably fine and the second tool simply doesn't support that format.

Viewer vs. editor vs. planner: which do you actually need?

  • Choose a viewer when you're inspecting, sharing, or sanity-checking someone else's build.
  • Choose an editor when you need to fix or modify blocks in an existing structure.
  • Choose a planner when you're designing something new and want generators or building tools.

Because Cubical bundles all three, the decision is about which mode you enter, not which site you visit. Start in view mode; switch to editing only when inspection turns up something you need to change.

What Is Cubical and How Do You Use It to Build Minecraft Schematics Online?

Cubical (beta.cubical.xyz) is a browser-based 3D schematic tool for Minecraft that lets you create, edit, convert, and share builds without installing anything. It fits players who want to plan a build, preview it in player view, and export a usable file for the game. Because it runs in the browser and is labeled beta, expect occasional loading states and a keyboard-driven interface rather than a fully polished desktop app.

What Cubical Does

The site describes itself as a tool to "easily create, edit, convert and share your Minecraft builds for free, right from your browser," with "advanced building tools, generators, player view and more." In practice that means four core jobs:

  • Create a new structure from scratch in a 3D workspace.
  • Edit an existing build with building tools and generators.
  • Convert between schematic/structure formats so the file works in your version of the game.
  • Share a build with others, since projects live online rather than on your disk.

The keyword set around the tool — Minecraft Schematic, Viewer, Planner, Editor, Structure — maps to these functions rather than to separate products.

How to Use It: Step by Step

  1. Open the tool. Go to beta.cubical.xyz in a modern browser. No install step is described.
  2. Start or load a project. The page shows a loading state ("Loading random project..."), so a project may open automatically. From there you either work on that project or start your own.
  3. Build or edit. Use the building tools and generators to place blocks and shape the structure. This is where the "advanced building tools" and "generators" come in.
  4. Check it in player view. Switch to player view to see the build at eye level, the way it will look in-game. This is the step that catches scale and proportion problems before export.
  5. Export or convert. Convert the build into a Minecraft-usable schematic or structure file for your target version.
  6. Share. Because the project lives on the site, sharing happens through the tool rather than by sending a file manually.

Expected result: a structure file you can bring into Minecraft, plus a shareable online copy of the build.

Keyboard Bindings and the Loading Screen

The page evidence shows a key-binding prompt: "Press keys to set binding for action," with Unbind, Default, Accept, and Cancel options. This tells you the editor is keyboard-driven — actions are triggered by keys you assign yourself.

If something doesn't respond:

  • Check whether a project is still loading ("Loading random project..."). Wait for it to finish before interacting.
  • If a key does nothing, open the binding prompt, press the key you want for that action, and choose Accept.
  • To undo a change, use Default to restore the original binding or Unbind to clear it.

Common Snags

  • Stuck on loading. The random-project loader can take a moment; don't assume it's broken.
  • Keys not working. Rebind the action instead of assuming the tool is unresponsive.
  • Wrong format on export. Match the export format to your Minecraft version, since "convert" exists precisely because formats differ.
  • Beta behavior. As a beta tool, expect interface changes and the occasional rough edge.

Who It's For

Cubical suits players who want to plan or edit a build in the browser, preview it in player view, and export a schematic without installing desktop software. If you need offline work or a stable, non-beta toolchain, a desktop editor may fit better. If you want quick online building, conversion, and sharing, Cubical covers that workflow directly.

What Is Cascadeur and How Does AI-Assisted Keyframe Animation Work?

Cascadeur is a 3D animation software built specifically for character animation, combining traditional keyframe work with AI-assisted tools for posing, inbetweening, and motion generation. It fits workflows where you need to block out or refine character motion — game combat animations, previz, mocap cleanup — rather than general-purpose 3D modeling or rendering. You can evaluate it through a free trial before committing.

What Cascadeur Is Designed For

The software targets a specific slice of the animation pipeline: the motion of humanoid and quadruped characters. Its stated use cases are:

  • Mocap cleanup — fixing and editing motion capture data, including preventing foot sliding, knee pops, and geometry penetration.
  • Previz — rapid blocking of animation for planning.
  • Animation editing — making changes through Animation Layers.
  • Game prototyping — producing combat, locomotion, and idle animations for games.

One documented production example: Nekki created the combat animations for Shadow Fight 4: Arena in Cascadeur. The game has surpassed 50 million downloads and 1.8 million reviews on Google Play alone.

The Core AI-Assisted Tools

Cascadeur's distinguishing feature is that its AI tools are meant to be editable rather than one-click black boxes. The CTO, Alexander Grishanin, has argued that editable AI matters more than one-click generation — worth keeping in mind if you need to iterate on results rather than accept them.

Inbetweening

AI interpolation that generates motion between your keyframes. You set the key poses; the system fills the gaps, which you can then adjust.

AutoPosing

An AI system that produces natural poses when you move fewer control points. Instead of rotating every joint, you move a few and the system infers a plausible full-body pose.

Ragdoll

A procedural tool that makes characters react to impacts, simulate falls, and handle collisions.

AutoPhysics

Displays a physically accurate result for the character, letting you quickly adjust secondary motion, inertia, and similar properties.

AI Motion Generation

Generates animation types including running, jumping, combat, acrobatics, and idles. This is generation as a starting point, not a final output — the editable framing matters here.

Rigging and Retargeting

  • Rigging: drag-and-drop the joints of your character to generate a rig automatically, for both humanoids and quadrupeds (cats, dogs, horses, etc.).
  • Retargeting: copy and paste animation between different characters regardless of skeletal structure or proportions. Quadrupeds get one-click retargeting.

How It Fits Into an Existing Pipeline

Cascadeur works with common interchange formats, which determines whether it can slot into your current toolchain:

Format Use
.FBX Standard 3D interchange
.DAE Collada
.GLB / .GLTF glTF
.USD Universal Scene Description

For Unreal Engine users, UE Live Link streams animation directly into the engine, with changes updating in real time. That's the most direct integration path if your target is a UE project.

When Cascadeur Is a Good Fit — and When It Isn't

Choose it if:

  • Your work is character motion: combat, locomotion, acrobatics, idles.
  • You need to clean up mocap data and fix common artifacts like foot sliding.
  • You want AI assistance that stays editable rather than generating a final clip you can't adjust.
  • You're targeting Unreal Engine and want live streaming of animation changes.

Look elsewhere if:

  • You need general 3D modeling, texturing, or rendering — Cascadeur is animation-focused.
  • Your work is 2D animation or sprite-based.
  • You need a fully automated one-click motion pipeline with no keyframe editing.

How to Evaluate It

  1. Go to the plans page and start the free trial.
  2. Import a character in a supported format (.FBX, .DAE, .GLB/.GLTF, or .USD).
  3. Use drag-and-drop rigging to generate a rig, then test AutoPosing by moving a few control points and checking whether the inferred poses are usable.
  4. Set two keyframes and run Inbetweening to see whether the generated motion matches your intent.
  5. If you use Unreal Engine, connect UE Live Link and confirm that edits update in the engine in real time.

The trial is the practical test: the value of an AI-assisted keyframe tool depends on whether its generated poses and inbetweens are close enough to your target that editing them is faster than animating from scratch.

Website Overview

An established domain and managed infrastructure suggest continuity of operations and may support dependable delivery, although neither guarantees service quality. Several search or sharing settings need attention. Together they may make snippets, preview images or preferred URLs less consistent across platforms.

Domain and Registration

The domain uses .xyz. Assess the website's identity and content rather than relying on the extension alone. Registered in 2015, this domain has about 11 years of history. That suggests continuity, although ownership and purpose may have changed. Transfer-protection status is present, helping reduce the risk of unauthorized domain transfers. The registrar is NameCheap, Inc., a widely used domain service provider.

DNS and Email

Nameservers are provided by DigitalOcean, indicating managed DNS hosting. MX records point to the Mailgun email service. No CNAME was found; the observed records resolve directly to addresses. SPF and DMARC are configured. DKIM status is unknown. TXT records include verification markers for Google. Such markers may also remain after a service stops being used.

TLS and Certificates

The certificate uses an RSA 2048-bit public key, offering broad client compatibility. The server supplied a complete certificate chain. No organization name is present in the certificate; the available fields are consistent with domain validation. The certificate was issued by Let's Encrypt, commonly associated with automated certificate services. The certificate's total validity is about 89 days, consistent with a short renewal cycle.

HTTP and Browser Security

The response lacks these common security headers: CSP, Permissions-Policy, clickjacking protection. No X-Powered-By header was found, reducing one common source of backend fingerprinting information. No obvious internal addresses or debug information were found in the headers. The Server header identifies Apache without an exact version. Cookie security attributes are unknown.

Technology Stack Analysis

The public page identifies Apache without precise versions, leaving fewer clues for version-specific scanning.

Search and Social Sharing

The title has 71 characters and may be truncated in search results. The meta description has 163 characters and may be shortened in search results. No homepage canonical URL was detected. If duplicate URLs exist, consolidation may be less explicit. Twitter Card metadata is configured. JSON-LD includes Organization data, helping describe the organization as an entity.

Hosting and Email

DNSDigitalOcean
HostingDigitalOcean, LLC
EmailMailgun
Location United States flagClifton, New Jersey, United States 159.203.168.80

User reviews (0)

  • No reviews yet.

Pages, Search and Sharing

Meta descriptionEasily create, edit, convert and share your Minecraft builds for free, right from your browser! Includes advanced building tools, generators, player view and more!
Canonical URLNot detected
LanguageEnglish (default)
Twitter Cardsummary_large_image
All bots 0 allowed · 4 disallowed
  • Disallow/cgi-bin/
  • Disallow/includes/
  • Disallow/php/
  • Disallow/beta/

Registration details RDAP / WHOIS

RegistrarNameCheap, Inc.
Registered2015-07-16
Expires2027-07-16
Domain statusclient transfer prohibited
Nameserversns1.digitalocean.com、ns2.digitalocean.com、ns3.digitalocean.com
DNSSECunsigned

DNS records

TypeNameValueTTLPriority
Abeta.cubical.xyz159.203.168.803600—
MXcubical.xyzmxa.mailgun.org1440010
MXcubical.xyzmxb.mailgun.org1440010
NScubical.xyzns1.digitalocean.com1800—
NScubical.xyzns2.digitalocean.com1800—
NScubical.xyzns3.digitalocean.com1800—
TXTcubical.xyzgoogle-site-verification=s-Lh8oA-g1Fnl7c9Wkln3_fYJL5UvrlTczd6SSls3JU3600—
TXTcubical.xyzv=spf1 include:sendgrid.net include:mailgun.org -all3600—
DMARC_dmarc.cubical.xyzv=DMARC1; p=reject; rua=mailto:[email protected]; pct=100;3600—

TLS and certificates

AssessmentNormal configuration
Supported protocolsTLSv1.2、TLSv1.3
Negotiated protocolTLSv1.3
Certificate subjectbeta.cubical.xyz
IssuerLet's Encrypt
Valid until2026-12-08T10:35 · Remaining when checked: 65 days
Verification detailsCertificate trust: Passed · Hostname match: Passed

HTTP response headers

HeaderValue
content-typetext/html; charset=UTF-8
cache-controlno-store, no-cache, must-revalidate
serverApache
strict-transport-securitymax-age=31536000
x-content-type-optionsnosniff
referrer-policyno-referrer-when-downgrade
set-cookieRedacted

Identified technologies

Apache