Website profiles · Technology insights · Alternatives

mixvio.ai Paid content

Categories: Artificial Intelligence Design & Creativity

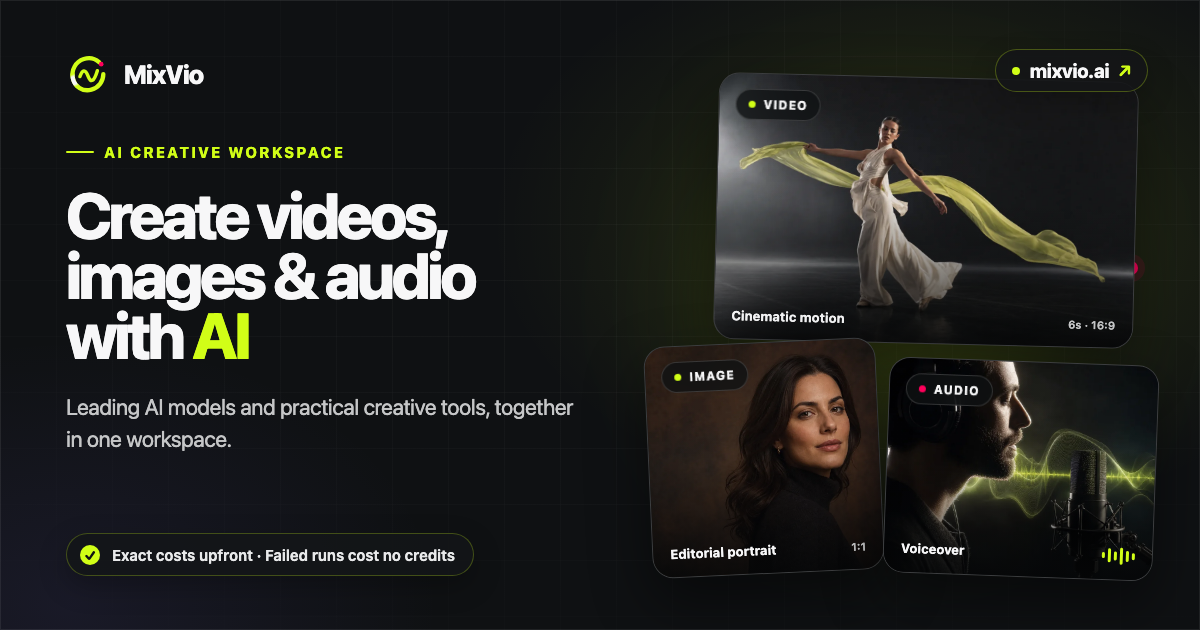
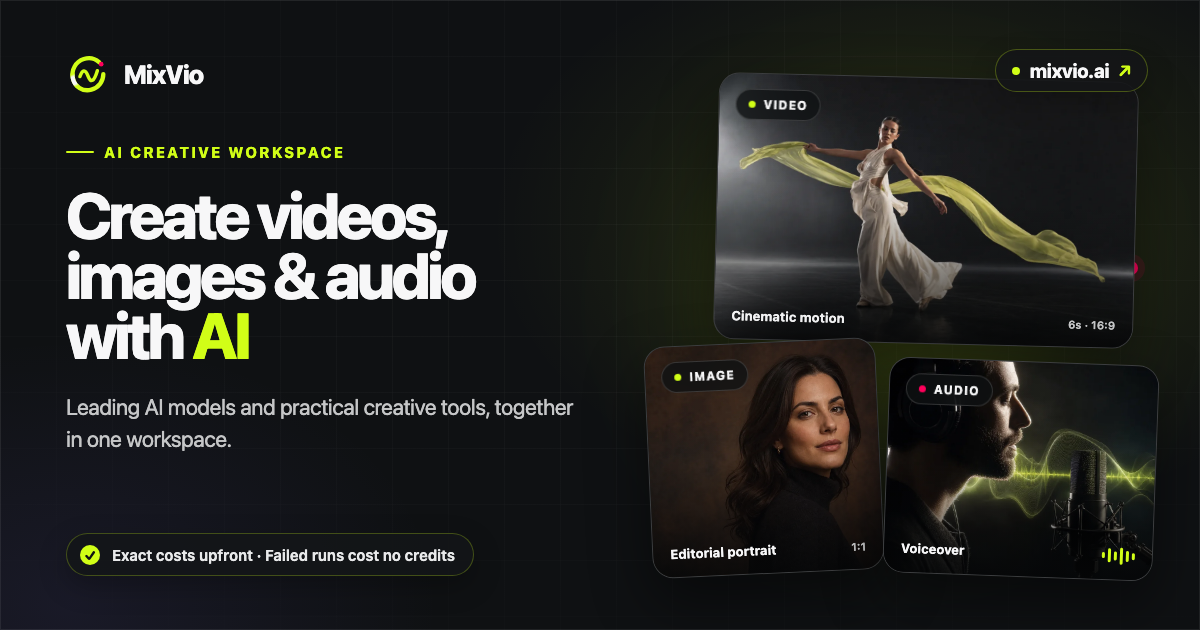
Create AI videos, images, and audio with Seedance, Kling, Veo, GPT Image, and practical creative tools. See exact costs upfront; failed runs cost no credits.

Visit website

Updated: 2026-09-27 13:21 Language: English (default) Access: Normal

Profile views 6 Outbound visits 1
MixVio Full homepage screenshot
Editorial Review

Website Review

What is MixVio?

MixVio is a web-based AI creation workspace that combines video, image, and audio generation with practical editing tools in one place. Instead of juggling separate services for each medium, you can move between them from a single interface — for example, generating a still image, then animating it, then producing a soundtrack.

What you can do with it

  • Video: text-to-video, image-to-video, video-to-video restyling, and motion control (copying motion from one clip onto a photo).
  • Images: text-to-image generation, image-to-image rebuilding, subject-preserving photo editing, background removal, and upscaling.
  • Audio: scene-directed sound generation with timing driven by text.

How it works in practice

The creation flow is prompt- and settings-driven. On the video side, the interface exposes controls such as start frame, optional end frame, duration, resolution, and audio on/off, and lets you describe the result you want in natural language. A concrete scenario: a small online seller photographs a product, removes the background, upscales the shot for a listing, then uses image-to-video to produce a short animated clip for social media — all without leaving the workspace.

Models and audience

MixVio curates third-party models rather than relying on a single engine, listing names such as Seedance 2.0, Seedance 2.5, Kling 3.0, Veo 3.1, Wan 3.0, MiniMax H3, GPT Image 2.5, Seedream 5.0 Pro, Nano Banana 2, and Seed Audio 1.0. That breadth suits content creators, marketers, and small teams who want model variety without maintaining separate accounts. The trade-off is typical of multi-model platforms: you get convenience and comparison, but less control over how any individual model behaves than you would get from its native tool.

Pricing approach

MixVio advertises upfront, per-run cost visibility and states that failed runs consume no credits. Its pricing page lists per-video figures for at least some models, so check current rates before committing to a workflow.

Next step: open the pricing page to compare per-run costs across the models you'd actually use, then run one small test — a single image-to-video clip — to see whether the output quality and credit consumption match your expectations before scaling up.

How much does it cost to generate a video or image with MixVio?

MixVio prices generation by the model you choose, and it shows you the exact credit cost before each run. Failed generations don't consume credits, so you're only paying for outputs you actually get. According to the site, video costs start as low as $0.10 per video for Seedance 2.0 and $0.17 per video for Veo 3.1; the full model-by-model breakdown lives on the MixVio pricing page. Image and audio rates aren't stated on the material provided here, so check that page for current numbers.

What drives the cost

  • Model choice. A newer or heavier video model generally costs more per run than an older one — the spread between Seedance 2.0 and Veo 3.1 above is a good illustration.
  • Output length and resolution. Longer clips and higher resolutions typically consume more credits than short, low-resolution drafts.
  • Audio. Turning native audio on can add to the cost of a video run.
  • Iteration count. Because failed runs are free, the real budget question is how many successful takes you need, not how many times you click generate.

A practical way to decide

If you're testing an idea, start with the cheapest capable model at short duration and low resolution, then re-run the winning prompt on a premium model once the composition works. For a social clip you may only need one or two paid runs; for client work, budget for several iterations plus an upscale pass.

Next step: open the pricing page, list the two or three models you'd realistically use, and multiply their per-run cost by the number of finished assets you need this month. That gives you a working budget before you commit credits.

Which AI models are available on MixVio and how do I choose between them?

MixVio groups its models by output type, so the fastest way to choose is to start from what you are making, then pick the model whose specialty matches.

Video models

  • Seedance 2.5 — described as producing 30-second video with native audio and support for large reference packs. Best when you need a longer single clip and want to feed in several reference images.
  • Seedance 2.0 — positioned for cinematic video with native audio. A sensible default for short, mood-driven shots; the site's own example ("Lantern street kite run") shows a painterly dusk scene with motion and reflections.
  • Wan 3.0 — 2–30 second video with native audio, first/last frame control, and document-to-video. Choose it when you want to bookend a shot with specific start and end frames, or turn a document into footage.
  • MiniMax H3 Multimodal — 2K video with native generated audio. The pick when resolution matters more than clip length.
  • Kling 3.0 — illustrated on the site with a moody fashion-film push-in, so it is worth trying for controlled camera moves and stylized live-action looks.
  • Veo 3.1 Fast — the site's example is a wide opera-house shot, suggesting it handles large, detailed scenes; "Fast" implies a speed-oriented option for iteration.

Image models

  • GPT Image 2.5 — generate and edit, with Flare or Sunburst styles.
  • Seedream 5.0 Pro — high-fidelity art with layout control; useful when composition and placement matter.
  • Nano Banana 2 — fast, typography-aware images from detailed instructions; the practical choice when text must appear inside the image.

Audio

  • Seed Audio 1.0 — scene-directed audio with timing derived from text.

Tools that are not model choices

Alongside the models, MixVio lists task-based tools: text-to-video, image-to-video, video-to-video, motion control, image-to-image, photo editing, background removal, and image upscaling. Treat these as the workflow layer — you still pick a model underneath.

How to decide

Your goal Start with
Longer clip, multiple references Seedance 2.5
Cinematic short shot Seedance 2.0
Fixed first and last frame Wan 3.0
Highest resolution MiniMax H3 Multimodal
Stylized camera movement Kling 3.0
Text inside the image Nano Banana 2
Precise layout and art quality Seedream 5.0 Pro
Generate and edit in one model GPT Image 2.5
Sound designed to a scene Seed Audio 1.0

A practical next step: run the same short prompt through two candidates before committing to a longer piece. The site states that you see the exact cost before every run and that failed runs cost no credits, so cheap comparison tests are low-risk. If you are weighing cost against quality, check the model cost details on MixVio before scaling up.

Can I use MixVio to edit or restyle an image or video I already have?

Yes. MixVio is built for editing existing media, not just generating new clips from text. The page lists dedicated tools for both directions: Image to Image (restyle or rebuild an image you already own), AI Photo Editor (keep the subject, change only what you ask), Background Remover, and AI Image Upscaler on the image side; Video to Video (restyle or recast a video from a prompt) and Motion Control (copy motion from a video onto a photo) on the video side.

Which tool fits your case

What you have What you want Tool to reach for
A photo New style, same subject Image to Image
A photo One targeted change (background, clothing, lighting) AI Photo Editor
A photo Clean cutout on transparency Background Remover
A photo Sharper output for social, print, or a listing AI Image Upscaler
A still image Gentle motion — blinks, head turn, slow push-in Image to Video
An existing video Restyle or replace the subject from a prompt Video to Video
A photo + a reference video Transfer the reference's movement onto the photo Motion Control

A practical example

Say you shot a portrait against a cluttered background. The AI Photo Editor path lets you keep the face and swap only the background; if you need a transparent PNG for a product listing instead, Background Remover is the cleaner route. If you then want the still to feel alive — the page's own "Studio portrait gaze" example describes natural blinks, a slight head turn, and a slow push-in — Image to Video handles that step without a reshoot.

Two things worth knowing before you start

Costs are shown before each run, and failed runs don't consume credits, which matters most for video restyling, where you'll likely iterate several times before the motion and style land. The pricing page lists per-video figures for some models, so check the model-cost section for the specific model you pick rather than assuming one rate.

Model choice drives output. Video restyling and motion transfer are handled by named models (the page features Wan 3.0, MiniMax H3, Seedance 2.5/2.0, Kling 3.0, and Veo 3.1, among others), and each has different strengths — some emphasize native audio, some longer durations, some reference-image handling. If your source clip needs audio replaced or generated alongside the visual restyle, pick a model that lists native audio.

Next step: open MixVio, upload your file to the tool matching the table above, and run one low-cost test pass before committing to a longer clip or a batch of images.

How do credits and failed runs work on MixVio?

MixVio charges credits per generation, and a run that fails does not consume credits. You see the exact cost of a run before you start it, so you can decide whether a clip, image, or audio track is worth the spend rather than discovering the price afterward. Because failed runs are free, retrying after a technical error or a rejected prompt does not eat into your balance.

That combination matters most when you are iterating. A short video with native audio, for example, tends to cost more than a single still image, so the practical workflow is to test a prompt at low settings, confirm the direction, then spend on the final render. MixVio's own example settings show this in practice — auto, 5 seconds, 480p, audio on with Seedance 2.0 — which is a cheap way to check motion and pacing before committing to a longer, higher-resolution pass.

A few things worth knowing:

  • Costs are shown upfront. The price appears before the run, not on a later invoice.
  • Failed runs are not billed. Errors or unsuccessful generations cost no credits.
  • Cost varies by model and output. Video models such as Seedance 2.0 and Veo 3.1 are listed with per-video starting prices on the MixVio pricing page, and model costs are broken out separately. Treat those figures as starting points, since length, resolution, and audio affect the total.
  • Image and audio work is usually the cheaper way to explore. Use it to lock a look or a script before moving to video.

Next step: before a big project, run one test generation at the lowest duration and resolution that still tells you something useful. If it fails, you have lost nothing but time; if it succeeds, you have a cheap reference for the final run.

Decision criterion: if you are still unsure about the concept, stay with images or short low-resolution video. Once the concept is settled and you need a finished clip, spend the credits on the higher-quality model.

Can MixVio generate audio, and how does it sync with video?

Yes. MixVio lists audio as one of its three core output types alongside video and image, and several of its video models generate native audio rather than requiring a separate sound pass.

Audio generation

  • Seed Audio 1.0 is the dedicated audio model, described as scene-directed audio with timing taken from text.
  • Native audio in video models: Wan 3.0, MiniMax H3 Multimodal, Seedance 2.5 and Seedance 2.0 are all described as producing video with native generated audio.
  • The video creation interface shows an Audio On toggle among the settings (alongside duration, resolution and model choice), so audio is something you decide per run.

How sync works

The page describes audio as generated with the video for the native-audio models, and Seed Audio 1.0 as taking its timing from your text. In practice that means synchronisation is driven by your prompt rather than by a separate waveform editor: you describe what happens and when, and the model places sound against that timeline. MixVio does not present itself as a dialogue-dubbing or frame-accurate sound-design tool.

A concrete example

Take the listed example "Lantern street kite run" — a painterly dusk market street, a boy running with a butterfly kite over wet stone. With audio on, you would write the prompt so the sound cues match the action: footsteps on wet stone, crowd murmur, kite fabric snapping, a swell as he runs. For tighter control, generate the visuals first, then use Seed Audio 1.0 with a text description that specifies order and timing.

Trade-offs

Approach Control Best for
Native audio in the video model Prompt-level; sound arrives with the clip Single-pass shorts, atmosphere, ambience
Seed Audio 1.0 as a separate step Timing specified in text; can be redone without regenerating video Replacing or refining sound on finished visuals

The separate route costs an extra generation but avoids re-rendering video just to fix audio.

Next step

Decide whether you need ambience or precise cue placement. For ambience, pick a native-audio video model and leave Audio On. For cue placement, generate video silently and build the track with Seed Audio 1.0. Since MixVio shows the exact cost before each run and does not charge for failed runs, you can test both on the same prompt and compare.

For model-by-model details, see MixVio.

Related questions

More questions →
How Do Content Creators Combine AI-Generated Assets With Licensed Stock Media in One Project?

Yes, you can combine AI-generated assets with licensed stock media in a single project, but the two categories carry different rights, and that difference is where most problems start. The practical rule: treat AI output and stock media as two separate asset classes with two separate paper trails, then document both before you publish. Below is how the rights differ, where creators get tripped up, and a workflow you can run in any editor.

AI assets vs. licensed stock: the core difference

AI-generated assets Licensed stock media
Who owns it Often unclear; depends on the tool's terms and your jurisdiction The creator or library; you get a license, not ownership
What you receive A generated file, sometimes with commercial-use rights granted by the tool A defined license (royalty-free, rights-managed, editorial-only)
Attribution Rarely required, sometimes prohibited from claiming authorship Sometimes required, often restricted from redistribution
Main risk Training-data provenance, platform terms changing, unclear copyrightability Scope creep — using editorial-only footage in a commercial ad, for example

The key point: a stock license tells you exactly what you can do. An AI tool's terms tell you what the platform permits, which is not the same as what copyright law allows. When you mix them, both sets of rules apply to the same final video.

Common licensing pitfalls when mixing the two

Editorial-only stock inside a monetized video

Many libraries label certain footage as "editorial use only" — news clips, celebrity shots, branded products. Dropping that into a YouTube video with ads or a client project can breach the license even if the rest of your timeline is clean AI output. Check the license tag on every stock clip, not just the ones you think are risky.

Assuming AI music is automatically "royalty-free"

AI-generated music may be free of royalties to a rights holder, but the tool's terms can still restrict commercial use, require a paid tier, or prohibit redistribution as a standalone track. If you upload your video to a platform that fingerprints audio, an AI track can still trigger a claim if it closely resembles training data.

Voiceover and likeness rights

AI voiceover that mimics a real person, or AI images of recognizable faces, can create publicity-rights issues that no stock license covers. Keep AI voice and likeness generic, or use a tool that explicitly grants commercial rights for the output.

Stacking licenses you didn't read

A single subscription may cover music, SFX, footage, and AI tools — but each category can have its own terms page. One plan does not mean one uniform license.

A practical workflow for one project

  1. Create two folders before you edit. Name them AI_generated and Licensed_stock. Never let files mix on disk; you will need to prove origin later.

  2. Log every asset as you import it. A simple spreadsheet works:

    File name Source Type License/tier Attribution required? Restrictions
    intro_music.wav AI tool Music Pro plan No No standalone resale
    city_broll_04.mp4 Stock library Footage Royalty-free No Not for editorial use
  3. Tag clips in your editor. Most editors let you add color labels or keywords. Mark AI assets one color, licensed stock another. This makes a final rights check fast.

  4. Do a pre-export audit. Walk the timeline and confirm every clip's license permits your intended use — commercial, monetized, client work, or broadcast.

  5. Keep the export clean of metadata conflicts. Some stock files carry embedded license metadata; AI files usually don't. Don't strip or fake either one.

How to verify one subscription covers both

Before you rely on a single platform for AI tools and stock media, confirm:

  • The pricing page lists both categories under the same plan. If AI tools sit on a separate tier, your "one subscription" assumption is wrong.
  • The terms of use have a section for AI output and a separate section for stock assets. One combined clause is a warning sign.
  • Commercial use is explicit for both. Look for the words "commercial use" tied to each asset type, not just the plan overall.
  • Attribution rules are stated per category. Music often differs from footage.
  • There's a clear answer on client work and redistribution. If you can't find it, ask support in writing and save the reply.

Questions to ask before committing to one platform

  • Does my plan cover AI music, SFX, footage, and voiceover, or only some of them?
  • If I cancel, can I keep using assets downloaded during my subscription in existing videos?
  • Are AI-generated assets covered for client and monetized work, or personal projects only?
  • What happens if a stock clip is later reclassified as editorial-only?
  • Is there a per-project or per-channel limit I might hit?
  • Can I get written confirmation of commercial rights for both asset types?

Bottom line

Combining AI-generated and licensed stock assets is workable if you treat them as two licensed streams feeding one project. Separate your files, log every asset's origin and terms, audit before export, and verify that any single platform actually covers both categories in writing. The creative mix is easy; the paperwork is what keeps the project publishable.

How to Compress Images for the Web Without Losing Visible Quality

You can cut most images to a fraction of their original file size without any visible quality loss by doing three things in the right order: resize the image to the dimensions it will actually display at, pick the right format for the content, then apply compression at a quality level that survives a side-by-side check. The single biggest mistake is skipping step one — an oversized image compressed at maximum quality is still far heavier than a correctly sized one.

Why file size and quality are a trade-off, not a fixed setting

Every compressed image is a negotiation between three variables: how many pixels you keep, how precisely each pixel is described, and how much the format is allowed to guess.

  • Dimensions decide how many pixels exist at all. Halving width and height removes 75% of the pixel data before any compression happens.
  • Quality level decides how aggressively the encoder discards detail it thinks you won't notice.
  • Format decides the kind of discarding allowed — some formats throw away color precision, others only remove redundancy.

Because these interact, "quality 80" means something different on a 4000px photo than on a 600px thumbnail. Tune dimensions first, then quality.

Pick the format before you touch the quality slider

Format Best for Compression type Transparency Notes
JPEG Photographs, gradients, complex scenes Lossy No Smallest for photos; artifacts appear around sharp edges and text
PNG Logos, icons, screenshots, flat color, anything needing transparency Lossless (or lossy via quantization) Yes Often 5–10× larger than JPEG for photos; excellent for flat graphics
WEBP Almost everything, as a modern default Both lossy and lossless Yes Typically 25–35% smaller than JPEG at comparable quality; broad browser support
SVG Logos, icons, diagrams, charts Vector (resolution-independent) Yes Stays crisp at any size; not suitable for photos
GIF Short simple animations only Lossless, 256 colors Yes (1-bit) Superseded by WEBP/MP4 for animation in nearly all cases

Practical rule: photos → JPEG or lossy WEBP; flat graphics and transparency → PNG or lossless WEBP; anything vector → SVG.

The four levers, in the order you should pull them

1. Resize to display size (biggest win, zero quality cost)

If your layout renders an image at 800px wide, serving a 2400px original wastes roughly 89% of the pixels. Resize to the largest size it will ever be displayed at, and add a 2× version only if you need retina sharpness.

2. Choose the format

Match the format to the content type using the table above. Converting a photographic PNG to JPEG or WEBP alone can shrink it by 80% or more.

3. Set the quality level

For JPEG and lossy WEBP, most photographs hold up well between quality 70 and 85. Below ~60, banding appears in skies and blur around text. Above ~90, file size climbs steeply for gains nobody can see.

4. Strip metadata

EXIF data, camera info, and embedded thumbnails can add tens of kilobytes. Remove them unless you specifically need copyright or orientation data — and note that stripping orientation can rotate an image, so verify after export.

When lossy compression is fine, and when it isn't

Lossy is acceptable when:

  • The image is a photograph or has natural texture.
  • It's decorative or below the fold.
  • Slight softening won't be noticed at final display size.

Use lossless or vector instead when:

  • The image contains text, UI elements, or thin lines (lossy creates ringing artifacts).
  • It's a logo, icon, or diagram — SVG or PNG keeps edges clean.
  • It will be edited again later; repeated lossy saves compound degradation.
  • It's a screenshot of code or a chart where color accuracy matters.

Compressing vs. resizing: don't confuse them

Compressing reduces the bytes needed to describe the same pixels. Resizing reduces the number of pixels. They're independent, and resizing usually delivers the larger saving. A 3000×2000 photo at quality 95 might be 2 MB; the same photo resized to 1200×800 at quality 80 might be 180 KB. Doing only the quality reduction gets you maybe 40% off; doing both gets you over 90%.

A repeatable workflow

  1. Determine the maximum display width in your layout (inspect the element or check your CSS).
  2. Export at that width (plus a 2× variant if needed).
  3. Convert to the right format — WEBP as a modern default, JPEG as a fallback, PNG/SVG for graphics.
  4. Apply quality 75–85 for lossy formats and compare against the original.
  5. Strip metadata and re-check orientation.
  6. Verify before publishing (see below).
  7. Serve the right file with srcset so small screens don't download the large variant.

How to verify quality before you publish

  • View at 100% at final display size, not zoomed in — artifacts you can't see at real size don't matter.
  • Toggle between original and compressed in a viewer or an online compressor's before/after preview.
  • Check the worst-case areas: skies, smooth gradients, sharp edges, and any text.
  • Compare file sizes and ask whether the extra kilobytes buy visible improvement. If not, go smaller.
  • Test on a mid-range phone, where banding and blur are often more obvious than on a desktop monitor.

Common mistakes

  • Compressing a full-resolution image and calling it optimized.
  • Using PNG for photographs.
  • Setting quality to 100 "to be safe" — it inflates size with no visible benefit.
  • Re-saving a JPEG repeatedly, stacking artifacts each time.
  • Forgetting that GIF animations are usually better as WEBP or video.
  • Ignoring metadata, which can silently add weight.

Quick reference

Goal Do this
Photo on a webpage Resize to display width → WEBP (fallback JPEG) → quality 75–85
Logo or icon SVG; fall back to PNG if vector isn't possible
Screenshot with text PNG or lossless WEBP
Transparent photo cutout Lossy WEBP or PNG
Short animation WEBP or MP4, not GIF

The order matters more than any single setting: resize, then choose format, then tune quality, then strip metadata, then verify at real display size. Follow that sequence and you'll routinely land at 10–20% of the original file size with no quality your visitors can detect.

How Does AI Audio Transcription Work and What Affects Its Accuracy?

AI audio transcription converts speech into text by combining signal processing with machine learning models trained on huge amounts of paired audio and text. In practice, the pipeline runs through several stages: audio preprocessing, acoustic and language modeling, punctuation and formatting, and—if enabled—speaker diarization and summarization. Accuracy is not a single fixed number; it depends on recording quality, accents, background noise, overlapping speech, vocabulary, and how well the chosen language is supported. This article explains each stage and the practical factors that move accuracy up or down, so you can judge when automated transcription is enough and when human review still matters.

The core pipeline: from sound wave to readable text

1. Audio preprocessing

Before any speech recognition happens, the file is normalized and cleaned up. Typical steps include:

  • Resampling to a consistent sample rate (commonly 16 kHz for speech models).
  • Channel handling: mono conversion or selecting the dominant channel when stereo tracks differ.
  • Noise reduction and gain normalization to bring quiet speakers up and steady loud peaks.
  • Voice activity detection (VAD) to find where speech actually occurs and skip silence.

Good preprocessing improves everything downstream. A clean, consistent input gives the model less to compensate for.

2. Speech recognition (acoustic + language modeling)

Modern systems use neural networks—often transformer-based—that map short audio frames to probable words or subword units. Two components work together:

  • The acoustic model estimates which sounds were spoken.
  • The language model estimates which word sequences are plausible in the target language.

The decoder combines both to produce the most likely transcript. This is why context matters: a model that "knows" a phrase is common will favor it over a phonetically similar but unlikely alternative.

3. Punctuation, casing, and formatting

Raw recognition output is a stream of words. A separate step adds:

  • Sentence boundaries and punctuation.
  • Capitalization of proper nouns and sentence starts.
  • Number, date, and currency formatting.

These are learned from text data, so they follow the conventions of the training material rather than any single style guide.

4. Speaker diarization

Diarization answers "who spoke when." The system extracts voice characteristics (embeddings) from each speech segment, clusters similar segments, and assigns labels like Speaker 1, Speaker 2. It works best when speakers sound distinct and don't talk over each other. Overlapping speech and similar voices are the main failure modes.

5. Summaries and derived outputs

Once a transcript exists, summarization models condense it into key points, action items, or topics. Because summaries are generated from the transcript, any transcription error can propagate into the summary. Speaker labels also let a summary attribute statements to the right person—if diarization was accurate.

What actually affects accuracy

Accuracy varies widely by conditions. The table below summarizes the main factors and their typical effect.

Factor Why it matters Practical impact
Audio quality / bitrate Low bitrate or clipping destroys phonetic detail Major
Background noise Music, traffic, chatter mask speech Major
Microphone distance Far-field audio is reverberant and quiet Major
Accents and dialects Training data may underrepresent them Moderate to major
Overlapping speech Models struggle to separate simultaneous voices Major for diarization
Speaking rate Very fast speech blurs word boundaries Moderate
Domain vocabulary Jargon, names, acronyms are rare in training data Moderate to major
Language coverage Less-resourced languages have weaker models Major
Audio length / consistency Mixed conditions within one file Moderate

Language coverage and multilingual models

A system advertising "54+ languages" does not mean equal quality in all of them. High-resource languages (English, Spanish, French, German) usually have more training data and better accuracy. Lower-resource languages may show more errors, especially with specialized terms. Multilingual models can handle code-switching—mixing languages in one conversation—but results depend on how much mixed-language data the model saw. If your content is in a less common language, test a sample before committing.

Domain-specific vocabulary

Names, product terms, medical or legal jargon, and acronyms are frequent error sources because they're rare in general training text. Many tools let you supply a custom vocabulary or keyword list to bias the decoder. This is one of the highest-leverage fixes you can apply.

Practical steps to improve your results

  1. Record well. Use a close microphone, a quiet room, and a consistent setup. This single step often matters more than any setting.
  2. Use one speaker per channel when possible; it makes diarization trivial and more reliable.
  3. Add a custom vocabulary for names, brands, and technical terms.
  4. Choose the correct language explicitly rather than relying on auto-detection, especially for short clips.
  5. Review the transcript against the audio for high-stakes content.
  6. Check speaker labels if attribution matters; correct them before generating summaries.

A simple quality-check template

For any important recording, run this quick pass:

  • [ ] Does the transcript match the audio in the first two minutes?
  • [ ] Are proper nouns and numbers correct?
  • [ ] Are speaker labels consistent and correctly assigned?
  • [ ] Do punctuation and paragraph breaks aid readability?
  • [ ] Does the summary reflect the actual discussion, not just keywords?

When human review is still needed

Automated transcription is fast and increasingly accurate, but certain situations call for a human pass:

  • Legal, medical, or financial records where a single word changes meaning.
  • Heavily accented or overlapping speech in noisy environments.
  • Highly technical content with dense jargon.
  • Anything published under your name where errors carry reputational cost.

A common workflow is machine transcription first, then targeted human editing—this captures most of the speed benefit while controlling risk.

Choosing a tool: what to compare

When evaluating transcription software, compare on the dimensions that match your use case:

  • Language support for your specific languages, not just the headline count.
  • Speaker detection quality if you need attributed transcripts.
  • Custom vocabulary support.
  • Export formats (SRT, VTT, DOCX, JSON) for your downstream tools.
  • Summarization if you want derived outputs.
  • Pricing model—check the vendor's current pricing page, since plans and rates change.

Sonix, for example, positions itself around transcription in 54+ languages with AI summaries and speaker detection, and offers a free trial without a credit card. Verify current features and pricing directly on its site, as these details evolve.

Bottom line

AI transcription works by cleaning audio, recognizing speech with acoustic and language models, then adding punctuation, speaker labels, and summaries. Accuracy is driven less by the model alone and more by your recording conditions, language, vocabulary, and whether speakers overlap. Improve the input, supply domain terms, and reserve human review for high-stakes content—and you'll get reliable results from automated transcription in most everyday cases.

Image Editing: What It Is and How to Choose the Right Tool

Image editing is the process of changing an existing image—cropping, resizing, retouching, correcting color, removing a background, or converting its format—rather than creating a new design from scratch. It's the right approach when you already have a photo or graphic and need it to meet a specific requirement: a marketplace listing, a website, a print piece, or a social post. If you're building an original layout with type and vector shapes, that's graphic design; if you're repairing an old or damaged photo, that's restoration. Image editing sits in between and covers most day-to-day tasks.

What counts as image editing

The label covers a defined set of operations. Knowing which one you need determines which tool will work.

  • Crop — remove unwanted edges or change the aspect ratio.
  • Resize — change pixel dimensions or file size for a platform's limits.
  • Retouch — remove blemishes, dust, or small unwanted objects.
  • Color correction — fix white balance, exposure, contrast, or saturation.
  • Background removal — isolate the subject, usually for product or profile images.
  • Format conversion — move between JPEG, PNG, WebP, TIFF, and similar.

For example, an Amazon seller preparing a listing image may need background removal, a square crop, and a resize to the marketplace's minimum pixel requirement—three separate operations in one workflow.

Comparing editor types

The three main categories differ in where they run, what they cost in effort, and what they're good at. Use the same dimensions to compare any two tools.

Type Best for Typical trade-off
Desktop software Precise, repeatable, high-volume work; layered files Install and learning curve
Web apps Quick edits, no install, sharing a link Depends on browser and upload speed
Mobile apps On-the-go crops, filters, quick retouches Smaller screens, fewer precision controls

Some platforms bundle image editing into a wider toolset. IntelliFox, for instance, describes itself as a unified set of Amazon seller tools covering listing optimisation, PPC automation, sales and profit tracking, image editing, review requests, and fee change alerts—so image editing there is one function among several rather than a standalone editor. That matters if your editing needs are tied to marketplace listings rather than general photo work.

How to choose a tool

Match the tool to four things before you commit time to learning it:

  1. Platform — Do you work on desktop, in a browser, or on a phone? Pick the one you'll actually use daily.
  2. Budget — Check the vendor's pricing page rather than assuming a free tier. IntelliFox lists a pricing page at intellifox.com/pricing/, but the source material doesn't state what's free or paid, so verify before relying on it.
  3. Skill level — If you need layers and masks, a full editor is worth the learning curve. If you need a crop and a resize, a simpler tool is faster.
  4. Output needs — Resolution, file format, and transparency requirements rule out some tools immediately.

A basic editing workflow

The same sequence works in almost any editor:

  1. Import the original and keep a copy untouched.
  2. Crop to the target aspect ratio first, so later adjustments apply to the final framing.
  3. Correct color and exposure before retouching, since tonal changes can reveal or hide flaws.
  4. Retouch blemishes and unwanted objects.
  5. Remove or replace the background if the output needs transparency or a clean backdrop.
  6. Resize to the final pixel dimensions.
  7. Export in the required format and check the file size against the platform's limit.

Doing resize and export last avoids re-editing a file that's already been compressed.

Common problems and fixes

  • Quality loss after resizing — You enlarged beyond the original resolution. Start from the largest source file you have, and downsize rather than upsize where possible.
  • Wrong file format — Transparency needs PNG or WebP; JPEG doesn't support it. Convert after editing, not before.
  • Unsupported file — Some editors won't open RAW, TIFF, or HEIC. Convert to a supported format first, or choose a tool that lists your camera's format.
  • Colors look different after export — Check the color profile and whether the platform re-compresses uploads.

If your editing is part of a larger listing or storefront workflow, confirm the tool handles the export formats and dimensions that platform requires before you build a routine around it.

What to Look for in a Video Platform Beyond Hosting and Sharing

If you're evaluating a video platform for a small business or marketing team, hosting and sharing are just the entry point. The features that actually determine whether a platform fits your workflow fall into four areas: privacy and playback control, collaboration and review tools, marketing and analytics capabilities, and practical limits like storage and mobile support. Most general-purpose tools (cloud storage, social networks, free hosts) cover hosting well but leave gaps in the other three. This guide walks through what each area means in practice, so you can map features to your own situation instead of comparing endless checklists.

Start by separating three jobs: hosting, editing, and marketing

Video platforms tend to bundle three distinct functions, and confusion usually comes from mixing them up:

  • Hosting — storing a file, generating a player, delivering it reliably to viewers. This is the baseline.
  • Editing — trimming, assembling, adding captions or branding. Some platforms include basic editors; others expect you to edit elsewhere and upload the result.
  • Marketing and business features — privacy controls, lead capture, calls to action, analytics, team review workflows. These are what separate a "video host" from a "video platform."

A useful exercise: write down your last five video tasks (a product demo, a client pitch, a social clip, an internal training, a landing page embed). For each one, note which of the three jobs it required. If most of your tasks stop at hosting, a lighter tool may be enough. If several involve review cycles, gated access, or measuring viewer behavior, a fuller platform earns its cost.

Privacy and playback control: the business-vs-social divide

On social platforms, everything is public by default and wrapped in ads and recommendations. For business use, that's often the opposite of what you want. Look for:

  • Granular privacy settings — can you restrict a video to specific people, a password, a domain, or an embed location? Can you make it unlisted but still embeddable?
  • Ad-free playback — your product demo shouldn't end with a competitor's ad or an unrelated recommendation.
  • Customizable embeds — control over player color, logo, and whether related videos appear. This matters when the video sits on your own site and represents your brand.
  • Domain-level restrictions — the ability to limit playback to your own website prevents your content from being re-embedded elsewhere.

If your videos are purely promotional and public, these controls matter less. If you share client work, internal training, or pre-release material, they become the deciding factor.

Collaboration and review: the most common gap

This is where general-purpose tools most often fall short. A shared drive lets people comment on a file, but it doesn't give you a structured review process. A dedicated platform typically offers:

  • Timestamped comments — feedback attached to a specific moment in the video, so "the logo looks off" points to an exact frame.
  • Versioning — uploading a new cut while keeping the old one, so reviewers can see what changed.
  • Approval status — a clear "approved" or "needs changes" state rather than a scattered email thread.
  • Role-based access — reviewers who can comment but not download or reshare.

When this becomes relevant: as soon as more than two people need to sign off on a video, or when you're producing videos on a recurring schedule. For a solo operator publishing once a month, a simple comment thread may be sufficient.

Analytics and lead capture: beyond view counts

A raw view count tells you almost nothing actionable. Business-oriented platforms go further:

Feature What it tells you When it matters
Watch time / engagement graph Where viewers drop off Improving content or editing
Viewer identity Who watched (when gated) Sales follow-up, internal training
Lead capture forms Email collected before or during playback Demand generation
Calls to action Click-through to a page or booking link Converting viewers
Embed/domain reports Where your video is being watched Tracking campaign performance

If your goal is brand awareness, basic view counts may be fine. If you're using video to generate leads or train staff, the deeper metrics are the reason to choose a platform over a free host.

Practical limits that affect daily use

Feature lists rarely mention the constraints that cause friction later. Check these before committing:

  • Storage and bandwidth limits — how much you can upload, and whether high viewership triggers overage fees.
  • Upload size and length caps — relevant if you work with long recordings or high-resolution footage.
  • Mobile app support — can you upload, review, and respond to comments from a phone? For teams that shoot on mobile, this is a real workflow factor.
  • Export and portability — can you download your originals and embed codes if you leave? Lock-in is a hidden cost.
  • Integrations — does it connect to the tools you already use (your website builder, CRM, or project tracker)?

Deciding between a full platform and a lighter tool

Use these rough conditions as a starting point:

A lighter tool (free host, cloud storage, social platform) is likely enough if:

  • You publish occasionally and mostly to public channels.
  • One person handles video end to end.
  • You don't need gated access or viewer-level analytics.

A dedicated platform is worth evaluating if:

  • Multiple people review or approve videos.
  • You need privacy controls, ad-free playback, or branded embeds.
  • You're using video for lead generation, training, or client delivery.
  • You publish frequently enough that manual workarounds cost more than a subscription.

Pricing and plan details change often, so check the platform's current plans page directly rather than relying on secondhand comparisons. The right approach is to list your actual requirements first, then match them against what each option offers — not the other way around.

Website Overview

Page metadata, canonical configuration and social previews work together to provide more consistent search and sharing presentation.

Domain and Registration

The domain was registered less than a year ago and has limited historical evidence to assess. Transfer-protection status is present, helping reduce the risk of unauthorized domain transfers. Registration contact information is publicly available through RDAP. The domain uses the common .ai extension, which is not an independent safety signal.

DNS and Email

Nameservers are provided by Cloudflare, indicating managed DNS hosting. MX records point to the Cloudflare Email Routing email service. No CNAME was found; the observed records resolve directly to addresses. SPF and DMARC are configured. DKIM status is unknown. TXT records include verification markers for Google. Such markers may also remain after a service stops being used.

TLS and Certificates

The public key uses EC with 256 bits. The server supplied a complete certificate chain. No organization name is present in the certificate; the available fields are consistent with domain validation. The certificate was issued within the Google Trust Services cloud or CDN ecosystem. The certificate's total validity is about 90 days, consistent with a short renewal cycle.

HTTP and Browser Security

No X-Powered-By header was found, reducing one common source of backend fingerprinting information. All six checked browser-security headers are present. Their effectiveness still depends on the policy values and application behavior. The cf-ray response header indicates a CDN or caching proxy in the delivery path. No obvious internal addresses or debug information were found in the headers. The Server header identifies cloudflare without an exact version.

Technology Stack Analysis

The public page identifies Next.js, Google Analytics, Cloudflare without precise versions, leaving fewer clues for version-specific scanning.

Search and Social Sharing

Twitter Card metadata is configured. JSON-LD includes Organization data, helping describe the organization as an entity. The title has 49 characters, within a common display range. A meta description is present, with 157 characters. The observed directives allow indexing and link following.

Hosting and Email

DNSCloudflare
HostingCloudflare
EmailCloudflare Email Routing
Location Location unknown 104.21.30.11

User reviews (0)

  • No reviews yet.

Pages, Search and Sharing

Meta descriptionCreate AI videos, images, and audio with Seedance, Kling, Veo, GPT Image, and practical creative tools. See exact costs upfront; failed runs cost no credits.
Canonical URLhttps://mixvio.ai/
LanguageEnglish (default)
Twitter Cardsummary_large_image
All bots 2 allowed · 25 disallowed
  • Allow/
  • Allow/_next/image?
  • Disallow/*?*q=
  • Disallow/settings/*
  • Disallow/activity/*
  • Disallow/admin/*
  • Disallow/api/*
  • Disallow/create
  • Disallow/history
  • Disallow/feedback
  • Disallow/sign-in
  • Disallow/sign-up
  • Disallow/credits
  • Disallow/settings
  • Disallow/projects
  • Disallow/studio
  • Disallow/team
  • Disallow/invite/
  • Disallow/templates
  • Disallow/inspiration
  • Disallow/customer-stories
  • Disallow/tools/lip-sync
  • Disallow/tools/subtitle-generator
  • Disallow/tools/image-editor
  • Disallow/models/seedance-2-mini
  • Disallow/models/seedance-2-fast
  • Disallow/internal/

Registration details RDAP / WHOIS

RegistrarSpaceship, Inc.
Registered2026-08-01
Expires2028-08-01
Domain statusclient transfer prohibited
Nameserversjasper.ns.cloudflare.com、raegan.ns.cloudflare.com
DNSSECunsigned

DNS records

TypeNameValueTTLPriority
Amixvio.ai104.21.30.11300—
Amixvio.ai172.67.150.47300—
AAAAmixvio.ai2606:4700:3031::6815:1e0b300—
AAAAmixvio.ai2606:4700:3034::ac43:962f300—
MXmixvio.airoute2.mx.cloudflare.net30054
MXmixvio.airoute3.mx.cloudflare.net30062
MXmixvio.airoute1.mx.cloudflare.net30094
NSmixvio.aijasper.ns.cloudflare.com86400—
NSmixvio.airaegan.ns.cloudflare.com86400—
TXTmixvio.aigoogle-site-verification=6bTTQqynR3RYT3IGW6_jqbbWF9OavmiPBqjBYn-Z9P0300—
TXTmixvio.aigoogle-site-verification=GHTwinB7PmxW4ZMh85mJEEWwZlCj6nbMeUpppQp_TfQ300—
TXTmixvio.aiv=spf1 include:_spf.mx.cloudflare.net ~all300—
DMARC_dmarc.mixvio.aiv=DMARC1; p=reject; pct=100; rua=mailto:[email protected]300—

TLS and certificates

AssessmentNormal configuration
Supported protocolsTLSv1.2、TLSv1.3
Negotiated protocolTLSv1.3
Certificate subjectmixvio.ai
IssuerGoogle Trust Services
Valid until2026-11-12T06:35 · Remaining when checked: 45 days
Verification detailsCertificate trust: Passed · Hostname match: Passed

HTTP response headers

HeaderValue
content-typetext/html; charset=utf-8
cache-controls-maxage=31536000, stale-while-revalidate=2592000
servercloudflare
strict-transport-securitymax-age=31536000; includeSubDomains
content-security-policydefault-src 'self'; base-uri 'self'; object-src 'none'; frame-ancestors 'none'; form-action 'self'; font-src 'self' data:; img-src 'self' data: blob: https://lh3.googleusercontent.com https://8a6d768f959de456a4477fae747674f8.r2.cloudflarestorage.com https://*.google-analytics.com https://*.googletagmanager.com https://www.clarity.ms https://c.clarity.ms https://c.bing.com https://www.google.com https://www.googleadservices.com https://pagead2.googlesyndication.com https://googleads.g.doubleclick.net https://google.com https://www.google.co.uk https://www.google.co.kr https://stats.g.doubleclick.net; media-src 'self' blob: https://8a6d768f959de456a4477fae747674f8.r2.cloudflarestorage.com; style-src 'self' 'unsafe-inline' https://accounts.google.com; script-src 'self' 'unsafe-inline' https://accounts.google.com https://www.googletagmanager.com https://www.clarity.ms https://scripts.clarity.ms https://static.cloudflareinsights.com https://www.google.com https://www.googleadservices.com https://pagead2.googlesyndication.com https://googleads.g.doubleclick.net; script-src-attr 'none'; connect-src 'self' https://8a6d768f959de456a4477fae747674f8.r2.cloudflarestorage.com https://accounts.google.com https://*.google-analytics.com https://analytics.google.com https://*.analytics.google.com https://*.googletagmanager.com https://*.posthog.com https://*.clarity.ms https://c.bing.com https://ad.doubleclick.net https://www.google.com https://www.googleadservices.com https://pagead2.googlesyndication.com https://googleads.g.doubleclick.net https://google.com https://www.google.co.uk https://www.google.co.kr https://stats.g.doubleclick.net; frame-src https://accounts.google.com https://www.googletagmanager.com; worker-src 'self' blob:; manifest-src 'self'; report-uri /api/security/csp-report
x-frame-optionsDENY
x-content-type-optionsnosniff
referrer-policystrict-origin-when-cross-origin
permissions-policycamera=(), microphone=(), geolocation=()

Identified technologies

Next.jsGoogle AnalyticsCloudflare