
 简体中文
简体中文 English
Website review
This review may include AI-generated content and is not individually verified. Domain, certificate and other facts come from the observed data on this page.
What is MultiBuild?
MultiBuild is a free, modular 3D-printed organization system for workshops and homes. Its core idea is a shared 25 mm standard: boards, beams, bins, drawers, and accessories are all designed to connect and expand, so you can start with one piece and add more as your storage needs change.
The system is split into two main subsystems that work together:
- MultiBoard — a modular mounting board for walls or desktops. It holds tools, heavy supplies, hooks, shelves, and accessories, and can also be used to build larger 3D structures.
- MultiBin — a modular bin and drawer system for tools, craft supplies, hardware, and household items. Bins can connect to each other, be customized, mounted on boards, or turned into drawers.
Who it suits: makers with a 3D printer who want a storage setup that adapts over time rather than a fixed purchased unit. It is aimed at garages, workshops, offices, kitchens, and similar spaces, and the page notes a community of 50,000+ DIYers sharing builds.
Trade-offs to weigh: printing parts yourself takes time and filament, and the result is only as good as your printer and material choices. The modular 25 mm standard is the main advantage, but it also means you are committing to that ecosystem for future add-ons.
A practical next step: pick one small area—a single wall section or one drawer—download the relevant MultiBoard or MultiBin parts, and test the fit and strength before expanding. If you want to see how others have approached similar setups, browse community builds on Thangs, where the page notes MultiBuild ranks as the #1 most popular model.
How do I download and print MultiBuild parts for free?
Start at MultiBuild and use its "Download individual parts for FREE" entry point. The site presents MultiBuild as a free, modular system built around a 25 mm standard, with two main subsystems: MultiBoard (mounting boards, hooks, shelves) and MultiBin (bins, drawers, connectors). You download the specific part files you need rather than a single fixed kit, so the practical workflow is: choose a subsystem, pick the parts for your first build, then print and expand later.
A realistic first print
- Decide the job: a wall tool rack (MultiBoard) or a bench-top parts organizer (MultiBin).
- Download only the core parts for that job plus one or two accessories.
- Print the core connectors or board sections first and test-fit them before committing to a large batch.
- Once the fit works with your printer, add bins, hooks or drawers as needed.
What to check before printing
- Scale and tolerance: because the system uses a 25 mm standard, parts from different subsystems are meant to connect. Print one test piece and measure it; small printer calibration errors compound across a whole wall of boards.
- Material and load: board mounts that hold heavy tools need a stronger filament and sensible wall thickness, while light bins can be printed faster and cheaper. The site's own emphasis is on holding heavy supplies, so treat structural parts differently from storage parts.
- Fasteners and wall fixing: the printed parts are only half the job; how you anchor a board to a wall or desk determines real-world capacity.
- Time budget: a full drawer system is many hours of printing. Starting with one board and a handful of bins keeps the project finishable.
Who this suits
MultiBuild fits makers who already own a 3D printer and want an organizer that grows incrementally, rather than buying a fixed plastic storage set. If you don't have a printer, the free files are of little direct use unless you use a print service. If you want a single ready-made product with no assembly or printing, a conventional bought system will be simpler.
Next step: download one MultiBoard section or one MultiBin core, print it, and test how it connects before downloading the rest of your planned setup. For general 3D-printing file sources and community models, Printables and Thangs are well-known places makers browse, and the page notes MultiBuild ranks highly there.
What 3D printer and filament settings work best for MultiBuild?
MultiBuild doesn't publish a single recommended printer or filament profile, so "best" depends on which subsystem you print and how much load it must carry. The page evidence shows the system is designed around a 25 mm global standard, with boards, beams, bins, drawers and accessories that interconnect — but it doesn't list nozzle temperatures, layer heights or material specs. Treat any settings below as general starting advice, not official requirements.
What to check first
Look at the individual part listing before you slice. A wall-mounted MultiBoard carrying heavy tools and a small MultiBin drawer for hardware have different demands. The download page or the part's description is the place to find any designer notes on material, orientation or strength.
A practical starting point
- Material: PLA is the easiest choice for bins, drawers and light mounts. PETG or ASA/ABS are better for boards under continuous load, warm garages, or parts that flex when you snap them together.
- Layer height: 0.2 mm balances speed and strength for most boards and bins. Drop to 0.12–0.16 mm only where fit matters, such as connectors or sliding drawer interfaces.
- Walls: 3 perimeters or more for anything structural; 2 is usually fine for decorative or light-duty bins.
- Infill: 15–25% for bins; consider 30–40% or more for board segments that hold hooks and shelves.
- Orientation: Print load-bearing parts so layer lines run across the stress direction, not along it. Connectors and clips are the usual weak points.
- Tolerance test: Print one small connector or bin first. If parts bind or fit loosely, adjust horizontal expansion or flow before committing to a full board.
Who this matters for
If you're organizing a home office or craft shelf, PLA at 0.2 mm will likely be fine. If you're outfitting a garage wall with heavy hand tools, choose PETG or ASA, increase walls and infill, and test one mounted segment under load before printing the rest. The system's modularity means a failed part is cheap to reprint — but a board that sags under weight is a nuisance to redo.
A useful next step: download one board segment and one bin from MultiBuild, print both in your intended material, and mount the board with a representative load. That single test tells you more about your printer and filament than any generic profile.
How can I mount MultiBoard on a wall or desk to organize my tools?
MultiBoard is designed as a modular connection board you can either mount on a wall or stand on a desk, then expand with hooks, shelves, and accessories to hold tools and supplies. The system is built around a 25 mm global standard, so parts from the wider MultiBuild ecosystem — including MultiBin bins and drawers — are meant to connect with it. Individual parts are downloadable for free, so you can print just the boards and mounts you need and add more later.
Practical mounting paths
Wall mounting suits heavier tools and keeps bench space clear. You attach a board to the wall, then add hooks, shelves, and accessories to hold items. This is the common choice for garages and workshops where you want tools visible and within reach.
Desk standing suits smaller items, craft supplies, or hardware you want close at hand without drilling into a wall. The board stands on the surface and grows upward or outward as you add modules.
A concrete starting scenario
If you are organizing a workbench, start with one wall-mounted board above the bench, add hooks for frequently used hand tools, and place a MultiBin bin or drawer module at bench level for loose hardware. Because subsystems are compatible, you can move a bin from the desk to the board, or convert it into a drawer, as your needs change.
Decision criteria
- Weight and reach: Wall mounting for heavy or frequently grabbed tools; desk standing for light, occasional items.
- Space constraints: Wall mounting frees bench area; desk standing needs no drilling and suits renters or shared rooms.
- Growth plan: Since the ecosystem expands with compatible parts, choose a starting configuration you can add to rather than a fixed one-off setup.
Next step
Download the MultiBoard parts and print one board plus a couple of hooks or a shelf to test fit and load before committing to a full wall layout. The page notes real builds from 50,000+ DIYers across garages, workshops, offices, and kitchens, which is useful for seeing how others configured their spaces before you print.
How do MultiBin bins and drawers connect and adapt to different storage needs?
MultiBin is the bin-and-drawer subsystem within MultiBuild, and its defining trait is that bins are not fixed containers: they connect to each other, change function, mount onto boards, and can be converted into drawers. The whole ecosystem is built around a 25 mm standard, which is what allows parts from different subsystems to fit together.
How the pieces connect
- Bin-to-bin: bins join directly to one another, so a single unit can be extended into a row, a stack, or a larger block as your collection of parts grows.
- Bin-to-board: bins mount onto MultiBoard, the connection board subsystem, which can sit on a wall or stand on a desk. That moves storage off the bench and onto a vertical surface.
- Bin-to-drawer: a bin can be turned into a drawer rather than staying an open container, which suits items you want covered or pulled out rather than lifted.
- Accessory layer: hooks, shelves and other accessories share the same standard, so the same board that holds bins can also hold tools.
What that means in practice
A reader scenario: you start with a few bins for screws and drill bits on a desk. Later you add a MultiBoard on the wall, clip the same bins onto it, and convert one into a drawer for items you reach for daily. Nothing is wasted, because the parts remain compatible.
The trade-off is the usual one for modular 3D-printed systems: you gain adaptability and repairability, but you supply the printing time, filament and assembly yourself, and a setup only works as well as the parts you choose to print. If you want a fixed, ready-made drawer unit, a conventional storage product will get you there faster. If your storage needs keep shifting, the modular route pays off.
A useful next step: list what you store by size and access frequency, then decide which items belong in open bins (frequently grabbed, visible) versus drawers (dusty, messy, or bulky). That split tells you how many of each to print before you commit filament. You can also see how other makers solved similar layouts at MultiBuild.
What are some real examples of MultiBuild setups in workshops and homes?
MultiBuild’s own page shows real maker builds across garages, workshops, offices, kitchens, and other rooms, with named examples including Jonathan (Keep Making), Tamio Honma, Alex Puga, Ben Woodard, Florian Rasche, Mark Eckert, and Marc de Bruijn. These are presented as user builds rather than official case studies, so treat them as inspiration for what the system can do rather than as detailed plans.
What the examples suggest you can build
- Wall-mounted tool boards: MultiBoard is described as a modular connection board for mounting tools, holding heavy supplies, or building 3D structures. A typical workshop use is a wall panel with hooks and shelves for frequently used hand tools.
- Bins and drawers for small parts: MultiBin is a modular bin and drawer system for tools, craft supplies, hardware, and household items. Bins can connect to each other, mount on boards, or become drawers, which suits screws, nails, electronics parts, and craft materials.
- Mixed home and workshop setups: The page mentions garages, workshops, offices, kitchens, and beyond. A kitchen or office build might use bins and drawers for utensils, stationery, cables, or household odds and ends, while a workshop build leans on boards and mounts.
How to judge whether an example fits your space
Look at the subsystem it uses, not just the finished photo. If your problem is vertical storage and tool access, a MultiBoard-based setup is the closer match. If your problem is many small items that need sorting and moving, a MultiBin-based setup is more relevant. Because the subsystems are described as compatible, you can start with one and add the other later.
A practical next step: browse the user builds on MultiBuild, pick one that resembles your room or bench, and note which parts it uses. Then download only those parts and test the layout before committing to a larger print.
 Cloudflare
 Vercel
 Google Workspace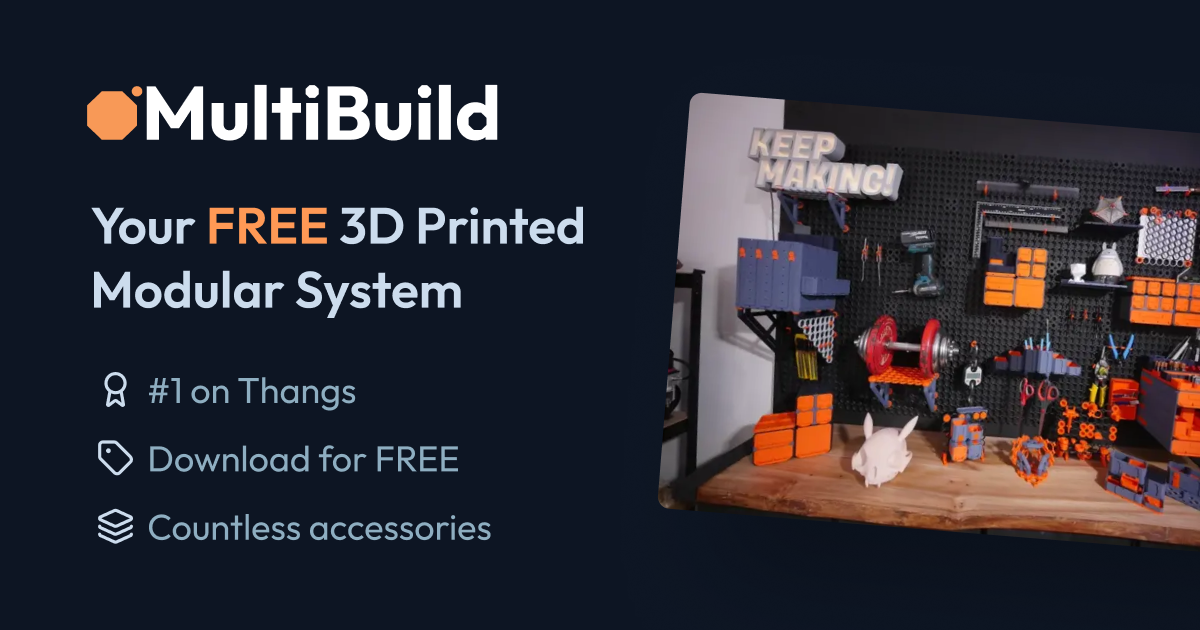

User reviews (0)