Website profiles · Technology insights · Alternatives

postspark.app

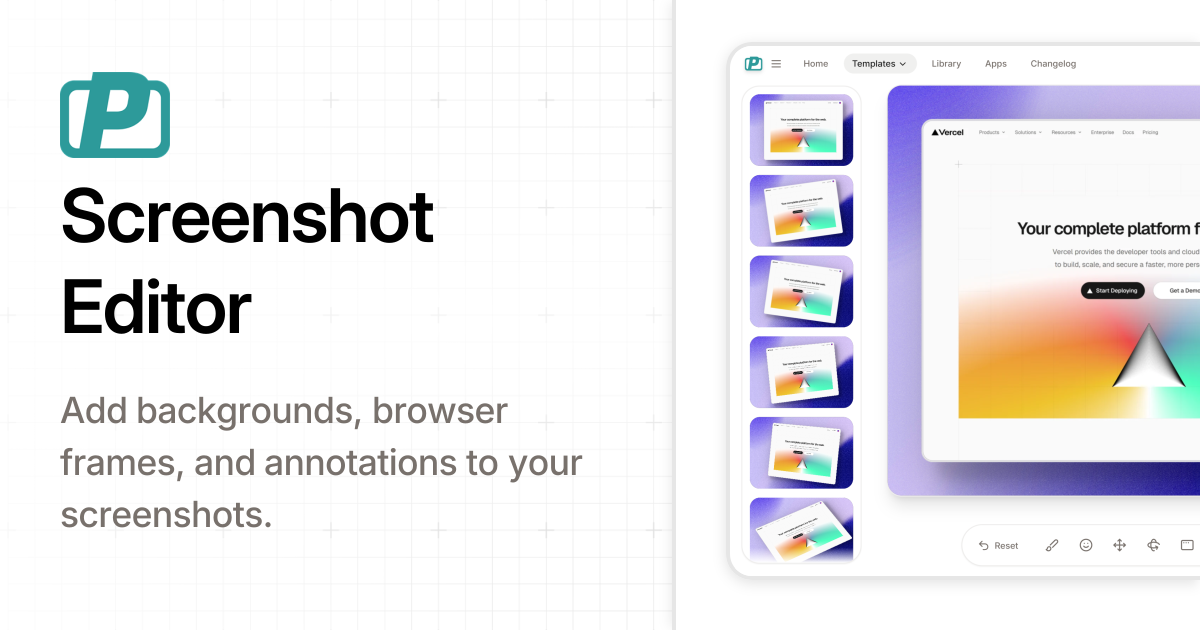
Edit and beautify screenshots: add backgrounds, browser frames, text, arrows, and blur, then export as PNG, JPG, or MP4.

No paid content found
Visit website
Profile views 1 Outbound visits 0 Normal
PostSpark Full homepage screenshot

At a glance

Category
Other
Language
English
Paid-content signal
No paid content foundObserved
Registered
2024
Hosting
VercelInferred
HTTPS certificate trusted
PassedObserved
Last updated

Website review

This review may include AI-generated content and is not individually verified. Domain, certificate and other facts come from the observed data on this page.

What is PostSpark?

PostSpark is a browser-based screenshot editor and beautifier. It takes a plain screen capture and turns it into a presentation-ready image or clip by layering on backgrounds, device and browser frames, annotations, shadows and blur. Exports come out as PNG, JPG or MP4, so the same tool covers a static social post and a short animated demo.

What you can do with it

  • Frame a capture in a browser window (light or dark) or a device mockup — iPhone, Android, iPad, MacBook, iMac and laptop options appear in the template list.
  • Set the scene with a custom background, drop shadow or overlay so the screenshot doesn't sit flat on a white page.
  • Point things out with text and arrows, or hide sensitive details with blur.
  • Animate it using layouts such as slide-in, floating, rotating or 3D-tilted device views, then export as video.
  • Capture from a URL rather than uploading, if you want a live page rendered inside a mockup.

Who it suits

It fits people who publish screenshots as content: indie developers shipping a landing page, designers presenting UI work, marketers building app-store or social assets, and anyone writing a product update who wants the image to look deliberate rather than raw. The template gallery is oriented toward that — X posts, Bluesky posts, code snippets, device presentations — rather than toward pixel-level retouching.

The trade-off is scope. This is a framing and styling tool, not an image editor: if you need to crop precisely, retouch, or composite multiple screenshots, you'll still want a general editor alongside it. For quick, repeatable mockups it removes the manual work of building device frames yourself.

A practical starting point

Pick the destination first, then the template. A screenshot headed for an X or Bluesky post reads well in a phone frame with a tight background; a website presentation usually looks better in a browser frame or laptop mockup where the surrounding chrome signals "this is a real page." Match the background to your brand colour, add one arrow or label at most, and export PNG for static use or MP4 when you want motion. If you only need a browser frame and nothing else, a dedicated frame generator such as Screenshot.rocks may be faster; if you want the styling and animation in one place, PostSpark covers both.

How do I add a browser frame to a screenshot?

Use PostSpark's Browser Frames option to place a screenshot inside a realistic browser window, then export it as PNG, JPG, or MP4. On PostSpark, browser frames sit alongside backgrounds, annotations, shadows and blur in the main screenshot editor, so framing is one step in a short workflow rather than a separate tool.

A practical sequence:

  1. Add your screenshot to the editor.
  2. Choose Browser Frames and pick a light or dark browser style.
  3. Adjust the background, padding and shadow so the frame reads as a deliberate mockup rather than a pasted image.
  4. Add text, arrows or blur if you need to point at part of the interface or hide private data.
  5. Export in the format your destination needs — PNG for crisp stills, JPG for smaller files, MP4 if you are producing a short animation.

Which frame style to choose

Style Best for Trade-off
Light browser frame Documentation, blogs, light-themed product pages Can blend into a white page unless you add a contrasting background
Dark browser frame Developer tools, dark-mode apps, technical posts May look heavy next to light surrounding content
No frame, shadow only Social posts where the UI should feel floating and modern Loses the "this is a real website" cue

A concrete scenario

Suppose you are writing a launch post about a web app and want one image for X and one for a documentation page. For X, a dark browser frame on a coloured background with a soft shadow tends to stop the scroll because the frame signals "website" instantly. For documentation, a light frame with generous padding and no decorative background keeps attention on the interface itself. The same screenshot can serve both if you save two versions.

PostSpark's own page shows a template gallery covering browser, laptop, phone and tablet presentations, plus testimonials from people such as Vinh Pham and Dustin W. Stout describing it as a screenshot tool they use for posts — those are their observations, not a measured comparison. My practical read: the value is speed and consistency, so the main decision is whether you want a neutral frame or a device mockup, not whether framing is worth doing at all.

If you need a frame that exactly matches a specific browser's chrome, check the available styles first and compare with a dedicated mockup generator such as Screely or BrowserFrame before committing to one tool for a whole campaign.

Which device mockups can I use for an iPhone or MacBook screenshot?

PostSpark lists iPhone and MacBook mockups as ready-made device frames you can apply to a screenshot, alongside browser frames, backgrounds, shadows and annotations. For Apple hardware specifically, the device templates named on the page are:

  • iPhone: iPhone 17 Pro Max, iPhone 17 Pro
  • iPad: iPad Pro 13 M4
  • MacBook: MacBook Pro 16 Gen 5, MacBook Air 15 M5

The layout templates that pair with these include iPhone UI Showcase, iPhone App Presentation, iPhone Close-up, Two iPhones (UI Showcase and Shadow versions), Three iPhones (App Presentation), iMac Website Presentation, and a transparent laptop frame. So an iPhone screenshot can be shown alone, in a pair, or in a three-phone row, while a MacBook screenshot is presented as a website or app screen inside the laptop body.

Choosing between them

Your screenshot Better fit Why
Mobile app screen iPhone 17 Pro / Pro Max frame Matches the aspect ratio and shows the app as it appears on a phone
Mobile onboarding or feature set Two or Three iPhones Lets you show several screens side by side in one image
Desktop web app or landing page MacBook Pro 16 or MacBook Air 15 Gives the page a realistic laptop context
Marketing hero image for a website iMac or transparent laptop presentation Reads as a product shot rather than a raw capture

A practical next step: export your screenshot at the highest resolution you have, then pick the frame that matches the device it was actually taken on. Cropping a desktop capture into a phone frame usually looks wrong, and a mobile capture stretched into a laptop frame loses its proportions. If you need the result as a short clip rather than a still, the page also lists video and animation templates and PNG, JPG and MP4 export.

For comparison, Shots and Screely are other well-known screenshot beautifiers, while Mockuuups Studio focuses more heavily on device mockups.

How do I export a screenshot as MP4 video or animation?

PostSpark handles this through its video and animation templates rather than a plain "export as MP4" button on a still image. The page lists a Video & Animations section alongside 16+ layouts, and the export options are PNG, JPG, or MP4 — so the MP4 path is the animated-template path.

How the workflow goes

  1. Bring your screenshot in (the page also shows a URL → Screenshot route, so you can capture a live page instead of uploading).
  2. Pick an animated template instead of a static one. The listed animation styles include Screenshot + Shadow, Floating Screenshot, Slide-In, Rotating, and 3D Tilted.
  3. Apply the device or browser frame you want — iPhone, iPad Pro, iMac, laptop, light or dark browser chrome.
  4. Add annotations, overlays or shadow if needed.
  5. Export as MP4.

Choosing between MP4 and a still

Goal Better choice Why
App Store / Play Store listing Static PNG or JPG Stores accept stills for screenshots; video is a separate slot
X, Bluesky or Threads post Short MP4 Motion stops the scroll in a feed
Landing page hero MP4, muted and looping Shows a real interface without a click
Docs, help centre, email PNG Loads instantly, no autoplay surprises
Slide deck PNG Stays crisp when scaled and printed

Practical notes

A rotating or slide-in animation draws the eye to one part of the UI, so crop tightly around the feature you are showing — a full-page capture shrunk into motion is unreadable on a phone. Keep clips short; a two-to-four second loop usually reads better than a long sequence. If the same asset also needs to sit in a store listing or a doc page, export the still first and the MP4 second from the same layout so the two match.

For a concrete case: a solo developer shipping a mobile app exports a static PNG for the store listing and a three-second 3D-tilted MP4 for the launch post on X, both from the same iPhone template.

If you want a second opinion on the motion templates before committing, the page's Templates and All Templates sections are the fastest way to see what each animation actually looks like.

Can I use PostSpark to create social media posts for X or Bluesky?

Yes. PostSpark is built for exactly that kind of output: you can turn a plain screenshot into a styled image or short video sized for social feeds, and the page explicitly lists X Post and Bluesky Post among its templates.

What you can make for X or Bluesky

  • Screenshot posts with backgrounds, browser or device frames, shadows, text, arrows and blur applied before export.
  • Device mockups — the template list includes iPhone, Galaxy, Pixel, iPad, MacBook and iMac frames, so an app screen can be shown inside realistic hardware.
  • Animated versions of the same idea, exported as MP4, for posts that benefit from motion.
  • Static exports as PNG or JPG when a single image is enough.

How the workflow fits a social post

The common pattern is: capture the screen, drop it into a layout, add a frame and background so it doesn't look like a raw grab, then export at the ratio your feed expects. PostSpark's layout options — floating, slide-in, 3D tilted, close-up, transparent laptop — exist to make a screenshot look deliberate rather than accidental, which matters on X and Bluesky where bare screenshots blend into the timeline.

Practical notes

  • The page shows a URL → Screenshot path, so you can generate the image from a link rather than uploading a file first.
  • Template names like X Post and Bluesky Post suggest presets, but check the actual dimensions in the editor before exporting, since both platforms crop previews differently.
  • Video export (MP4) is useful for short looping demos; keep clips brief because both platforms autoplay muted.

Choosing between this and alternatives

If your goal is a quick, well-framed screenshot post, PostSpark covers it. If you need full design control over typography and multi-element layouts, a general editor such as Figma or Canva gives more room. For pure device mockups without editing, Screenshots Cloud and BrowserFrame are narrower, simpler options.

Next step: open the editor, pick the X Post or Bluesky Post template, paste your URL or upload the screenshot, then export a PNG for a static post or MP4 if you want motion.

Is there a PostSpark Chrome extension or VSCode integration?

Yes. PostSpark lists both integrations in its own navigation: a Google Chrome extension and a VSCode extension, alongside a Firefox browser extension.

What each one is for

  • Chrome extension — the natural fit if your screenshots come from web pages you're already viewing in the browser. You capture in place instead of downloading an image, opening a separate editor tab, and re-uploading it.
  • VSCode extension — aimed at code screenshots rather than page captures. PostSpark's template list includes a "Code Snippet" template, so this path suits developers who want to render code as a shareable image without leaving the editor.
  • Firefox extension — the same browser-side capture idea for Firefox users.

Choosing between them

Your situation Sensible starting point
You capture live websites or dashboards Chrome extension
You want to post code snippets VSCode extension
You browse in Firefox Firefox extension
You need device frames, backgrounds, arrows or blur The web editor at PostSpark, where the full layout and device-mockup set lives

The extensions shorten the capture step; the heavier work — browser frames, iPhone and MacBook mockups, shadows, annotations, blur, and PNG/JPG/MP4 export — is described as part of the main editor, so expect to finish there for anything beyond a quick grab.

A practical test: install the Chrome extension, capture one page you'd normally screenshot manually, and see whether the result is presentable without opening the editor. If you still find yourself adding frames or backgrounds every time, treat the extension as a capture shortcut and do the styling on the web app.

Related questions

More questions →
What Is a Browser Frame Generator and When Should You Use One?

A browser frame generator wraps a screenshot in a realistic browser window — complete with address bar, tabs, and window controls — so the image reads as a live website rather than a flat capture. Use one when you need a website screenshot to look like a real browsing session: portfolio pieces, case studies, landing page mockups, or social posts. PostSpark's Screenshot Editor & Beautifier is one example: it adds browser frames alongside backgrounds, text, arrows, and blur, then exports as PNG, JPG, or MP4.

What a browser frame generator actually adds

The "frame" is the chrome around your content — the parts of a browser window that aren't the page itself. A generator composites your screenshot into that chrome so the result looks like a screenshot of a browser, not just of a page.

Typical chrome elements:

  • Address bar — the URL field, which signals "this is a real site"
  • Tabs — one or more tab shapes above the content
  • Window controls — minimize, maximize, close buttons
  • Optional toolbar icons — back/forward, refresh, menu

PostSpark lists Browser Frames as a dedicated feature and offers both Browser, Light and Browser, Dark frame styles. The rest of the editor handles what sits behind and around the frame: backgrounds, shadows, annotations, and overlays.

When to use one

Use case Why a browser frame helps
Website mockups Shows the design in context instead of floating on a blank canvas
Portfolio / case studies Signals "this shipped and ran in a real browser"
Social media and marketing visuals Adds visual structure that plain screenshots lack
Landing page previews Makes a product screenshot look like a live demo
Presentations Gives a consistent, polished container for multiple screenshots

If you only need to show a UI component in isolation — a button, a form, a single card — a frame can add noise. Skip it and use a plain screenshot or a device mockup instead.

Typical workflow

The general steps are the same across tools; PostSpark's editor follows this shape:

  1. Capture or upload — take a screenshot of the page, or use the URL-to-screenshot path if the tool supports it. PostSpark lists "URL -> Screenshot" as an input option.
  2. Pick a frame style — choose a browser frame (light or dark) or another layout. PostSpark offers 16+ layouts including device mockups like iPhone, iPad Pro, MacBook, and iMac.
  3. Adjust the surroundings — set a background, add a shadow, and optionally add text, arrows, or blur to highlight parts of the page.
  4. Export — save as PNG, JPG, or MP4 depending on whether you need a still or a short animation.

The input is your screenshot; the action is choosing a frame and background; the expected result is a composed image where the page sits inside believable browser chrome.

Light vs. dark frames: how the choice changes the look

The frame color sets the tone of the whole mockup, so pick it against your background, not in isolation.

  • Light frame — reads as a default, neutral browser. Works well on light or pastel backgrounds and keeps attention on the page content.
  • Dark frame — reads as a dark-mode browser or a more premium, editorial look. Pairs well with dark backgrounds and makes bright page content pop.

A quick rule: match the frame's contrast to the background. A light frame on a light background can disappear; a dark frame on a dark background can do the same. If the frame vanishes, the mockup loses the "this is a browser" signal you added it for.

Common issues and how to fix them

  • Mismatched aspect ratio — the screenshot is wider or taller than the frame expects, so the page gets stretched or letterboxed. Fix: crop the screenshot to the frame's proportions before uploading, or choose a frame that matches your capture.
  • Cropped browser chrome — the top of the frame (tabs, address bar) gets cut off by the canvas or a background element. Fix: zoom out or reposition the frame so the full chrome is visible.
  • Blurry export — the source screenshot was low-resolution, or the export was scaled up. Fix: capture at a higher resolution and export at the size you actually need.
  • Frame fights the background — low contrast between frame and background. Fix: switch frame style (light ↔ dark) or change the background.
  • Too many elements — frame, shadow, text, arrows, and blur all at once. Fix: keep one focal point; the frame is usually enough.

Where PostSpark fits

PostSpark's editor combines browser frames with backgrounds, shadows, annotations, and blur in one place, and exports to PNG, JPG, or MP4. It also lists templates for X posts, Bluesky posts, and code snippets, plus device mockups (iPhone 17 Pro Max, Galaxy S24 Ultra, iPad Pro, MacBook Pro, and others) and integrations including a Chrome extension, Firefox extension, and VSCode extension. If your goal is a website screenshot that looks like a real browsing session, the browser frame feature is the part you'd use; the surrounding tools are there if you want to go further than a plain frame.

How to Add Custom Backgrounds to Screenshots for Social Media and Mockups

You can add a custom background to a screenshot in PostSpark's Screenshot Editor & Beautifier by uploading your image, picking a background (color, gradient, or your own image), then adjusting padding, rounded corners, and shadow before exporting as PNG, JPG, or MP4. This works well when you want a screenshot to look intentional on social media or in a marketing mockup rather than like a raw screen grab. The steps below follow the tool's stated capabilities: backgrounds, browser frames, text, arrows, blur, and export to PNG, JPG, or MP4.

Step 1: Get your screenshot into the editor

Start with a clean capture — hide personal data, notifications, and anything you don't want public before uploading. PostSpark also offers a URL → Screenshot path, so you can generate a screenshot from a web address instead of uploading a file. If you already have an image, upload it directly.

Expected result: your screenshot appears on the canvas, ready for a background layer behind it.

Step 2: Choose your background type

PostSpark supports adding backgrounds as part of its beautify workflow. Match the background to where the image will live:

Background type Best for Watch out for
Solid color Clean product shots, brand-colored posts Low contrast against the screenshot's own colors
Gradient Social posts, hero images, app promos Busy gradients competing with UI detail
Custom image Mockups, themed campaigns, device showcases Image resolution too low once the canvas scales up

Pick a background that contrasts with the screenshot's dominant color so the frame reads as deliberate. If the screenshot is mostly white, a mid-tone or dark background separates it clearly.

Step 3: Tune padding, corners, and shadow

These three settings decide whether the screenshot looks placed on the background or just pasted over it:

  • Padding — the gap between the screenshot edge and the canvas edge. More padding reads as more premium; too little looks cramped.
  • Rounded corners — softens the screenshot's edges so it blends with the background instead of sitting on top of it.
  • Shadow — adds depth. PostSpark lists Shadow Overlays and templates such as "Screenshot, Shadow" and "Screenshot, Floating," which combine these effects.

Expected result: the screenshot looks like a designed object on the background, not a flat rectangle.

Step 4: Add a browser frame or device mockup (optional)

If the goal is to show a website or app in context, layer a frame on top of the background:

  • Browser frames — PostSpark offers Light Browser and Dark Browser frames, useful for website screenshots and "website presentation" mockups.
  • Device mockups — iPhone, iPad Pro, Android, iMac, MacBook, and other device templates are available for app screenshots and UI showcases.

Choose the frame that matches the platform your audience uses. A browser frame signals "this is a website"; a phone mockup signals "this is an app." You can also add text, arrows, and blur for annotations or to hide sensitive areas.

Step 5: Export in the right format

PostSpark exports PNG, JPG, or MP4.

  • PNG — best for screenshots with text and sharp UI edges; supports transparency.
  • JPG — smaller files for photo-heavy or gradient backgrounds where transparency isn't needed.
  • MP4 — for animated or video output, such as the video and animation templates.

Export at a size that matches your target platform's aspect ratio. A square or 4:5 canvas suits feed posts; 16:9 suits presentations and video.

Common problems and fixes

Background doesn't show up The screenshot layer is likely covering the full canvas. Reduce the screenshot's size or increase padding so the background is visible around the edges.

Export looks blurry The background image or screenshot resolution is lower than the export canvas. Use a higher-resolution source image, or export at a smaller canvas size.

Aspect ratio looks wrong The canvas ratio doesn't match the platform. Re-check the target ratio (square, 4:5, 16:9) before exporting, and adjust padding rather than stretching the screenshot.

Screenshot and background clash The background is too similar in tone to the screenshot. Switch to a contrasting solid color or a gradient with a clear light-to-dark range.

When this workflow fits

Use custom screenshot backgrounds when the screenshot is meant to be seen as a designed asset — social media posts, marketing pages, app store listings, or presentations. If you just need to share a raw screen for debugging or internal notes, skip the background and export the plain capture.

What Is a Screenshot Mockup Generator and How Do You Use One?

A screenshot mockup generator is a tool that places a plain screenshot inside a realistic device or browser frame, adds a background and visual effects, and exports the result as a presentation-ready image or video. Use one when a raw capture looks flat or unfinished and you need it to read as a product shot — for app store listings, landing pages, social posts, or demos. A basic screenshot editor crops, annotates, and redacts; a mockup generator goes further by wrapping the capture in context (a phone, laptop, or browser window) so viewers instantly understand what they're looking at.

What a mockup generator actually does

The core job is composition, not just correction. You start with a screenshot and end with something that looks designed. That typically means four layers stacked together:

  • The capture — your original screenshot, ideally high resolution.
  • The frame — a device shell (iPhone, Android, iPad, MacBook, iMac) or a browser window in light or dark styling.
  • The background — a solid color, gradient, image, or transparent canvas behind the frame.
  • The effects — drop shadows, 3D tilt, blur, text, arrows, and overlays that add depth or direct attention.

PostSpark, for example, describes its Screenshot Editor & Beautifier as a tool to "add backgrounds, browser frames, text, arrows, and blur, then export as PNG, JPG, or MP4." That combination — frame plus background plus effects plus export — is the defining feature set of a mockup generator.

Features worth checking before you commit

Not every tool offers the same depth. Compare candidates on these dimensions:

Feature Why it matters
Device frames Determines whether your mockup looks native to the platform you're promoting
Browser frames (light/dark) Essential for web apps, landing pages, and SaaS screenshots
Backgrounds Solid, gradient, image, or transparent — affects how the mockup sits on a page
Shadows and 3D tilt Adds realism and separates the UI from the background
Annotations (text, arrows, blur) Lets you highlight or hide specific parts of the interface
Layout presets Speeds up recurring formats like "two iPhones" or "website presentation"
Export formats PNG/JPG for static, MP4 for animated or video mockups

PostSpark lists device mockups including iPhone 17 Pro Max, iPhone 17 Pro, Galaxy S24 Ultra, Pixel 7, iPad Pro 13 M4, MacBook Pro 16 Gen 5, and MacBook Air 15 M5, alongside layout templates such as "Browser, Light," "Browser, Dark," "iPad Pro, UI Showcase," "Screenshot, 3D Tilted," and "Two iPhones, Shadow." It also offers browser extensions for Chrome and Firefox and a VSCode extension, which matters if you want to capture and mock up without leaving your workflow.

The typical workflow

The steps are consistent across most generators, including PostSpark:

  1. Upload or capture your screenshot. Some tools accept a URL and generate the screenshot for you; others take an image file. PostSpark supports a "URL -> Screenshot" path as well as direct image input.
  2. Pick a frame or layout. Choose a device shell or a preset like "Screenshot, Shadow" or "Website Presentation." This sets the canvas proportions.
  3. Customize the background. Apply a color, gradient, or image. Transparent backgrounds are useful if you'll place the mockup on a colored page later.
  4. Add effects and annotations. Apply shadows, tilt, blur, text, or arrows. Keep this restrained — the UI should stay the focus.
  5. Export. Choose PNG or JPG for a static mockup, or MP4 if you've built an animation. PostSpark's template list includes animation options like "Rotating, Shadow Display" and "Slide-In," which export as video.

Expected result: a single file that looks like a product screenshot from a marketing page, not a raw capture from your screen.

Where mockups get used

  • App store and Play Store listings — device frames make screenshots look native and professional.
  • Landing pages — a browser-framed screenshot communicates "this is a web product" instantly.
  • Social posts — X, Bluesky, and Reddit posts benefit from a background and shadow so the image doesn't blend into the feed. PostSpark's own testimonials reference using it for exactly this.
  • Product demos and docs — annotations and blur let you point at a feature or hide sensitive data.
  • Presentations — 3D-tilted and floating layouts add visual interest to slides.

Mistakes to avoid

  • Starting with a low-resolution capture. A blurry screenshot stays blurry inside a crisp frame — the contrast makes it look worse, not better.
  • Cluttered backgrounds. A busy gradient or photo competes with the UI. Neutral or subtle backgrounds keep attention on the product.
  • Overusing effects. Tilt, shadow, glow, and blur all at once reads as amateur. Pick one or two.
  • Ignoring aspect ratio. A mockup built for a square social post won't fit a 16:9 landing page hero. Match the export to where it will live.
  • Forgetting the platform frame. Showing an Android app inside an iPhone shell (or vice versa) undermines credibility with the audience you're targeting.

Choosing between a basic editor and a mockup generator

If you only need to crop, redact, or draw a quick arrow, a plain screenshot editor is faster. If the screenshot will be seen by customers, investors, or a social audience and needs to look intentional, a mockup generator earns its place. The deciding question is simple: does the image need context — a device, a browser, a background — to make sense at a glance? If yes, use a generator.

What Can You Do with a Free Online Screenshot Editor (and How Does It Compare)?

A free online screenshot editor like Screenshot Studio runs entirely in your browser and turns a plain screenshot into a share-ready image: you add a background, wrap it in a browser or device frame, apply shadows or a 3D tilt, and export PNG, JPEG, or WebP at up to 5x resolution. The same editor can also animate the result and export MP4, WebM, or GIF. It fits landing pages, README files, slides, and social posts. Choose it when you want a polished mockup without installing software; skip it when you only need to shrink, convert, or crop a file — the site's quick image tools handle that separately.

What a free online screenshot editor actually does

Screenshot Studio's main editor takes a screenshot as input and lets you compose it into a presentable image. According to the site, you can:

  • Drop in a screenshot and place it on one of 250+ backgrounds
  • Wrap it in a Safari or Chrome frame, or an iPhone or MacBook mockup
  • Tilt it in 3D and add shadows
  • Export PNG, JPEG, and WebP at up to 5x resolution
  • Animate the result and export MP4, WebM, and GIF

That last point is the main differentiator. Most free screenshot editors stop at a static image; this one produces short motion clips from the same canvas, which is useful for demo GIFs in a README or a looping social post.

When to use the general editor vs. the focused editors

The site splits its tools by what you're making, not by a single do-everything interface. Pick based on your source material:

Your input Tool to use What you get
A raw screenshot Main screenshot editor Background, frame, shadow, 3D tilt, image or video export
A code snippet Code image editor Clean shareable image, 14 themes, 20 languages
A post on X Post-to-image editor Clean image from a post link, light or dark, any background
App screens for a store listing App Store screenshot editor Screens in phone frames with short headlines, sized for the App Store
A file you just need to shrink or reformat Quick image tools Compress, convert, resize, crop, rotate, remove background

The practical rule: if the screenshot needs framing or styling, use the editor. If it only needs a technical fix (smaller file, different format, tighter crop), use the quick tools — they're faster and don't require you to think about layout.

Privacy and limits worth knowing before you start

These points come directly from the site's own description and are the ones most likely to affect your decision:

  • Editing happens on your device. Imported images are read by your browser and drawn on a canvas in the tab; they are not uploaded to be edited. Drafts are saved in your own browser storage.
  • Image tools run without uploads. Compress, convert, resize, crop, and rotate use the browser's own image APIs, so files go from your disk to your downloads folder without touching a server.
  • EXIF is stripped on export. Every image is re-encoded from pixels, which drops metadata such as camera model and GPS location before you share it.
  • Some features do need the network — for example, capturing a screenshot from a URL.
  • No signup, no watermark, and no paid tier are stated on the site. The project is open source under the Apache 2.0 licence.

If your screenshot contains sensitive on-screen content, local processing is a meaningful advantage over tools that upload your file to a server. Note that "no paid tier" is the site's own claim; if pricing matters to you, confirm it on the site before relying on it long-term.

How to edit a screenshot, step by step

  1. Open the editor from the "Edit a screenshot" option on the homepage.
  2. Add your screenshot — it's read locally by the browser, not uploaded.
  3. Choose a background from the 250+ options.
  4. Add a frame or mockup — Safari/Chrome frame, or an iPhone/MacBook device frame.
  5. Adjust depth with shadows or a 3D tilt.
  6. Export as PNG, JPEG, or WebP at up to 5x resolution, or export MP4, WebM, or GIF if you want motion.

Verify it worked: open the downloaded file and check that the frame, background, and any tilt are intact, and that the resolution matches what you selected. Because EXIF is stripped on export, the file should also be free of camera/location metadata.

Common snags: if a network-dependent feature (like capturing from a URL) fails, that's expected offline behavior — the core editing still works locally. If your export looks soft, raise the resolution multiplier before exporting rather than upscaling afterward.

Choosing between this and other free editors

Use the same dimensions to compare any free online screenshot editor:

  • Output types: static image only, or image and video/GIF? Screenshot Studio does both.
  • Framing options: backgrounds, browser frames, device mockups, 3D tilt — how many are offered?
  • Resolution ceiling: can you export above 1x for retina or print?
  • Privacy model: does editing happen locally, or is your file uploaded?
  • Account and watermark: signup required? Watermark added?
  • Specialized modes: separate editors for code, posts, and App Store screenshots, or one generic canvas?

Screenshot Studio's stated position on each: image + video export, 250+ backgrounds with frames and mockups, up to 5x, local editing, no signup or watermark, and dedicated editors for code, X posts, and App Store screenshots. If a competing tool matches those on the dimensions you care about, the tiebreaker is usually which specialized modes you actually need — a code-snippet editor with themes and language support saves real time if you publish code images often.

Website Overview

Page metadata, canonical configuration and social previews work together to provide more consistent search and sharing presentation.

Domain and Registration

Transfer-protection status is present, helping reduce the risk of unauthorized domain transfers. The domain has about 2 years of registration history; its current configuration provides more context than age alone. The registrar is CloudFlare, Inc., a widely used domain service provider. The domain uses the common .app extension, which is not an independent safety signal.

DNS and Email

Nameservers are provided by Cloudflare, indicating managed DNS hosting. MX records point to the Google Workspace email service. DNSSEC is enabled, allowing validating resolvers to authenticate signed DNS data. No CNAME was found; the observed records resolve directly to addresses. SPF and DMARC are configured. DKIM status is unknown.

TLS and Certificates

The certificate uses an RSA 2048-bit public key, offering broad client compatibility. The server supplied a complete certificate chain. No organization name is present in the certificate; the available fields are consistent with domain validation. The certificate was issued by Let's Encrypt, commonly associated with automated certificate services. The certificate's total validity is about 89 days, consistent with a short renewal cycle.

HTTP and Browser Security

The response lacks these common security headers: CSP, Permissions-Policy. CORS permits any origin to read this response. This is common for public resources; sensitive responses need narrower handling. No X-Powered-By header was found, reducing one common source of backend fingerprinting information. No obvious internal addresses or debug information were found in the headers. The Server header contains the custom value Vercel.

Technology Stack Analysis

The public page identifies Next.js, Vercel without precise versions, leaving fewer clues for version-specific scanning.

Search and Social Sharing

Twitter Card metadata is configured. JSON-LD includes Organization data, helping describe the organization as an entity. The title has 42 characters, within a common display range. A meta description is present, with 120 characters. The observed directives allow indexing and link following.

Hosting and Email

DNSCloudflare
HostingVercel
EmailGoogle Workspace
Approximate IP geolocation (inferred; a CDN or proxy may differ from the origin server) United States flagUnited States Inferred 66.33.60.35

Registration details

RDAP / WHOIS

RegistrarCloudFlare, Inc.
Registered2024-06-22
Expires2027-06-22
Domain statusclient transfer prohibited
Nameserversarcher.ns.cloudflare.com、lara.ns.cloudflare.com
DNSSECsigned

DNS records

DNS

TypeNameValueTTLPriority
Apostspark.app66.33.60.35234—
Apostspark.app76.76.21.123234—
MXpostspark.appaspmx.l.google.com36001
MXpostspark.appalt1.aspmx.l.google.com36005
MXpostspark.appalt2.aspmx.l.google.com36005
MXpostspark.appalt3.aspmx.l.google.com360010
MXpostspark.appalt4.aspmx.l.google.com360010
NSpostspark.apparcher.ns.cloudflare.com86400—
NSpostspark.applara.ns.cloudflare.com86400—
TXTpostspark.appgoogle-site-verification=-Sgq0VZCgg8z9qpiw5yNhAXea7pCk-8VqL7VOxLilYQ3600—
TXTpostspark.appgoogle-site-verification=AR1T-BIL7nz0PY1mQHc1qu2_RVendx909zg1y_zdQLg3600—
TXTpostspark.appv=spf1 include:_spf.google.com -all3600—
DSpostspark.app2371 13 2 bdcae7b97d757a4b7955a726ec9c6b5f00ed2fef5a6701823b18c062db4250f01800—
DMARC_dmarc.postspark.appv=DMARC1; p=reject; sp=reject; rua=mailto:[email protected]; ruf=mailto:[email protected]; adkim=s; aspf=s;300—

TLS and certificates

TLS / SSL

AssessmentNormal configuration
Supported protocolsTLSv1.2、TLSv1.3
Negotiated protocolTLSv1.3
Certificate subjectpostspark.app
IssuerLet's Encrypt
Valid until2026-12-05T18:15 · Remaining when checked: 50 days
Verification detailsCertificate trust: Passed · Hostname match: Passed

HTTP response headers

HTTP

HeaderValue
content-typetext/html; charset=utf-8
cache-controlpublic, max-age=0, must-revalidate
serverVercel
strict-transport-securitymax-age=63072000; includeSubDomains; preload
x-frame-optionsDENY
x-content-type-optionsnosniff
referrer-policystrict-origin-when-cross-origin
access-control-allow-origin*

Identified technologies

Next.jsVercel

Pages, Search and Sharing

Meta descriptionEdit and beautify screenshots: add backgrounds, browser frames, text, arrows, and blur, then export as PNG, JPG, or MP4.
Canonical URLhttps://postspark.app
LanguageEnglish (default)
Twitter Cardsummary_large_image
All bots 1 allowed · 2 disallowed
  • Allow/
  • Disallow/api/
  • Disallow/portal

User reviews (0)

  • No reviews yet.