
 简体中文
简体中文 English
Website review
This review may include AI-generated content and is not individually verified. Domain, certificate and other facts come from the observed data on this page.
What is Chalk.ist?
Chalk.ist is a web tool for turning source code into shareable images. You paste in a code snippet, and it renders it as a styled graphic rather than a plain block of text—useful when you want code to look good in a slide deck, a social post, a documentation page or a chat message.
Its core purpose is presentation, not execution: it does not run, lint or test your code. It formats it. That makes it most relevant to developers, technical writers, educators and anyone who publishes code where visual clarity matters.
Who it suits
- Developers sharing snippets on social media or in presentations
- Instructors and tutorial authors who want consistent, readable code visuals
- Teams producing documentation or release notes that include code samples
Trade-offs to weigh
- Convenience vs. control: a browser tool is fast, but if you need exact brand fonts, custom themes or automated batch output, a local screenshot setup or a static-site code highlighter may fit better.
- Images vs. text: an image is easy to share but not searchable, not copyable and not accessible to screen readers. Keep the original code available in text form alongside any image.
A practical next step
If you are preparing a talk or a post, paste a short, self-contained snippet—ideally under 20 lines—into Chalk.ist and export an image for the visual, while keeping the full code in a linked repository or text block for copying. For a broader set of formatting options, you can also compare dedicated code-image tools such as Carbon or Ray.so, which follow a similar paste-and-export approach.
How do I create a code image with Chalk.ist?
Paste your code into the editor at Chalk.ist, adjust the appearance, and export the result as an image. The tool is built specifically for turning source code into a shareable visual, so the workflow is short: enter code, style it, download.
Typical steps
- Open the site and paste or type your snippet into the code area.
- Choose a language or theme if the interface offers one, so syntax highlighting matches your code.
- Tweak the look — padding, background, window frame, or font — until it reads well at the size you'll share it.
- Export or download the image, then drop it into a slide, README, blog post, or social post.
What it's good for
- Documentation and README snippets that should look polished rather than plain text.
- Social posts (X/Twitter, LinkedIn, Mastodon) where a raw code block won't render.
- Slides and talks where you want consistent, readable code visuals.
- Teaching material where a clean, framed snippet keeps attention on the code.
Trade-offs to keep in mind
- Images aren't searchable or copyable, so keep the original text somewhere accessible (a repo, gist, or doc) for anyone who needs to copy it.
- Long files get unreadable fast; crop to the key lines rather than exporting everything.
- Very wide lines may need manual wrapping or trimming before export.
- If you have accessibility needs in mind, add alt text describing the snippet when you embed the image.
Next step: paste a short, self-contained function or config block first, export it, and check readability at the size it'll actually appear. If it's hard to read there, shorten the snippet or increase the font before styling further.
What customization options does Chalk.ist offer for code images?
Chalk.ist is built around one job: turning a snippet of source code into a clean, shareable image. Its customization options focus on presentation rather than code execution.
What you can typically adjust
- Theme and color scheme — switch between light and dark looks, and pick a palette that matches your brand or a slide deck.
- Window chrome and frame — choose whether the snippet appears in a mock editor or browser window, with or without padding and a background.
- Font and font size — set the typeface and scale so the code stays legible at the size you'll share it.
- Line numbers and highlighting — toggle line numbers and emphasize specific lines to direct attention.
- Background and padding — add a gradient or solid background and control spacing around the code block.
- Language selection — set the syntax so keywords, strings and comments are colored correctly.
How to choose
| Goal | What to prioritize |
|---|---|
| Social post or slide | Bold background, large font, few lines |
| Documentation or tutorial | Light theme, line numbers, readable font size |
| Brand consistency | Custom colors and a fixed font |
A practical next step
Paste a short snippet (10–15 lines works best), pick a theme, then export at a size that matches where it will live. For a talk, test the image on a projector first; for a blog, check it against your page background so the frame doesn't clash.
If you want to compare approaches, similar tools include Carbon and Ray.so.
Can I export Chalk.ist images in different formats or resolutions?
Yes. Chalk.ist is built around turning a code snippet into an image, so the output is a raster image file rather than a live code embed or vector document. In practice that means you can control the visual result through the export settings the tool exposes (such as scale or resolution) and through the framing options you choose before exporting.
That matters most in three situations:
- Slides and docs: export at a higher scale so the text stays crisp when projected or zoomed.
- Social posts: a wider frame with padding and a background reads better in a feed than a tight crop.
- Print or retina screens: render larger than the final display size, since a raster export scaled up will soften the glyph edges.
Deciding what to use:
| Goal | What to prioritise |
|---|---|
| Readability on a screen | Higher scale, generous padding, high-contrast theme |
| Small file for chat or email | Lower scale, simpler background |
| Brand-consistent look | Match window chrome, font and background to your palette |
A useful next step: pick one representative snippet, export it twice — once at a modest scale and once at the largest the tool allows — then view both at the size your audience will actually see them. Choose the smaller file only if the text still reads cleanly; otherwise keep the larger export. If you need a format the tool doesn't offer, export at the highest resolution available and convert downstream, accepting that the result stays raster.
Is Chalk.ist free to use, or are there paid plans?
Chalk.ist does not present any pricing information on its site, so there is no evidence of paid plans, subscriptions, or payment options. Based on what the site shows, it appears to function as a free browser tool: you paste or type source code, style it, and export an image. No account or checkout flow is described.
That said, "no visible pricing" is not the same as a formal free-forever guarantee. Treat it as free to use now, with the usual caveat that a hosted tool can change its model later.
How to decide if it fits your use
- Casual and one-off use: If you want a quick code screenshot for a slide, README, or social post, the lack of a paywall makes it easy to try without commitment.
- Recurring or team use: If you plan to build a workflow around it, check the site yourself for any account, export, or usage limits before depending on it.
- Privacy-sensitive code: A browser-based tool may process your code locally or on a server. If the snippet is proprietary, confirm how it handles input before pasting.
A practical next step
Paste a short, non-sensitive snippet and try the full path you care about—styling, exporting, and image quality. If that works without prompts to pay or sign up, it is effectively free for your use case. For alternatives with clearer terms, you can compare Carbon or Ray.so, which serve a similar purpose.
How does Chalk.ist compare to other code-to-image tools?
Chalk.ist is best understood as a focused tool for turning a code snippet into a clean, shareable image, rather than a full publishing or documentation platform. It fits the common case where you want a screenshot-like graphic for a slide, a social post, a README, or a chat message without opening a design app.
Compared with other code-to-image tools, the main differences usually come down to these trade-offs:
- Speed vs. control. Minimal tools get you an image in seconds with sensible defaults. More configurable tools take longer but let you tune fonts, themes, padding, and line numbers.
- Aesthetics vs. fidelity. Some tools prioritize a polished, presentation-ready look; others try to mirror your editor exactly, including syntax highlighting quirks.
- One-off vs. repeatable. If you only need a single image now, a browser-based tool is enough. If you generate many images regularly, a CLI or editor-integrated workflow saves time.
- Static image vs. interactive embed. An image is universal and paste-anywhere. Embeds or hosted snippets stay editable and can update, but they depend on a third-party service.
A practical way to choose: start with the destination. For a conference slide or a social post, pick the tool that gives the cleanest visual result with the least setup. For documentation that changes often, prefer an approach where the code stays in your repo and the image is regenerated automatically.
If you want to try Chalk.ist, open Chalk.ist, paste a snippet, and check two things first: whether the exported image keeps your indentation and line breaks intact, and whether the default theme is readable at the size you will actually display it. Those two details matter more than the number of available options.
 Cloudflare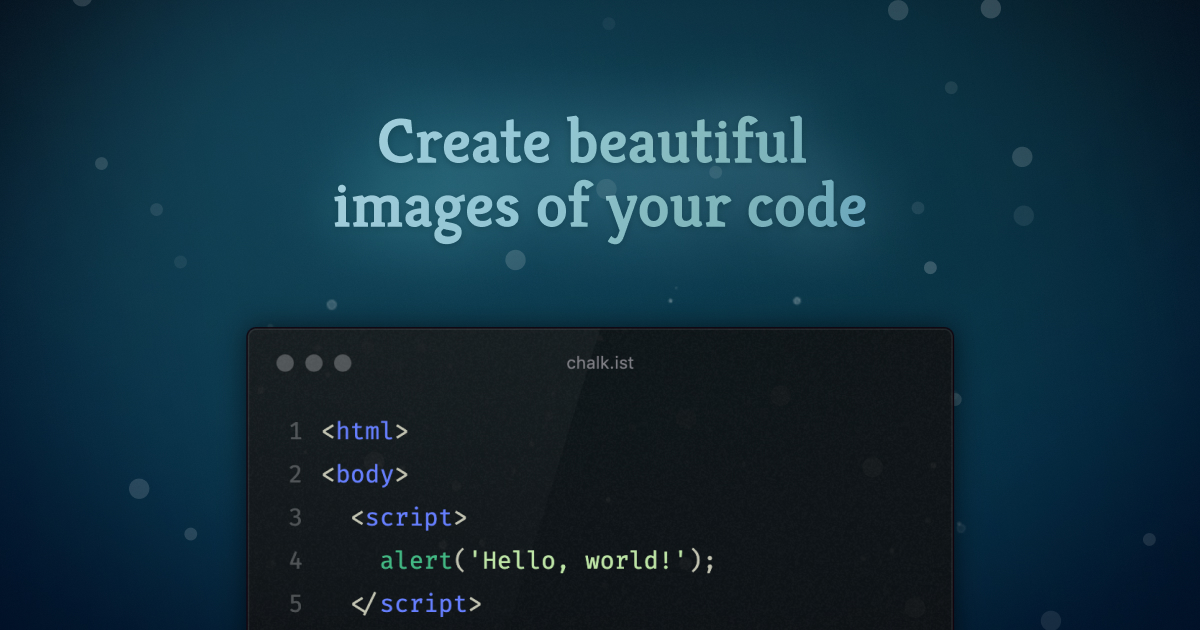

User reviews (0)