Website profiles · Technology insights · Alternatives

clickvote.dev

Seamlessly Integrate Like, Upvote, and Review Components into Your App with React / Angular / Svelte / Vue

Paid content
Visit website
Profile views 10 Outbound visits 1 Normal
Clickvote Full homepage screenshot

At a glance

Category
Development
Language
English
Paid-content signal
Paid contentObserved
Registered
2023
Hosting
VercelInferred
HTTPS certificate trusted
PassedObserved
Last updated

Website review

This review may include AI-generated content and is not individually verified. Domain, certificate and other facts come from the observed data on this page.

What is Clickvote?

Clickvote is a developer tool for adding like, upvote and review components to an existing app. Instead of building the interaction and the backend yourself, you embed small components into your interface and Clickvote handles the counting, storage and delivery of that feedback data.

What it actually gives you

  • Ready-made UI components for likes, upvotes and reviews, available for React, Vue, Angular and Svelte.
  • A hosted backend that tracks votes and can scale with your traffic.
  • Analytics in the form of time-series views, so you can see how engagement changes over time.
  • Delivery of the collected data back into your own system, via API calls or Kafka topics.
  • An open-source codebase, with a self-hosted option using docker-compose, plus a managed cloud service.

How you would use it

A typical setup is a content site, documentation portal or community product where you want per-item reactions without building a voting service. You drop a provider and a component around each item, pass an identifier for that item, and choose a style. The example in the documentation wraps a component with a context id and a target id, then renders a like style — so the same pattern works for a blog post, a feature request, a comment or a product page.

Deciding between the two deployment paths

Self-hosted Cloud
Setup Run locally with docker-compose Managed service, sign up and embed
Control Full control over infrastructure and data Less operational work
Best for Teams with strict data or hosting requirements Teams that want to ship quickly

Where the trade-offs sit

The appeal is speed: a like or upvote widget is deceptively expensive to build well once you account for deduplication, scale and analytics. The cost is a dependency — you are routing engagement data through another system, so check how it fits your privacy and data-residency needs. The open-source option is the natural answer if that is a blocker, but it moves the operational burden back to you.

Next step

Open the documentation and look at the component API for your framework, then decide whether your engagement data needs to live in your own database or can flow through Clickvote's managed service. If you want to compare it against alternatives, look at how each handles self-hosting and data export before committing.

How do I integrate Clickvote's like, upvote, and review components into a React app?

Clickvote is designed to be embedded as a component rather than built from scratch. For React, the integration path shown on the site is: wrap your app (or the relevant subtree) in a ClickVoteProvider, then render a ClickVoteComponent with an id (the context) and a voteTo (the target being voted on), and pass a render prop that supplies the UI — for example the built-in LikeStyle.

A minimal shape, based on the code sample on Clickvote:

import { ClickVoteProvider, ClickVoteComponent, LikeStyle } from '@clickvote/react';

export const LikeExample = () => (
  <ClickVoteProvider>
    <ClickVoteComponent id={CONTEXT} voteTo={ID}>
      {(props) => <LikeStyle {...props} />}
    </ClickVoteComponent>
  </ClickVoteProvider>
);

Practical steps

  1. Install the React package, then place ClickVoteProvider once near the root so multiple vote components share context.
  2. For each item you want votable, render ClickVoteComponent with a stable id for the page/thread and a voteTo identifying the specific item.
  3. Use the render-prop props to drive your own button, count, or styling instead of LikeStyle if you want the widget to match your design system.
  4. Decide how votes reach your backend: the site describes sending received likes to your system via API calls or Kafka topics, so plan which of those fits your stack.

What to check before committing

  • Review and upvote variants: the site advertises like, upvote, and review components across React, Vue, Angular, and Svelte, so confirm the review component's props differ from the like example.
  • Scale: the site claims it handles an unlimited number of likes and scales with traffic — worth load-testing against your own expected peak.
  • Hosting: a self-hosted Docker Compose option and a managed cloud option are both mentioned, which matters if you need data residency or want to avoid running infrastructure.

H3. Who this suits Teams that want voting or reviews as a drop-in component and don't want to maintain the counting, storage, and event pipeline themselves. If you need deep custom logic around vote weighting or moderation, verify how much control the component props give you before adopting it.

Can I self-host Clickvote, and how does that compare to using the cloud service?

Yes. Clickvote explicitly offers a self-hosted option: you can run it locally with docker-compose, alongside a free managed cloud service. That gives you two deployment paths for the same like, upvote and review components.

H3 When self-hosting makes sense

  • You need data to stay inside your own infrastructure or network.
  • You want to run the service locally during development so front-end work doesn't depend on a hosted backend.
  • You expect to customize or extend the open-source code; Clickvote states its source is publicly available and community-driven.
  • You already operate Docker-based environments and can absorb the extra service, storage and maintenance.

H3 When the cloud service is the easier choice

  • You want to add vote or review components without running another backend.
  • Your team is small and would rather not own upgrades, monitoring or scaling.
  • You are prototyping and want to validate the interaction before committing to infrastructure.

H3 Comparison

Aspect Self-hosted (docker-compose) Cloud (free managed service)
Setup effort You run and configure it yourself Sign up and start
Operational burden Yours: hosting, backups, upgrades Handled by the provider
Data location Stays in your environment Held by the provider
Customization Full, since the source is open Limited to what the service exposes
Scaling Your responsibility Provider's responsibility
Cost model Your infrastructure costs Free managed tier described on the site

H3 What stays the same Either way, the integration surface is the same component library, with packages for React, Vue, Angular and Svelte. The documented React example wraps a ClickVoteProvider around a ClickVoteComponent and renders a LikeStyle inside it, passing a context and the item to vote on. The site also says likes can be forwarded into your own system via API calls or Kafka topics, which matters most when you self-host and want votes to land in your existing pipeline.

H3 A practical decision rule Choose self-hosting if data residency, deep customization or existing Docker operations are hard requirements. Choose the cloud service if speed of adoption matters more than control. A common middle path: prototype on the cloud, then move to docker-compose once the interaction pattern and data flow are settled.

Next step: read the documentation and the docker-compose instructions on Clickvote, and check the pricing page before assuming the managed tier covers your traffic.

How does Clickvote handle scaling for a large number of likes and votes?

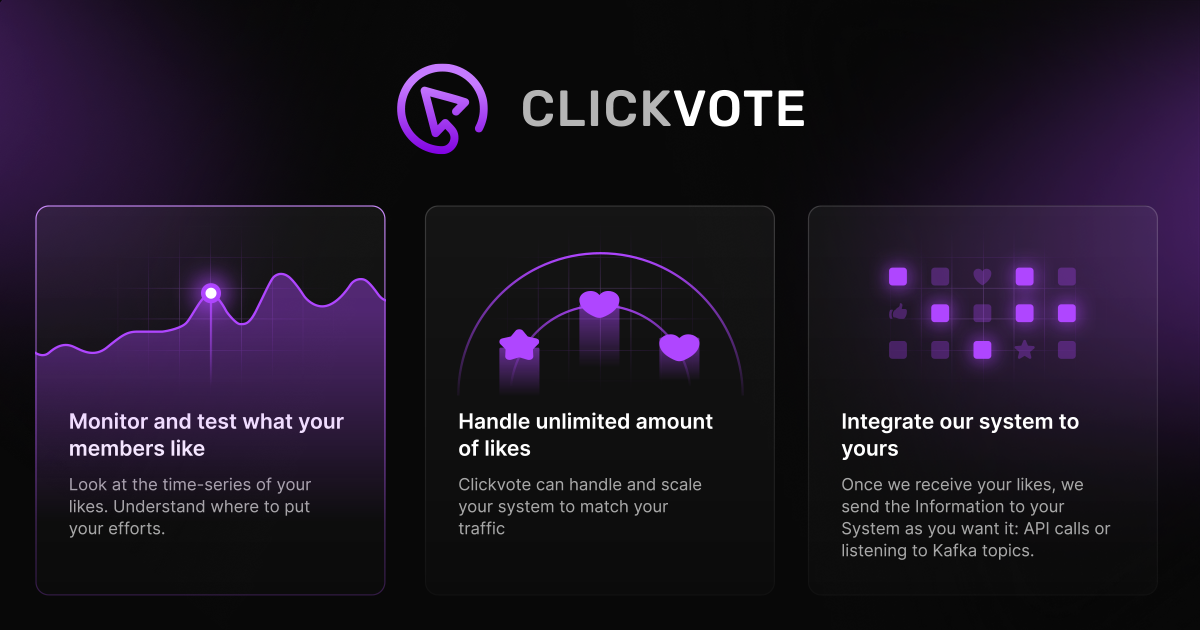
Clickvote is designed to absorb high volumes of likes, upvotes, and reviews without requiring you to build the counting or storage layer yourself. Its page states that it can handle and scale an unlimited amount of likes to match your traffic, and that once votes are received, it can forward them into your own system either through API calls or by publishing to Kafka topics.

That design separates two concerns:

  • Vote ingestion and aggregation happen inside Clickvote, so a viral post or a high-traffic poll does not force your application database to process every single click.
  • Downstream delivery is configurable. If you already run an event-driven backend, Kafka lets you consume vote events as a stream. If you prefer a simpler setup, API calls push the data into your system on your terms.

For a concrete scenario, imagine a marketplace with product pages that can suddenly spike after a social media mention. Instead of writing directly to your primary database on every upvote, the like component sends the interaction to Clickvote, and your service receives the resulting events through the integration you chose. Your read path for displaying counts stays fast, and your analytics pipeline can process the event stream separately.

There is also a monitoring angle: the page mentions looking at the time-series of likes to understand what members engage with and where to direct effort. At scale, that is often more useful than a raw total, because it shows whether traffic is a short burst or sustained interest.

Two practical trade-offs to weigh:

  • Operational control vs. convenience. The self-hosted option runs locally with docker-compose, which suits teams that need data residency or custom scaling policies. The cloud option is a managed service, which reduces operational work but gives you less control over the underlying infrastructure.
  • Integration choice. API calls are easier to reason about and debug; Kafka topics are better when you already have stream processing and want vote events to feed multiple consumers without point-to-point wiring.

A useful next step is to decide which delivery path matches your existing stack, then check the documentation for the relevant SDK and provider setup for your framework. The page shows React, Vue, Angular, and Svelte components, so you can start with the framework you already use. You can compare the self-hosted and cloud paths on the official site at Clickvote.

What options does Clickvote offer for sending vote data to my own system?

Clickvote offers two integration paths for getting vote data into your own backend: outbound API calls and Kafka topics. The page states that once likes are received, the information is sent to your system "as you want it: API calls or listening to Kafka topics."

What each option suits

  • API calls — The better fit if you already run an HTTP service and want vote events pushed to an endpoint you control. Good for typical web apps where a webhook-style request can trigger your own logic: updating a score column, awarding points, or writing to your database.
  • Kafka topics — The better fit if you already have event streaming infrastructure and need votes to feed multiple downstream consumers, such as analytics, ranking jobs, or notification pipelines. It decouples Clickvote from whatever processes the events.

Deciding between them

Ask one question first: does more than one system need to react to a vote? If yes, Kafka avoids you building fan-out logic yourself. If a single endpoint handles everything, API calls keep the setup smaller.

A concrete scenario: a community forum where a vote should bump a post's ranking and also send the author a notification. With API calls, your endpoint does both jobs in one request. With Kafka, a ranking consumer and a notification consumer each subscribe independently, so adding a third use later doesn't touch the first two.

Deployment context

The page also notes a self-hosted route (running locally with docker-compose) and a managed cloud service, which matters here because Kafka-based delivery usually assumes you can reach a broker. If you self-host, you control that; if you use the managed service, confirm how topics are exposed before committing to that path.

For component-level integration, the code sample shows a React provider and component pattern with voteTo and id props, and the page lists React, Vue, Angular and Svelte support. Start by checking the docs linked from Clickvote for the exact payload shape and delivery guarantees of each option, then pick the one that matches your existing infrastructure.

Is Clickvote open-source, and how can I contribute or get support from the community?

Yes. Clickvote describes open source as central to the project: the source code and work are kept publicly available, and the project says it has a community of 3,000+ developers who contribute code. The site also offers a self-hosted path using Docker Compose, which is consistent with an open-source project you can run yourself.

To contribute or get community support, start from the official site and look for the public repository and community links:

  • Clickvote — main entry point; check the docs and community/repository links.
  • The self-hosted route ("Run locally with docker-compose") is the practical first step if you want to inspect, modify or extend the code before contributing.

A useful decision criterion: if you want to fix or extend the components yourself, choose the self-hosted/open-source route; if you only need managed hosting, the cloud option is the lower-effort path. For contributions, begin with small, well-scoped fixes (for example, a component or documentation improvement) and follow the project's own contribution guidelines once you find them in the repository.

Related questions

More questions →
How Clickvote Integrates With Your Existing System

Clickvote sends vote data to your own system through two mechanisms: API calls or Kafka topics. You embed its Like, Upvote, or Review components in a React, Vue, Angular, or Svelte app, and once a user interacts, Clickvote forwards that event to your backend in whichever format you configure. This fits teams that already have an API endpoint or a Kafka pipeline and want voting data to flow into existing infrastructure rather than live only inside Clickvote.

The two integration paths

Clickvote's own description of the data flow is short but specific: "Once we receive your likes, we send the Information to your System as you want it: API calls or listening to Kafka topics."

Path What it means for you Reasonable fit
API calls Clickvote makes an outbound HTTP request to an endpoint you control when a vote event occurs You have an existing REST API and want votes written to your own database
Kafka topics Clickvote publishes vote events to a Kafka topic your services consume You already run Kafka and want votes to feed multiple downstream consumers

Both paths keep your system as the destination — Clickvote handles the collection and forwarding, not the final storage decision.

Embedding the component first

Integration starts on the front end. The site shows a React example using three imports from @clickvote/react:

import { ClickVoteProvider } from '@clickvote/react';
import { ClickVoteComponent } from '@clickvote/react';
import { LikeStyle } from '@clickvote/react';

export const LikeExample = () => {
  return (
    <ClickVoteProvider>
      <ClickVoteComponent id={CONTEXT} voteTo={ID}>
        {(props) => <LikeStyle {...props} />}
      </ClickVoteComponent>
    </ClickVoteProvider>
  );
};

The inputs that matter here are id (the context being voted on) and voteTo (the target of the vote). The provider wraps the component, and the render-prop pattern lets you swap in a different style component. The same component set is offered for Vue, Angular, and Svelte, so the integration shape is consistent across frameworks.

What you get on the Clickvote side

  • Monitoring and testing — the site lists the ability to "monitor and test what your members like" and to "look at the time-series of your likes," which helps you see where engagement is concentrated.
  • Scale — Clickvote states it "can handle and scale your system to match your traffic" and can handle an unlimited amount of likes. Treat this as a vendor claim about capacity rather than a benchmark.
  • Open source — the source code is public, and the project describes a community of 3,000+ developers. This matters for integration because you can inspect how events are emitted before wiring them into production.

Self-hosted vs. cloud, and why it affects integration

The site presents two deployment options, and your choice changes where the forwarding logic runs:

  • Self-hosted — "Run locally with docker-compose." You control the environment, which is useful if your API endpoint or Kafka broker sits inside a private network.
  • Cloud — "Use our free managed service." Faster to start, but your endpoint or topic must be reachable from Clickvote's infrastructure.

If your system is internal-only, self-hosting avoids exposing an endpoint publicly. If you just want to test the API-call path, the managed service is the shorter route. The site labels the managed service "free," but no pricing page details were available in the provided material, so confirm current terms on the pricing page before committing.

A practical integration sequence

  1. Decide the destination: an HTTP endpoint you own, or a Kafka topic.
  2. Embed the component in your front end with the correct id and voteTo values for each voting context.
  3. Configure Clickvote to forward events to that destination.
  4. Verify by casting a test vote and confirming the event arrives — check your API logs or consume from the Kafka topic.
  5. Use Clickvote's monitoring view to confirm the vote was recorded on its side as well.

The most common failure point is step 4: a vote registers in the UI but never reaches your system because the endpoint is unreachable or the topic name is wrong. Testing the destination independently before connecting Clickvote isolates that quickly.

When this integration model fits

Choose Clickvote's forwarding approach if you want vote data to land in infrastructure you already operate and you're comfortable configuring either an HTTP endpoint or a Kafka consumer. If you'd rather not run any receiving service, the API-call path still requires an endpoint — so a serverless function or a small webhook handler is the minimum you'll need.

Clickvote Pricing: What You Can Use for Free and What to Check Before Committing

Clickvote's site advertises a free managed cloud service and a self-hosted option, but it does not publish a price list. The homepage links to a pricing page, yet no plan tiers, rates, or payment details appear in the available page content. So the practical answer is: you can start on the free cloud tier or run it yourself with docker-compose, and any paid or enterprise pricing has to be confirmed directly with Clickvote.

What the site actually says about cost

Two entry points are described on the homepage:

  • Cloud — "Use our free managed service." This is the only explicit price signal on the page.
  • Self-Hosted — "Run locally with docker-compose." No cost is stated, because you supply the infrastructure.

A "Pricing" link exists at https://clickvote.dev/pricing, which suggests a structured pricing page is intended. The page content available here does not include its contents, so treat the free cloud tier as the only confirmed offer.

Choosing between cloud and self-hosted

Dimension Cloud (managed) Self-hosted
Stated cost Free managed service Not stated; you pay for your own infrastructure
Setup Sign up and embed components Run locally with docker-compose
Operations Handled by Clickvote You run and maintain it
Best when You want to validate quickly You need data inside your own environment

The homepage also notes the project is open-source, with source code and work publicly available and a community of 3,000+ developers. That matters for cost only in the sense that self-hosting is a supported path rather than a workaround.

What you get regardless of plan

The free/managed and self-hosted paths share the same component model. You embed like, upvote, and review components into React, Vue, Angular, or Svelte:

import { ClickVoteProvider } from '@clickvote/react';
import { ClickVoteComponent } from '@clickvote/react';
import { LikeStyle } from '@clickvote/react';

export const LikeExample = () => {
  return (
    <ClickVoteProvider>
      <ClickVoteComponent id={CONTEXT} voteTo={ID}>
        {(props) => <LikeStyle {...props} />}
      </ClickVoteComponent>
    </ClickVoteProvider>
  );
};

The homepage also lists monitoring and time-series views of likes, unlimited like volume, and delivery of vote data into your system via API calls or Kafka topics. None of these are marked as paid-only in the available content.

What to verify before you commit

Because pricing is not published, confirm these points with Clickvote or on the pricing page:

  • Whether the free managed service has usage limits (likes per month, contexts, or seats).
  • Whether API calls or Kafka delivery are included at every tier.
  • Whether there is a paid plan or enterprise option, and what triggers an upgrade.
  • What data retention and export look like on the managed service.

If those answers matter to your decision, the self-hosted route removes most of them from the equation — you control the deployment, and the cost becomes your own hosting bill rather than a Clickvote invoice.

How to Integrate Clickvote Components into a React App

Clickvote provides embeddable Like, Upvote, and Review components that you can drop into a React app to add voting and feedback features to any context. The integration path is short: install the @clickvote/react package, wrap your component tree in ClickVoteProvider, and render a ClickVoteComponent with an id (the context) and a voteTo (the target being voted on). You can then style it with a preset like LikeStyle or supply your own render function. This guide covers the setup steps, what each prop does, and where people typically get stuck.

Prerequisites

Before you start, confirm you have:

  • A React project (the package is imported as @clickvote/react).
  • A Clickvote backend to talk to. The docs describe two options: a self-hosted instance run locally with docker-compose, or the cloud managed service. You need one of these before votes will persist anywhere.
  • A decision on how you want Clickvote to send data back to your system. The site states that once likes are received, the information is forwarded to your system either via API calls or by listening to Kafka topics.

Step 1: Install the package

Add the React package to your project:

npm install @clickvote/react

The import path used in the official example is @clickvote/react, so keep that exact scope when importing.

Step 2: Wrap your app in ClickVoteProvider

ClickVoteProvider sets up the context that the voting components rely on. Place it high enough in the tree that every ClickVoteComponent sits inside it.

import { ClickVoteProvider } from '@clickvote/react';

export const App = () => {
  return (
    <ClickVoteProvider>
      {/* your app */}
    </ClickVoteProvider>
  );
};

If you render a ClickVoteComponent outside this provider, it has no context to attach to — that's the most common cause of a component that renders but never registers a vote.

Step 3: Render a ClickVoteComponent

The component takes two props in the official example:

  • id — the context the vote belongs to (for example, a page, post, or product identifier).
  • voteTo — the ID of the specific target being voted on.
import { ClickVoteProvider, ClickVoteComponent, LikeStyle } from '@clickvote/react';

const CONTEXT = 'my-page';
const ID = 'item-123';

export const LikeExample = () => {
  return (
    <ClickVoteProvider>
      <ClickVoteComponent id={CONTEXT} voteTo={ID}>
        {(props) => <LikeStyle {...props} />}
      </ClickVoteComponent>
    </ClickVoteProvider>
  );
};

Note the render-prop pattern: ClickVoteComponent passes props to a function, and you decide what to render with them. LikeStyle is one of the preset styles you can spread those props into.

Step 4: Choose a style or build your own

The example uses LikeStyle, but the same render-prop slot accepts any component. Because props carries the state and handlers, you can:

  • Use a preset (LikeStyle, and the other Like / Upvote / Review styles referenced on the site).
  • Write a custom component that consumes props and renders your own markup.

This is also where the framework choice matters: Clickvote ships components for React, Vue, Angular, and Svelte, so the surrounding syntax differs but the id / voteTo concept carries across.

Step 5: Verify it works

After wiring it up:

  1. Render the component and confirm it appears in the UI.
  2. Cast a vote and check that it registers.
  3. Confirm the vote reaches your system through whichever channel you configured (API call or Kafka topic).
  4. Use the monitoring view described on the site to look at the time-series of your likes and confirm the event landed.

If the vote shows locally but never arrives in your system, the problem is almost always the backend connection (self-hosted instance not running, or the API/Kafka output not configured) rather than the React code.

What you get beyond the component

Clickvote isn't only the embed. The site highlights:

  • Monitoring and testing — see what members like and review the time-series of likes to decide where to focus.
  • Scale — the system is described as handling an unlimited amount of likes and scaling to match traffic.
  • Output flexibility — forward votes to your system via API calls or Kafka topics.
  • Open source — source code is public, with a community of 3,000+ developers contributing.

Common sticking points

Symptom Likely cause
Component renders but no vote registers ClickVoteComponent is outside ClickVoteProvider
Votes register but never reach your system Backend output (API/Kafka) not configured, or self-hosted instance not running
Wrong item gets the vote id (context) and voteTo (target) mixed up
Styling looks off Preset not spread correctly — LikeStyle needs {...props}

Choosing self-hosted vs cloud

The site presents both without stating prices, so treat the choice on operational grounds: self-hosted runs locally with docker-compose and keeps everything in your environment; cloud is described as a managed service you can get started with. If you need to control the infrastructure or already run Docker, start self-hosted. If you want to skip setup, start with the cloud option.

What are the self-hosted and cloud options for Clickvote?

Clickvote offers two deployment paths: a self-hosted option you run locally with docker-compose, and a cloud option described on the site as a free managed service. The right choice depends on whether you want to control the infrastructure yourself or hand operations to Clickvote and start faster.

The two options at a glance

Dimension Self-Hosted Cloud
How it runs Locally via docker-compose Managed by Clickvote
Setup effort You run and maintain the stack Sign up and start
Infrastructure control Full — runs in your environment None — Clickvote operates it
Cost signal Not stated on the page Described as "free managed service"
Best for Teams that need data to stay in their own infrastructure Teams that want the fastest path to embedding components

The page presents both as entry points under "Embed Your Components Now," with "Self-Hosted — Run locally with docker-compose" and "Cloud — Use our free managed service."

What Clickvote actually does

Clickvote provides like, upvote, and review components you embed into your app. The page shows support for React, Vue, Angular, and Svelte, and includes a React example:

import { ClickVoteProvider } from '@clickvote/react';
import { ClickVoteComponent } from '@clickvote/react';
import { LikeStyle } from '@clickvote/react';

export const LikeExample = () => {
  return (
    <ClickVoteProvider>
      <ClickVoteComponent id={CONTEXT} voteTo={ID}>
        {(props) => <LikeStyle {...props} />}
      </ClickVoteComponent>
    </ClickVoteProvider>
  );
};

Beyond the UI components, Clickvote handles the vote data: it can scale to unlimited likes, lets you monitor and test what members like through time-series data, and sends information back to your system either via API calls or by listening to Kafka topics. It is open-source, with source code publicly available and a community the page cites as 3,000+ developers.

Choosing between them

Pick self-hosted if you need the vote data and infrastructure to live inside your own environment, or you already run docker-compose-based services and want to keep operational control.

Pick cloud if you want to embed components without managing infrastructure, and a managed service fits your setup. The page calls the cloud option free, but confirm current terms and limits on the pricing page before committing.

A practical middle path: start with the cloud managed service to validate the integration and see how the components behave in your app, then move to self-hosted if data residency or control requirements appear later. Because the component API is the same either way, switching deployment models does not require rewriting your front-end integration.

What to verify before deciding

  • Pricing and limits: The page links to a pricing page but does not state figures here. Check it for current cloud terms.
  • Data flow: Decide whether you want votes delivered via API calls or Kafka topics, since that shapes both your integration and your infrastructure needs.
  • Framework fit: Confirm your framework is among the supported ones (React, Vue, Angular, Svelte) before building around the components.
What is Clickvote?

Clickvote is a component library and backend service for adding like, upvote, and review functionality to any app context. You embed its prebuilt components into a React, Vue, Angular, or Svelte frontend, and it handles the vote storage, counting, and delivery back to your system. It fits teams that want engagement features without building and scaling the voting infrastructure themselves.

What Clickvote actually does

The core idea is that "like," "upvote," and "review" are recurring UI patterns, but the hard part is the backend: storing votes, counting them at scale, and reacting to them. Clickvote splits the problem in two:

  • Frontend components you drop into your app, styled and wired to a provider.
  • A backend that receives the votes and forwards the information to your system.

The homepage describes it as "Like, Upvote And Review Any Context" with components for React, VueJs, Angular, Svelte, and the web generally.

How integration works

The documented React example shows the shape of the API:

import { ClickVoteProvider } from '@clickvote/react';
import { ClickVoteComponent } from '@clickvote/react';
import { LikeStyle } from '@clickvote/react';

export const LikeExample = () => {
  return (
    <ClickVoteProvider>
      <ClickVoteComponent id={CONTEXT} voteTo={ID}>
        {(props) => <LikeStyle {...props} />}
      </ClickVoteComponent>
    </ClickVoteProvider>
  );
};

The pattern is consistent across frameworks: wrap your app (or the relevant subtree) in a provider, then render a vote component that takes a context identifier and a target ID. The LikeStyle component is one of the available styles; the render-prop form lets you substitute your own UI while keeping the vote logic.

  • CONTEXT identifies where the vote lives (for example, a post, a comment thread, a product).
  • ID identifies the specific item being voted on.

What you get on the backend side

From the feature list on the site:

Feature What it means for you
Monitor and test what members like See a time-series of likes so you can judge where to invest effort
Handle unlimited likes The service is described as able to scale with your traffic
Integrate with your system Votes are delivered to you via API calls or by listening to Kafka topics
Open source Source code is public, with a community of 3,000+ developers cited

The Kafka option matters if you already run an event pipeline and would rather consume votes as a stream than poll an API.

Self-hosted vs. cloud

Clickvote offers two deployment paths, and the choice is mostly about who runs the infrastructure:

  • Self-hosted — run locally with docker-compose. Choose this if you need data to stay inside your own environment or want to modify the source.
  • Cloud — the site describes a "free managed service" you can get started with. Choose this if you want to skip deployment and just embed components.

The site links to a pricing page, but the input does not include its contents, so check that page directly for current plan limits and terms.

When Clickvote is a good fit

  • You want like/upvote/review UI in more than one frontend framework and prefer one consistent backend.
  • You need votes to flow into an existing system, especially via Kafka or API.
  • You value open source and self-hosting as an option.
  • You would rather not build vote counting and scaling yourself.

It is less obviously a fit if you need a highly custom voting model (weighted votes, complex moderation rules) — the documented surface is like, upvote, and review components, and anything beyond that depends on what the open-source code and your own integration layer support.

To evaluate it concretely, start with the React snippet above in a scratch project, point CONTEXT and ID at a test item, and confirm votes arrive in your system through whichever delivery method you chose.

Website Overview

An active inbound-mail setup with incomplete authentication may leave the domain more open to impersonation. Provider hosting alone does not close that gap.

Domain and Registration

Transfer-protection status is present, helping reduce the risk of unauthorized domain transfers. The domain has about 3 years of registration history; its current configuration provides more context than age alone. The registrar is CloudFlare, Inc., a widely used domain service provider. The domain uses the common .dev extension, which is not an independent safety signal.

DNS and Email

The observed email authentication setup is incomplete: DMARC is missing. Nameservers are provided by Cloudflare, indicating managed DNS hosting. MX records point to the Google Workspace email service. No CNAME was found; the observed records resolve directly to addresses. TXT records include verification markers for Google. Such markers may also remain after a service stops being used.

TLS and Certificates

The certificate uses an RSA 2048-bit public key, offering broad client compatibility. The server supplied a complete certificate chain. No organization name is present in the certificate; the available fields are consistent with domain validation. The certificate was issued by Let's Encrypt, commonly associated with automated certificate services. The certificate's total validity is about 89 days, consistent with a short renewal cycle.

HTTP and Browser Security

X-Powered-By exposes backend information: Next.js. The response lacks these common security headers: CSP, X-Content-Type-Options, Referrer-Policy, Permissions-Policy, clickjacking protection. No obvious internal addresses or debug information were found in the headers. The Server header contains the custom value Vercel. No explicit CDN or WAF marker was found in the response headers.

Technology Stack Analysis

The public page identifies Next.js, Vercel without precise versions, leaving fewer clues for version-specific scanning.

Search and Social Sharing

No homepage canonical URL was detected. If duplicate URLs exist, consolidation may be less explicit. Twitter Card metadata is configured. The title has 47 characters, within a common display range. A meta description is present, with 106 characters. The observed directives allow indexing and link following.

Hosting and Email

DNSCloudflare
HostingVercel
EmailGoogle Workspace
Approximate IP geolocation (inferred; a CDN or proxy may differ from the origin server) United States flagUnited States Inferred 66.33.60.193

Registration details

RDAP / WHOIS

RegistrarCloudFlare, Inc.
Registered2023-10-05
Expires2027-10-05
Domain statusclient transfer prohibited
Nameserverscheryl.ns.cloudflare.com、nicolas.ns.cloudflare.com
DNSSECunsigned

DNS records

DNS

TypeNameValueTTLPriority
Aclickvote.dev66.33.60.193124—
Aclickvote.dev76.76.21.241124—
MXclickvote.devaspmx.l.google.com36001
MXclickvote.devalt1.aspmx.l.google.com36005
MXclickvote.devalt2.aspmx.l.google.com36005
MXclickvote.devalt3.aspmx.l.google.com360010
MXclickvote.devalt4.aspmx.l.google.com360010
NSclickvote.devcheryl.ns.cloudflare.com86400—
NSclickvote.devnicolas.ns.cloudflare.com86400—
TXTclickvote.devgoogle-site-verification=h5UyoEfFNe48q-HeU-sgouEYvGGj88ovb955n8Obs9I3600—
TXTclickvote.devv=spf1 include:_spf.google.com -all3600—

TLS and certificates

TLS / SSL

AssessmentNormal configuration
Supported protocolsTLSv1.2、TLSv1.3
Negotiated protocolTLSv1.3
Certificate subjectclickvote.dev
IssuerLet's Encrypt
Valid until2026-12-04T12:59 · Remaining when checked: 65 days
Verification detailsCertificate trust: Passed · Hostname match: Passed

HTTP response headers

HTTP

HeaderValue
content-typetext/html; charset=utf-8
cache-controlpublic, max-age=0, must-revalidate
serverVercel
strict-transport-securitymax-age=63072000

Identified technologies

Next.jsVercel

Pages, Search and Sharing

Meta descriptionSeamlessly Integrate Like, Upvote, and Review Components into Your App with React / Angular / Svelte / Vue
Canonical URLNot detected
LanguageEnglish (default)
Twitter Cardsummary_large_image
All bots 1 allowed · 0 disallowed
  • Allow/

User reviews (0)

  • No reviews yet.