
 Visit website
 Updated: 2026-09-28 02:35
 Language: English (default)
 Access: Normal
 Profile views 0
  Outbound visits 0
 Website Review
What is Dripzels?
Dripzels is a free, all-in-one toolkit for Roblox clothing designers. Rather than being a single tool, it bundles several utilities that cover the workflow from designing a shirt or pant texture to previewing it and pricing it. The site describes its main features as Clothing Preview, a Robux Calculator, Template Conversion, and more.
What it actually does
The tools map to real steps in Roblox clothing creation:
- Clothing Preview — See how a 2D template looks on a character in 2D or 3D before uploading it. This matters because Roblox's UV mapping can make a design look fine as a flat image but warped on an avatar.
- Template Conversion — Convert between Roblox clothing template formats, useful when you have art sized for one template type but need it for another.
- Robux Calculator — Work out Robux amounts and the associated Roblox marketplace cut, which helps you set prices without doing the math by hand.
Who it's for
It suits hobbyist and semi-pro Roblox clothing creators who already make textures in an image editor and want a faster way to check, convert, and price them. If you only buy clothing rather than make it, the preview and conversion tools won't help you much.
A practical starting point
If you have a finished shirt template, run it through Clothing Preview first to catch alignment problems, then use Template Conversion if the file needs to be a different format, and finally check your intended price in the Robux Calculator before listing. For broader Roblox creator resources, see Roblox.
How do I preview my Roblox clothing design in 3D before uploading it?
Use Dripzels' Clothing Preview to check a Roblox outfit in 3D before you upload it. According to the site's own description, Dripzels is an all-in-one resource for Roblox clothing design that includes Clothing Preview alongside a Robux Calculator and Template Conversion. So the intended workflow is: prepare your template, convert it if needed, preview it in 3D, then upload.
Dripzels
H3. A practical way to use it
- Finish your design as a Roblox clothing template (shirt or pants), keeping the front, back and sleeve/side panels aligned.
- Open the Dripzels Clothing Preview tool and load your template.
- Rotate the 3D model and inspect the parts that usually cause problems:
- Seams where the front and back panels meet
- How the design stretches across the shoulders and torso
- Whether logos or text land where you expect on the chest and back
- Fix the template in your image editor, then re-preview.
- Upload only once the 3D view looks right.
H3. What to watch for
A 3D preview shows placement and proportion; it does not guarantee that the uploaded asset will be approved or that it will render identically in every Roblox experience. Treat it as a cheap way to catch obvious mistakes before you spend time on an upload.
H3. Other tools worth knowing
If you want a second opinion on how the clothing looks on an avatar, Roblox's own Avatar Shop and creator documentation are the authoritative references for how clothing is worn and sold. Try Roblox for the official upload and catalog side.
H3. Decision criterion
If your main worry is "does this pattern wrap correctly around a body?", a 3D clothing preview is the right tool. If your worry is "will this sell?", that is a catalog and audience question, not a preview question — previews catch geometry and placement errors, not demand.
How can I calculate how many Robux I need to price my clothing items for profit?
To price Roblox clothing for profit, work backward from Roblox's cut: you don't keep the full sale price, so your listed price must cover both your costs and the marketplace commission. The practical formula is:
Listed price = (your desired take-home + costs) ÷ (your share of each sale)
Roblox's marketplace takes a percentage of every clothing sale, so the amount you actually receive is less than the sticker price. Because that percentage can change, verify the current rate in Roblox's own documentation before you commit to a pricing strategy.
A worked example
Say you want to earn 100 Robux clear on a shirt, and you spent 50 Robux on the upload fee. If you keep roughly 70% of each sale, you'd need to list at about (100 + 50) ÷ 0.7 ≈ 214 Robux to hit your target. Round to a clean number buyers respond to, like 215 or 220.
Tools that do the math for you
Dripzels bundles a Robux calculator alongside clothing preview and template conversion tools, which is useful if you want to check the numbers quickly rather than doing the division by hand each time. Its 3D and 2D preview features also let you see how a design reads before you upload it — worth doing, since a design that looks flat in the editor often looks different on an avatar.
Decision criteria
- Upload fees are sunk costs. Treat them as a one-time expense per item, not something every sale must repay.
- Volume vs. margin. Cheap items (5–25 Robux) sell more but need high volume to matter; premium items need a design and audience that justify the price.
- Check the current commission. Any calculator is only as accurate as the rate it uses, so confirm the live percentage yourself.
A sensible next step: pick one design, calculate your break-even price including the upload fee, then set your listing slightly above it and track actual sales for a week before adjusting.
What is the process for converting a Roblox clothing template into a usable format?
Converting a Roblox clothing template into a usable format usually means two separate jobs: turning the template image into an upload-ready asset, and turning it into a preview you can check before spending Robux. Dripzels bundles both, offering Template Conversion alongside a Clothing Preview and Robux Calculator, so a designer can move from raw template to finished, previewed design in one place.
The typical workflow
- Design on the template. Roblox provides a standard 585×559 template for shirts and pants, with the front, back, sides and sleeves laid out in fixed regions. Keep every element inside its region; anything bleeding across boundaries shows up misplaced in-game.
- Export as PNG. Transparency and clean edges matter more than file size. Avoid JPG, which introduces compression artefacts along the seams.
- Convert or prepare the file. This is where a Template Conversion tool helps: it takes your working template and outputs the cropped, correctly sized image Roblox expects for upload. Doing this by hand means carefully selecting the torso and limb regions and reassembling them at the right dimensions.
- Preview in 3D. Upload the result to a preview tool to see how it wraps around a character. This catches problems that a flat template hides — stretched logos, mirrored text, seams that don't line up at the shoulders.
- Upload to Roblox and set a price. The Robux Calculator is useful here for working out what you actually take home after Roblox's cut, so you can price without doing the maths manually.
What to watch for
- Region accuracy. The single most common failure is a design that looks fine flat but sits off-centre on the avatar. Always preview before uploading.
- Text and asymmetry. Anything directional will mirror on one side. Preview is the only reliable check.
- Upload costs. Each clothing upload costs Robux, so a preview step saves real money by catching mistakes first.
Where to start
If you already have a template ready, go straight to the conversion and preview tools on Dripzels. If you're new to clothing design, design one simple shirt first — a single colour block with one logo — and run it through the full process before investing time in something complex.
Can I use Dripzels to showcase and share my Roblox clothing designs with others?
Yes, Dripzels is designed around exactly that idea. Its feature set includes Clothing Preview and a Showcase, so you can see how a design reads on a character before sharing it, and then present it to others in a cleaner format than a flat template file.
How it fits a typical workflow
- Preview first. You upload or convert your clothing design, then check it in a 2D and 3D preview. This catches problems that are easy to miss on a flat image, such as seams landing in the wrong place, awkward shading across the torso, or a logo that stretches when wrapped onto a body.
- Convert templates when needed. The Template Conversion tool helps when your artwork was made for one template format and needs to match another. That matters most for people moving between classic and layered clothing styles, or following a tutorial that used a different template size.
- Share the result. The Showcase is where the design becomes something you can point people to, rather than a file they have to open themselves.
Who gets the most out of it
- New designers who want to check their work visually before spending Robux on an upload. The Robux Calculator is useful here for estimating what a set of items will cost.
- Commission artists who need to show a client how a design will actually look on a character, not just as a flat PNG.
- Group owners and sellers who want a presentable page for a catalog drop or portfolio.
Trade-offs to keep in mind
A preview is a rendering, not the live Roblox engine, so treat it as a strong sanity check rather than a guarantee. Very small details, unusual body proportions, and some layered-clothing behaviour can still look different once the item is actually worn in-game. For anything you plan to sell, do a real test upload on an alternate account before committing to a full release.
If you want a quick decision rule: use the preview and showcase for feedback, iteration, and presentation, then confirm the final look in Roblox itself before you publish.
Is Dripzels free to use, and what features are included without paying?
Yes. Dripzels presents itself as a free, all-in-one toolkit for Roblox clothing design, and the features it lists — Clothing Preview, a Robux Calculator, Template Conversion and others — are described as part of that free resource rather than as paid tiers. There is no pricing page, subscription signal or payment platform mentioned on the site, which is consistent with a free, browser-based toolset.
Dripzels is therefore best understood as a utility hub rather than a marketplace or design suite you buy into.
What the free feature set covers
- Clothing Preview — check how a 2D template reads as a 3D garment before you upload or sell it.
- Robux Calculator — work out Robux amounts and likely earnings from a sale price.
- Template Conversion — move designs between template formats so they fit the uploader.
- Showcase — display finished work, based on the site's own keywords.
Who gets the most out of it
A creator making their first few Roblox shirts will get the clearest benefit: the preview step catches alignment and shading mistakes that are hard to spot on a flat template, and the calculator removes guesswork about what a listed price actually returns after Roblox's cut. Someone already selling at volume may find the preview and conversion tools handy for quick checks, but should not expect the site to replace a full image editor.
A practical first step
Take one design you have already finished, run it through Clothing Preview, then price it with the Robux Calculator. If both outputs match what you expected, the free tools are doing their job for your workflow; if you need layer-level editing or bulk export, keep your usual editor alongside them.
One caveat worth stating plainly: because the site publishes no pricing or account details, treat "free" as the current state of the tool rather than a guarantee about future limits or sign-up requirements. Verify anything you depend on before building a paid workflow around it.
 Hosting and Email
 Cloudflare
 Hosting
 Netlify
 Location
 Pages, Search and Sharing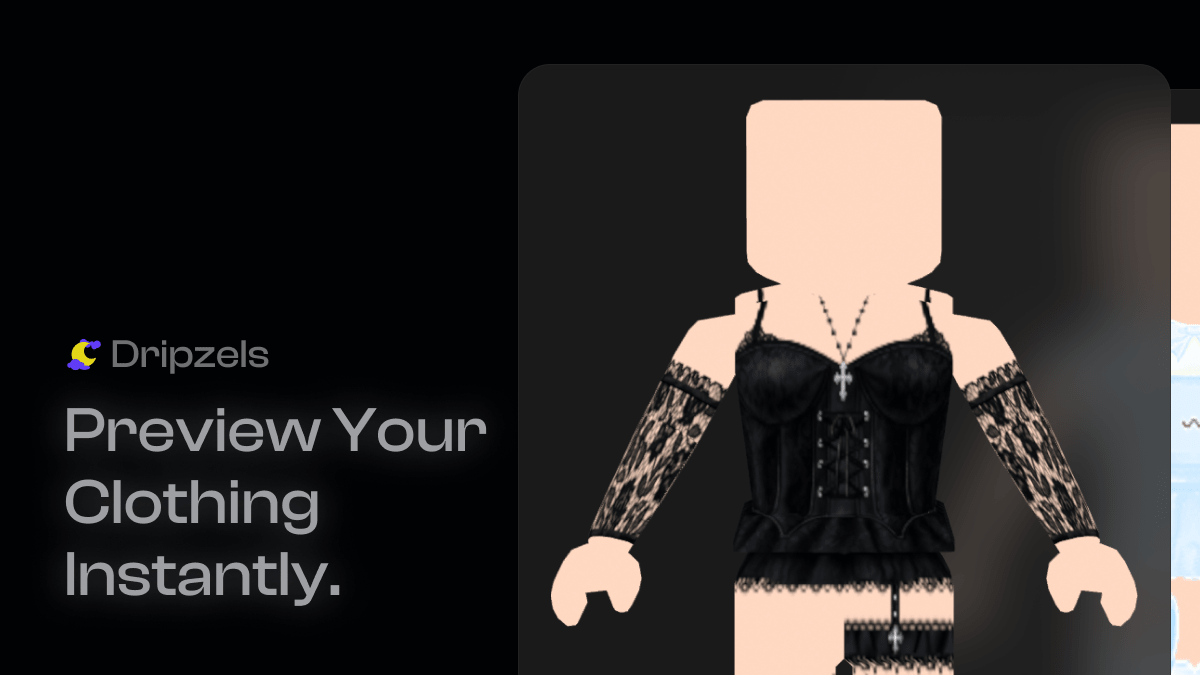



 gptbot

 Registration details

 Identified technologies
User reviews (0)