
 简体中文
简体中文 English
Website review
This review may include AI-generated content and is not individually verified. Domain, certificate and other facts come from the observed data on this page.
What is EasyRender?
EasyRender is a browser-based AI rendering tool aimed at architects and interior designers. Its core promise is speed: turn rough sketches, basic 3D models or room photos into photorealistic visuals and short videos without a full manual rendering workflow.
What it actually covers
- Sketch to render — converts rough sketches or basic models into client-ready images.
- Room Designer — upload a room photo and see it reimagined in several styles side by side (the site names Japandi, Coastal and Modern).
- Virtual staging — furnishes empty rooms with lighting and style consistency.
- Paint visualization — swaps wall colors, finishes and materials.
- Cinematic video — animates static renders.
- Collaboration board — a shared space where clients and teammates comment, request changes and approve, instead of scattered email or chat threads.
The page states compatibility with common modeling software including SketchUp, Revit, Blender, Rhino, 3ds Max, Chief Architect, Vectorworks and Archicad, and lists a 4K output and commercial license option.
Who it suits
| User | Where it fits |
|---|---|
| Solo designer | Fast concept visuals and style options for client conversations |
| Busy studio | Higher volume of renders plus a review board to centralize feedback |
| Architect | Early-stage massing and material studies before committing to full renders |
Trade-offs to weigh
The value is iteration speed and client communication, not replacing precise production documentation. AI output still needs your judgment on proportions, materials and code-relevant details. The collaboration board helps only if clients will actually use it; otherwise it adds a second channel alongside your existing one.
The site advertises flexible pricing — subscribe or pay as you go, with monthly and yearly options and no long-term commitment. Check the current plans and credit allowances directly at EasyRender before deciding, since credit limits determine how many renders and videos a real project will consume.
A practical first step: take one live project, run the same room through a sketch render and a Room Designer style comparison, and show both to a client. If the feedback loop genuinely shortens, the tool has earned a place in your workflow.
Can I turn my SketchUp or Revit model into a photorealistic render without redoing it by hand?
Yes — EasyRender is built for exactly that workflow. Its Sketch-to-Render tool takes rough sketches or basic models and turns them into client-ready visuals, and the page lists SketchUp, Revit, Blender, Rhino, 3ds Max, Chief Architect, Vectorworks and Archicad as compatible modeling software. The point is that you keep modeling where you already work and use the render step as a conversion, not a rebuild.
What the hand-off actually looks like
In practice you would export or screenshot your SketchUp or Revit view, feed it in, and get a photorealistic output back. That is a different job from traditional rendering, where you'd redo materials, lighting and camera setup by hand. EasyRender also offers related tools on the same page — Room Designer, Virtual Staging, Paint Visualization, Cinematic Video and a Collaboration Board — so the same model or photo can serve several client-facing purposes without a second tool.
Where it fits and where it doesn't
- Fast concept iteration: ideal when you need several style directions (Japandi, Coastal, Modern) to show a client before committing to a full render pipeline.
- Client approvals: the Collaboration Board keeps feedback and approvals in one place instead of scattered emails and messages, which the page frames as its main time-saver.
- Final documentation-grade renders: treat AI output as a presentation and decision tool. If you need exact material specs, joinery details or lighting levels for construction documents, verify those against your model rather than trusting the render.
A practical next step
Pick one live project, export a single SketchUp or Revit view, and run it through Sketch-to-Render. Compare the result against what you'd normally produce by hand and judge whether it's good enough for a client meeting — that tells you more than any feature list. If it holds up, the Collaboration Board is the logical second step, since the page's own customer quotes (Priya Nair, Mumbai; Rajan Mehta, Bangalore) emphasize faster approval cycles rather than prettier images.
For a broader look at where AI rendering fits alongside conventional tools, see Chaos and Autodesk.
How do I use EasyRender to get a client to approve a design faster?
EasyRender is built around a simple idea: replace slow back-and-forth with visuals a client can react to immediately. The page presents two features that do most of the approval work — Room Designer, which reimagines a photo of the client's actual room across multiple styles side by side, and the Collaboration Board, a dedicated review space where clients leave feedback, request changes, and approve without email or WhatsApp threads. Sketch-to-render and virtual staging feed the same loop: you show something concrete, the client responds to it, and you iterate.
A practical approval workflow
The fastest path is to front-load the decision rather than the render quality.
- Upload the real room. Use a photo of the client's own space rather than a similar-looking reference. Recognition is what makes a client commit.
- Show styles side by side. Present two or three directions (for example Japandi, Coastal, Modern) at once. Clients find it easier to say "that one" than to describe what they want.
- Move the choice to the board. Share the selected direction on the Collaboration Board so feedback, change requests, and sign-off live in one place instead of scattered messages.
- Refine in the tool, not in email. Swap wall colors or finishes with paint visualization and re-share, so each round trip is minutes rather than a day.
- Close with motion if the decision stalls. Cinematic video is useful when a still image leaves a client unsure about flow or atmosphere.
Where it helps most, and where it doesn't
| Situation | What works well | Watch out for |
|---|---|---|
| Client can't read floor plans | Sketch-to-render and room redesign | Renders are persuasive — make sure what you show is buildable |
| Approval drags over many small changes | Collaboration Board keeps one thread | Clients still need a clear prompt to respond |
| Empty property or listing | Virtual staging | Staged furniture may not match what the client owns |
| Colour or finish indecision | Paint visualization | Screen colour is not paint colour; confirm physical samples |
A quick decision rule
If the bottleneck is understanding, lead with side-by-side room redesign. If the bottleneck is coordination — approvals lost across channels — lead with the Collaboration Board. If the bottleneck is confidence, use video.
EasyRender offers flexible pricing with a subscribe-or-pay-as-you-go choice and no long-term commitment, so a solo designer can test the approval workflow on one project before committing. The page also notes compatibility with common modelling tools including SketchUp, Revit, Blender, Rhino, 3ds Max, Chief Architect, Vectorworks and Archicad, which matters if your existing models are the starting point.
One caveat worth stating plainly: two testimonials on the page — from Priya Nair and Rajan Mehta — describe faster approvals in their own practices. That is their experience, not a guarantee. The underlying reason it tends to work is behavioural: clients approve what they can see, and every extra day between question and visual is another chance for the decision to drift.
What does virtual staging look like on an empty room photo before I show a client?
Virtual staging on an empty-room photo means uploading a picture of the vacant space and getting back the same room furnished — with realistic lighting, depth, and a consistent style — so a client can react to a lived-in version instead of bare walls and floor.
On EasyRender, this is one of several tools alongside sketch-to-render, room redesign, paint visualization, and video. The page describes virtual staging as generating "fully furnished interiors with realistic lighting, depth, and style consistency" from an empty room, and shows before/after pairs. Two named users, Priya Nair (principal architect, Mumbai) and Rajan Mehta (interior designer, Bangalore), describe faster client approvals and fewer revision requests — their observations, not a guarantee of your results.
What to check before you rely on it for a client meeting
- Camera and framing: shoot straight-on, well lit, and uncluttered; the tool works from your photo, so a skewed or dim shot limits how convincing the staging looks.
- Style control: confirm you can pick or describe the style (Japandi, Coastal, Modern, and similar) rather than accepting one default look.
- Fidelity to the real room: verify that windows, doors, radiators, and ceiling height stay put in the output. If furniture floats or blocks a window, the render will raise questions instead of answering them.
- Client-facing presentation: EasyRender's collaboration board lets clients comment, request changes, and approve in one place, which suits a review step better than sending images by email.
A practical first test
Pick one empty room you know well, stage it in two clearly different styles, and show both to a client alongside the original photo. If the client starts discussing furniture and layout rather than asking what happened to the window, the staging is doing its job. If they ask about the window, adjust the source photo before your next meeting.
For cost and credit details, check EasyRender directly, since plans and included credits change.
How much does EasyRender cost if I only need a few renders a month?
EasyRender is aimed at occasional-use pricing as well as subscriptions. Its page shows a Starter plan at $19 per month with 50 credits, described as 50 realistic renders and 50 upscales per month, plus 10 cinematic videos and 5 approval boards. It also mentions a "pay as you go" option with one-time packs, and a Pro plan at $39 per month with 200 credits. If your need is genuinely just a few renders a month, the one-time pack route is the one to check, since a monthly subscription's included credits are sized well above that.
H3 What this means for a light user
- A few renders a month sits far below the 50-credit Starter tier, so you may be paying for capacity you won't use.
- One-time packs avoid a recurring charge and long-term commitment, per the page's own "subscribe or pay as you go" framing.
- Credits appear to be shared across tools (renders, upscales, videos, approval boards), so video and approval-board use would eat into the same pool.
H3 How to decide Compare the per-render cost of a one-time pack against $19 for Starter. If you'd use fewer than roughly a handful of renders monthly and don't need ongoing client review boards, packs usually win; if you want continuous access, video, and collaboration features, the subscription is simpler.
Next step: open EasyRender pricing to see the exact one-time pack sizes and credit costs per render, then match a pack to your typical monthly output.
Can I let a client see paint colors or design styles on their own room photo without an in-person meeting?
Yes. EasyRender is built around exactly that workflow: you upload a photo of the client's actual room, then generate reimagined versions the client can view remotely. The page describes a Room Designer that shows one room photo reimagined across multiple styles side by side (Japandi, Coastal, Modern and similar), a Paint Visualization feature for swapping wall colors, finishes and materials, and a Collaboration Board where clients and team members view renders, leave feedback, request changes and approve — described as replacing email and WhatsApp back-and-forth.
How this plays out in practice
A typical remote scenario: the client photographs their living room on a phone, you upload it, generate three or four style directions plus two or three paint options, and share the board link. The client reacts from their own sofa instead of scheduling a site visit.
What each piece is good for:
- Room Designer — comparing whole-look directions before committing to a scheme. Best early, when the client is still deciding what they like.
- Paint Visualization — narrowing a specific wall color or finish. Best late, when the palette is nearly settled but the client is nervous about the exact shade.
- Virtual Staging — furnishing an empty or newly emptied room so the client sees scale and lighting rather than bare walls.
- Collaboration Board — collecting comments and approvals in one thread so decisions are documented rather than scattered across chats.
Trade-offs worth knowing
Rendered color is not painted color. Screens vary, and a client viewing on a phone in dim light will see something different from the finished wall. Treat the visualization as a direction-setter and confirm the final shade with a physical sample. The same caution applies to materials and finishes. Also consider that a client browsing styles unsupervised may gravitate toward images that don't fit their budget or the room's actual constraints — curating the options you share is usually better than handing over an open playground.
Suggested next step
Run one real project through it before a live client: upload a photo of a room you know well, generate a few styles and paint variations, and compare the output against your own judgment of the space. That tells you how much cleanup the renders need. The page notes you can start rendering without a credit card, and pricing is listed as either subscription or one-time packs — worth checking the current plans on EasyRender against how many client projects you'd actually run per month.
 Cloudflare
 Hostinger International Limited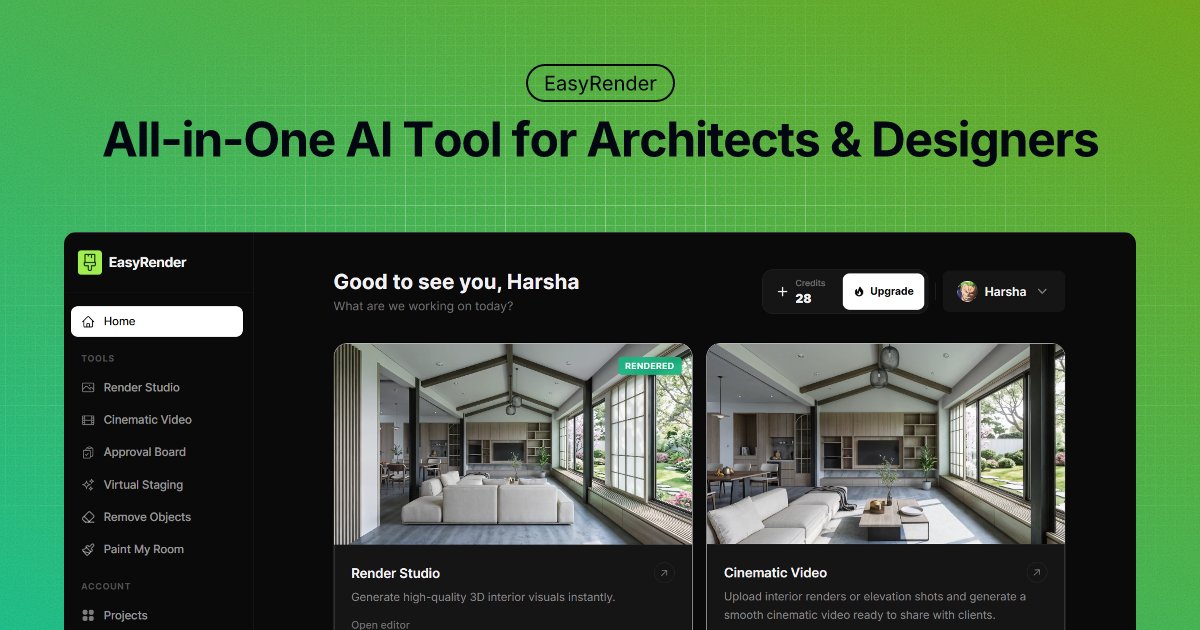

User reviews (0)