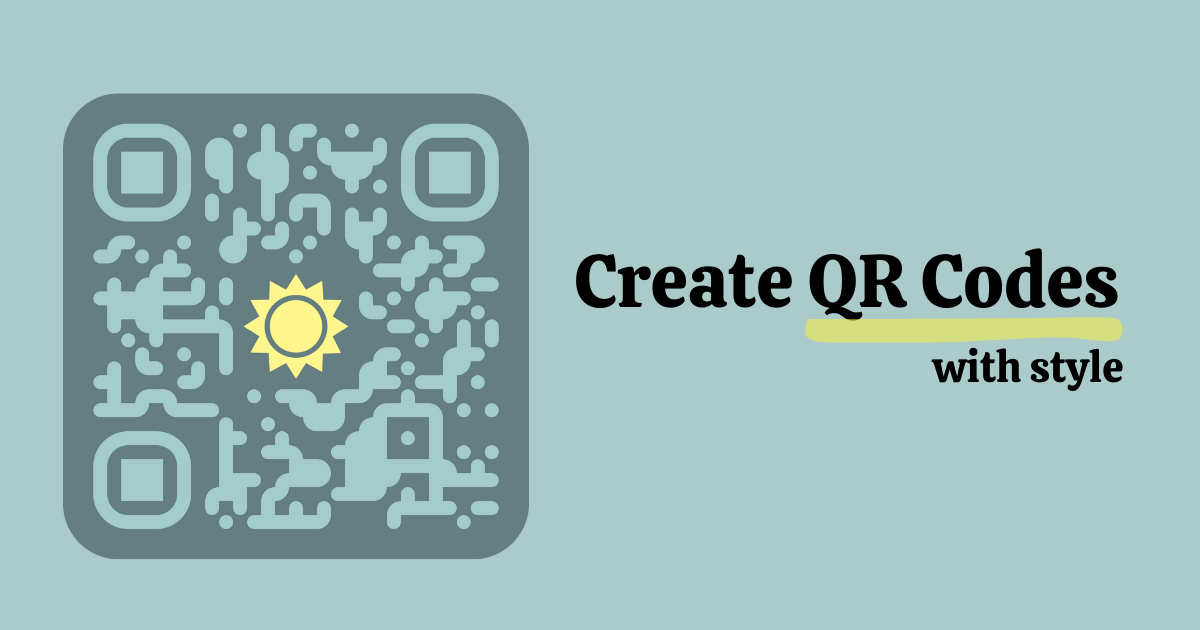
Website profiles · Technology insights · Alternatives

mini-qr-code-generator.vercel.app

The simplest way to create and scan QR codes. Design beautiful QR codes in just a few clicks, and scan codes instantly. Perfect for everyone, from beginners to professionals.

No paid content found
Visit website
Profile views 11 Outbound visits 0 Normal
Mini QR Code Generator Full homepage screenshot

At a glance

Category
Resources & Utilities
Language
English
Paid-content signal
No paid content foundObserved
Registered
2020
Hosting
VercelInferred
HTTPS certificate trusted
PassedObserved
Last updated

Website review

This review may include AI-generated content and is not individually verified. Domain, certificate and other facts come from the observed data on this page.

What is Mini QR Code Generator?

Mini QR Code Generator is a browser-based tool for creating and scanning QR codes. According to its own description, it aims to be the simplest way to do both: you design a QR code in a few clicks, and you scan codes instantly. It presents itself as suitable for beginners and professionals alike.

The practical appeal of this kind of tool is that it removes setup work. A small business owner can turn a menu link, a payment page or a Wi-Fi password into a scannable code without installing an app or learning design software. A teacher can generate a code for a class resource and print it on a handout. Someone receiving a code can scan it in the same place rather than switching apps.

Its two functions serve different moments:

  • Creating: turning a URL, text or similar content into a QR code, with some design control over how it looks.
  • Scanning: reading an existing QR code, useful when you are the one receiving information rather than sharing it.

Because the tool runs in a web browser, the main trade-offs are typical of lightweight online generators. Convenience is high, but for anything you will print at scale or use commercially, check the output resolution, whether the design stays scannable after customisation, and whether you are comfortable with how the service handles your data. If you need dynamic codes whose destination can be changed later, or detailed scan analytics, a dedicated QR platform is usually the better fit.

A useful next step: open the site and test it with a real destination you care about, such as your own website, then scan the result with two different phones before printing or sharing it. For a broader comparison, established alternatives include QR Code Generator and QRCode Monkey.

How do I create a QR code with Mini QR Code Generator?

Open Mini QR Code Generator in your browser and use the generator side of the page: enter the content you want the code to point to, adjust the design options you care about, then download or save the finished code. Because it's a browser-based tool, there's nothing to install and no account needed for a basic code.

A typical first code

  1. Decide what the code should do. A URL is the most common choice; plain text, contact details, Wi-Fi credentials and similar payloads also work, but each behaves differently when scanned.
  2. Paste or type that content into the generator's input field.
  3. Make your design choices — colours, shape, and any logo or image placement the tool offers.
  4. Generate the code, then preview it.
  5. Download the image and, before printing or sharing, scan it with your phone to confirm it resolves to the right destination.

H3. Design choices and their trade-offs Customisation is where QR codes most often break. The more you change, the more you risk a code that some phones can't read.

Choice Helps with Watch out for
High contrast (dark code, light background) Reliable scanning in most conditions Inverted colours can fail on some scanners
Adding a logo or image Brand recognition Too large a logo can block error-correction data
Decorative colours Fitting a brand palette Low-contrast pairs look fine on screen but fail in print
Larger physical size Scanning from a distance Small print sizes need simpler, higher-contrast designs

Practical uses

  • Print and signage: a code on a poster or menu is scanned at arm's length, so keep the design simple and test it at the intended print size.
  • Packaging or business cards: a small logo is usually fine here because the code is scanned up close.
  • Screen-only sharing: codes shown on a laptop or phone screen can be more decorative, since lighting and distance are controlled.

H3. Next step Generate one plain, high-contrast code first and confirm it works. Then create a second, styled version and test that one the same way. If the styled version fails, step back toward the plain design until it scans reliably — that tells you which specific change caused the problem.

Can I scan QR codes using Mini QR Code Generator?

Yes. Mini QR Code Generator is described as both a generator and a scanner: you can create and design QR codes, and scan codes instantly. That makes it a single stop for the common loop of making a code, testing it, and reading codes other people hand you.

What that looks like in practice

  • You print or display a QR code you just designed, then scan it yourself to confirm it points where you intended.
  • You scan a code from a poster, receipt, or a colleague's screen without switching to a separate scanning app.
  • A beginner can use one interface for both tasks instead of learning two tools.

A useful next step

Before relying on it for anything important, run a quick test: generate a code for a page you control, scan it with this tool, and then scan the same code with your phone's built-in camera. If both land on the same destination, the code is sound. For codes you plan to print at small sizes or in low-contrast colors, test the scan at the actual final size and lighting — that catches more problems than any feature list.

When a dedicated scanner may suit you better

If you mostly scan codes in bulk, need a history of past scans, or want offline scanning on a phone, a general-purpose camera app or a dedicated scanner app is often faster. Use this tool when the create-and-verify loop is the main job.

Is Mini QR Code Generator free to use?

Mini QR Code Generator presents itself as a free, no-frills tool for creating and scanning QR codes. The site's own description calls it "the simplest way to create and scan QR codes," aimed at everyone from beginners to professionals, and it lists no pricing pages, subscription tiers, or payment platforms. That combination is a reasonable signal that the core generate-and-scan functions are available at no cost, though the site does not spell out formal terms, so treat "free" as the practical experience rather than a contractual guarantee.

What that means in practice

For a typical user — say a small shop owner printing a code for a menu, a teacher linking a worksheet, or someone sharing a Wi-Fi password — the workflow is: open the site, type or paste your content, and download the resulting image. No account is described, which keeps friction low and avoids the usual "free trial, then paywall" pattern.

Where free tools usually draw the line

Customization is the common dividing line. Many generators let you create a basic black-and-white code for free but charge for logo embedding, color styling, or higher-resolution exports. Because the page evidence here is thin, check these directly on the site before you commit to a design:

  • Can you download at print-ready resolution, or only screen size?
  • Are colors and logo placement available without an upgrade prompt?
  • Do generated codes expire, or are they static and permanent?
  • Is there a usage limit per day or per code?

A quick decision rule

If you need a handful of static codes for personal or small-business use, a free browser tool like this is usually enough. If you need dynamic codes you can edit after printing, scan analytics, or bulk generation, those features almost always sit behind a paid plan — at which point compare dedicated services such as QR Code Generator or Bitly, which publish their pricing openly.

Next step: generate one test code, download it, and scan it with two different phones before designing anything you plan to print. That five-minute check catches resolution and contrast problems that free tiers sometimes introduce.

What customization options are available for designing QR codes?

For this tool, the page evidence lists "custom" and "design" as keywords but does not document specific customization controls, so treat the design options below as what to look for in a QR generator generally, not as confirmed features here.

Typical customization options

  • Colors — foreground and background, often with solid fills or gradients.
  • Pattern shapes — square, rounded, or dotted modules; some tools style the finder "eyes" separately.
  • Logo or image — a centered icon, usually paired with error correction so the code still scans.
  • Frames and captions — a border with a call-to-action like "Scan me."
  • Export format — PNG for screen, SVG or PDF for print at any size.
  • Content type — URL, plain text, Wi-Fi credentials, contact card, or email.

What matters more than looks

Contrast and quiet zone. Dark modules on a light background scan reliably; inverted colors often fail. Leave a margin around the code, and test the final image with more than one phone before printing or publishing.

A practical decision path

If you need a code for a poster, prioritize SVG export and high contrast over decorative styling. If it is for a business card, a small logo is fine. For a conference badge, keep the design plain so scanning is fast.

Related tools

If you want to confirm what this specific generator offers, open it and check whether color, logo, and SVG export controls appear in the editor before you commit to a design.

How does Mini QR Code Generator compare to other QR code tools for beginners?

For a beginner, Mini QR Code Generator's main advantage is focus: it is positioned as a create-and-scan tool rather than a full marketing platform. Its own description stresses "the simplest way to create and scan QR codes" and "just a few clicks," which suggests the intended experience is: type or paste content, generate the code, and optionally adjust its look. That is a good fit if your task is one-off or occasional — a poster, a class handout, a menu, a Wi-Fi card for guests.

Where it likely differs from better-known tools:

Beginner need Mini QR Code Generator Typical mainstream tools
Making a basic code fast Core purpose; minimal steps implied Often easy, but surrounded by plan choices
Custom colors/design Offered as part of the "design beautiful QR codes" promise Usually available, sometimes locked to paid tiers
Scanning an existing code Included alongside generation Sometimes a separate app or feature
Managing many codes over time Not indicated in the available information Often the main paid offering
Knowing what's free vs. paid Not stated on the page Usually shown via pricing pages

The practical trade-off is scope. Beginner-friendly often means fewer options, which reduces confusion but can limit you later. If you only need a code that works, fewer decisions is a benefit. If you need to change the destination URL after printing, track scan counts, or run several campaigns, a tool built around dynamic codes and dashboards will serve you better — that is general advice, not a claim about this product.

As a concrete test, try this before committing to any tool: generate a code for a URL you control, print it at the smallest size you actually expect to use (for example, a 2 cm label), then scan it with two or three different phones in normal indoor light. If it reads reliably and the design still looks right, the tool is doing its job for your case.

If you want to compare, these are established options in the same space: QR Code Generator, QRCode Monkey and Bitly. Look at whether the features you care about — custom colors, scan tracking, editable destinations — sit in the free tier or behind a plan, since that is usually where beginner tools diverge most.

Related questions

More questions →
What Does Design Mean in Stainless Steel Fabrication?

In stainless steel fabrication, design means engineering the part so it can actually be made: setting dimensions, material grade, joint and weld details, finish and tolerances, then checking that the workshop can cut, form, weld and finish it as drawn. It is not graphic design or product styling. This stage matters whenever you need a bespoke stainless item — a frame, tank, duct, pipework run or enclosure — and it usually starts from your sketch, sample or drawing rather than a finished CAD model.

What the design stage covers

Design work in a fabrication shop turns an idea into instructions the workshop can follow. That normally includes:

  • Geometry and dimensions — overall sizes, bend radii, hole positions, and how parts fit together.
  • Material grade — which stainless grade suits the environment (for example a grade chosen for corrosion resistance or for weldability). The fabricator should confirm the grade rather than assume it.
  • Joint and weld details — where seams run, whether welds are visible or dressed, and how access is provided for the welder.
  • Finish — the surface treatment required, such as a brushed, polished or other finish, and which faces are cosmetic.
  • Tolerances — how accurate the finished part must be, since tighter tolerances generally mean more work.

How design decisions affect manufacture and cost

Most cost and lead-time differences between two apparently similar parts come from design choices, not from the amount of steel:

Design choice Effect on fabrication
Complex geometry with many bends More forming steps, more chances of distortion
Welds in hard-to-reach positions Slower welding, higher risk of defects
Visible, dressed welds Extra finishing time
Tight tolerances More checking and rework
Cosmetic finish on all faces More handling and protection during work

A design that is easy to weld and finish is usually cheaper and faster than one that only looks simple on paper.

Typical design-to-manufacture workflow

  1. Brief or sketch — you provide a drawing, sketch, photo or sample, plus what the part must do.
  2. Design review — the fabricator checks feasibility, suggests changes, and confirms grade, finish and tolerances.
  3. Agreed drawing — a dimensioned drawing or model is signed off before cutting starts.
  4. Fabrication — cutting, forming, welding and finishing to the agreed drawing.
  5. Inspection — the finished part is checked against the drawing and finish specification.

The design review step is where most problems are caught cheaply, before any material is cut.

Common design mistakes that cause delays

  • Missing dimensions, or dimensions that do not add up.
  • No material grade specified, or a grade that is hard to weld or form.
  • Finish left undefined, so the workshop guesses.
  • No tolerance stated, leading to disagreement at inspection.
  • No allowance for weld distortion on large or thin panels.
  • Cosmetic faces not marked, so they get scratched during handling.

Questions to ask a fabricator at the design stage

  • Which grade do you recommend for this environment, and why?
  • Can this be made as drawn, or would a small change reduce cost or lead time?
  • Which faces are cosmetic, and how will you protect them?
  • What tolerance can you hold, and how will it be checked?
  • Will welds be visible, dressed or hidden?
  • What do you need from me before you can quote and start?

Getting clear answers to these before fabrication begins is the practical way to avoid rework and unexpected cost.

What Makes a QR Code Generator Beginner-Friendly?

A beginner-friendly QR code generator lets you create a working code in under a minute without an account, design skills, or technical knowledge. The core test is simple: you can paste a link or text, click one button, and download a scannable PNG using the default settings. Everything else — logos, colors, dynamic codes — is optional and can wait until you actually need it.

The Core Signs of a Beginner-Friendly Tool

Not every generator earns the label. These are the traits that matter most for a first-time user:

  • No sign-up required to create and download. If you have to register before you can even test the tool, that's friction a beginner doesn't need.
  • One input field and one generate button. The main screen should ask for your content (URL, text, Wi-Fi details) and nothing else.
  • Usable default styling. You shouldn't have to pick colors or add a logo to get a code that scans. The default black-on-white output should work immediately.
  • A clear download step. After generating, there should be an obvious way to save the code as an image file.
  • A built-in scanner or preview. Being able to test your own code before sharing it removes the most common beginner anxiety: "Did I do this right?"

If a tool hides the generate button behind a template gallery, a pricing wall, or a multi-step wizard, it's not beginner-friendly — it's just marketed that way.

The Shortest First-Code Workflow

For a first QR code, you only need three actions:

  1. Paste your content. A URL is the most common case. Copy the full link, including https://.
  2. Click generate. The tool converts your content into a QR pattern. No settings changes needed.
  3. Download the image. Save it as a PNG. This format works everywhere — websites, print, slides, chat apps.

That's the whole process. If your tool requires more steps than this for a basic link, you're paying in time for features you don't need yet.

Verify before you share

Point your phone camera at the code on your screen. If it opens the right page, you're done. This 5-second check catches the most common beginner mistake: a truncated or mistyped URL.

Advanced Features and What They Actually Cost You

These features are fine to use later, but each one adds decisions and potential failure points. Here's what changes when you turn them on:

Feature What it adds Beginner risk
Logo in the center Branding, visual appeal Too large a logo can break scannability
Custom colors Design match Low contrast between code and background makes scanning fail
Frames and labels "Scan me" call-to-action Adds clutter; some frames shrink the code area
Dynamic QR codes Editable destination, tracking Usually requires an account and may expire or cost money

The pattern is consistent: every visual or functional upgrade trades simplicity for control. A beginner's first code should use none of them.

Where Beginners Actually Get Stuck

The failures are predictable, and most have nothing to do with the tool itself:

  • Wrong file format. Saving as a tiny JPG or a screenshot instead of a clean PNG can blur the code. Use PNG for digital use, and a high-resolution format (PNG or SVG) for print.
  • Code too dense. Long URLs create denser patterns that are harder to scan from a distance. Shorten the link first if you plan to print it small.
  • Too small when printed. A code that scans fine on your monitor may fail on a business card. Give printed codes enough physical size and quiet space around the edges.
  • Can't find the downloaded file. Browsers often save to a default Downloads folder. Check there before assuming the download failed.
  • Low contrast. Light gray on white, or a colored code on a busy background, is a common self-inflicted failure. Keep it dark-on-light.

Privacy and Cost Questions to Ask Before Committing

Two things beginners rarely check until it's too late:

Does the tool upload or store your data? Some generators send your content to a server; others generate the code entirely in your browser. If you're encoding something sensitive — a private Wi-Fi password, an internal link — browser-side generation is the safer choice. The tool's own documentation is the only reliable source here; don't assume either way.

Is the free version actually free? Watch for watermarks on the downloaded code, limits on how many codes you can create, or scan-count caps on dynamic codes. A code that stops working after 100 scans is a trap for anyone printing it on packaging. Check the tool's stated terms rather than inferring from the interface.

A Practical Rule for Choosing

If you're making your first QR code, pick the tool that gets you from paste to download in the fewest clicks and lets you test the result immediately. Skip anything that demands an account, a template choice, or a design decision before it will produce a code. Once you've made a few and know what you actually need, revisit the advanced features — by then you'll be choosing them deliberately instead of guessing.

What Does "Custom" Mean in App, Icon, and UI/UX Design?

In app, icon, and UI/UX design, "custom" means the visual and interaction work is created for one specific product or brand rather than adapted from a template, stock asset, or generic UI kit. It is worth pursuing when your interface or identity is part of what differentiates you — for example, a distinctive app icon that must read at small sizes, or a workflow that no existing pattern fits. It is usually not worth it when you need a standard, well-understood screen (a settings list, a login form) on a tight timeline.

What "custom" covers in each area

Area Custom means Off-the-shelf alternative
App icon A mark drawn for your product, tested at multiple sizes and in context (home screen, App Store, notifications) A purchased icon set or a generic symbol with your color applied
UI (screens, components) Layouts, components, and states designed around your content and tasks A UI kit or framework's default components
UX (flows, interaction) Task flows, navigation, and feedback shaped to how your users actually work A conventional pattern applied as-is
Brand system Type, color, spacing, and iconography rules that stay consistent across the product Ad-hoc styling per screen

The Iconfactory describes itself as crafting "icons, apps, and user experiences for clients large and small" over more than 25 years — a scope that spans all four rows above, which is why "custom" in this field is rarely just one asset.

Custom vs. templates, stock assets, and UI kits

The practical difference is not quality — it is fit and ownership.

  • Templates and UI kits give you a proven starting point. You trade distinctiveness and some control for speed and lower cost.
  • Stock assets (icons, illustrations, fonts) are licensed for reuse. They can look right but may appear in competing products.
  • Custom work is made for your constraints: your content lengths, your platform, your brand voice, your edge cases.

A useful test: if a competitor could drop in the same asset and nothing would feel wrong, it is probably not custom in any meaningful sense.

When custom design adds real value

Custom work tends to pay off when at least one of these is true:

  • The icon is a primary brand touchpoint. App icons compete at very small sizes; a generic glyph gets lost.
  • Your workflow differs from the norm. If users do something no standard pattern handles, a custom flow removes friction instead of forcing users into the wrong model.
  • Consistency across many screens matters. A defined system (type scale, spacing, component rules) prevents drift as the product grows.
  • You are in a crowded category. Distinctiveness is the point.

When off-the-shelf is the better call

  • You need a standard, low-risk screen quickly (forms, lists, settings).
  • You are validating an idea and expect the interface to change.
  • Your budget is better spent on function than on visual identity.
  • The platform's own conventions already serve users well.

These are conditions, not verdicts — a project can mix both, using a UI kit for structure and custom work for the icon and key moments.

A typical custom design process

  1. Brief. Goals, audience, platforms, constraints, and what "done" looks like.
  2. Research and references. Competitors, platform guidelines, and existing brand assets.
  3. Concepts. A small number of distinct directions, not many variations of one.
  4. Refinement. Chosen direction developed across real sizes and states.
  5. Delivery. Final assets plus the rules for using them.
  6. Verification. Check the icon at small sizes and in real contexts; check screens against actual content, not placeholder text.

Common pitfalls

  • Scope creep. "Custom" quietly expands from one icon to a full system. Agree on deliverables up front.
  • Unclear ownership. Confirm who owns the files and how they may be reused before work starts.
  • Inconsistent branding. Custom assets applied without a system drift apart over time.
  • Designing without real content. Placeholder text hides the problems custom work is meant to solve.

If you can state which touchpoints must be custom, which can stay standard, and who owns the result, you have enough to decide — and enough to brief the work.

How Do I Create a Custom QR Code with a Logo and Download It?

Go to QRCode Monkey, pick the content type that matches what you want the code to do (URL, text, email, phone, SMS, vCard, WiFi, event, social link, or crypto address), fill in the required fields, then style the code and upload a logo before generating. The site describes itself as a 100% free QR code generator that supports logos, colors, and design, and it offers free vector formats for print quality. You can upload a logo as PNG, JPG, GIF, or SVG up to 2 MB, or pick one from the built-in gallery. The main constraint to plan around: your colors need enough contrast against the background, and the tool warns you when they don't.

Step 1: Choose the right content type

The content type determines what happens when someone scans the code, so pick it before you style anything. QRCode Monkey lists these options in its generator:

Content type Use it for
URL Linking to a website
Text Showing a plain message
Email Pre-filling recipient, subject, and message
Phone Dialing a number
SMS Pre-filling a number and message
vCard / MeCard Saving contact details
Location Opening a map point
Facebook / Twitter / Youtube Social profiles or shares
WIFI Joining a network (SSID, password, encryption)
Event Title, location, start and end time
Bitcoin and other crypto Wallet address and amount
MP3, VIDEO, PDF, social media, app store, image gallery, rating, feedback File or media destinations

Enter valid data for the fields the tool marks as required. For example, the URL field expects a valid URL, the email field expects a valid email address, and the text field allows line breaks. If a field is invalid, you'll see a validation error and the code won't generate until you fix it.

Step 2: Customize colors and shapes without breaking scannability

The design controls cover foreground color, background color, gradients (linear or radial), eye color, body shape, eye frame shape, and eye ball shape. Two things matter more than aesthetics:

  • Contrast. The tool recommends making your color darker and warns you to keep enough contrast against the background. A light foreground on a light background is the most common reason a styled code fails to scan.
  • Logo size. A large logo covers more of the code pattern. Keep it modest and test before you print.

You can set a single foreground color or a gradient, and optionally give the eyes (the three corner squares) their own color. If you want a branded look, this is where most of it happens.

Step 3: Add your logo

Under "Add Logo Image," you have two paths:

  1. Upload your own — PNG, JPG, GIF, or SVG, maximum 2 MB. If your file is bigger, you'll get a "File is too big" error and need to resize or compress it first.
  2. Pick from the gallery — useful if you don't have a prepared logo file.

There's also a "Remove Background Behind Logo" option, which strips the logo's backdrop so it sits more cleanly on the code. The site promotes logo placement as a way to make your brand recognizable at the center of the code.

Step 4: Fix errors, then generate and download

Before generating, clear any validation errors — the tool blocks generation until required fields are valid and your color contrast is acceptable. Once it generates, you get a preview and download options. The site advertises free vector formats, which is what you want for print because vectors scale without pixelation. For screen use, a standard raster export is usually enough.

A practical check: scan the finished code with two or three different phones before committing it to print or a permanent placement. Styling and logos are the two variables most likely to cause a scan failure, and a quick test catches it before it's expensive to fix.

Common snags

  • Invalid input in a required field. The generator won't proceed. Re-check the format the field expects (URL, email, phone number).
  • Logo over 2 MB. Resize or compress the file, or convert it to SVG.
  • Low contrast. Darken the foreground or lighten the background until the warning clears.
  • WiFi codes. You need the exact SSID, password, and encryption type (none, WEP, or WPA/WPA2) — a wrong encryption setting can stop devices from connecting.
  • Crypto codes. The address field is required; the amount is optional. Double-check the address before printing, since a wrong address can't be corrected after the fact.

The site also notes a QR Code API and a Chrome app alongside the web generator, so if you need to generate codes programmatically or repeatedly, those are worth checking.

What Is an Easy QR Code Generator and How Do You Use One?

An easy QR code generator is a tool that turns a link, Wi-Fi login, or contact card into a scannable QR code in a few steps, without design skills or technical setup. Mini QR Code Generator is one example: it describes itself as "the simplest way to create and scan QR codes," aimed at everyone from beginners to professionals. Use this kind of tool when you need a working code quickly; reach for a more advanced editor only if you need precise brand control or print-ready vector files.

What "easy" actually means here

A generator earns the label when it removes decisions rather than adding them. In practice, that means:

  • One input field. You paste or type your content and the code appears.
  • Sensible defaults. Size, margin, and error correction are pre-set so the code scans without tweaking.
  • No account wall for basic use. You can produce and download a code without a signup flow. (Whether a specific tool requires login is a product detail — check the tool itself.)
  • Instant preview. You see the code before you commit to downloading it.

If a tool asks you to configure error correction levels, module shapes, and export DPI before showing anything, it may still be good — it just isn't "easy" in this sense.

Step 1: Decide what the code should contain

The content type drives everything else. The common ones:

Type What you enter Typical use
URL A full web address Posters, packaging, slides
Wi-Fi Network name, password, security type Guest access, cafés, offices
vCard Name, phone, email, org Business cards, email signatures
Plain text Any short string Notes, serial numbers, instructions

Pick the type first. A URL code and a Wi-Fi code are not interchangeable, and converting one into the other means generating a new code.

Step 2: Generate the code

  1. Open the generator and select your content type.
  2. Enter the content. For a URL, include https:// — some scanners treat a bare domain as plain text and won't offer to open it.
  3. Let the tool render the preview. On a minimal generator this happens as you type.
  4. Adjust only if needed: a logo in the center, a color change, or a larger size.
  5. Download in the format you need — PNG for screens and documents, SVG when you'll scale it up for print.

Step 3: Test before you ship it

Scan the downloaded file with at least two phones, ideally one iOS and one Android, using the native camera app rather than a dedicated scanner. Check that:

  • The code resolves to the right destination.
  • It scans from the distance and angle people will actually use.
  • It still scans after you place it in its final layout.

This step catches almost every real-world failure before it costs you a print run.

Customization: what's worth changing

Custom design is a supported feature category on this tool, and it's where easy generators differ most. Two changes are usually safe and two are risky.

Safe:

  • Adding a logo in the center, as long as error correction is high enough to survive the covered area.
  • Modest color changes that keep strong contrast between the code and its background.

Risky:

  • Low-contrast palettes (light gray on white, for example).
  • Heavy styling that thins or distorts the modules.

The rule: a scanner needs to distinguish dark modules from light ones. Anything that blurs that distinction — including a busy background image behind the code — reduces reliability.

Why codes fail to scan

Most failures trace back to one of five causes:

  1. Too much content. Long URLs and long vCards push module density up, and dense codes need more space and better printing.
  2. Low contrast. Covered above — the single most common design mistake.
  3. Too small. A code packed with data needs a larger physical size to stay readable.
  4. Damaged or cropped output. A logo that's too large, or a margin trimmed to zero, breaks the quiet zone scanners rely on.
  5. Dead destination. The code is fine; the link behind it moved or expired. Test the destination, not just the scan.

Choosing between an easy generator and a full design tool

Use an easy generator when you need a code today, the content is a standard type, and the code will live on a screen or a modest print piece. Move to a fuller design tool when you need vector output at large scale, dynamic codes you can edit after printing, or scan analytics.

One caveat worth checking on any tool: whether it processes your content locally or uploads it. If you're encoding a Wi-Fi password or a private contact card, that distinction matters more than any design option.

Website Overview

An established domain and managed infrastructure suggest continuity of operations and may support dependable delivery, although neither guarantees service quality. Several search or sharing settings need attention. Together they may make snippets, preview images or preferred URLs less consistent across platforms.

Domain and Registration

Registered in 2020, this domain has about 6 years of history. That suggests continuity, although ownership and purpose may have changed. Transfer-protection status is present, helping reduce the risk of unauthorized domain transfers. The registrar is Tucows Domains Inc, a widely used domain service provider. The domain uses the common .app extension, which is not an independent safety signal.

DNS and Email

Nameservers are provided by vercel-dns-3.com, indicating managed DNS hosting. CAA records restrict which certificate authorities are authorized to issue certificates. No CNAME was found; the observed records resolve directly to addresses. No MX record was found. A conventional explicit inbound-mail route is not configured. TXT records include verification markers for Google. Such markers may also remain after a service stops being used.

TLS and Certificates

The certificate uses an RSA 2048-bit public key, offering broad client compatibility. The server supplied a complete certificate chain. No organization name is present in the certificate; the available fields are consistent with domain validation. The certificate was issued within the Google Trust Services cloud or CDN ecosystem. The certificate's total validity is about 89 days, consistent with a short renewal cycle.

HTTP and Browser Security

The response lacks these common security headers: CSP, X-Content-Type-Options, Referrer-Policy, Permissions-Policy, clickjacking protection. CORS permits any origin to read this response. This is common for public resources; sensitive responses need narrower handling. No X-Powered-By header was found, reducing one common source of backend fingerprinting information. No obvious internal addresses or debug information were found in the headers. The Server header contains the custom value Vercel.

Technology Stack Analysis

The public page identifies Vercel without precise versions, leaving fewer clues for version-specific scanning.

Search and Social Sharing

The meta description has 174 characters and may be shortened in search results. No homepage canonical URL was detected. If duplicate URLs exist, consolidation may be less explicit. Twitter Card metadata is configured. The title has 22 characters, within a common display range. The observed directives allow indexing and link following.

Hosting and Email

DNSvercel-dns-3.com
HostingVercel
EmailUnknown
Approximate IP geolocation (inferred; a CDN or proxy may differ from the origin server) United States flagUnited States Inferred 216.198.79.3

Registration details

RDAP / WHOIS

RegistrarTucows Domains Inc
Registered2020-01-28
Expires2036-01-28
Domain statusclient transfer prohibited、client update prohibited
Nameserversns1.vercel-dns-3.com、ns2.vercel-dns-3.com、ns3.vercel-dns-3.com、ns4.vercel-dns-3.com
DNSSECunsigned

DNS records

DNS

TypeNameValueTTLPriority
Amini-qr-code-generator.vercel.app216.198.79.3300—
Amini-qr-code-generator.vercel.app64.29.17.3300—
NSvercel.appns1.vercel-dns-3.com84902—
NSvercel.appns2.vercel-dns-3.com84902—
NSvercel.appns3.vercel-dns-3.com84902—
NSvercel.appns4.vercel-dns-3.com84902—
TXTvercel.appgoogle-site-verification=ye33zD88WkvAKX2-F2WH7Fi-QkAzvvWaPJQneD6Vt801285—
TXTvercel.appv=spf1 -all1285—
CAAvercel.app0 issue "letsencrypt.org"3600—
CAAvercel.app0 issue "pki.goog"3600—
DMARC_dmarc.vercel.appv=DMARC1; p=reject; sp=reject; adkim=s; aspf=s;3600—

TLS and certificates

TLS / SSL

AssessmentNormal configuration
Supported protocolsTLSv1.2、TLSv1.3
Negotiated protocolTLSv1.3
Certificate subject*.vercel.app
IssuerGoogle Trust Services
Valid until2026-11-27T19:48 · Remaining when checked: 57 days
Verification detailsCertificate trust: Passed · Hostname match: Passed

HTTP response headers

HTTP

HeaderValue
content-typetext/html; charset=utf-8
cache-controlpublic, max-age=0, must-revalidate
serverVercel
strict-transport-securitymax-age=63072000; includeSubDomains; preload
access-control-allow-origin*

Identified technologies

Vercel

Pages, Search and Sharing

Meta descriptionThe simplest way to create and scan QR codes. Design beautiful QR codes in just a few clicks, and scan codes instantly. Perfect for everyone, from beginners to professionals.
Canonical URLNot detected
LanguageEnglish (default)
Twitter Cardsummary_large_image

No robots.txt found

No sitemaps found

User reviews (0)

  • No reviews yet.