
 简体中文
简体中文 English
Website review
This review may include AI-generated content and is not individually verified. Domain, certificate and other facts come from the observed data on this page.
What is PanosFX?
PanosFX is a website that sells creative add-ons for Adobe Photoshop, alongside a library of free tools and tutorials. Its focus is on actions, brushes, patterns, styles and effects that automate or shortcut complex editing techniques, so you spend less time on manual steps and more on the creative decisions.
What you'll find there
- Premium collections — themed bundles of actions and effects, such as a Digital Art Bundle (sketches, engravings, cartoons, mosaics, painterly and typographic portrait effects) and a Frames & Borders Bundle for polished presentation layouts. A "COMPLETE PanosFX" bundle groups the collections together.
- Individual premium add-ons — newer items include AI Vector & Poly Art effects (using Adobe Firefly or an external AI generator) and Glued Poster & Plastic Wrap effects for a gritty street or glossy packaging look, the latter including free templates and AI-assisted custom sizing.
- Free add-ons — for example a Coin Portrait action that turns portraits into embossed metallic coins, and a Stack of Photos set producing photo-pile effects for Photoshop and Photoshop Elements.
- Tutorials — written walkthroughs on techniques such as building halftone and line patterns with Bitmap Mode, pro colour grading with target colours and luminosity control, and framing subjects with hand-drawn sketch borders.
Who it suits
It is aimed at Photoshop users who already know their way around layers and masks but want faster routes to stylised results: social media content creators, print and poster designers, digital artists, and photographers producing promotional or portfolio imagery. Photoshop Elements users are covered for some items, so check each add-on's compatibility before buying. Beginners can still use the actions, but the tutorials are where the real learning happens.
How to decide
Start with the free downloads and one tutorial that matches a task you actually have. If the workflow fits how you edit, the bundles make more sense than buying effects one at a time, since they cover many styles for a single purchase. If you only need one specific look, an individual add-on is the cheaper route. For broader Photoshop learning alongside these tools, Adobe Photoshop Help and PHLEARN are useful complements.
How do I install and use PanosFX Photoshop actions?
PanosFX actions are installed as .atn files in Photoshop, then run from the Actions panel. The general workflow is: download your files, load the action set, open your image, and play the action. Because PanosFX actions are built around layered, editable output, the more important skill is not the installation itself but learning to adjust the generated layers afterwards.
Installing an action set
- Download and unzip the product. You will usually find
.atnfiles plus any supporting assets such as patterns, brushes, styles or textures. - In Photoshop, open the Actions panel (Window > Actions).
- Open the panel menu and choose Load Actions, then select the
.atnfile. Alternatively, double-clicking the file often loads it directly. - Install supporting assets the same way: patterns via the Patterns panel menu, brushes via the Brushes panel menu, and so on.
If an action references a pattern or brush that is not loaded, it will either stop or produce a flat result, so install everything included in the download before running anything.
Running an action
Open your photo, select the relevant action in the Actions panel, and press the Play button. Most PanosFX actions are designed for a specific kind of source image — a portrait, a landscape, a centred subject — so check the product's own instructions for the recommended image size and orientation. Actions that build complex effects typically take a few seconds and generate a layered document.
What to expect after it runs
The page evidence describes PanosFX add-ons as "fully layered & customizable" and as tools that "handle the technical complexity" while leaving creative control with the user. In practice this means the action does the repetitive construction work, and you finish the job by editing the layers it produced.
For example, a designer producing a social media campaign could run a poster or plastic-wrap effect on a product shot, then hide or reorder the generated texture layers to dial the effect up or down for different platforms. A photographer making a portrait gift might run a coin or sketch effect and then adjust the subject mask rather than accepting the default.
Practical adjustments worth knowing:
- Toggle layer visibility to compare the effect against the original.
- Lower layer opacity to soften an effect that looks too strong.
- Edit layer masks to protect faces, text or important details.
- Recolour by changing a fill or adjustment layer rather than repainting.
- Keep the original background layer intact so you can start over.
Free versus premium
| Free add-ons | Premium collections | |
|---|---|---|
| Access | Some are free to everyone; others require newsletter signup | Paid bundles and toolkits |
| Typical use | Testing the style and workflow | Larger, themed sets for ongoing production |
| Examples on the site | Coin Portrait, Stack of Photos | Digital Art Bundle, Frames & Borders Bundle, AI Vector & Poly Art, Glued Poster & Plastic Wrap |
If you are new to actions, start with a free one to confirm the install process works on your Photoshop version and that you like the layered output. Then decide whether a premium bundle matches the kind of work you actually produce.
Common problems
- Action runs but nothing changes: the required pattern, brush or font is missing.
- Action stops partway: the document size or colour mode does not match what the action expects.
- Result looks flat: you may be viewing a smart object or a group that needs to be opened.
- Text or logo looks wrong: the action may rely on a specific font that is not installed.
Next step
Pick one free action, install it fully with its supporting assets, and run it on a copy of a real project image rather than a test file. That tells you quickly whether the workflow fits how you edit. If you want to understand the techniques behind the effects rather than just apply them, the site also publishes tutorials, including one on pro colour grading and one on building halftone and line patterns with Bitmap Mode. For broader action-based editing, GraphicRiver and Envato host marketplace alternatives, though quality and documentation vary far more than with a single dedicated maker.
What is included in the Complete PanosFX bundle and how does it compare to individual purchases?
The Complete PanosFX bundle is the all-in-one option: it gathers the full range of PanosFX Photoshop add-ons into a single purchase rather than making you buy each collection separately. The page presents it as the broad alternative to the individual bundles, which are organised by creative purpose — the Digital Art Bundle (sketch, engraving, cartoon, mosaic, painterly, typographic portrait and motion effects), the Frames & Borders Bundle (actions plus vector graphics for polished presentation), and newer add-ons such as AI Vector & Poly Art and Glued Poster & Plastic Wrap effects.
What the bundle approach includes
- The premium collections shown on the page, covering digital art transformations, framing and borders, and newer AI-assisted effects.
- Actions, brushes, patterns, styles and textures that work together inside Adobe Photoshop.
- Tutorials and free add-ons, such as Coin Portrait and Stack of Photos, which are available separately from the premium material.
- A workflow aimed at producing social media, poster, marketing and personal-project results without building each effect from scratch.
Bundle versus individual purchases
| Consideration | Complete bundle | Individual collections |
|---|---|---|
| Scope | Broadest access across the PanosFX range | Only the effects in that collection |
| Best for | Designers who expect to use several styles over time | Someone who needs one specific look now |
| Decision risk | Higher upfront commitment | Lower commitment, easier to test one style |
| Overlap | May include effects you would not otherwise buy | No paying for styles outside your interest |
The practical trade-off is breadth versus precision. If you mainly need one effect — say, turning portraits into sketch art — a single collection is the more focused choice. If your work moves between social graphics, client posters and personal art, the bundle avoids repeated purchases as your needs shift.
A useful next step is to list the three or four effects you would realistically use in the next few months, then check whether those sit in one collection or are spread across several. If they are spread out, the bundle is likely the better fit; if they cluster in one place, start there. You can review the options at PanosFX and compare the current bundle contents against the individual collections before deciding.
Which PanosFX add-ons are free and which require a premium subscription?
PanosFX mixes genuinely free add-ons with paid premium toolkits, and the split matters most when you are deciding whether to build a workflow around a specific effect or just grab a quick win.
Free add-ons
These are the ones the site presents as free, with no premium purchase implied:
- Coin Portrait — a Photoshop action that turns portraits into embossed metallic coins, described as fully layered and customizable. It is free for newsletter subscribers, so the "cost" is an email signup rather than payment.
- Stack of Photos — six square and landscape photo-pile effects for Photoshop and Photoshop Elements, free for everyone.
Premium add-ons
These sit inside the paid collections, and the site frames them as professional-grade tools:
- AI Vector & Poly Art effects — converts photos into vector or poly art in three styles, using Firefly inside Photoshop or free external generation via Gemini.
- Glued Poster & Plastic Wrap effects — wet-glue wrinkles and glossy plastic packaging looks, with ten free templates and AI custom sizes, aimed at social media and print.
- Digital Art Bundle — sketches, engravings, cartoons, mosaics, painterly effects and typographic portraits, combining actions, textures, patterns, AI-assisted workflows and motion effects.
- Frames & Borders Bundle — actions plus vector graphics for presenting photos in polished frames and borders.
- The "COMPLETE PanosFX" bundle — the all-in-one option covering the full range.
- Premium Toolkits generally — the subscription-style tier that unlocks the paid catalogue.
How to choose
If you only need a single striking effect, start with the free items: Coin Portrait for portraits and Stack of Photos for quick social layouts. If your work depends on repeatable, layered output across many images — digital art styles, vector conversions or framed presentation pieces — the premium bundles make more sense, since the value comes from reuse rather than one-off novelty.
One practical caveat: free add-ons can still carry conditions. Coin Portrait requires newsletter signup, while Stack of Photos is open to all. Check the individual product page before assuming "free" means no strings.
As a next step, open the Premium Toolkits page at PanosFX to see the current bundle contents, and compare that list against the free downloads before committing to a subscription. If most of what you want appears in the free section, you may not need premium at all.
Can PanosFX actions and brushes be used with Adobe Photoshop Elements?
Yes, some PanosFX add-ons can be used with Adobe Photoshop Elements, but compatibility varies by product and is not universal across the catalogue.
What the site indicates
The page explicitly mentions Photoshop Elements for at least one free add-on: the Stack of Photos action, described as creating "six unique square & landscape photo pile effects for Adobe Photoshop & Photoshop Elements." That tells you Elements support exists for some items, but the wording is product-specific rather than a blanket claim.
Most other listings on the page refer to "Adobe Photoshop" alone, including the Coin Portrait action, the AI Vector & Poly Art effects, and the Glued Poster & Plastic Wrap effects. Photoshop actions in particular rely on features such as the Actions panel, Smart Objects, layer styles and certain blending modes; Elements includes a reduced Actions panel and lacks some of the advanced scripting and adjustment capabilities found in full Photoshop. Brushes, patterns and styles are generally the most portable asset types, since Elements supports .abr brush files and pattern/style libraries, though newer brush features may not render identically.
Practical decision guide
| Asset type | Typical Elements outlook |
|---|---|
| Brushes, patterns, styles | Usually the most likely to work, with possible feature limits |
| Simple actions | Sometimes work, but may break on unsupported steps |
| Complex actions with AI or advanced layers | Least likely to work as intended |
| Tutorials | Often transferable in principle, but steps may differ |
Next step
Before buying, open the individual product page and look for an explicit "Photoshop Elements" mention, or check whether a free sample is offered. The free Stack of Photos add-on is a low-risk way to test how PanosFX files behave in your version of Elements. If you rely on Elements as your main editor and the product page only says "Adobe Photoshop," treat Elements compatibility as unconfirmed rather than assumed. For broader Photoshop learning alongside these tools, PanosFX also publishes tutorials, and Adobe documents which features differ between Photoshop and Photoshop Elements.
How do PanosFX tutorials help me create effects like halftone patterns or sketch art borders?
PanosFX tutorials are step-by-step Photoshop walkthroughs that teach the underlying technique, not just a one-click result. For halftone and line patterns, the site's tutorial covers building authentic patterns through Bitmap Mode, plus a Smart Object workflow intended to keep results more professional and re-editable. For sketch art borders, a separate tutorial shows how to frame and emphasise a main subject with organic, hand-drawn-looking borders.
That matters if you want to understand why an effect works, so you can adapt it to your own images rather than being locked into one preset. It suits intermediate Photoshop users comfortable with layers, Smart Objects and blending; beginners may need to pause and look up basics as they go.
How to choose between learning and downloading
| Goal | Better route |
|---|---|
| Reusable, editable effect on many photos | Follow the tutorial, then save your own action or template |
| Fast result for one image | Use a ready-made action or add-on |
| Understanding channel/bitmap mechanics | Tutorial |
| Consistent social-media output | Add-on plus light manual tweaking |
A practical next step: open the halftone/line pattern tutorial with one portrait and one landscape photo, build the effect once, then save it as your own action. If you only need a finished look, browse the freebies and premium collections instead — for example, the site notes free add-ons such as Coin Portrait and Stack of Photos, with premium toolkits including Digital Art and Frames & Borders bundles. Compare those against general Photoshop learning resources like Adobe Photoshop tutorials if you want broader fundamentals alongside the effect-specific guides.
Decision criterion: pick the tutorial when you expect to repeat or customise the effect; pick the add-on when speed and consistency matter more than control.
 Cloudflare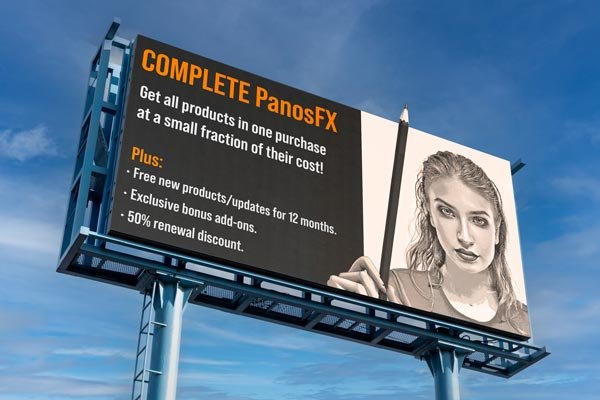
User reviews (0)