
 简体中文
简体中文 English
Website review
This review may include AI-generated content and is not individually verified. Domain, certificate and other facts come from the observed data on this page.
What is Dirty Little Zine?
Dirty Little Zine is a free, browser-based tool for making an eight-page folded zine from a single sheet of paper. You lay out the panels in the editor, upload photos, add captions, and export a print-ready JPG or PDF at 300 DPI. The layout work that usually trips people up — rotating and ordering panels so everything lands correctly after folding — is handled automatically. It runs in the browser with no account or sign-up, and the editor processes files locally rather than uploading them to a server.
What you can actually do with it
- Build a one-sheet zine on US Letter or A4 paper, with a preview before you print.
- Place a photo in any panel using either contain or cover fit, so you can choose between showing the whole image or filling the frame.
- Write a caption per panel and drag panels into a different order.
- Export a high-resolution JPG for a single page or a multi-page PDF for the whole booklet.
- Work offline after the first load.
Who it suits, and who it doesn't
It fits photographers assembling a small photo zine, illustrators collecting sketchbook pages, writers putting out a mini zine, or anyone who wants a quick DIY booklet without opening InDesign or Photoshop. The trade-off is control: this is a fixed eight-panel template, not a general page-layout program, so if you need custom page counts, bleeds, CMYK colour management or a print shop's specific imposition, you will outgrow it. It is also a one-sheet format by design, so longer projects are better served elsewhere.
A practical first project
Pick eight images that read well small — a single subject per frame, strong contrast — and treat panel one as the cover and panel eight as the back. Print one copy on plain paper first and fold it using the site's six-step instructions (long fold, short fold, fold the sides inward, cut the centre, pop it open, collapse). Check that nothing important sits near a crease or the centre cut, then export the PDF and print the final run on heavier stock. For folding technique, a short demonstration video is often faster than reading steps; YouTube has several. If you later want a bound booklet with more pages, a general design tool such as Canva or a dedicated layout app is the more sensible route.
How do I fold and cut a single sheet of paper into an 8-page zine?
You fold a single sheet into an 8-page zine by creasing it in both directions, cutting one slit along the center fold, then collapsing it so the panels stack into page order.
The fold-and-cut sequence
- Long fold: With the printed side facing out, fold the sheet in half top-to-bottom and crease hard. Unfold.
- Short fold: Fold left-to-right and crease hard. Unfold.
- Doors: Fold each short edge in to meet the center crease, then open the sheet flat again. You should see eight rectangles.
- The cut: Fold the sheet short-way again and cut along the center crease, starting from the folded edge and stopping at the middle — one panel deep, no further. Cutting past the middle splits the sheet.
- Pop it open: Unfold flat, refold the long way, and push the two short ends toward each other. The slit opens into a plus shape and the panels fan out.
- Collapse: Press flat so the cover sits on top and the back cover on the bottom.
The trickiest part is step 4. If your cut runs too far, the booklet falls apart; if it stops short, the pages won't fan open cleanly.
Where the page order comes from
The panels are not in reading order on the flat sheet. The cover, back cover and interior spreads land on specific positions that only make sense after folding, so the layout has to be rotated and ordered for you. Dirty Little Zine handles that panel ordering automatically and lays the eight pages out on one US Letter or A4 sheet, which removes the main source of misprinted zines. The same site includes a fold diagram and a short folding video if you prefer watching the sequence once before trying it.
A practical test
Before committing a full run, print a blank sheet, fold and cut it, then number the pages as you turn them. If the numbers read in sequence, your fold direction and cut length are correct — then run the real sheet.
Can I make a photo zine without my images being uploaded to a server?
Yes. On Dirty Little Zine, the editor runs in your browser and the page states that nothing is uploaded to a server — your photos stay on your device. You can upload photos to any panel, choose contain or cover fit, add captions, reorder panels by dragging, then export a 300 DPI JPG or a multi-page PDF.
What "local" means in practice
- Your images are processed in the browser, so they aren't sent to a remote host for editing.
- It works offline after the first load, which is a good sign the tool isn't relying on a live server round-trip.
- No account or sign-up is needed, so there's no cloud library tied to your identity.
- Exports are generated on your machine, so the final files land wherever your browser saves downloads.
A concrete workflow for a photo zine
- Pick eight photos and decide the order before you start — the cover and back cover are just two of the eight panels.
- Choose US Letter or A4 to match your printer and paper.
- Upload each image, using cover fit for full-bleed panels and contain fit when you want the whole frame visible with margins.
- Add short captions; on a folded mini zine, a few words per panel read better than paragraphs.
- Export the PDF for printing and keep a 300 DPI JPG as a backup or for sharing online.
- Print single-sided on one sheet, then follow the fold sequence: long fold, short fold, fold the short sides inward, cut the center crease one panel deep, pop it open, and collapse it into a booklet.
Trade-offs to weigh
| Consideration | What it means for you |
|---|---|
| Browser-only editing | Good privacy, but your work lives in that browser session — export before clearing data or switching devices |
| One-sheet, eight-panel format | Fast and cheap to print, but each panel is small, so tight crops and simple captions work best |
| Local processing | No server upload, but very large photo sets may depend on your device's memory and speed |
| 300 DPI export | Print-ready for a small booklet, though it isn't a substitute for a full layout app if you need bleeds, CMYK or professional prepress control |
If your main concern is keeping unpublished or personal images off someone else's server, this approach fits that need well. If you need precise color management or a print shop's exact PDF spec, you'll likely still finish the file in a desktop layout tool.
For folding help, the page points to a short demonstration by Alison Spence on YouTube, and the zine maker itself is at Dirty Little Zine. For general print guidance, a print shop's own paper and bleed instructions are worth checking before you send anything to press.
How do I export a print-ready zine as a JPG or PDF at 300 DPI?
Export from the editor's preview screen: Dirty Little Zine's page evidence lists "High-resolution JPG export at 300 DPI" and "Multi-page PDF export" as built-in features, so you choose the format from the download control rather than setting a DPI value yourself. Pick JPG when you want a single flat image to drop into a post, message or print-shop upload form; pick PDF when the printer expects a paginated document.
What each format is good for
| Format | Best for | Trade-off |
|---|---|---|
| JPG at 300 DPI | Quick sharing, single-image uploads, home printing | One flat image; no separate pages to reorder |
| Multi-page PDF | Print shops, archiving, keeping page order explicit | Larger file; needs a PDF-capable viewer to check |
Before you download
- Choose US Letter or A4 in the preview toolbar — the paper size is baked into the export, so match it to what your printer actually feeds.
- Confirm each panel's photo uses the right fit mode: contain keeps the whole image visible, cover fills the panel and crops the edges. Cover suits full-bleed photo panels; contain suits diagrams or images with important edges.
- Check captions on every panel, including the cover and back, since those are the panels people read first.
- Reorder panels by drag-and-drop before exporting, not after — a JPG won't let you fix sequence later.
A practical check
A photographer assembling a six-photo mini zine would set Letter for a home inkjet, use cover fit on the cover panel, export the PDF for a local copy shop, and also export the JPG to post as a flat preview. Print one test sheet on plain paper, fold it using the site's six-step diagram, and confirm the cover lands on the front and the back cover on the bottom before you commit to better stock. The fold instructions and a short folding video are linked from the same page.
Because the editor runs in your browser and the page states nothing is uploaded to a server, your photos stay on your device — useful if you're working with client images. If you want a second opinion on folding technique, Alison Spence's two-minute video is referenced on the site. For a broader look at the maker behind the tool, see Dirty Little Zine.
What's the difference between US Letter and A4 paper sizes when printing a zine?
US Letter and A4 are two standard paper sizes that produce slightly different finished zines. On Dirty Little Zine, you choose one or the other before exporting, and that choice determines the dimensions of your printed booklet.
The core difference
| US Letter | A4 | |
|---|---|---|
| Common use | United States, Canada | Most of Europe, Asia, Australia |
| Shape | Slightly wider, shorter | Slightly narrower, taller |
| Availability | Easy to find in North America | Easy to find almost everywhere else |
The practical gap is small. Both are close enough in size that a zine designed for one will usually print acceptably on the other, but the panels won't be identical, and margins or captions near the edges may shift.
Which to pick
- Print at home or at a local shop: match the paper you already own or can buy easily. In the US, that's Letter; in Europe, A4.
- Sharing a PDF internationally: A4 is the safer default, since it's the more common standard worldwide.
- Mailing zines: Letter fits US envelopes more naturally; A4 fits European ones.
A practical test
Before committing to a full run, export a single test sheet in both sizes and fold each one. Check that your cover text and any full-bleed photos still sit comfortably inside the panels. Dirty Little Zine handles the panel rotation and ordering automatically, so the fold itself will work either way — the question is simply which sheet your printer and envelopes are built around.
As a next step, decide where the zine will be printed and mailed, then choose the size that matches that context rather than trying to optimize for both.
How do I arrange photos and captions across the eight panels so they print in the right order?
Plan the eight panels as a sequence, then let the tool handle the imposition. In an eight-page one-sheet zine, the panels are not in reading order on the flat sheet: the sheet is folded and cut so that page 1 (front cover) ends up opposite page 8 (back cover), with the interior pages interleaved. Dirty Little Zine's page evidence says it "handles the rotation and panel ordering automatically so your layout prints correctly after folding," so your job is to decide what goes on pages 1–8, not to calculate the rotations.
A practical panel plan
Treat the eight panels as a tiny book:
- Page 1 — cover. One strong image, short title, your name or handle. Avoid small text; it will be folded and handled.
- Page 2 — inside front / intro. A single photo with a one-line caption, or a short statement.
- Pages 3–6 — the spreads. These are the working pages. Pair related images or give each a full panel; keep captions short and place them consistently (e.g. always bottom-left) so the eye knows where to look.
- Page 7 — closing image or note. A quieter photo, a credit, or a "thanks for looking."
- Page 8 — back cover. Contact info, edition number, date, or a small logo.
If you are making a photo zine, a common rhythm is: cover image, then one image per panel with a caption, then a back-cover credit. If you are making a text-led mini zine, give each panel one idea and let the images support it.
Captions that survive folding
Keep captions to roughly one line at the size you will actually print. Because the sheet folds down to a small booklet, text near the outer edges can feel cramped after trimming or folding. Leave a margin inside each panel, and check the fold diagram before you commit. Dirty Little Zine supports custom captions for each panel and drag-and-drop panel reordering, so you can move a caption or image if the sequence reads wrong.
Check the order before you print
The fastest way to catch an ordering mistake is to export and fold a plain-paper proof. Print the JPG or PDF at actual size, fold it using the six-step method on the site (long fold, short fold, fold inward, cut the middle, pop it open, collapse), and read it page by page. If page 2 and page 7 are swapped, or a caption lands on the wrong spread, reorder the panels in the editor and re-export. The site's own how-to-fold instructions and fold diagram are the reference for this step.
Export and paper choices
The editor exports a print-ready JPG or PDF at 300 DPI and supports US Letter and A4. Choose the paper size that matches your printer and your audience: US Letter for US-based readers, A4 for most other regions. For a photo zine, a slightly heavier matte paper folds more cleanly and shows images better than thin copy paper; for a quick draft, plain paper is fine.
For a second opinion on folding and small-press zine conventions, Stolen Sharpie Revolution is a long-running zine resource, and ZineWiki covers zine history and formats. If you want to see the fold in motion, the site links to a short folding video by Alison Spence; watching one fold once will make the panel order obvious.
 Cloudflare
 Namecheap Private Email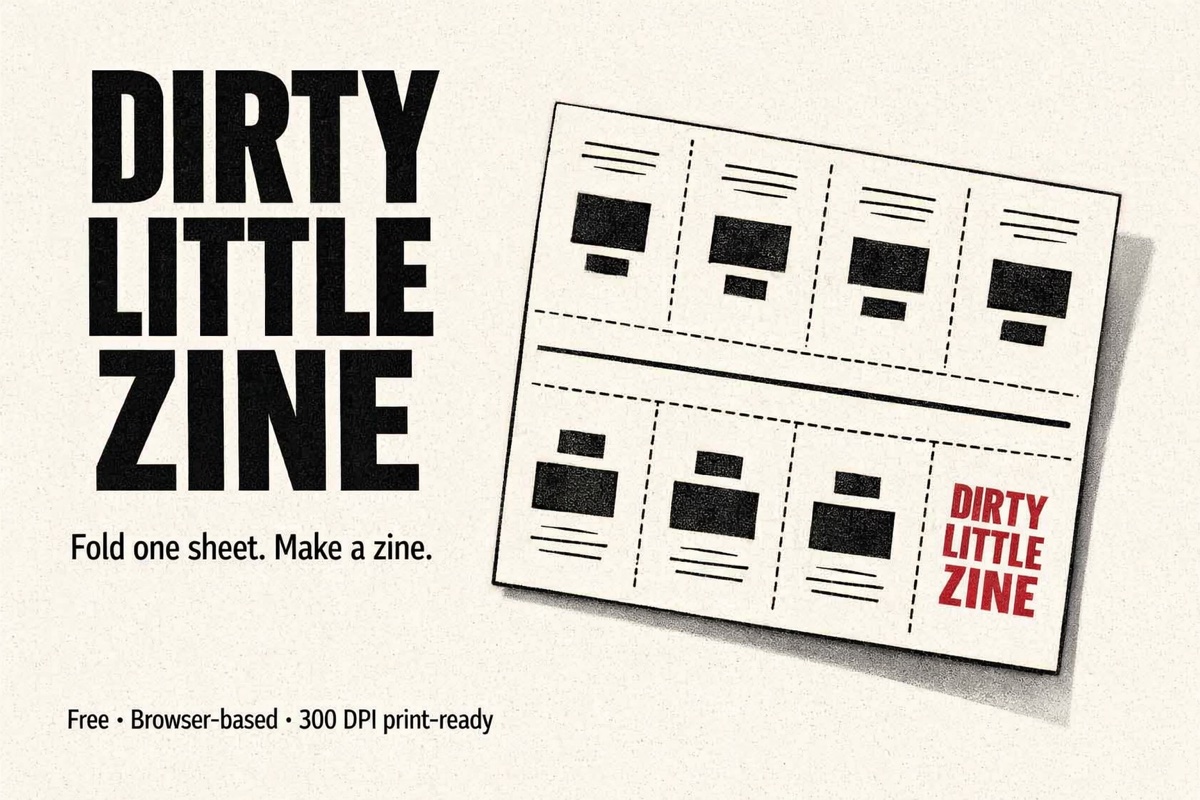

User reviews (0)