Website profiles · Technology insights · Alternatives

myfretboardtrainer.com

Free interactive guitar fretboard trainer. Memorize the notes on the neck with fast practice games, quizzes and exercises for scales and chords.

Paid content Multilingual
Visit website
Profile views 0 Outbound visits 0 Normal
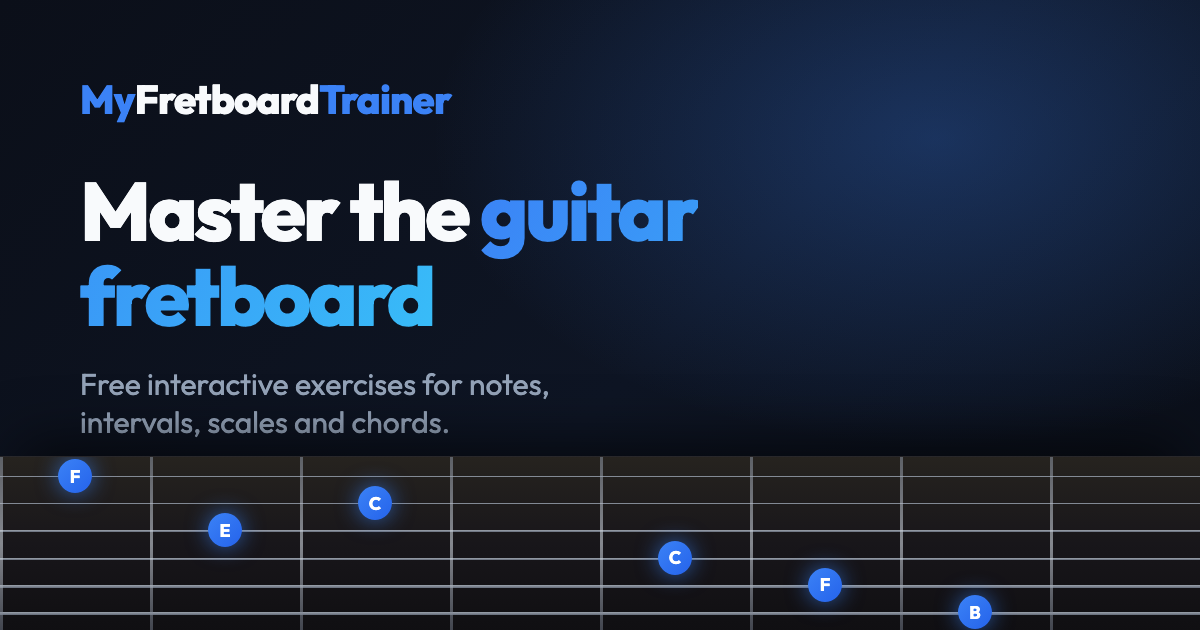
My Fretboard Trainer Full homepage screenshot

At a glance

Category
Education & Learning
Language
English
Paid-content signal
Paid contentObserved
Registered
2020
Hosting
NetlifyInferred
HTTPS certificate trusted
PassedObserved
Last updated

Website review

This review may include AI-generated content and is not individually verified. Domain, certificate and other facts come from the observed data on this page.

What is My Fretboard Trainer?

My Fretboard Trainer is a free, browser-based trainer for learning the notes on a guitar neck. Rather than a general lesson library, it is a set of active practice games: you are asked to find or identify notes, intervals, or chord shapes on a fretboard diagram, and you repeat that until the layout becomes automatic.

What you actually practise

  • Note finding: select a named note on a given string, or identify a flashing note on the neck.
  • Full-neck recall: find every location of a single note across all strings.
  • Intervals: recognise interval shapes relative to a chosen root.
  • Scales and chords: drill major scale patterns and test chord shapes.
  • Timed mode: the same note-selection and note-identification drills against a clock, for speed and accuracy.
  • Improvisation: play along with a backing band and find the notes that fit a looping chord progression.
  • Reference charts: scale and mode diagrams, including pentatonic boxes and CAGED shapes, plus the modes of the major, harmonic minor and melodic minor scales, and an interactive circle of fifths.

Who it suits

It fits a player who already knows a few chords and can read a fretboard diagram, but still hunts for notes by counting frets. A typical session is five to ten minutes: one round of note identification, then a timed round to see whether speed holds up. It is less useful for someone who wants songs, technique instruction or rhythm practice, since the site is built around fretboard knowledge rather than playing repertoire.

The optional paid tier adds a short onboarding quiz, a 30-day structured module sequence for notes and a second for intervals, tracking of your weakest notes and strings, and a global speed leaderboard. That structure helps players who would otherwise practise randomly; if you prefer to design your own drills, the free exercises cover the core work.

A practical next step

Start with note identification on the low E and A strings only, since those are the reference points most players use to orient themselves. When you can name them without counting, move to finding all locations of one note across the neck. For structured guitar curricula alongside this kind of drilling, Justin Guitar is a well-known free option.

How do I use the trainer to memorize notes on all six strings efficiently?

Use the trainer as a short, repeated drill rather than a long study session. Its core exercises are built for exactly this: Note Selection (find a named note on a given string), Note Identification (name the flashing note), and Select All Locations (find every instance of one note across the neck). Together these move you from single-string recall to whole-neck recognition.

A practical routine

  1. Start with one or two strings. Use Note Selection on the low E and A strings only. Accuracy first; ignore speed.
  2. Add strings gradually. Once you can name notes on a string without counting frets, add the next string. The goal is to stop using "two frets up from the octave" as a crutch.
  3. Switch to Note Identification. This removes the string hint and forces you to read the whole neck. Keep sessions to 5–10 minutes.
  4. Use Select All Locations for anchor notes. Pick one note (say, G) and find every G on all six strings. This builds the pattern-recognition that makes the rest faster.
  5. Then add the timer. The trainer's time-limited modes are best used after accuracy is solid — they measure fluency, not learning. Racing the clock too early teaches guessing.

What "efficient" actually means here

The efficient path is interleaving, not blocking. Ten minutes daily across mixed exercises beats an hour once a week. The site's Blind Spot tracking (part of its paid tier) is designed to show which notes and strings you miss most, so you can drill those specifically instead of reviewing what you already know. That is the single biggest time-saver if you plateau.

Where the other tools fit

  • Interval Exploration helps once note names are automatic — you start seeing relationships rather than isolated letters.
  • CAGED / Pentatonic and scale charts are reference material; use them to connect memorized notes to shapes you actually play, not as a substitute for the drills.
  • Improvisation / Play the Changes is the payoff stage: applying note knowledge over a progression.

Decision criterion

If you can name a random fret on any string within about two seconds, move to interval and scale work. If you still count up from open strings, stay with Note Selection and Select All Locations a while longer.

For a second, independent drill style, compare with Music Theory exercises, which offer a fretboard note-identification trainer with customizable strings and frets.

Which exercises should a beginner start with before moving to time-limited mode?

Start with Note Selection and Note Identification in untimed mode. These are the two exercises that build the base skill everything else depends on: knowing which note sits at a given string and fret. Note Selection asks you to find a named note on a specific string; Note Identification shows a flashing note and asks you to name it. Together they cover both directions of recall, which matters because reading a fretboard and naming a fret are different mental tasks.

Once those feel reliable, add Select All Locations (find every instance of one note across the neck) and Interval Identification. Select All Locations forces you to see the repeating pattern of octaves rather than memorizing single spots, and interval work starts connecting notes to each other instead of treating them as isolated labels. The site's Interval Exploration tool, where you pick a root and see how every note relates to it, is a useful reference alongside that exercise.

A practical order

  1. Note Selection, one or two strings at a time.
  2. Note Identification, same limited range.
  3. Widen to all six strings.
  4. Select All Locations for single notes.
  5. Interval Identification.
  6. Practice Major Scale and Practice Chords once single notes are solid.

When to switch on the timer

Move to Time-Limited Mode when you can answer untimed rounds accurately without counting frets or reciting the alphabet up the string. A concrete test: run a full untimed round on all strings and note your accuracy. If you are missing more than a couple per round, the timer will mostly train guessing. Accuracy first, then speed — the timed Note Selection and Note Identification challenges measure speed and accuracy together, so they are a check on fluency, not a way to build it.

A reader scenario: someone who plays open chords and wants to find any note by name within a few seconds. Their first week is Note Selection on the low E and A strings only, then Note Identification on the same pair, then expanding one string at a time. The timer comes in week three, not day one.

For structured pacing beyond the free exercises, the site describes a paid Pro tier with an onboarding quiz, 30 day-by-day modules and blind-spot tracking — see My Fretboard Trainer for how that works. If you want a second, independent drill for note naming, Music Theory offers free generic note and interval trainers that are not guitar-specific.

How can I use the scale and CAGED visualizations to learn soloing over chord changes?

Use the scale and CAGED charts as a map for finding chord tones, not as patterns to run up and down. The practical workflow is: pick a chord progression, identify the chord tones in one position using the CAGED shape, then use the scale chart for that position to connect those tones with lines. My Fretboard Trainer's pages include CAGED and pentatonic shape charts plus scale and mode references, and its "Play the Changes" exercise is built around finding the right notes over a looping progression — that combination is exactly the loop you want.

A concrete practice loop

  1. Choose one position. Take a single CAGED shape for the chord you're soloing over (say, an A-shape major chord). Note where its root, third and fifth sit.
  2. Overlay the scale. Open the matching scale or pentatonic chart for the same position and mark which scale notes are chord tones versus passing tones.
  3. Target, don't wander. Improvise in that position but land on a chord tone on each chord change. Start with just the third — it defines major versus minor most clearly.
  4. Change one chord at a time. Move to the next chord in the progression and repeat. The goal is hearing the shift, not memorizing more shapes.
  5. Add the clock only later. Once you can hit chord tones reliably, use time-limited modes to pressure-test speed.

Choosing between the chart types

Tool Best for Trade-off
CAGED shapes Seeing where chord tones live in each position Tied to one chord at a time; you must connect shapes mentally
Pentatonic boxes Safe, singable lines with few wrong notes Omits the 4th and 7th, so it can sound generic over changes
Full scale / mode charts Understanding the harmony behind each chord More notes to manage; easy to noodle without targeting

A reader scenario

Suppose you're soloing over a ii–V–I in C. In one position, use the CAGED shape for Dm7 to find its third (F), then shift your attention to the G7 shape for its third (B), then to Cmaj7 for its third (E). Those three notes alone outline the progression. Only after that feels solid should you fill in with the surrounding scale tones from the mode charts — Dorian for the ii, Mixolydian for the V.

For broader fretboard drilling outside this site, Music Theory covers interval and chord construction that makes chord-tone targeting easier to reason about, and JustinGuitar has free lessons on CAGED and targeting chord tones in solos.

What does the Pro version add compared to the free exercises, and is it worth it?

The Pro version adds structure and tracking rather than more fretboard content. The free site already gives you the core practice loop: note selection, note identification, interval drills, scale and chord practice, timed challenges, improvisation over changes, scale and mode charts, and the circle of fifths. Pro layers a guided path and feedback on top of that.

What Pro adds

According to the site's own description, the paid tier includes:

  • Onboarding quiz — a few timed rounds that place you at the right starting point instead of module one.
  • 30-day modules — a day-by-day curriculum for memorizing all notes, plus a second roadmap for intervals that ends with ear training.
  • Blind spot analytics — accuracy and speed data that flags your weakest notes and strings so you can drill them directly.
  • Global leaderboard — speed-based note-finding competition against other players.

Free vs. Pro at a glance

Need Free exercises Pro
Learn note names and shapes Yes Yes
Scales, modes, CAGED, pentatonic charts Yes Yes
Timed speed practice Yes Yes
A sequenced plan to follow No 30 modules
Knowing which notes you keep missing No Blind spot analytics
Motivation from competition No Leaderboard

Is it worth it?

It depends on why you stall. If you open the trainer, pick a random exercise, and quit after ten minutes, the modules solve a real problem: deciding what to practice today. If you already practice consistently but keep fumbling the same frets, the analytics are the more valuable piece, since the free drills won't tell you which notes are costing you.

The free version is enough if you want a quick warm-up before playing or you're charting scales for a specific song. Pro makes more sense for a beginner working through the neck systematically, or an intermediate player whose note recall is uneven and who wants the weak spots named.

A practical next step: spend a week with the free timed modes and note whether your mistakes cluster on particular strings or frets. If they do, and you want that pattern tracked and drilled for you, Pro is aimed at exactly that gap. If your accuracy is already spread evenly and you just want more material, the free charts and drills likely cover it. Details are on My Fretboard Trainer.

How does the Blind Spot Analytics feature identify and drill my weak notes and strings?

Blind Spot Analytics is a training aid that uses your own accuracy and speed data from practice rounds to find the notes and strings you get wrong or answer slowly, then points you to drills targeting those specific gaps. The site describes it as tracking accuracy and speed to "pinpoint and drill your exact weak notes and strings," and lists it among the advanced tools unlocked through Pro support.

How the loop works in practice

  1. Practice normally. You play the note-finding exercises (note selection, note identification, interval identification, and the timed versions). Each answer records whether you were correct and how long you took.
  2. Let the data accumulate. A single round says little; patterns emerge over several sessions, which is why the site frames this as part of a 30-day structured curriculum rather than a one-off quiz.
  3. Read the weak spots. The analytics surface the notes and strings where your accuracy is low or your response time is slow, instead of leaving you to guess.
  4. Drill those spots. You then focus practice on the flagged notes and strings rather than reviewing the whole neck evenly.

Why this matters for different players

  • Beginners tend to have broad gaps, so the analytics mainly confirm which strings (often the B and low E) need earlier attention.
  • Intermediate players usually have uneven knowledge—strong on the low frets, shaky above the 12th fret, or fine with naturals but slow on sharps and flats. This is where targeted drilling saves the most time.
  • Players preparing for speed challenges can use response-time data to shave seconds off note identification, which is the skill the site's leaderboard measures.

A concrete example

Suppose your accuracy is high on the A and D strings but you consistently miss F♯ and B♭ on the G string and take over two seconds on the high E. Instead of repeating full-neck drills, you would run note selection limited to those strings and notes until accuracy and speed even out, then re-test across the full neck.

Decision criterion

Choose this approach if you already practice regularly and want your sessions directed by evidence rather than intuition. If you are brand new and still learning open-string names, plain untimed exercises are likely enough first; the analytics become more useful once you have enough attempts to reveal a pattern. You can try the core exercises at My Fretboard Trainer before deciding whether the Pro tracking is worth it.

Related questions

More questions →
Can You Use CC0 Assets in Commercial Games? Licensing and Integration Basics

Yes. CC0 assets can be used in commercial games without paying royalties or crediting the creator. CC0 is a public-domain dedication: the creator has waived copyright and related rights to the fullest extent allowed by law. That means you can copy, modify, redistribute, and sell work built on those assets — including in a game you charge money for.

This article explains what CC0 actually covers, how it differs from other Creative Commons licenses, and how to bring CC0 assets into engines like Unreal and Unity and tools like Blender, Maya, and 3ds Max.

What CC0 actually means

CC0 is not a license in the traditional sense — it is a waiver. When a creator applies CC0 to their work, they give up their copyright and agree not to enforce related rights. You are free to:

  • Use the asset in personal, educational, or commercial projects
  • Modify, remix, and build derivative works
  • Distribute the asset or your derivative as part of a larger project
  • Do all of the above without attribution

There is no requirement to credit the creator, no share-alike clause forcing you to open-source your game, and no non-commercial restriction. For a studio shipping a paid title, that combination is unusually permissive.

One practical caveat: CC0 applies to the rights the creator holds. It cannot waive third-party rights the creator never owned. A scanned statue, a branded product, or a recognizable logo in a texture may still carry trademark or personality-rights issues. Treat CC0 as clearing copyright, not as clearing everything.

CC0 vs. other Creative Commons licenses

The differences matter most when you are choosing assets for a commercial build. The table below summarizes the common variants.

| License | Commercial use | Attribution required | Share-alike | Notes for games | |---|---|---|---|---|---| | CC0 | Yes | No | No | Closest to public domain; safest for closed-source commercial titles | | CC BY | Yes | Yes | No | Fine for commercial use, but you must credit — plan for a credits screen | | CC BY-SA | Yes | Yes | Yes | Derivatives may need to be shared under the same license; risky for proprietary code/assets | | CC BY-NC | No | Yes | No | Excludes commercial projects; avoid for any monetized game | | CC BY-ND | Yes | Yes | No | No derivatives — you cannot modify the asset, which limits integration |

If your goal is a commercial game with no legal overhead, CC0 is the simplest choice. CC BY is workable if you can maintain attribution. Avoid NC and ND for anything you intend to sell or heavily adapt.

How CC0 assets fit into game engines and pipelines

CC0 libraries typically provide HDRIs, PBR textures, and 3D models. Each type has a natural place in a game pipeline.

HDRIs

HDRIs are high-dynamic-range environment maps. In Unreal, they are commonly used for sky lighting via a Sky Light set to use an HDRI cubemap or a Sky Sphere material. In Unity, they feed the skybox and the environment lighting in the Lighting window. You can also use them as reflection probes or as the basis for image-based lighting in Blender, Maya, or 3ds Max for look development before export.

Textures

PBR texture sets usually ship as albedo (base color), roughness, metallic, normal, and sometimes ambient occlusion or height maps. These drop directly into Unreal's material system or Unity's Standard/URP/HDRP shaders. Keep the resolution appropriate: 4K textures are useful for hero assets, but 1K or 2K is often enough for background props and saves memory.

Models

Static meshes and props can be imported as FBX or OBJ. Check the scale and pivot before placing them in a level. If the asset was authored for offline rendering, it may have very high poly counts — decimate or LOD it before use in a real-time scene.

Practical steps for importing and adapting assets

  1. Download and verify the license. Confirm the asset page states CC0. Save a screenshot or the license text alongside the file.
  2. Organize by type. Keep HDRIs, textures, and models in separate folders. A consistent naming convention (for example, env_forest_01_4k.hdr) saves time later.
  3. Import into your engine. In Unreal, drag the FBX into the Content Browser and set up materials. In Unity, import the FBX and assign a PBR material, then wire the texture maps to the correct slots.
  4. Adapt scale and orientation. Real-world assets may be authored in meters or centimeters. Check against a reference cube of known size.
  5. Optimize. Reduce texture resolution where it will not be seen up close, generate LODs for models, and bake lighting where appropriate.
  6. Test in context. Place the asset in a representative scene and check lighting, reflections, and performance before committing it to the project.

What CC0 does not cover

CC0 clears copyright, but a few things still deserve a second look:

  • Trademarks and logos. A texture containing a recognizable brand mark is not automatically safe to ship.
  • Recognizable people or property. A model of a real person or a distinctive building may raise personality or property-rights questions.
  • Third-party content inside the asset. If a creator included someone else's work without permission, the CC0 dedication does not fix that.

For most generic assets — rocks, foliage, generic furniture, abstract HDRIs — these concerns are minimal. For anything depicting a real brand, person, or landmark, verify independently.

Documenting asset sources for teams and clients

Even though CC0 requires no attribution, keeping records is good practice. It protects you if a client or publisher asks for provenance, and it helps when a team member needs to know where a file came from.

A simple tracking sheet works:

Asset name Type Source License Date downloaded Notes
forest_01_4k.hdr HDRI Poly Haven CC0 2025-01-10 Used for level 2 sky
rock_cliff_a.fbx Model Poly Haven CC0 2025-01-10 Decimated to 8k tris

Store this alongside your project files. If you later combine CC0 assets with CC BY assets, the sheet makes it obvious which ones need credit.

Bottom line

CC0 assets are safe for commercial games, require no attribution, and impose no royalties or share-alike obligations. The main work is practical: verify the license, check for third-party rights, import and optimize the asset for your engine, and keep a record of where it came from. Do that, and a CC0 library becomes a legitimate, low-friction source for production assets in Unreal, Unity, Blender, Maya, and 3ds Max.

How to Memorize the Guitar Fretboard Notes with Interactive Practice

Memorize the guitar fretboard by training in short, active rounds: pick one string, find named notes on it, then test yourself against a timer and log the notes and strings you miss. My Fretboard Trainer (myfretboardtrainer.com) packages this into interactive exercises—Note Selection, Note Identification, Interval Identification, and Select All Locations—plus time-limited modes and scale/chord visualizations. This approach suits beginners who know basic string names and fret numbering, and players who can already find some notes but are slow or inconsistent. You need a guitar (or the site's on-screen fretboard) and 10–15 minutes per session.

Why active recall beats staring at a chart

A fretboard diagram gives you the answer; a trainer makes you produce it. The site's exercises are built around that difference:

  • Note Selection asks you to find a requested note on a specific string.
  • Note Identification shows a flashing note on the fretboard and asks you to name it.
  • Interval Identification has you recognize shapes and intervals rather than single letters.
  • Select All Locations asks you to find every instance of a note across the neck.

Each format tests a different skill: locating a note from its name, naming a note you see, and seeing relationships between notes. Rotating through them prevents you from memorizing one screen pattern instead of the neck.

A practice sequence you can follow

Step 1: Anchor the natural notes on one string

Start with the low E string and the natural notes (E, F, G, A, B, C, D). Use Note Selection on that single string until you can find each note without counting up from the open string. The expected result is that you can name a fret and produce the note, and hear a note and point to at least one location.

Repeat for the A string, then the D string. Two strings per session is enough; the goal is accuracy, not coverage.

Step 2: Add the timer to measure speed

Once a string feels solid, switch to Time-Limited Mode (Note Selection with a timer or Note Identification with a timer). The timer converts "I sort of know it" into a number: notes per minute and error count. Record both after each round.

A practical target before moving on: near-zero errors on a string at a comfortable pace, then push speed until errors appear, then back off slightly. That edge is where learning happens.

Step 3: Connect notes with intervals and shapes

Isolated note names fade quickly. Use Interval Exploration—pick a root and see how every note on the neck relates to it—to attach a shape to each interval. Then move to Scales & Modes and CAGED / Pentatonic charts to see the same notes organized into patterns you actually play.

For example, if you know where G is on the low E string, interval practice shows you the major third (B) and fifth (D) as fixed shapes from that root. You are no longer recalling three separate letters; you are recalling one shape.

Step 4: Drill your weak spots, not the whole neck

Track which strings and notes you miss most. The site's Pro tier includes Blind Spot Analytics, which tracks accuracy and speed to pinpoint weak notes and strings, plus a Global Leaderboard for note-finding speed. If you stay on the free exercises, keep a simple log:

Date Exercise String(s) Errors Notes/min
— Note Selection Low E 3 12
— Note Identification A, D 5 9

Spend the first five minutes of each session on your two worst rows. This is the difference between practicing and re-practicing what you already know.

Step 5: Apply it to scales, chords, and improvisation

Memory that never gets used decays. The site's Practice Major Scale and Practice Chords exercises train patterns, and Improvisation lets you play along with a band and learn the notes that make a solo work; Play the Changes has you find the right notes over a looping progression. Use these to confirm that fretboard knowledge transfers to playing.

What the free trainer includes, and what Pro adds

The site describes itself as a free interactive trainer with exercises, scales visualization, and theory tools. Its Pro option is framed as a way to support an independent developer and unlock advanced tools, including:

  • Onboarding Quiz — a few timed rounds to find your level so the 30 modules start where you actually are.
  • 30 Systematic Modules — a structured, day-by-day curriculum from strings and frets to all notes, with a second roadmap for intervals ending by ear.
  • Blind Spot Analytics and Global Leaderboard.

The site lists a "How Pro works" page and a "buy me a coffee" support mechanism; it does not state a price in the provided material, so check the Pro page for current terms before relying on it. The free exercises, scale/mode charts, interval exploration, and circle of fifths are described as available without that tier.

Common sticking points

  • Counting up from the open string. If you still say "E, F, G…" to reach a note, you are calculating, not recalling. Drill that string in isolation until the answer is immediate.
  • Memorizing one position. Use Select All Locations so a note is a set of places on the neck, not one dot.
  • Skipping the timer. Without it, slow-but-correct feels like mastery. The timer exposes the gap.
  • Practicing only what you like. The strings you avoid are usually the ones you need; let your error log choose the session.
  • Learning notes without intervals. Letters alone are hard to use in playing; interval shapes are what make them musical.

When this method is the right fit

Choose interactive timed practice if you can already name the open strings and want measurable progress. If you are brand new to the instrument, spend your first sessions on basic technique and string names, then start with Step 1 at a slow pace. If you already know the natural notes and want scale and mode patterns, go straight to the Scales & Modes and CAGED/Pentatonic charts and use Note Identification only as a warm-up.

What Is the ChordPro Format and How Do You Use It?

ChordPro is a plain-text file format for writing lyrics with chords, plus a reference implementation that turns those files into formatted lead sheets and songbooks. You write songs in any text editor using simple bracket notation, then render them to PDF or another output. It suits guitarists and other musicians who want clean, printable chord charts without a full notation program. The format and the reference implementation are free products, though the project asks for donations to cover hosting costs.

What a ChordPro File Is

A ChordPro file is a text file — the site notes that "any text editor can be used to create and maintain them." The format was developed in 1992 by Martin Leclerc and Mario Dorion, who built a tool called chord to process files they called chord files. Users and tools later adopted the name "chordpro" for the files, and that name stuck.

The core idea: lyrics are typed as normal text, and chords are placed inline where they should appear above the words. Because it is plain text, files are portable, diff-friendly, and readable without special software.

Basic Syntax

Chords in brackets

Put a chord in square brackets immediately before the syllable it belongs to:

[C]This is the [G]way we [Am]write a [F]song

When rendered, each chord sits above the point in the lyric where it was placed. This is the single most important rule to learn.

Directive lines

Lines that start with a curly brace are directives — instructions to the renderer rather than content to display. Typical uses include song metadata and formatting control. For example, a title directive marks the song title, and comment directives add notes that are not part of the lyric line.

The exact set of directives is large; the reference implementation's documentation is the authoritative list, and the site describes the format as "simple by nature" while the reference implementation itself "has very powerful features."

Rendering to Lead Sheets and Songbooks

The workflow is: write or edit the text file, then run it through a ChordPro processor to produce output. The official site highlights "powerful PDF creation" and the ability to "turn your ChordPro formatted songs into beautiful looking songbooks."

A practical sequence:

  1. Create the song as a plain-text file with a .cho, .crd, or .chordpro-style extension (the site lists chopro, cho, and crd among its keywords).
  2. Add chord brackets and any directives you need.
  3. Process the file with the reference implementation or another compatible tool.
  4. Check the rendered output — chord placement above lyrics is the thing most likely to need adjustment.
  5. For a songbook, combine multiple song files and render them together.

The site does not publish a step-by-step command reference in the material available here, so consult the reference implementation's own documentation for exact invocation and options.

Beyond Basic Chords

ChordPro is not limited to simple C-F-G charts on a standard-tuned six-string guitar. The site lists several extended capabilities:

Feature What it covers
Markup Change how lyrics and other text are displayed
Custom tunings and notes Alternative tunings; note naming such as C D E, Do Re Mi, Nashville, or Roman numerals
ABC support Include fragments of musical scores directly

Although the format was "initially intended for guitarists," the site states it "can be used for all kinds of musical purposes," and it "became a popular way to write lead sheets" with many tools adopting the format.

Where to Get It and Who Maintains It

Since 2015, a small team of volunteer users has maintained the ChordPro standard, taking over from Leclerc and Dorion. That team developed a new reference implementation with added features and "an easy to use graphical application."

Everything is Open Source, and the project welcomes contributions via GitHub. The standard and reference implementation are free products — the site describes them as "free as in speech" — but it also notes that websites, storage, and bandwidth cost money and invites donations through PayPal or a "buy a coffee" option.

When to Use ChordPro

Choose it if you want:

  • Chord-and-lyric lead sheets you can write in any text editor
  • A format many existing tools already read
  • PDF output and multi-song songbooks from the same source files
  • Extras like alternate tunings, note-naming systems, and embedded score fragments

It is less suited to full standard notation or audio production — for those, use a dedicated notation or DAW tool. For text-based chord charts that print cleanly, ChordPro is a well-established, widely supported choice.

How to Practice Guitar Fretboard Notes with Interactive Exercises

To memorize the guitar fretboard with interactive exercises, work in a fixed loop: pick one exercise that matches your current goal, practice it untimed until you can answer without counting frets, then repeat it in time-limited mode and record your accuracy and speed. Move to the next exercise only when your weak strings and notes are stable. My Fretboard Trainer organizes its practice games around exactly this progression, from single-string note finding to improvisation over a band.

Choose the exercise that matches your goal

Each exercise on the site trains a different skill. Pick by what you want to fix, not by what looks fun.

Your goal Exercise to use What you actually do
Learn note names on one string Note Selection Find the requested note on a specific string
Recognize notes fast, anywhere Note Identification Identify the flashing note on the fretboard
Connect notes to shapes Interval Identification Recognize intervals and their fretboard shapes
See one note across the whole neck Select All Locations Find every instance of a note on all strings
Build scale muscle memory Practice Major Scale Run major scale patterns until they are automatic
Learn chord shapes Practice Chords Learn and test different chord shapes
Test speed and accuracy Time-Limited Mode Note Selection (Timer) and Note Identification (Timer)

A sensible order for a beginner: Note Selection on one string, then Note Identification, then Select All Locations, then intervals. Scales and chords come after the note names are reliable, because scale practice assumes you can already name what you are playing.

Run the untimed-to-timed loop

The site's exercises are built for active recall, not passive looking. Use them in two phases.

Phase 1: Untimed accuracy

  1. Open Note Selection and choose a single string, starting with the low E.
  2. Answer each prompt by naming the note before you play it. If you have to count up the fretboard, that is a miss.
  3. Stay on that string until you can answer consecutive prompts without counting.
  4. Repeat for each string, then switch to Note Identification, where the note flashes and you name it cold.

Expected result: you can name natural notes on any single string without counting. If you are still counting after several rounds, drop back to one string and fewer frets.

Phase 2: Timed speed

  1. Switch to the timer versions: Note Selection (Timer) and Note Identification (Timer).
  2. Do one short round and write down two numbers: how many you got right and how many you attempted.
  3. Repeat the same round a day later and compare. Accuracy first; speed follows once accuracy is above roughly 90 percent in your own records.

The timer is the measurement tool, not the goal. Racing the clock before the notes are solid just trains guessing.

Find and drill your weak spots

The most common mistake is practicing what you already know. Two habits prevent it:

  • Track by string and by note. After each session, note which strings and which note names caused errors. Most players have one or two problem strings (often the B and G strings, where the pattern shifts) and a few problem notes.
  • Drill only the weak set. Use Select All Locations on a single problem note, or Note Selection on a single problem string, until errors stop. Then re-test the full set.

The site's Pro tier includes Blind Spot Analytics, which tracks your accuracy and speed and points to your exact weak notes and strings, plus a 30-day module curriculum and an onboarding quiz that places you at your level. The free exercises cover the core loop above; the analytics layer is the paid upgrade. Check the Pro page for current terms before relying on it.

Move from note names to scales and chords

Once note names are reliable, the same recall loop applies to patterns:

  1. Major scale: practice the pattern slowly, saying each note name aloud as you play it. This links shape to name instead of shape to finger memory alone.
  2. CAGED and pentatonic: use the CAGED / Pentatonic charts to see how the shapes you already know map onto note names.
  3. Modes: the site provides charts for the modes of the major, harmonic minor, and melodic minor scales. Treat these as reference material; practice them only after the major scale is solid.
  4. Intervals: use Interval Exploration to pick a root and see how every note on the neck relates to it. This is the bridge between note names and hearing.

Transfer the skill to real playing

Note names are only useful if they show up in music. Two site features close that gap:

  • Improvisation: play along with a band and learn which notes make a solo work.
  • Play the Changes: find the right notes over a looping chord progression.

A practical drill: pick a two-chord progression, find the chord tones by name on one string, then play a short solo using only those notes. If you can name the note you are bending to, the fretboard work has transferred.

Common sticking points

  • Counting frets instead of recalling. If you count, you are calculating, not memorizing. Slow down and answer from memory.
  • Skipping the B and G strings. The interval shift between these strings breaks patterns. Practice them separately.
  • Only practicing open-position notes. Use Select All Locations to force recall across the whole neck.
  • Chasing the leaderboard too early. The global leaderboard rewards speed; use it after accuracy is stable, or it will push you into guessing.

A weekly routine that fits the exercises

  • Days 1–2: Note Selection, one string per session, untimed.
  • Day 3: Note Identification, untimed, full neck.
  • Day 4: Select All Locations on two problem notes.
  • Day 5: Timed rounds; record accuracy and speed.
  • Day 6: Major scale pattern with note names spoken aloud.
  • Day 7: Improvisation or Play the Changes over a simple progression.

Repeat for several weeks, rotating the problem notes and strings each cycle. The measure of progress is simple: fewer misses on the same timed round, and fewer strings where you still have to count.

What Are Industrial Scales and How Do You Choose the Right Type?

Industrial scales are weighing systems built for repeated, commercial, or production use rather than occasional household weighing. Choosing the right type comes down to four things: what you're weighing (weight range and package size), how precisely you need the result, where the scale will live, and whether you need a simple weight reading or a pass/fail decision. Valley Scale Inc, a family-run scale business serving the industry since 1981, groups its work around scales, check weighing, indicators, industrial scales, and truck scales — a useful map of the main categories you'll be choosing between.

The main categories of industrial scales

Bench scales

Small, countertop or table-mounted platforms for parts, packages, and portions. They suit tight spaces and lighter capacities, and are the usual starting point when items can be lifted by hand.

Floor scales

Large platforms set on the floor for pallets, drums, and heavy bulk items. They're the default when a load can't be lifted onto a bench and needs to be rolled or driven on.

Truck scales

Heavy-duty, drive-on platforms for weighing whole vehicles and their loads. These are fixed installations with site, foundation, and traffic-flow implications, so they're planned as infrastructure rather than bought as a standalone device.

Check weighing scales

Systems that compare each item's weight against a target and flag it as under, over, or acceptable. They're used where weight is a quality or compliance check, not just a number to record.

Matching capacity and readability to the task

Two specifications do most of the work in narrowing your choice:

  • Capacity — the maximum weight the scale is rated for. Pick a capacity above your heaviest expected load, with headroom for containers, pallets, or fixtures that also sit on the platform.
  • Readability (resolution) — the smallest increment the scale displays. A scale that reads to 0.1 lb can't give you 0.01 lb detail, no matter how good the indicator is.

The practical rule: decide the smallest weight difference you actually need to see, then confirm the scale delivers that readability at the capacity you need. Very fine readability at very high capacity is a harder and more expensive combination than either one alone.

What indicators do and how they connect

An indicator is the display and control unit that turns the load cell signal into a readable weight. It's the part operators actually interact with, so it shapes daily use more than the platform does. Indicators can add functions like unit switching, tare, accumulation, and setpoint outputs for check weighing.

When comparing options, treat the indicator as part of the system, not an accessory:

  • Confirm the indicator's functions match your workflow (simple readout vs. setpoints and alarms).
  • Check how it connects — cable runs, power, and any output to a printer, PLC, or software.
  • Match the indicator's environmental rating to the washdown, dust, or outdoor conditions on site.

Check weighing vs. simple weight measurement

Use simple weight measurement when the goal is to know or record how much something weighs — receiving, shipping, batching, inventory.

Use check weighing when each item must fall inside an acceptable weight band and you need a consistent accept/reject decision. This matters for portion control, fill verification, and catching under- or over-filled product before it ships. If your process needs an operator to react to every reading, or an alarm when a weight drifts out of range, you're describing check weighing rather than plain weighing.

Factors to settle before buying

Factor Why it drives the choice
Weight range and item size Sets capacity and platform dimensions
Required readability Rules out scales that can't resolve your smallest difference
Environment Washdown, dust, vibration, and outdoor exposure affect construction and sealing
Duty cycle Continuous production use demands more robust hardware than occasional weighing
Installation Floor and truck scales need site prep, foundation, and access planning
Data needs Determines indicator outputs and connections to printers or systems

Working through these in order — task, precision, environment, then installation — usually eliminates most options before price even enters the conversation. For anything involving a fixed drive-on installation or a production line, it's worth having the site conditions reviewed before committing, since those constraints are the hardest to change later.

Website Overview

Page metadata, canonical configuration and social previews work together to provide more consistent search and sharing presentation.

Domain and Registration

Transfer-protection status is present, helping reduce the risk of unauthorized domain transfers. The domain has about 5 years of registration history; its current configuration provides more context than age alone. The domain uses the common .com extension, which is not an independent safety signal.

DNS and Email

Nameservers are provided by NS1, indicating managed DNS hosting. No CNAME was found; the observed records resolve directly to addresses. No MX record was found. A conventional explicit inbound-mail route is not configured. TXT records include verification markers for Google. Such markers may also remain after a service stops being used. DNSSEC signatures were not detected, so this additional DNS authenticity protection is not confirmed.

TLS and Certificates

The public key uses EC with 256 bits. The server supplied a complete certificate chain. No organization name is present in the certificate; the available fields are consistent with domain validation. The certificate was issued by Let's Encrypt, commonly associated with automated certificate services. The certificate's total validity is about 89 days, consistent with a short renewal cycle.

HTTP and Browser Security

The response lacks these common security headers: CSP, X-Content-Type-Options, Referrer-Policy, Permissions-Policy, clickjacking protection. No X-Powered-By header was found, reducing one common source of backend fingerprinting information. No obvious internal addresses or debug information were found in the headers. The Server header contains the custom value Netlify. No explicit CDN or WAF marker was found in the response headers.

Technology Stack Analysis

The public page identifies SvelteKit, Netlify without precise versions, leaving fewer clues for version-specific scanning.

Search and Social Sharing

Twitter Card metadata is configured. JSON-LD includes Product or Offer data, potentially supporting eligible product search features. The page declares 8 language or regional alternatives using hreflang. The title has 51 characters, within a common display range. A meta description is present, with 144 characters.

Hosting and Email

DNSNS1
HostingNetlify
EmailUnknown
Approximate IP geolocation (inferred; a CDN or proxy may differ from the origin server) United States flagAshburn, Virginia, United States Inferred 18.208.88.157

Registration details

RDAP / WHOIS

RegistrarIONOS SE
Registered2020-11-14
Expires2026-11-14
Domain statusclient transfer prohibited
Nameserversdns1.p07.nsone.net、dns2.p07.nsone.net、dns3.p07.nsone.net、dns4.p07.nsone.net
DNSSECunsigned

DNS records

DNS

TypeNameValueTTLPriority
Amyfretboardtrainer.com18.208.88.157120—
Amyfretboardtrainer.com98.84.224.111120—
AAAAmyfretboardtrainer.com2600:1f18:16e:df01::258311—
AAAAmyfretboardtrainer.com2600:1f18:16e:df01::259311—
NSmyfretboardtrainer.comdns1.p07.nsone.net3600—
NSmyfretboardtrainer.comdns2.p07.nsone.net3600—
NSmyfretboardtrainer.comdns3.p07.nsone.net3600—
NSmyfretboardtrainer.comdns4.p07.nsone.net3600—
TXTmyfretboardtrainer.comgoogle-site-verification=2RK35l0v_KCvlk0WSdMo-Bl1Au1m2KKYz2V6-Q0zhOk3600—
DMARC_dmarc.myfretboardtrainer.comv=DMARC1; p=none;3600—

TLS and certificates

TLS / SSL

AssessmentNormal configuration
Supported protocolsTLSv1.2、TLSv1.3
Negotiated protocolTLSv1.3
Certificate subjectmyfretboardtrainer.com
IssuerLet's Encrypt
Valid until2027-01-13T17:08 · Remaining when checked: 87 days
Verification detailsCertificate trust: Passed · Hostname match: Passed

HTTP response headers

HTTP

HeaderValue
content-typetext/html; charset=UTF-8
cache-controlpublic,max-age=0,must-revalidate
serverNetlify
strict-transport-securitymax-age=31536000

Identified technologies

SvelteKitNetlify

Pages, Search and Sharing

Meta descriptionFree interactive guitar fretboard trainer. Memorize the notes on the neck with fast practice games, quizzes and exercises for scales and chords.
Canonical URLhttps://myfretboardtrainer.com/
LanguageEnglish (default) · Multilingual
Twitter Cardsummary_large_image
All bots 0 allowed · 0 disallowed

User reviews (0)

  • No reviews yet.