Website profiles · Technology insights · Alternatives

perspectivetools.com

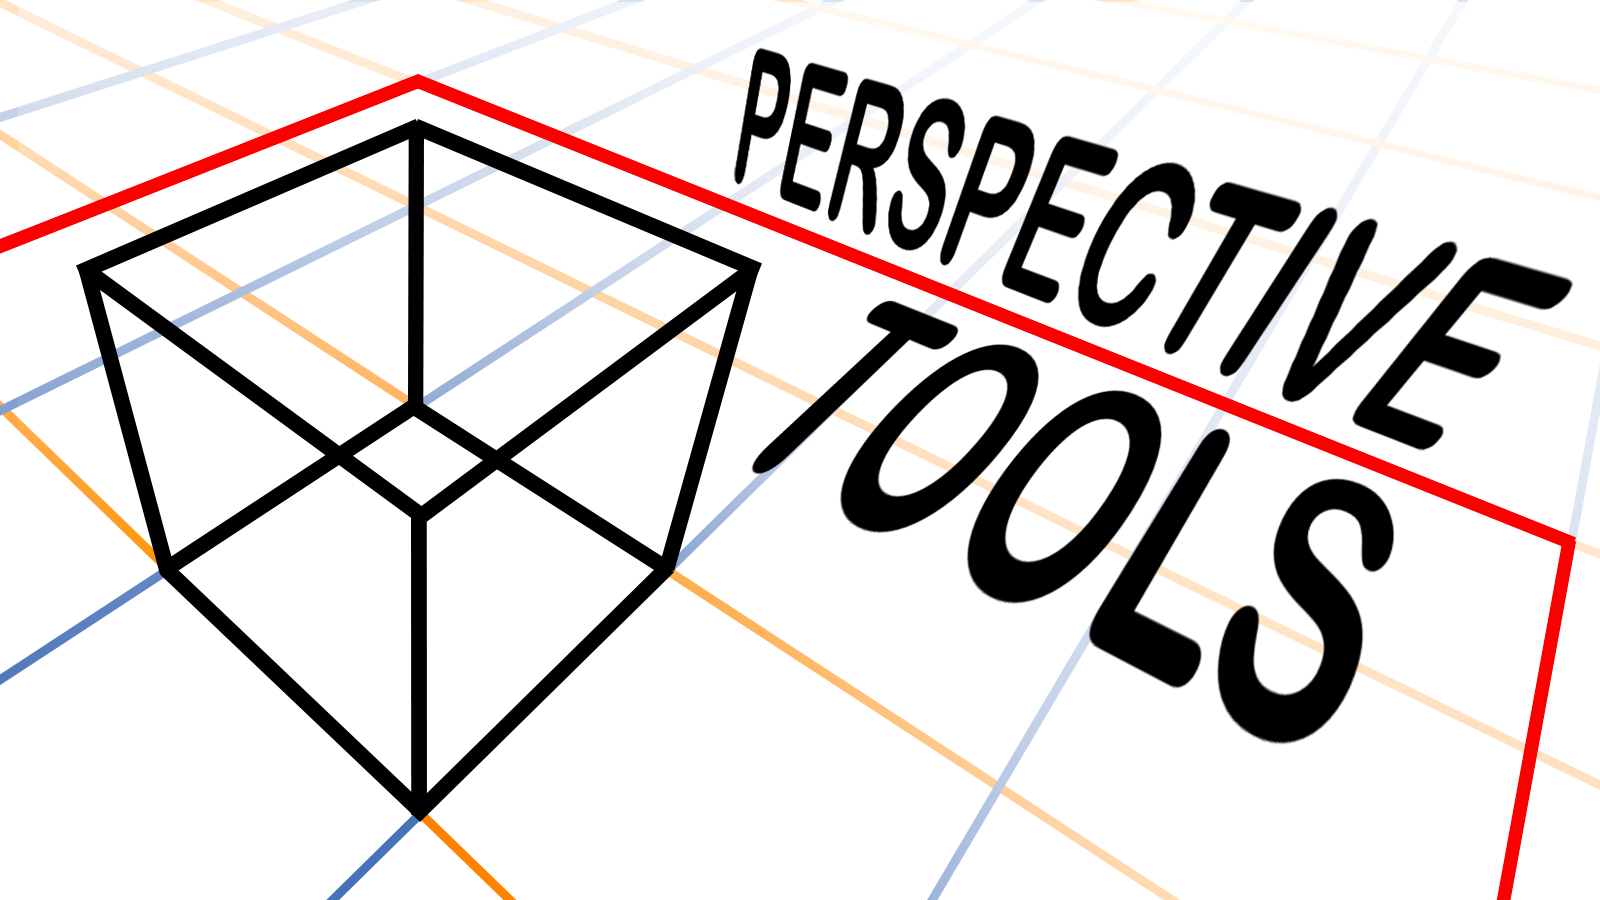
A collection of interactive perspective grids that can be used as a guide for artistic or technical drawings. 1-point, 3-point and 6-point curvilinear projections.

No paid content found
Visit website
Profile views 0 Outbound visits 0 Normal
Perspective Tools Full homepage screenshot

At a glance

Category
Resources & Utilities
Language
English
Paid-content signal
No paid content foundObserved
Registered
2022
Hosting
FastlyInferred
HTTPS certificate trusted
PassedObserved
Last updated

Website review

This review may include AI-generated content and is not individually verified. Domain, certificate and other facts come from the observed data on this page.

What is Perspective Tools?

Perspective Tools is a browser-based collection of interactive perspective grids meant to guide artistic or technical drawing. You choose a projection from the options on the page—1-point, 3-point, or 6-point curvilinear are the ones currently listed, with more said to be coming—and use the grid as a reference while you draw. It was created by Ben Mansfield.

Who it suits

  • Beginners learning perspective: a ready-made grid removes the guesswork of placing a horizon line and vanishing points, so you can focus on form and proportion.
  • Illustrators and concept artists: a quick reference for sketching interiors, buildings or objects in convincing depth.
  • Technical and design drawing: consistent projection lines help when accuracy matters more than expressive freedom.

A practical next step

Decide which projection matches your subject before opening the tool. For a street viewed head-on or a simple room interior, 1-point is usually enough. For a building seen from a corner, where two faces recede, 3-point adds the vertical convergence that makes tall structures look right. For very wide fields of view—panoramic scenes or fisheye-like compositions—6-point curvilinear is the appropriate choice, though it demands more care because straight lines curve.

As a concrete example: if you are sketching a corner café exterior, start in 3-point to establish the building's massing, then check your window and signage spacing against the grid lines. If you later want a dramatic wide-angle view of the same scene, switch to 6-point and redraw the main edges, since the curvature changes how parallel lines behave.

A reasonable decision criterion is fidelity to how the scene is actually viewed: the wider the angle of view you want to depict, the more points you need. Start with the simplest projection that captures your scene, and only move to curvilinear when the composition genuinely calls for it.

How do I choose between 1-point, 3-point, and 6-point perspective for my drawing?

Choose based on how many vanishing directions your subject needs and how much distortion you want. Perspective Tools currently offers 1-point, 3-point and 6-point grids, so the practical choice is usually between a calm frontal view (1-point), a dramatic corner view (3-point), or a wide, fisheye-like view (6-point).

Quick comparison

Projection Best for What it looks like Main trade-off
1-point Interiors, corridors, street views looking straight ahead, simple still-life setups One central vanishing point; horizontal and vertical lines stay parallel Easy to read, but can feel static or flat for tall objects near the edges
3-point Buildings seen from a corner, tall structures, dramatic low or high angles Two vanishing points on the horizon plus one above or below Strong sense of height and depth, but verticals converge and can look exaggerated
6-point curvilinear Very wide fields of view, panoramic scenes, stylised or technical drawings Lines curve toward multiple vanishing regions; resembles a fisheye lens Captures wide space convincingly, but straight architecture becomes curved and harder to plan

A concrete way to decide

Sketch the main edges of your scene as straight lines first. If most of them run toward a single distant point, use 1-point. If your subject is a building or box seen at an angle, and you want to emphasise height, switch to 3-point. If you are drawing a space wider than roughly a normal field of view—an entire room wrapping around the viewer, or a panoramic street—6-point curvilinear is the appropriate guide.

For a beginner, start with 1-point to learn how a horizon line and vanishing point control scale. Move to 3-point once you are comfortable placing a horizon and judging foreshortening. Treat 6-point as an advanced option for specific wide-angle compositions rather than a default.

You can open the relevant grid directly at Perspective Tools and test your scene against each projection before committing to a final drawing.

Can I use these interactive perspective grids for technical or architectural drawing?

Yes. Perspective Tools presents its grids as guides for both artistic and technical drawings, and it covers 1-point, 3-point and 6-point curvilinear projections. That makes it usable for architectural and technical sketching, especially where you want a quick, adjustable reference grid rather than a full CAD or drafting program.

What each projection suits

Projection Typical use Trade-off
1-point Interior elevations, corridors, frontal views of buildings, product sketches Simple and fast, but limited to views facing the picture plane
3-point Exterior building views, tall structures, dramatic angles More realistic for height, but harder to place measurements accurately
6-point curvilinear Wide-angle or panoramic views, very wide fields of view Visually striking, but unsuitable for measured or orthographic work

Practical considerations

These grids are drawing aids, not measurement tools. For construction documents, dimensioned plans or anything requiring precise scale, use proper drafting or CAD software and treat a perspective grid only as a compositional reference. For concept sketches, presentation visuals and student exercises, an interactive grid is a fast way to keep vanishing points consistent.

A concrete scenario: an architecture student sketching a street-corner building can open the 3-point grid to fix the vertical convergence, then trace or transfer the guide lines onto paper. Someone sketching a room interior would start with 1-point instead.

Next step

Decide first whether your drawing needs measured accuracy or just believable perspective. If it needs measurement, use the grid only for composition. If it is a sketch or study, pick the projection matching your viewpoint and adjust the grid before drawing.

How do I use a curvilinear 6-point grid to draw wide-angle scenes?

Use a six-point curvilinear grid as a construction scaffold for scenes that need a very wide field of view: choose the six-point projection, then place the horizon, vanish the main volumes toward the relevant points, and let the curved guide lines bend straight edges that would otherwise look unnaturally stretched at the frame edges. On Perspective Tools, the six-point curvilinear option sits alongside 1-point and 3-point grids, so the practical workflow is to pick the projection first and draw over the grid rather than inventing the curvature by eye.

A workable workflow

  1. Fix the horizon and eye level. Six-point curvilinear projection adds vertical curvature above and below the horizon, so a low or high eye level changes how strongly floors and ceilings bow.
  2. Block in the big masses first. Treat buildings, rooms and furniture as boxes aligned to the grid before adding detail; correct curvature is easiest to judge on long, straight edges.
  3. Keep the center calm and the edges dramatic. Wide-angle scenes read best when the subject sits near the center and peripheral elements carry the distortion.
  4. Check straight lines against the guides. If a wall edge cuts across several curved guides, adjust the endpoint rather than redrawing the whole line.

When six-point is the right choice

Projection Best for Trade-off
1-point Frontal interiors, corridors, simple stage sets Feels flat at the edges; poor for panoramic views
3-point Tall buildings, dramatic upward or downward views Straight verticals still look stiff in very wide frames
6-point curvilinear Panoramas, fisheye-like views, immersive or VR-style scenes Curvature is harder to control; small errors are visible

Choose six-point when the scene should feel enveloping—an atrium, a street corner seen with a very wide lens, or a fantasy environment. Stay with 1-point or 3-point for architectural illustrations where straight lines must remain straight.

Practical example

For an interior looking up into a domed hall, set the horizon low, align the floor and side walls to the horizontal guides, then let the upper guides curve the ceiling ribs inward. Draw the columns as verticals near the center and allow them to lean and bow as they approach the frame edge—this mimics how a wide lens renders them and keeps the composition from looking like a flat diagram.

Decision criterion

If the viewer should feel inside the space and the frame covers roughly a 120-degree or wider view, use the six-point grid. If the drawing must stay measurable or architecturally literal, use a simpler projection and accept a narrower field of view.

Are the perspective grids on Perspective Tools free to use?

Yes. Perspective Tools presents its interactive grids as a free browser-based guide: you choose a projection type and use the grid as a reference while drawing. No pricing, payment platform or account requirement is indicated on the page.

What you can use it for

  • 1-point: interiors, corridors and street views where forms recede toward a single vanishing area.
  • 3-point: tall buildings or objects seen from above or below, where verticals also converge.
  • 6-point curvilinear: wide-angle or fisheye-style scenes, useful for panoramic sketches and comic panels with strong curvature.

A practical workflow

For a room sketch, start with the 1-point grid to place the back wall and the main receding edges, then draw furniture using the grid lines as guides before adding freehand detail. Switch to 3-point when the subject is a tower or a low-angle figure, and reserve 6-point for scenes where straight edges visibly bow.

Decision criterion

Use these grids when you need consistent vanishing structure quickly; use a physical setup or drawing software when you need precise measurements, layer control or exportable templates. The page notes that additional projections are planned, so check the available options before relying on it for a specific projection.

Does Perspective Tools offer 2-point, 4-point, or 5-point perspective grids?

No. Based on the site's current options, Perspective Tools offers 1-point, 3-point and 6-point perspective grids. The page lists those three projections and notes that more are coming, so 2-point, 4-point and 5-point grids are not currently available.

What this means in practice

  • If you need a standard two-point grid for architectural interiors, product sketches or street scenes, you will need another source. Two-point is the most common setup for drawings with two receding directions and a level horizon.
  • If you want strong distortion or a wide field of view, the 3-point and 6-point curvilinear options are the relevant choices here. Six-point is a specialist curvilinear projection, useful for very wide-angle or spherical compositions rather than everyday room sketches.
  • If you are teaching perspective, the 1-point and 3-point grids cover the introductory and dramatic-tilt cases, but you would need a separate two-point example to complete the standard sequence.

Next step

Decide which projection your drawing actually needs before opening the tool. For a quick check: one vanishing point suits frontal views (a corridor, a facade seen head-on); two vanishing points suit angled views of box-like objects; three add a vertical vanishing point for looking up or down. If your scene is the angled, eye-level kind, plan on finding a two-point grid elsewhere, such as a dedicated perspective grid site or a drawing application with a built-in two-point guide.

Related questions

More questions →
What Is 2-Point Perspective and How Do You Use a Two-Point Perspective Grid?

Two-point perspective is a drawing system in which parallel lines on an object recede toward two separate vanishing points on a shared horizon line, while vertical edges stay vertical. Use it whenever you view a box-like object from a corner rather than face-on — a building seen at an angle, a table turned diagonally, an interior viewed into a corner. Perspective Tools (perspectivetools.com) offers an interactive 2-point grid among its 1-point, 3-point, and 6-point curvilinear options, and its own listing notes that additional projections are still in development.

The mechanics: two vanishing points, one horizon

In two-point perspective, the scene is built from three line families:

  • Verticals stay parallel and vertical on the page (no vanishing point).
  • One set of horizontals converges to the left vanishing point (LVP).
  • The other set converges to the right vanishing point (RVP).

Both vanishing points sit on the same horizon line, which represents the viewer's eye level. Moving the horizon up or down changes whether you appear to look down on the object or up at it; moving the vanishing points farther apart flattens the apparent rotation, and moving them closer together exaggerates it.

How it differs from 1-point and 3-point

Projection Vanishing points Typical use Watch for
1-point One, on the horizon Face-on views: a corridor, a wall, a box front Only one face recedes; side planes are flat
2-point Two, on the horizon Corner views of buildings, furniture, interiors Both VPs must stay consistent with eye level
3-point Three (two on the horizon, one above or below) Looking sharply up at towers or down at objects Vertical convergence; suited to tall or dramatic views

Choose 2-point when the object is rotated so that two faces are visible and verticals should remain upright. Switch to 1-point when a face is parallel to the picture plane, and to 3-point when the verticals themselves should converge — for example, a skyscraper viewed from street level.

Setting up a usable 2-point grid

  1. Draw the horizon line at the eye level you want the viewer to have. For a tabletop object seen slightly from above, place it above the object's midpoint.
  2. Place the two vanishing points on that line. Keep both inside or near the canvas edges. If a VP falls far off the page, the receding lines become nearly parallel and the drawing reads as flat; if the VPs are too close, the object looks distorted.
  3. Draw a vertical edge for the nearest corner of the object. This is your measuring edge and stays truly vertical.
  4. Connect the top and bottom of that edge to both vanishing points. These four lines define the top and bottom planes of the object.
  5. Add the far verticals where you want the object to end, then close the top and bottom faces along the receding lines.
  6. Check every horizontal edge against its vanishing point. Any line that doesn't aim at the LVP or RVP will look wrong even if the rest is correct.

Using the grid as an underlay

An interactive grid works best as a guide layer rather than a finished drawing. Set the horizon and both vanishing points first, then trace or snap your construction lines to the grid. On Perspective Tools, the 2-point option is selected from the projection menu on the landing page; the site presents each projection as a separate interactive grid. Once the construction is correct, hide or lighten the grid and draw the final linework over it.

Common mistakes and how to catch them

  • Vanishing points at different heights. Both must lie on the same horizon. If one sits above the other, the object appears to twist.
  • Tilted verticals. In true 2-point, verticals do not converge. Slanting them usually means you've drifted into 3-point by accident.
  • VPs too close together. This produces the "fisheye" look. Push them farther apart for a more natural, less distorted object.
  • Inconsistent scale. All edges in the same direction must aim at the same VP. A single edge aimed at the wrong point breaks the illusion of a solid object.
  • Horizon placed carelessly. The horizon is the viewer's eye level, so it should match the intended viewpoint — low for looking up at a tall object, high for looking down on a tabletop.

When to reach for a 2-point grid

Use a 2-point grid for architectural sketches seen from a corner, product or furniture drawings where two faces show, and interior scenes viewed into a corner. It is the most common choice for believable box-like forms because it keeps verticals upright while showing depth on two sides. For face-on compositions, a 1-point grid is simpler; for dramatic upward or downward views, a 3-point grid is the better fit.

What Is a Data Parsing Tool and How Do You Choose One for Your Data Format?

A data parsing tool is software that reads raw, often messy input—delimited text, log files, fixed-width records, or semi-structured documents—and converts it into structured data you can analyze, store, or feed into another program. Choosing one comes down to three questions: does it handle your specific input format, can you express your extraction rules without fighting the tool, and does its output fit where the data needs to go next? Everything below is a practical way to answer those questions before you commit to a purchase.

What "parsing" actually means in practice

Parsing is the step between having a file and having usable fields. A parser identifies boundaries (where one record ends and the next begins), extracts values (columns, key-value pairs, nested blocks), and normalizes them (dates, numbers, whitespace, encodings).

The input usually falls into one of these families:

Input type Typical example Main parsing challenge
Delimited text CSV, TSV, pipe-separated exports Quoted fields, embedded delimiters, inconsistent line endings
Fixed-width Legacy mainframe or instrument output Column positions shift between file versions
Log files Application, server, or device logs Variable message bodies, multi-line entries
Semi-structured JSON, XML, INI, HTML tables Nesting, optional fields, schema drift
Free-form / irregular Reports, PDFs converted to text No reliable delimiters; needs pattern rules

Knowing which family your data belongs to narrows the field immediately. A tool that excels at CSV may be the wrong choice for nested JSON, and a regex-heavy log parser may be overkill for clean tabular exports.

Core capabilities to look for

Configurable extraction rules

You want rules you can define, save, and re-run—not a one-time manual cleanup. Good signs: named fields, reusable rule sets, the ability to preview results against a sample before applying them to a whole batch.

Format handling breadth

Check whether the tool supports your format natively or only through workarounds. If your data is fixed-width, confirm it handles column definitions. If it's delimited, confirm it handles quoting and escaping correctly.

Output options

The parser's output should match your downstream tool. Common targets: CSV or tabular files, JSON, database inserts, or in-memory structures passed to a programming language. If you plan to post-process in Visual Basic or MATLAB, confirm the tool can emit data in a form those environments read easily—plain text, CSV, or a documented API.

Error handling and validation

Ask what happens when a record doesn't match the rules. Does the tool skip it, flag it, or fail the whole run? For production use, you want visibility into failures, not silent data loss.

Repeatability

The real test of a parsing tool is the second run: can you apply the same rules to next month's file with no manual rework? If the answer depends on the file looking identical, your rules are brittle.

Common use cases

  • Converting raw exports into analysis-ready tables. A delimited or fixed-width file becomes a clean CSV you can load into a spreadsheet or statistics package.
  • Preparing data for programming workflows. Parsed fields feed into scripts written in Visual Basic, MATLAB, Python, or similar, replacing hand-written string-splitting code.
  • Log and telemetry extraction. Pulling timestamps, IDs, and status codes out of high-volume text for monitoring or reporting.
  • Format migration. Moving data out of a legacy fixed-width system into a modern structured format.

Evaluation criteria: a practical checklist

Before buying or adopting any tool, run it against your own data—not a demo file.

  1. Format fit. Does it parse your actual file, including its quirks (odd encodings, blank lines, trailing delimiters)?
  2. Rule expressiveness. Can you describe your extraction logic clearly, or are you writing fragile patterns that break on the next sample?
  3. Integration. Does the output connect to your language or database without a conversion step you'll have to maintain?
  4. Learning curve. Estimate the time to get your first correct parse. A powerful tool you can't configure is worse than a simple one you can.
  5. Licensing and purchase terms. Understand what you're buying: per-seat, per-server, perpetual, or subscription. Check whether updates and support are included. If pricing isn't published, request a quote and ask specifically about deployment limits and renewal terms.
  6. Support and documentation. For a tool you'll depend on, documentation quality and vendor responsiveness matter as much as features.

A quick test protocol

Take three real samples: a typical file, an edge case, and a file from a different time period. Parse all three with the same rules. If the tool handles the edge case and the older file without rule changes, it's a strong candidate. If it needs a new rule per file, keep looking.

Common pitfalls

  • Brittle rules for irregular data. Rules tuned to one sample often fail on the next. Prefer rules based on stable structure (field order, key names) over incidental formatting.
  • Skipping real-sample testing. Demo data is clean by design. Always test with your messiest production file.
  • Ignoring encoding. Character encoding mismatches silently corrupt text. Verify the tool handles your file's encoding.
  • Overlooking the output stage. A parser that produces data your next tool can't read just moves the problem.
  • Underestimating maintenance. Every parsing rule is code you'll maintain. Fewer, more general rules age better than many specific ones.

How to decide

If your data is clean and tabular, a lightweight delimited-text parser is enough. If it's fixed-width or log-based, prioritize configurable column or pattern rules and clear error reporting. If you'll post-process in a programming environment, weight integration and output format heavily. And whatever you choose, validate it against your own files and confirm the licensing terms in writing before purchase—especially if the vendor doesn't publish pricing.

The right parsing tool isn't the most feature-rich one; it's the one that turns your specific raw files into structured data reliably, repeatably, and with the least ongoing effort.

What Is 1-Point Perspective and How Do You Use a One-Point Perspective Grid?

1-point perspective is a drawing system in which all receding parallel lines converge on a single vanishing point on the horizon line, while the front faces of objects stay parallel to the picture plane. Use it when you want a straight-on view—a room, corridor, street, or object face—rather than a corner view. On Perspective Tools, the 1-Point Perspective grid is one of the interactive projection options you can select as a drawing guide.

How 1-point perspective works

Three elements control the whole drawing:

  • Horizon line (eye level): the horizontal line representing the viewer's eye height. Everything above it is seen from below; everything below it is seen from above.
  • Vanishing point: a single point on the horizon line where receding edges meet. In true 1-point perspective it sits at the viewer's line of sight, often near the center of the frame.
  • Picture plane: the imaginary flat surface of your drawing. Front faces parallel to it keep their true shape; only depth edges converge.

The rule is simple: any edge that runs away from the viewer (depth) points at the vanishing point; any edge that runs across or up-and-down (width and height) stays horizontal or vertical. That is why a hallway looks like a series of nested rectangles shrinking toward one spot.

When to choose 1-point over other projections

Projection Vanishing points Best for Avoid when
1-point 1 Frontal interiors, corridors, straight-on street views, product faces You need to show two sides of a box or a corner
2-point 2 Building corners, objects seen at an angle The subject is meant to face the viewer squarely
3-point 3 Tall buildings or low/high viewpoints with vertical convergence You want verticals to stay parallel
6-point curvilinear Multiple (curvilinear) Very wide fields of view, fisheye-like panoramas A normal, natural-looking scene is the goal

Perspective Tools lists 1-point, 3-point, and 6-point curvilinear projections, with more planned. If your subject is a room or a street seen head-on, 1-point is the correct starting grid; switch to 2-point only when a corner or angled face becomes the focus.

Using a 1-point perspective grid: step by step

  1. Set the horizon line. Decide the viewer's eye height. A standing adult in a room puts the horizon roughly at mid-wall; a seated viewer or a child lowers it.
  2. Place the vanishing point. Put it on the horizon line where you want the viewer to look. Centering it gives a formal, symmetrical composition; moving it off-center creates a more natural, less static view.
  3. Draw the front face first. Sketch the rectangle or shape that faces you directly, with horizontal and vertical edges only.
  4. Connect corners to the vanishing point. Lightly draw lines from each corner of the front face to the vanishing point. These are your depth guides.
  5. Cut depth with horizontals and verticals. Where you want the object to end, draw a horizontal line (for floors, ceilings, tops) or a vertical line (for side walls) between the guide lines. The result is a back face smaller than the front one.
  6. Repeat and layer. Add doors, windows, floor tiles, and furniture by running their depth edges to the same vanishing point. All of them must share it.
  7. Check and darken. Confirm every receding line hits the single point, then ink the final lines and erase construction marks.

Expected result: a drawing where front faces keep their proportions and all depth lines converge cleanly on one point, producing a convincing sense of distance.

Common mistakes and fixes

  • Vanishing point drift: depth lines aimed at slightly different spots make the scene look warped. Fix by drawing all guides to one marked point, or by using an interactive grid that fixes the point for you.
  • Wrong horizon height: a horizon too high or low makes the viewer seem to float or sink. Match it to the intended eye level before adding detail.
  • Inconsistent scale: objects farther back should shrink in proportion to their distance along the guides. Measure heights against the guide lines rather than guessing.
  • Mixing projections: adding a second vanishing point for one object breaks the 1-point system. If a face turns, the whole scene should move to 2-point.
  • Over-darkening guides: heavy construction lines are hard to erase and flatten the final image. Keep them light until the layout is confirmed.

Practical note

Perspective Tools is a collection of interactive perspective grids intended as a guide for artistic or technical drawings, created by Ben Mansfield. The site presents projection choices rather than a fixed tutorial, so treat the grid as the measuring framework and your own subject as the content. For a quick check of a layout, overlay your sketch on the 1-point grid and look for any depth line that misses the vanishing point—those are the lines to correct first.

What Is 4-Point Perspective and How Does It Differ from 1-, 2-, and 3-Point Perspective?

4-point perspective is a curvilinear projection that uses four vanishing points to draw scenes with extreme depth or a fisheye-like field of view. It is the step beyond 1-, 2-, and 3-point linear perspective: instead of straight lines converging to points on a horizon, verticals and horizontals bend toward vanishing points placed above, below, left, and right of the frame. Use it when you want a wide-angle, wrap-around feel — a tall tower seen from its base, a room that seems to curve around the viewer, or a panoramic street scene. For ordinary, natural-looking drawings, 1-, 2-, or 3-point perspective is usually the better choice.

The core mechanism: four vanishing points, curved lines

In linear perspective, parallel lines appear to converge at a single vanishing point. In 4-point curvilinear perspective, the same idea applies but the lines are drawn as arcs:

  • Two horizontal vanishing points sit to the left and right, pulling horizontal lines into curves.
  • Two vertical vanishing points sit above and below, pulling vertical lines into curves.

The result is a grid that bulges outward toward the edges of the frame, mimicking how a very wide lens or the human eye perceives a scene that extends far beyond a normal field of view. The more extreme the placement of the vanishing points, the stronger the curvature.

A useful mental example: stand at the base of a skyscraper and look straight up. The building's vertical edges don't stay parallel — they appear to lean and curve toward a point overhead. Add a second vertical vanishing point below you, and you have the vertical half of a 4-point grid. Do the same horizontally, and the full four-point system emerges.

How 4-point differs from 1-, 2-, and 3-point perspective

The key differences come down to how many vanishing points are used and what kind of lines bend.

Projection Vanishing points Lines that converge Typical effect
1-point 1 (on the horizon) Depth lines only Looking straight down a road, corridor, or room
2-point 2 (on the horizon) Two sets of horizontal lines Corner view of a building or box
3-point 3 (two on horizon, one above or below) Two horizontal sets plus verticals Looking up at or down on a tall object
4-point 4 (two horizontal, two vertical) Both horizontals and verticals curve Fisheye, panoramic, or extreme wide-angle view

In 1-, 2-, and 3-point perspective, all lines are straight. In 4-point, both the horizontal and vertical families of lines become curved, which is what produces the distinctive spherical or panoramic distortion. This is why 4-point is classified as curvilinear rather than linear perspective.

When to use 4-point perspective — and when not to

Good fits:

  • Panoramic or fisheye compositions where the scene wraps around the viewer.
  • Dramatic low-angle or high-angle views of tall structures where straight-line perspective feels too rigid.
  • Stylized illustration, comics, or concept art that wants a sense of vast space or disorientation.

Poor fits:

  • Realistic interior or architectural drawings where straight edges are expected.
  • Any scene viewed through a normal lens, where 1-, 2-, or 3-point perspective reads as more natural.
  • Beginners still building comfort with vanishing points — the added curvature makes errors harder to diagnose.

Setting up a 4-point grid

A practical approach, whether you draw by hand or use a digital grid tool:

  1. Define the frame and center. Mark the center of your canvas; the curvature is usually strongest toward the edges.
  2. Place the horizontal vanishing points. Put one far to the left and one far to the right, typically on or near the horizon line. Moving them closer to the frame increases distortion.
  3. Place the vertical vanishing points. Put one well above the top edge and one well below the bottom edge, aligned with the center.
  4. Draw arcs, not straight lines. Horizontal lines curve toward the left or right vanishing points; vertical lines curve toward the top or bottom points. Keep the curvature consistent across the grid.
  5. Test with a simple object. Sketch a box or building and check that its edges follow the arcs smoothly. If the curves fight each other, your vanishing points are likely too close together.

Interactive perspective grid tools can generate these guides for you. Perspective Tools, for example, offers interactive grids for 1-point, 3-point, and 6-point curvilinear projections; its page notes that additional projections are "coming soon," so a dedicated 4-point grid may not yet be available there. In that case, you can adapt a 3-point grid by adding the fourth vanishing point and curving the verticals manually, or use a drawing application that supports custom curvilinear grids.

Common problems and how to fix them

  • Over-distortion. If the scene looks like it's inside a bubble, move the vanishing points farther from the frame. Strong curvature should serve the composition, not overwhelm it.
  • Mismatched curves. Horizontal and vertical arcs that don't share a consistent center create a warped, unconvincing grid. Re-check that all four points are symmetrically placed relative to the frame center.
  • Vanishing points too close. This is the most common cause of extreme bending. Push them outward until the curves feel controlled.
  • Mixing straight and curved lines. In a true 4-point drawing, both horizontal and vertical families curve. Drawing some edges straight breaks the illusion; decide on the projection and apply it consistently.
  • Using it where it isn't needed. If the goal is a believable room or street, step back to 1-, 2-, or 3-point perspective. Curvilinear projection is a stylistic and compositional tool, not a default.

The takeaway

4-point perspective adds two vertical vanishing points to the linear system, turning both horizontal and vertical lines into curves and producing a fisheye or panoramic effect. It differs from 1-, 2-, and 3-point perspective in exactly that way: more vanishing points and curved rather than straight converging lines. Reach for it when you want extreme depth or a wrap-around view; stay with the simpler linear systems when you want natural, straight-edged realism.

What Is an Interactive Music Generator and How Does It Work?

An interactive music generator is software that creates music in real time from rules or algorithms, while letting you change what you hear as it plays. It differs from a fixed recording, which is identical every time, and from purely generative music, which may run on its own without your input. Blossom by Alex Bainter is a browser-based example: a "lovely interactive music generator" you open and influence rather than a track you simply press play on. Use this guide if you want to understand the mechanism before trying one, or if you are deciding whether an interactive generator fits how you want to make or explore music.

Interactive vs. fixed vs. generative music

The three categories differ mainly in who decides what happens next and when.

Type Who shapes the result When it is decided Repeatability
Fixed recording Composer/performer, in advance Before you listen Identical each play
Purely generative music The algorithm/rules While it runs Varies; you may only start/stop it
Interactive music generator You plus the algorithm In real time, as you act Varies with your input

A fixed recording is a snapshot. A purely generative piece is a process you observe. An interactive generator is a process you steer — the algorithm still supplies notes and structure, but your actions change the outcome while it is happening.

The real-time feedback loop

What makes a generator "interactive" is a loop, not just a play button:

  1. You act — adjust a control, toggle an element, or change a parameter.
  2. The system interprets — the software maps your action to a musical rule (which notes, which rhythm, which layer).
  3. Sound is produced — the browser synthesizes or schedules audio immediately.
  4. You hear the result — and respond by acting again.

Because step 4 feeds back into step 1, the music is co-authored in the moment. If a tool only lets you press start and stop, it is generative but not very interactive; the more of the middle steps you can influence, the more interactive it feels.

How the algorithm produces notes and texture

An interactive generator does not store a finished song. It stores rules, then applies them on the fly. Typical ingredients:

  • Note selection — a scale, mode, or set of pitches the system draws from, so results stay musical rather than random noise.
  • Rhythm and timing — intervals or probability that decide when the next event fires.
  • Layering — separate parts (a bass, a melody, a pad) that can be added or removed.
  • Randomness with limits — variation that keeps each pass different while staying inside the chosen rules.

The interaction is meaningful because your changes alter these rules or their weights, not just the volume. That is why the same generator can sound calm one moment and busy the next.

Blossom as a concrete example

Blossom is described as "a lovely interactive music generator" by Alex Bainter, and it runs in the browser. That combination matters:

  • Browser-based means no install step — you open the page and it plays.
  • Interactive means the point is to engage with it live, not to download a finished file.
  • Generative means the music is produced by rules rather than being a fixed recording.

Treat it as a live instrument or environment to explore. The value is in the ongoing variation and your influence over it, not in a single repeatable output.

Common limitations to expect

Interactive browser generators trade control for immediacy, so set expectations:

  • Browser audio support — playback depends on your browser handling audio correctly; if sound does not start, the browser's audio permissions or autoplay behavior is the usual cause.
  • No export by default — many such tools, including browser-based ones, focus on live listening rather than saving a file. Do not assume you can download the result unless the tool offers it.
  • Less precise control — you influence tendencies and layers rather than editing individual notes like in a DAW.
  • Session-bound results — because output is generated live, a passage you liked may not be exactly reproducible.

How to start experimenting

  1. Open the generator in a modern browser and allow audio if prompted.
  2. Start playback and listen to the default state before changing anything — learn the baseline.
  3. Change one thing at a time and listen for how the music responds. This teaches you the mapping between controls and sound.
  4. Push it to extremes — go from minimal to dense — to find the range you enjoy.
  5. Let it run and interact occasionally rather than constantly; generative systems often reward patience.
  6. Note what you like in words (calm, busy, sparse) so you can return to that state, since exact reproduction may not be possible.

If you want precise, editable, exportable tracks, a DAW is the better fit. If you want to explore evolving music and shape it as it plays, an interactive generator like Blossom is the right kind of tool.

Website Overview

Several search or sharing settings need attention. Together they may make snippets, preview images or preferred URLs less consistent across platforms. An active inbound-mail setup with incomplete authentication may leave the domain more open to impersonation. Provider hosting alone does not close that gap.

Domain and Registration

Transfer-protection status is present, helping reduce the risk of unauthorized domain transfers. The domain has about 3 years of registration history; its current configuration provides more context than age alone. The domain uses the common .com extension, which is not an independent safety signal.

DNS and Email

The observed email authentication setup is incomplete: DMARC is missing. Nameservers are provided by domain.com, indicating managed DNS hosting. MX records point to the perspectivetools.com email service. No CNAME was found; the observed records resolve directly to addresses. DNSSEC signatures were not detected, so this additional DNS authenticity protection is not confirmed.

TLS and Certificates

The certificate uses an RSA 2048-bit public key, offering broad client compatibility. The server supplied a complete certificate chain. No organization name is present in the certificate; the available fields are consistent with domain validation. The certificate was issued by Let's Encrypt, commonly associated with automated certificate services. The certificate's total validity is about 89 days, consistent with a short renewal cycle.

HTTP and Browser Security

The response lacks these common security headers: HSTS, CSP, Referrer-Policy, Permissions-Policy, clickjacking protection. Debug-related headers are present: x-trace-id. Check whether they are needed in production. No X-Powered-By header was found, reducing one common source of backend fingerprinting information. The x-cache, x-served-by, via response header indicates a CDN or caching proxy in the delivery path. The Server header contains the custom value adobe.

Technology Stack Analysis

The public page identifies Fastly without precise versions, leaving fewer clues for version-specific scanning.

Search and Social Sharing

The meta description has 163 characters and may be shortened in search results. Open Graph is partially configured; og:type is missing. Twitter Card metadata is configured. The title has 49 characters, within a common display range. The observed directives allow indexing and link following.

Hosting and Email

DNSdomain.com
HostingFastly
Emailperspectivetools.com
Approximate IP geolocation (inferred; a CDN or proxy may differ from the origin server) United States flagUnited States Inferred 151.101.128.119

Registration details

RDAP / WHOIS

RegistrarDomain.com - Network Solutions, LLC
Registered2022-11-15
Expires2026-11-15
Domain statusclient transfer prohibited
Nameserversns1.domain.com、ns2.domain.com
DNSSECunsigned

DNS records

DNS

TypeNameValueTTLPriority
Aperspectivetools.com151.101.128.1191800—
Aperspectivetools.com151.101.64.1191800—
MXperspectivetools.commx.perspectivetools.com360030
NSperspectivetools.comns1.domain.com3600—
NSperspectivetools.comns2.domain.com3600—
TXTperspectivetools.comv=spf1 ip4:66.96.128.0/18 include:websitewelcome.com ?all3600—

TLS and certificates

TLS / SSL

AssessmentNormal configuration
Supported protocolsTLSv1.2
Negotiated protocolTLSv1.2
Certificate subjectperspectivetools.com
IssuerLet's Encrypt
Valid until2026-11-25T02:33 · Remaining when checked: 37 days
Verification detailsCertificate trust: Passed · Hostname match: Passed

HTTP response headers

HTTP

HeaderValue
content-typetext/html; charset=utf-8
cache-controls-maxage=31536000
serveradobe
x-content-type-optionsnosniff

Identified technologies

Fastly

Pages, Search and Sharing

Meta descriptionA collection of interactive perspective grids that can be used as a guide for artistic or technical drawings. 1-point, 3-point and 6-point curvilinear projections.
Canonical URLhttps://perspectivetools.com/home
LanguageEnglish (default)
Twitter Cardsummary_large_image
All bots 0 allowed · 0 disallowed

User reviews (0)

  • No reviews yet.