
 simplescraper.io
 Paid content
Categories: Other
Web scraping made simple — extract data with our free Chrome extension and powerful cloud platform. Turn websites into structured data at scale, via dashboard or API.
 Visit website
 Updated: 2026-10-02 11:29
 Language: English (default)
 Access: Normal
 Profile views 2
 Outbound visits 1
Related questions
More questions →What Is a Web Scraper and How Do You Use One to Extract Web Data?
A web scraper is a tool that loads a web page and pulls structured data out of it — prices, reviews, posts, contact details — instead of showing you the page to read. You use one when you need that data in bulk, on a schedule, or fed into another system. The basic workflow is: pick a target, choose a scraper that already handles that site, run it, then export or connect the output. Apify's marketplace, for example, lists 73,229 ready-to-run tools ("Actors"), including site-specific scrapers for TikTok, Google Maps, Instagram, Facebook, and e-commerce sites, plus a general Website Content Crawler for feeding AI models and RAG pipelines.
Web scraper vs. web crawler
The two terms get used interchangeably, but they do different jobs:
| Web scraper | Web crawler | |
|---|---|---|
| Job | Extract specific fields from pages | Discover and follow links across a site |
| Output | Structured records (rows, JSON, CSV) | A list of URLs / crawled pages |
| Typical use | Prices, reviews, profiles, posts | Site mapping, content inventory, feeding an index |
In practice they overlap. Apify's Website Content Crawler, for instance, crawls a site and extracts text content — because to feed an LLM or vector database you need both the discovery step and the extraction step.
The basic scrape workflow
- Pick a target and define the fields you need. "All Google Maps listings for coffee shops in one city, with name, address, phone, and rating" is a usable spec. "Everything about a business" is not.
- Choose a scraper. If a ready-to-run Actor exists for your site, start there — it already handles that site's layout and pagination. If not, look for a general-purpose tool or plan to build your own.
- Provide input. Most scrapers take either specific URLs or a search query. The TikTok Scraper, for example, accepts URLs or search queries to pull profiles, hashtags, posts, shares, followers, and music data.
- Run it. You can run from the UI, via API, or on a schedule.
- Export or connect the output. Download the dataset, or push it into another tool or AI workflow.
Ready-to-run scrapers vs. building your own
Ready-to-run is the right default when a maintained tool already covers your target. The trade-off is less control over exactly which fields you get.
Build your own makes sense when your target is niche, your fields are unusual, or you need logic no existing tool covers. Apify supports building, deploying, and scaling your own Actors for this case.
A quick way to decide:
- Target is a major platform (TikTok, Instagram, Google Maps, Facebook, common retail sites) → try a ready-to-run scraper first.
- Target is a small or internal site, or you need custom parsing → build your own.
- You need text for an LLM/RAG pipeline → use a content crawler rather than a field-by-field scraper.
Ways to run a scraper
- UI — run it manually and watch the results, good for testing and one-off jobs.
- API — trigger runs programmatically and pull results into your own app.
- Scheduling — run on a recurring basis to track changes over time (e.g., monitoring price details across e-commerce sites).
- AI/LLM integration — feed extracted content into models, vector databases, or RAG pipelines. The Website Content Crawler is built for this and integrates with LangChain and LlamaIndex.
Common failure points and how to handle them
- Blocking and anti-bot defenses. Sites may refuse automated requests. Site-specific scrapers usually handle this for you; custom scrapers often need proxies or request throttling.
- Layout changes. When a site redesigns, field mappings break. This is the main reason to prefer a maintained ready-to-run scraper over a hand-built one for major platforms.
- Rate limits. Sending too many requests too fast gets you throttled. Slow down or spread runs out.
- Pagination and dynamic content. Data loaded by JavaScript or spread across many pages needs the scraper to follow pagination and render the page — check that your chosen tool does this before committing.
- Scope creep. Pulling more fields than you need increases breakage risk and cost. Extract only what you'll actually use.
What to check before you commit
- Does a maintained scraper already exist for your target site?
- Does it accept the input you have (URLs vs. search queries)?
- Can you run it the way you need — UI, API, or schedule?
- Does the output format match where the data is going (spreadsheet, database, LLM pipeline)?
- How will you handle the site changing or blocking you?
Answer those five and you can pick a scraper and get a first dataset out without guessing.
What Can an Amazon Seller Browser Extension Actually Do for Your Listings?
An Amazon seller browser extension is a small piece of software that runs inside Chrome, Edge, or Firefox and adds information or shortcuts directly onto Amazon pages you already visit. In practice, it can overlay demand and competition data on a product page, pull quick numbers while you browse a niche, flag missing or weak listing elements, and save you from switching between tabs. What it cannot do is replace a full listing engineering or growth platform: extensions are lightweight, page-level helpers, while serious listing work — keyword architecture, AI-readiness, bulk optimization, and performance tracking over time — needs a dedicated toolset. The useful question is not "extension or platform" but "which jobs belong to each."
What a browser extension typically does well
Most seller extensions cluster around a few repeatable, on-page tasks. If your workflow involves a lot of browsing, these are where the time savings are real.
On-page data overlays
While you're on a product detail page, the extension can display estimated sales, revenue, review velocity, seller count, and price history in a panel next to the listing. This turns "open a separate research tab and paste the ASIN" into "read the number where you already are." For quick sanity checks on a competitor or a potential product, that's a genuine speed gain.
Quick product and niche research
Extensions often let you scan a search results page and see metrics for every listing at once, or export a batch of ASINs. This is useful for early filtering: you can spot which results have thin review counts, unstable pricing, or a dominant seller, and decide which few are worth deeper analysis.
Listing checks and basic audits
Some extensions highlight on-page elements — title length, bullet presence, image count, whether A+ content appears, whether key fields look empty. This is a fast visual audit, not a scoring system. It tells you what's there, not whether your listing is engineered to match how Amazon discovery works now.
Convenience features
Coupon and deal finders, price-drop alerts, review-request shortcuts, and quick links to seller tools fall into this bucket. They're small quality-of-life wins rather than strategy.
Where extensions fall short
This is the part sellers most often underestimate. An extension sees the page in front of you; it doesn't hold your catalog, your history, or your strategy.
| Job | Browser extension | Full listing/growth platform |
|---|---|---|
| On-page competitor snapshot | Yes, fast | Yes, often deeper |
| Keyword architecture across a listing | No | Yes |
| AI-readiness / discovery optimization | Rarely | Core function |
| Bulk edits across many ASINs | No | Yes |
| Tracking your own listings over time | Limited | Yes |
| Historical trend and seasonality | Usually shallow | Yes |
| Team workflows and permissions | No | Yes |
The pattern: extensions are read-and-react tools for pages you're already on. Platforms are build-and-manage tools for your own catalog. If your bottleneck is "I need to know if this niche is worth entering," an extension helps. If your bottleneck is "my listings aren't converting or aren't being surfaced the way Amazon discovery now works," an extension won't fix that — you need listing engineering, not a data overlay.
Scenarios: when an extension earns its place
- Early product research. You're scanning dozens of search pages a day. An overlay that shows demand and competition inline saves hours of tab-switching. Worth it.
- Competitor spot-checks. You want a fast read on a rival's pricing and review momentum before a pricing decision. An extension gives you that in seconds.
- Quick listing sanity checks. You're about to publish and want to confirm images, bullets, and title are all present. A visual audit extension is handy.
- Ongoing listing optimization. You need to align titles, bullets, and backend terms with how Amazon's discovery systems interpret intent, and to keep that consistent across a catalog. This is platform territory — an extension can't hold or apply that structure.
- Scaling a catalog. Once you're managing many ASINs, bulk operations, version history, and team access matter more than any single-page overlay.
What to check before installing any extension
Extensions can read the pages you visit, and some request broad permissions. Before you install:
- Read the permission list. Does it need access to all sites, or only Amazon domains? Broader access than the job requires is a yellow flag.
- Check what data leaves your browser. Does it send your browsing or seller data to a server? Is that disclosed?
- Confirm the vendor. Prefer extensions from established sellers/tool providers with a real product behind them, not anonymous one-off add-ons.
- Test on a non-critical account first. If it touches your Seller Central session, verify behavior before relying on it.
- Know the exit. Can you disable it cleanly, and does uninstalling remove stored data?
How to decide if it fits your stage
Ask three questions:
- Is my main pain "I browse a lot and want data inline"? An extension is likely worth it.
- Is my main pain "my listings underperform and I need to engineer them properly"? Skip the extension-first mindset; look at a listing/growth platform.
- Am I managing more than a handful of ASINs? You'll outgrow page-level tools quickly; extensions become a supplement, not the system.
A practical setup for many sellers is both: an extension for fast on-page research, and a dedicated platform for the listing work that actually moves rankings and conversion. ZonGuru, for example, positions its toolset around listing engineering and AI-readiness rather than page overlays — the kind of work an extension structurally can't do. If you want to see where a full platform picks up, its pricing page outlines the options, and there's a free trial to test the workflow before committing.
The short version: a browser extension is a fast, cheap way to see more while you browse. It is not a listing strategy. Use it for the browsing jobs, and bring in a real platform for the engineering jobs — that division is what keeps your time and your listings both working.
What Does a Chrome Screenshot Beautifier Extension Do and How Do You Use It?
A Chrome screenshot beautifier extension turns a plain browser screenshot into a polished, share-ready mockup without leaving the browser. Screenshot Beautifier Pro is one example: it captures a tab, region, uploaded file, or clipboard image, then applies gradients, shadows, 3D tilt, padding, and an optional watermark before exporting a 2× PNG. It fits when you need a clean visual fast for a social post, product page, or presentation, and you don't want to open Figma or another design app. If you need layered editing, custom typography, or multi-element compositions, a full design tool is still the better fit.
What a screenshot beautifier extension actually does
A raw screenshot is just pixels of your screen — usually with a flat white background and hard edges. A beautifier wraps that image in a styled frame so it reads as a deliberate visual rather than a screen grab.
The core job is three steps, as the site describes it: Capture, Edit, Export.
- Capture — get the screenshot into the tool.
- Edit — apply background, shadow, tilt, and spacing.
- Export — download a finished image at a usable resolution.
The problem it solves is speed and consistency. Instead of building a frame manually in a design app, you pick a preset, adjust a few sliders, and export. The trade-off is control: you get curated gradients and preset shadow styles, not a blank canvas.
The capture-edit-export workflow
Step 1: Get your screenshot in
Screenshot Beautifier Pro supports four input methods, so it works with screenshots you already have:
| Method | What it does | When to use it |
|---|---|---|
| Capture Tab | Screenshots the active browser tab in full fidelity | You're documenting a live page right now |
| Region Select | Drag a custom selection to capture only part of the screen | You want one section, not the whole tab |
| Upload Image | Loads an existing screenshot or image file | The screenshot came from your phone or another app |
| Paste from Clipboard | Takes whatever image is on your clipboard | You copied an image and want it framed fast |
Expected result: your image appears in the editor, ready to style. If nothing shows up after pasting, the clipboard likely holds text or a file path rather than image data — copy the image itself and retry.
Step 2: Style it
This is where the "beautify" happens. The extension exposes controls that the site says normally live in expensive design software:
- Gradient library — dozens of curated gradients plus solid colors, with a one-click shuffle for new combinations.
- Shadows — three styles with adjustable blur, spread, and opacity, so the screenshot appears to float above the background.
- 3D tilt and padding — a subtle perspective tilt for depth, plus padding sliders to control whitespace precisely.
- Branding watermark — add your name or brand as a footer watermark and toggle it on or off.
Practical tip: start with a gradient and a soft shadow, then add tilt only if the image will sit on a page with room around it. Heavy tilt plus tight padding tends to look cramped.
Step 3: Export
Hit Export and you get a 2× PNG. The site lists these output sizes: 1:1, 16:9, 9:16, 4:5, or auto-fit — aimed at Twitter, LinkedIn, or product pages.
Choosing a ratio:
- 16:9 — landing pages, blog headers, wide social cards.
- 1:1 — feed posts and profile-adjacent placements.
- 9:16 — stories and vertical formats.
- 4:5 — portrait feed posts.
- Auto-fit — when the image's own proportions matter more than a fixed frame.
When a browser extension is enough vs. when it isn't
Use the extension when:
- You need a clean mockup in under a minute.
- The screenshot is the whole visual — no extra text, arrows, or callouts.
- You want consistent styling across a series of screenshots.
- You're already in Chrome and don't want to switch apps.
Reach for a full design tool when:
- You need to annotate, add arrows, or combine multiple screenshots.
- You want custom fonts, brand-specific layouts, or pixel-exact control.
- You're building a reusable template with layers.
The extension's own positioning is "No Figma needed" — accurate for single-image framing, less so for anything that requires composition.
What users report
The site features reviews from developers, designers, and makers. One reviewer (Roko Bojanic) notes it's "simple to use, saves time, and works well for product screenshots, landing page visuals, and social posts," and mentions the creator is open to feedback. Another (Allwin Jeba) says a professional-looking, share-ready screenshot took "just a few clicks." These point to the same pattern: the value is speed and a low learning curve, not deep editing power.
Getting started
The extension is added from the Chrome Web Store ("Add to Chrome — It's Free" on the site). Once installed, the workflow is: capture or load an image, pick a background and shadow, adjust tilt and padding, optionally add a watermark, then export. The site does not publish pricing details beyond the free add-to-Chrome prompt, so check the store listing for any current plan or usage limits before relying on it for regular work.
What Is OpenAPI-Generated API Documentation and How Does It Work?
OpenAPI-generated API documentation is reference documentation that is produced automatically from an OpenAPI description file rather than written by hand. You write (or generate) a machine-readable specification of your API — endpoints, parameters, request bodies, responses, schemas, and auth — and a documentation tool reads that file and renders a browsable, often interactive reference site. The spec becomes the single source of truth; the docs become a build artifact.
This differs from manually written docs in one fundamental way: with hand-written docs, the prose is the source of truth and the API is described separately. With spec-driven docs, the API description is the source, and every page, table, and code sample is derived from it.
How the workflow actually runs
A typical spec-driven documentation pipeline has five stages:
- Author or generate the spec. You either write an OpenAPI document by hand (YAML or JSON), or generate it from code annotations, framework metadata, or a design-first editor. Design-first means the spec is written before implementation; code-first means it is extracted from existing code.
- Validate and lint. The spec is checked against the OpenAPI schema and against style rules — consistent naming, required descriptions, no undocumented
4xxresponses, no orphaned schemas. - Bundle and transform. Multi-file specs are combined,
$refpointers are resolved, and the document is optionally split into per-tag or per-version outputs. - Render. A documentation tool converts the spec into HTML: an endpoint list, a sidebar of operations, parameter tables, response schemas, and a "try it" console.
- Publish and version. The rendered site is deployed, and each API version gets its own snapshot so consumers can read docs matching the version they call.
Steps 2 through 5 are usually automated in CI. If the spec fails validation, the docs build fails — which is the point.
Spec-driven vs. hand-written documentation
| Dimension | OpenAPI-generated | Hand-written |
|---|---|---|
| Source of truth | The spec file | The prose |
| Consistency with the API | High, if the spec is accurate | Drifts as the API changes |
| Effort per endpoint | Low after setup | Repeated for every endpoint |
| Narrative and tutorials | Weak; needs separate pages | Strong |
| Code samples | Generated per language from schemas | Written and maintained manually |
| Customization | Bounded by the tool's templates | Unlimited |
| Failure mode | Accurate spec, poor docs, or stale spec | Beautiful docs that describe an API that no longer exists |
The practical conclusion most teams reach: generate the reference, write the guides. Reference material is repetitive and mechanical, which is exactly what generation is good at. Conceptual explanations, migration notes, and tutorials carry judgment that a spec cannot express.
What you get out of the box
Generated reference pages commonly include:
- An operation list grouped by tag or path, with HTTP method and path.
- Parameter tables showing name, location (path, query, header, cookie), type, required flag, and description.
- Request and response schemas rendered as expandable trees, including nested objects and arrays.
- Authentication details pulled from the
securitySchemessection. - Interactive request consoles that let a reader send a real call from the browser.
- Generated code samples in several languages, derived from the same schemas.
- Multiple output formats, such as a static site, a single HTML file, or a mock server.
Because all of these come from one document, changing a field name in the spec updates the parameter table, the schema tree, and every code sample at once.
Where spec-driven documentation breaks down
Generation is not free. The trade-offs are real:
Spec quality becomes documentation quality. A field with no description produces a table row with an empty cell. A vague summary produces a vague heading. Tools can enforce presence of descriptions via linting, but they cannot enforce that the description is useful.
Customization has limits. If you need a page that does not map to an OpenAPI concept — a conceptual overview, a pricing explanation, a comparison of two endpoints — you write it outside the generator and link to it.
Not everything is expressible. Webhooks, streaming responses, long-polling behavior, and complex multi-step flows are awkward or impossible to describe fully in OpenAPI. Those need prose.
The spec can go stale. If the spec is maintained separately from the implementation, it drifts just like hand-written docs. The mitigation is to generate the spec from code, or to test the implementation against the spec in CI.
Interactive consoles need care. A "try it" button that hits a production API with real credentials is a security and rate-limit problem. Point it at a sandbox, or disable it.
Deciding whether to adopt it
Adopt spec-driven reference documentation if most of these are true:
- Your API has more than a handful of endpoints, or changes frequently.
- You ship client SDKs or code samples in more than one language.
- Multiple teams consume the API and need a consistent, always-current reference.
- You already have, or are willing to maintain, an OpenAPI description.
Stay with hand-written docs, or a hybrid, if:
- Your API is small and stable, and the reference fits on one page.
- Your documentation is mostly conceptual and contains little endpoint-level detail.
- You cannot commit to keeping the spec in sync with the implementation.
A reasonable middle path: generate the reference from the spec, and hand-write the getting-started guide, authentication walkthrough, and error-handling page. Link the two directions so readers can move from concept to endpoint and back.
A minimal starting checklist
- Produce one valid OpenAPI document for a single API version.
- Add a linter with rules for descriptions, operation IDs, and error responses.
- Wire the docs build into CI so a failing spec fails the build.
- Render the reference and review it as a reader, not as the author.
- Write the two or three conceptual pages the generator cannot produce.
- Version the published docs alongside the API version.
The core idea is simple: describe the API once, in a format both machines and humans can read, and let the reference documentation fall out of that description. Everything else — tooling, hosting, interactivity — is a detail on top of that decision.
Website Overview
An established domain and managed infrastructure suggest continuity of operations and may support dependable delivery, although neither guarantees service quality.
Domain and Registration
Registered in 2019, this domain has about 6 years of history. That suggests continuity, although ownership and purpose may have changed. Transfer-protection status is present, helping reduce the risk of unauthorized domain transfers. The registrar is NameCheap, Inc., a widely used domain service provider. The domain uses the common .io extension, which is not an independent safety signal.
DNS and Email
Nameservers are provided by Cloudflare, indicating managed DNS hosting. MX records point to the Google Workspace email service. No CNAME was found; the observed records resolve directly to addresses. SPF and DMARC are configured. DKIM status is unknown. TXT records include verification markers for Google. Such markers may also remain after a service stops being used.
TLS and Certificates
The certificate uses an RSA 2048-bit public key, offering broad client compatibility. The server supplied a complete certificate chain. No organization name is present in the certificate; the available fields are consistent with domain validation. The certificate was issued within the Google Trust Services cloud or CDN ecosystem. The certificate's total validity is about 90 days, consistent with a short renewal cycle.
HTTP and Browser Security
The response lacks these common security headers: CSP, Referrer-Policy, Permissions-Policy, clickjacking protection. No X-Powered-By header was found, reducing one common source of backend fingerprinting information. The x-cache, x-served-by response header indicates a CDN or caching proxy in the delivery path. No obvious internal addresses or debug information were found in the headers. No CORS permission header was found, so browsers normally restrict cross-origin script access.
Technology Stack Analysis
The public page identifies Google Analytics, Stripe, Fastly without precise versions, leaving fewer clues for version-specific scanning.
Search and Social Sharing
The meta description has 166 characters and may be shortened in search results. Twitter Card metadata is configured. The title has 55 characters, within a common display range. The observed directives allow indexing and link following. No Generator meta tag is publicly exposed.
 Hosting and Email
 Cloudflare
 Hosting
 Fastly
 Google Workspace
 Location
 United States
 Pages, Search and Sharing
| Meta description | Web scraping made simple — extract data with our free Chrome extension and powerful cloud platform. Turn websites into structured data at scale, via dashboard or API. |
|---|---|
| Canonical URL | https://simplescraper.io |
| Language | English (default) |
| Twitter Card | summary_large_image |
Social Sharing Preview
6 fields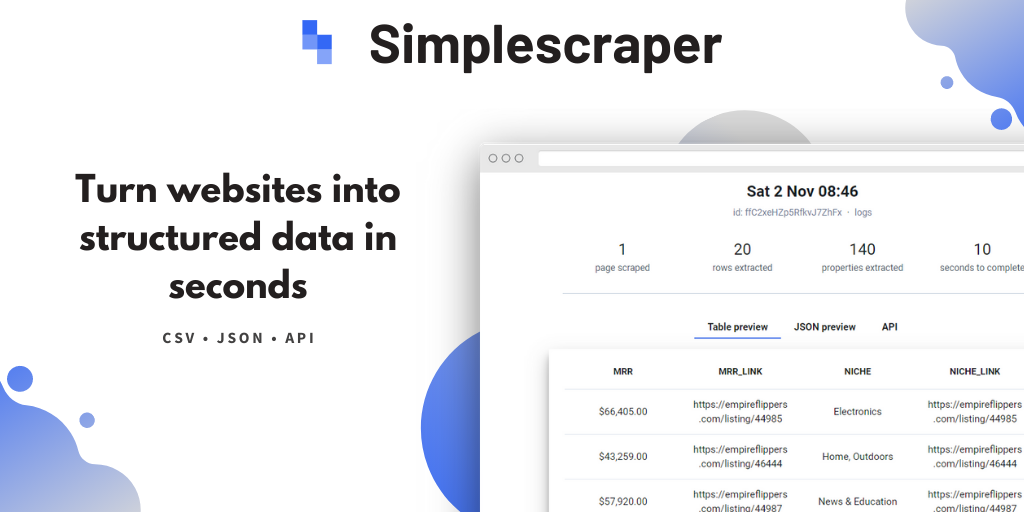
Sharing metadata
| og:url | https://simplescraper.io/ |
|---|---|
| og:type | website |
| og:image | https://simplescraper.io/easy_scraper_social.png?1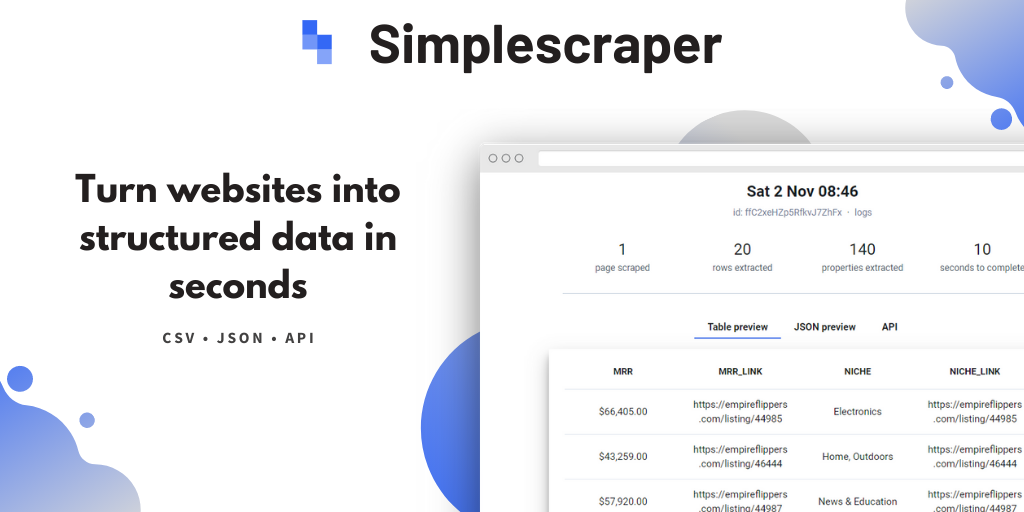 |
| og:title | Simplescraper — Scrape Websites and turn them into APIs |
| og:description | Web scraping made simple — extract data with our free Chrome extension and powerful cloud platform. Turn websites into structured data at scale, via dashboard or API. |
| twitter:card | summary_large_image |
robots.txt (opens in a new tab)
0 rulesAll bots 0 allowed · 0 disallowed

 All bots
No matching rules.
Sitemaps
1 Registration details RDAP / WHOIS
| Registrar | NameCheap, Inc. |
|---|---|
| Registered | 2019-10-12 |
| Expires | 2028-10-12 |
| Domain status | clientTransferProhibited https://icann.org/epp#clientTransferProhibited |
| Nameservers | brenda.ns.cloudflare.com、chip.ns.cloudflare.com |
| DNSSEC | unsigned |
 DNS records
| Type | Name | Value | TTL | Priority |
|---|---|---|---|---|
| A | simplescraper.io | 151.101.1.195 | 300 | — |
| A | simplescraper.io | 151.101.65.195 | 300 | — |
| MX | simplescraper.io | aspmx.l.google.com | 300 | 1 |
| MX | simplescraper.io | alt1.aspmx.l.google.com | 300 | 5 |
| MX | simplescraper.io | alt2.aspmx.l.google.com | 300 | 5 |
| MX | simplescraper.io | aspmx2.googlemail.com | 300 | 10 |
| MX | simplescraper.io | aspmx3.googlemail.com | 300 | 10 |
| NS | simplescraper.io | brenda.ns.cloudflare.com | 86400 | — |
| NS | simplescraper.io | chip.ns.cloudflare.com | 86400 | — |
| TXT | simplescraper.io | ahrefs-site-verification_52a3d7fa3da1359b8aab182e5f27ae807e78574a6531141760c0006e5f0dcd3e | 300 | — |
| TXT | simplescraper.io | firebase=easy-scraper | 300 | — |
| TXT | simplescraper.io | google-site-verification=brb-i6YacCx1ktYXWAkofn7AJ-TUBxpJQFPWCq6ZfvQ | 300 | — |
| TXT | simplescraper.io | google-site-verification=sixybo_-pAJVhxjWbVBhm5Y2lceV-YIfHIH9GWXvTKo | 300 | — |
| TXT | simplescraper.io | google-site-verification=yCSmBmFemtwrrCO7sdMru94M0RY-nFHBuyl0zTQTHT4 | 300 | — |
| TXT | simplescraper.io | v=spf1 include:spf.mailjet.com include:_spf.google.com include:_spf.firebasemail.com ~all | 300 | — |
| DMARC | _dmarc.simplescraper.io | v=DMARC1; p=none; rua=mailto:[email protected]; | 300 | — |
 TLS and certificates
| Assessment | Normal configuration |
|---|---|
| Supported protocols | TLSv1.2、TLSv1.3 |
| Negotiated protocol | TLSv1.3 |
| Certificate subject | www.sdlankanet.com |
| Issuer | Google Trust Services |
| Valid until | 2026-11-05T20:51 · Remaining when checked: 34 days |
| Verification details | Certificate trust: Passed · Hostname match: Passed |
 HTTP response headers
| Header | Value |
|---|---|
| content-type | text/html; charset=utf-8 |
| cache-control | max-age=3600 |
| strict-transport-security | max-age=31556926 |
| x-content-type-options | nosniff |
 Identified technologies
Recent Updates
- Screenshots
- Website images
- Network details
- Website Technologies
- Pages and Search Information
- HTTP Response Information
- TLS and certificates
- DNS Information
- Domain Registration
- Website profile
- Website Description
- Website Name
- Website profile
- Website Description
- Website Name
User reviews (0)